SuperMax 19-38 Manual de usuario

Owner’s Manual
19-38 Drum Sander

OPERATING YOUR
19-38 DRUM SANDER
2
To the new SuperMax owner:
SuperMax takes pride in our products and stands
behind them with continuing service and support
for our customers. Your SuperMax Sander was de-
signed with several features that will bring a new
dimension of productivity to your shop. Our goal at
SuperMax is to develop machines that provide you
with maximum performance, maximum economy
and maximum utility.
Your SuperMax 19-38 Drum Sander has features
that will give you better results in less time in the
years ahead. This sander is designed to be tailored
to every project and features ultra-precise control
for any sanding project.
This sander is covered with a warranty and your
dealer can answer any questions you may have.
Additionally, we will always be here to offer sup-
port, service information, and product supplies and
services.
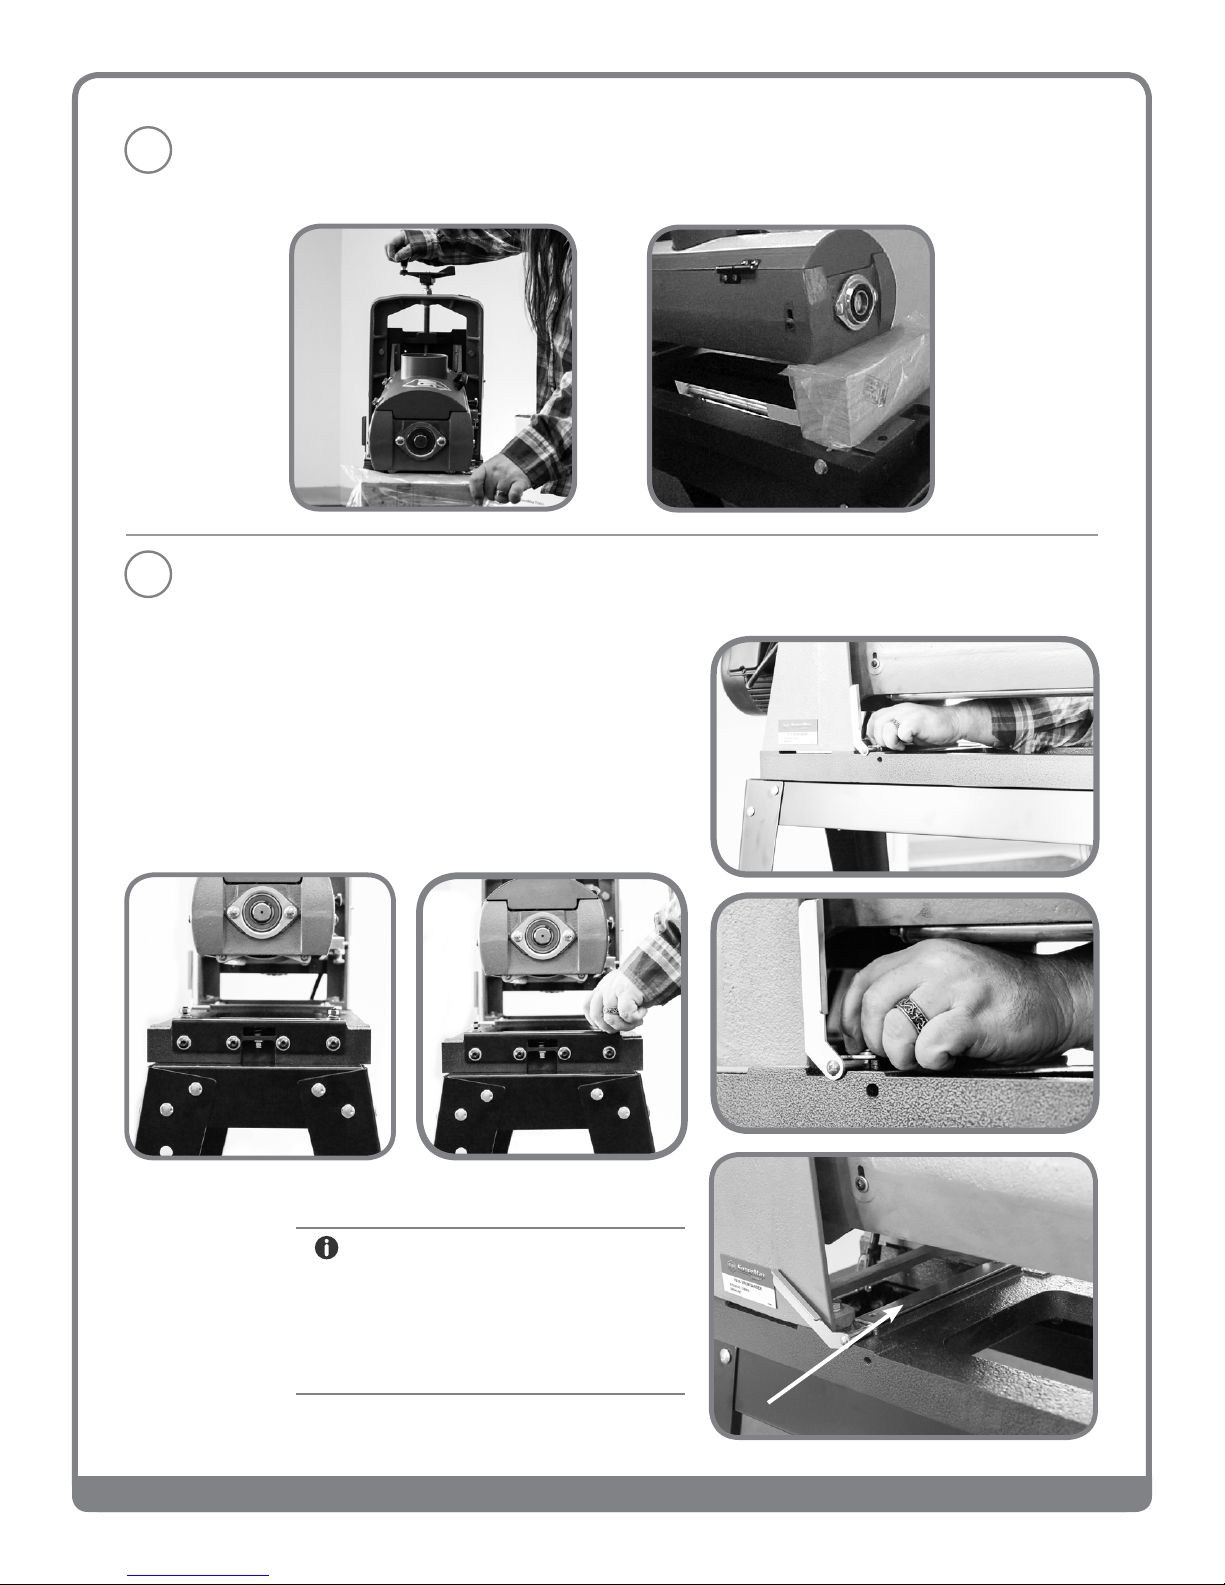
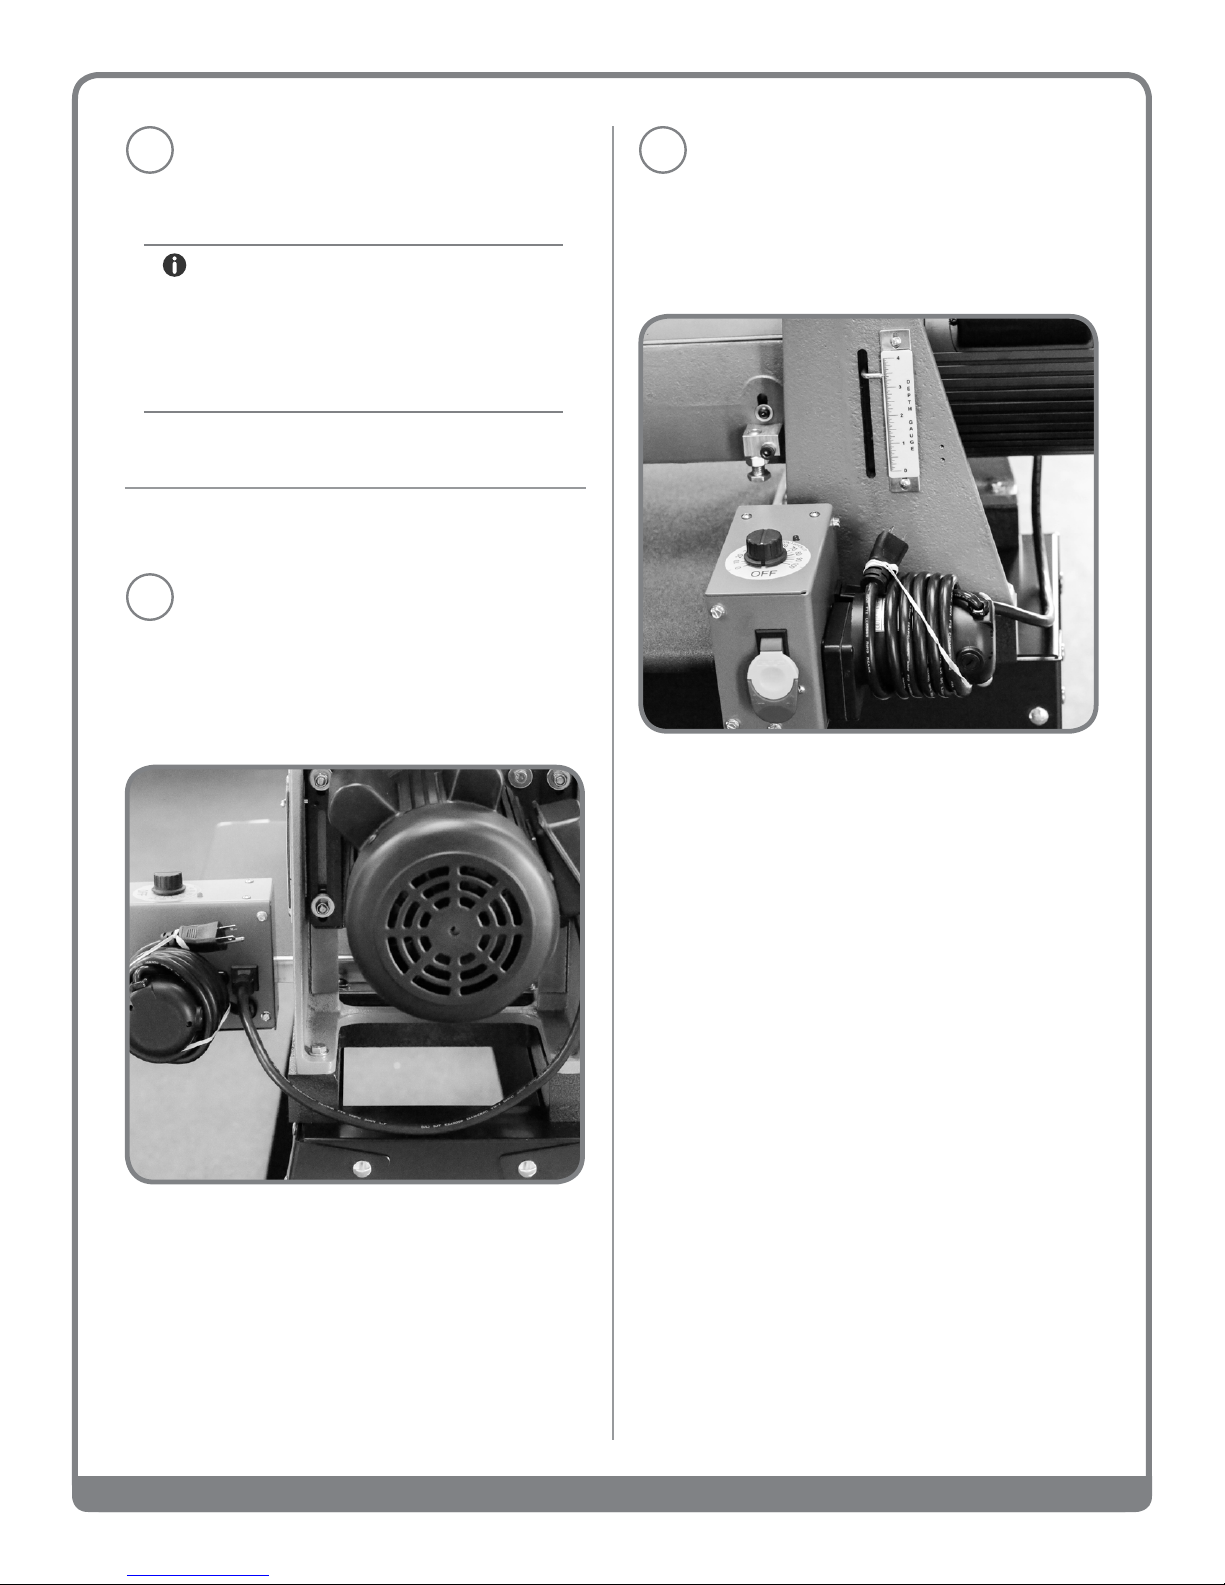
Before using your sander for the first time learn
how to use it. This manual covers unpacking step-
by-step, sander set up and fine-tuning the controls.
Safety information is also provided to makes sure
your process is hassle free. If you have any ques-
tions this manual will provide answers and you can
also refer to our website or customer service for
any updates or further details.
SuperMax Team
Write your model and machine number in this
manual for any questions or ordering information:
CONTACT INFORMATION FOR SUPERMAX
SuperMax Tools
1275 Corporate Center Drive
St. Paul, MN 55121
Phone: 651-454-3401
Toll Free: 888-454-3401
Fax: 651-454-3465
sales@supermaxtools.com
www.supermaxtools.com
IDENTIFICATION INFORMATION
Model # 71938-D
Serial # ______________________________________________
Purchase Date _______________________________________
Dealer Info __________________________________________
________________________________________________________
________________________________________________________
WARRANTY
The SuperMax 19-38 Sander comes with a two-
year limited warranty. We will provide replace-
ment parts if found to be defective materially or
in workmanship.

3
MANUAL
CONTENTS
SAFETY WARNINGS 4
ABOUT THE SUPERMAX
19-38 DRUM SANDER5
Specifications: .....................5
QUICK SET UP GUIDE TO UNPACKING 6
SETTING UP THE 19-38 DRUM SANDER11
Checking Drum Alignment ...........11
Dust Collection .....................12
Power And Electrical Safety..........12
ABRASIVES 13
Abrasive Selection Guide ............13
Installing and Wrapping Abrasives....13
Abrasive Wrap Tension Adjustment .. 14
Maximizing Abrasive Longevity ..... 14
OPERATING THE 19-38 DRUM SANDER 15
Basic Operating Procedures Checklist .15
Conveyor Belt Tension...............17
Conveyor Belt Tracking ..............17
Tension Roller Pressure .............17
TROUBLESHOOTING19
MAINTENANCE 22
Monthly Maintenance Checklist .....22
Cleaning the Machine ..............22
Replacing Conveyor Belts ..........22
TECHNICAL SPECIFICATIONS 23
Wiring Diagram ...................23
Head Assembly....................24
Parts List—Head Assembly.......... 25
Conveyor and Motor Diagram.......28
Parts List—Conveyor and Motor .....29
SUPPLY CHECKLIST AND
ORDER INFORMATION 31
NOTES32

4
SAFETY WARNINGS
Caution, Safety First
When maintaining and operating this machine al-
ways put safety first. For your own protection read
and study this manual and safety precautions be-
fore operating the machine. Always heed standard
safety precautions including the following:
• Wear eye protection when operating or
cleaning the sander.
• Always feed stock against drum rotation.
• Never place hands or fingers under the
tension roller, drum, or dust cover.
• Keep hands and clothing away from oper-
ating drum.
• Never operate the sander without the dust
cover or guard in place.
• Always maintain control of stock to avoid
kickback.
• Always disconnect electrical power before
during any services or making any adjust-
ment to the machine.
• Do not modify the machine in any way. Any
modification will be done at the user’s risk
and will void the warranty and liability.
• Always be safety conscious when operat-
ing or making adjustments on the sander.

5
ABOUT THE SUPERMAX
19-38 DRUM SANDER
This manual was designed to help familiarize you
with your SuperMax 19-38 Drum Sander and to
help you take advantage of its exclusive features.
By understanding the major components and how
they work together, you will be able to get the
most from your investment. The SuperMax 19-38
Drum Sander system components are:
Specifications:
❖Sanding Capacity
Maximum Width: 38” (two passes)
Minimum Length: 2 -1/4”
Maximum Thickness: 4” typical
Minimum Thickness: 1/32” typical
❖Dimensions
Length-36”
Width-42”
Height-51” on stand
❖Drum
5” in diameter
1740 RPM
❖Dust hood
Hinged Back with 4”vaccum port
❖Height Adjustment
1/16” per revolution of the height adjust-
ment handle
Depth Gauge included
❖Conveyor Motor
Direct drive D.C. motor
Infinitely variable 1-10 feet per minute
❖Drive Motor (TEFC)
1-3/4HP
Continuous Duty
❖Power Requirements
110 Volt, Single Phase 20 Amp service
1. Height Adjustment Handle
2. Shroud
3. Depth Gauge
4. Conveyor Speed Adjustment
5. Drum ON/OFF Switch
6. Conveyor Table
7. Tension Rollers
8. Drum Carriage
1
2
3
4
6
7
8
5

6
QUICK SET UP GUIDE TO UNPACKING
Your SuperMax 19-38 Drum Sander has been shipped mostly assembled from the factory. If any damage has
occurred during shipping, notify the transportation company as soon as possible and ask for a damage and
loss report. Then notify your dealer of any loss or damage.
Before setting up make sure that the space is adequate for your new equipment. We also recommend that
there is more than one person available for lifting and initial set up procedures.
The SuperMax 19-38 Drum Sander and stand is
shipped in three boxes.
Assemble the SuperMax 19-38 Drum Sander Open
Stand #71938-OP or alternatively, if you have cho-
sen to use your own bench prepare the existing
bench for the sander attachment.
NOTE:
See Open Stand #71938-OP man-
ual included in the Open Stand
shipping box for stand set-up and
directions.
Open BOX 1 that contains the main sanding unit.
Remove the cardboard liner. Open the plastic bag
enclosing the sanding unit.
1
2
NOTE: HARDWARE
There will be a small container
of hardware included with your
sander. This container will in-
clude everything you need to set
up your sander.
NOTE: REQUIRED TOOLS
All of the tools required for set
up are shipped with your sander
and stand.

7
19-38 DRUM SANDER OWNER’S MANUAL Quick Set Up Guide to Unpacking
Cut each corner of BOX 1 to fold sides flat,
providing access to sanding unit.
Remove the two wooden packing plates
from bottom of the sanding unit. Attach se-
curely, use the enclosed wrench to tighten
and keep wrench for future adjustments.
3 5
4
6
NOTE: BOLTS
These bolts that you just removed
from the packing plates will work
as your bolts for attaching the
sander or as extra bolts for fu-
ture replacement.
With one or two helpers, place the sanding
unit on stand or bench.
Install knob to height adjustment handle.
First, finger tighten nut to knob. Thread
stud from knob into hand wheel and tight-
en nut against hand wheel.
Lift points marked.

8
19-38 DRUM SANDER OWNER’S MANUAL Quick Set Up Guide to Unpacking
7
8
Turn the handle and raise sanding head to higher position to remove
packing block from under carriage arm.
Next prepare the unit for the installation of the
conveyor belt. You will remove the bolts at at-
tachment points to allow the conveyor belt to be
attached to the sanding unit. You will need to re-
move 4 bolts in total, two on each side of the unit.
NOTE: SILVER PLATE
Leave the silver plate, which is
near the fast lever and under
the motor, in place when re-
moving bolts.
A. First remove the 2 bolts on the outboard side of the
conveyor belt.
B. Next remove the 2 bolts on the inboard
side of the conveyor belt.

9
19-38 DRUM SANDER OWNER’S MANUAL Quick Set Up Guide to Unpacking
NOTE: FAST LEVER
The fast lever should be in the up-
right position for installation of
the sanding unit. The fast lever
raises the inboard side of con-
veyor up. Do not ever tighten the
bolts all the way down. The fast
lever should always be able to be
moved back and forth between
and up/down position. The bolts
should be tightened, but not so
tight that the fast lever doesn’t
move. The lever should be able to
move from the down to up posi-
tion easily.
10
11
Install two lock washers and two flat
washers on the studs on outboard side of
the conveyor belt.
9
Open BOX 2. Remove conveyor from pack-
aging and place on sanding unit. The con-
veyor motor should be nearest to the main
motor and depth gauge.
Install lock washer and flat washer onto
two socket heads (or hex head bolts) and
install into flange of conveyor bed on in-
board (motor side.) Keep support plate in
place on inboard side and make sure the
fast lever is positioned up.

10
19-38 DRUM SANDER OWNER’S MANUAL Quick Set Up Guide to Unpacking
Check your power supply to make sure that
it is adequate but do not plug the machine
in to the power supply until it is fully set-
up.
Plug the short power cord that is attached
to the motor into the outlet on the control
box. This cord will provide switched power
for the motor when the machine is plugged
into the power source.
12
13
14
Tighten all nuts and bolts with wrench.
The power cord that is wrapped around the
gear motor is the power cord that must be
plugged into a 110 Volt, 20 Amp outlet.
NOTE: FAST LEVER BOLT
EXCEPTION
Do not completely tighten bolts
with fast lever. See Step 9 for ref-
erence.
Otros manuales para 19-38
1
Tabla de contenidos
Otros manuales de Lijadora de SuperMax


