strex SP64 Manual de usuario
HD WIFI PROJECTOR
INSTRUCTION MANUAL SP64
STREX
Thanks for choosing Strex! Read the manual carefully, for
correct and safe operation of the product. Always follow these
instructions for safe usage.
If you have any questions about the product or encounter
English
Nederlands

INTRODUCTION
Getting started
WARNING
Thanks for choosing Strex! Read the manual carefully, for correct and safe operation of the
product. Always follow these instructions for safe usage.
If you have any questions about the product or encounter problems,
The illustrations in this manual have been created with care. However, some parts of the
product may dier from the illustration shown in this manual. In that case, Strex is not obliged
to adjust the part or the manual.
This manual is intended for the end user of the product. Using the table of contents on the next
page you can nd the necessary information in the manual.
2
Improper use of this product and accessories are dangerous to you
and others and can damage, destroy or cause a serious accident. We
therefore ask you to read the manual carefully and to read and strictly
observe the danger, safety and warning messages.
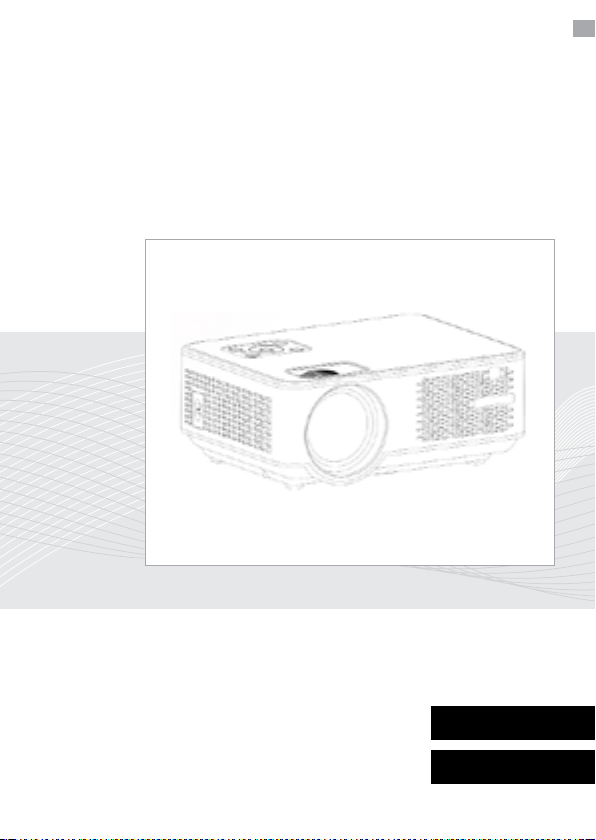
Strex WiFi Projector
Do you want to enjoy HD quality footage in your own home theater? Its possible with the Strex
Projector! Despite its small size, this compact beamer is not inferior to a larger, larger beamer
and is easy to move and set up in dierent rooms. With WiFi you stream wirelessly from your
phone to the screen and you no longer need clumsy cables.
SAFETY PRECAUTIONS
Read these safety instructions before using your device and store them for
possible future reference.
3
●If the cord is damaged, have it repaired by the manufacturer, it’s service or a similarly qualied
person in order to avoid any hazard.
●The cord should always be readily accessible.
●The apparatus shall not be exposed to dripping or splashing of water or liquids and that no
objects lled with liquids such as owers vases shall be placed on the product.
●The normal ventilation of the product shall not be impended for intended use.
●Always leave a minimum distance of 10 cm around the unit to ensure sucient ventilation.
●Open ame sources, such as candles, should not be placed on top of the device.
●The device is intended for use only in a temperate climate.
●The ventilation should not be impeded by covering the ventilation openings with items, such as
newspapers, table-cloths,curtains, etc
●CAUTION: to avoid accident, this appliance must be xed properly on the oor or on the wall
according to instructions for installation.
●CAUTION: Danger of explosion if batteries are incorrectly replaced or not replaced by the same
type or equivalent.
●INTERFERENCE All wireless devices are susceptible to interference
●which may aect their performance.
●AUTHORIZED PERSONNEL Only qualied people are authorized to install or repair this
product.
●ACCESSORIES Only use batteries, chargers and other accessories which are compatible with
this equipment. Do not connect incompatible products.

5
VISUAL INSTRUCTIONS
5
• Top View
• Control Pane
Control Panel
Manual Source
Power
Indicator Light
Return
Keystone Correction
Manual Focus
4
CONTENTS
VISUAL INSTRUCTIONS 5
• Top View 5
• Bottom View 6
• Side View 7
• Rear View 8
• Remote Control 8
PROJECTION DISTANCE AND SIZE 9
HOW TO USE 10
Before Starting 10
Power Plug 10
Power Button 11
Keystone and Focus 11
Multimedia Connection 12
ACCESSORIES LIST 17
MULTIMEDIA FILE SPECIFICATION 18
WARRANTY CARD 19
NEDERLANDSTALIGE HANDLEIDNG 28
SCREEN MIRRORING 20

7
VISUAL INSTRUCTIONS
• Side View
A. Left Side
B. Right Side
Power Socket
HDMI1 Port
HDMI2 Port
AV Port
HeadphoneJ ack(3.5mm)
USB1 Port
USB2 Port
6
VISUAL INSTRUCTIONS
• Bottom View
• Front View
For Support Base
For Tripod Stand
Speaker
IR Receiver
Lens
Remark:
The adjustable support base can assure the max projection angle by 15°,
The best display eect will be obtained by projection angle ranges of 0° - 8°.
The content of this manual are subject to change without notice

PROJECTION DISTANCE AND SIZE
9
●The image size depends on the distance between projector and screen, there may be 3%
deviation among above listed data. Dierent settings cause various distances.
50 inch 72 inch 100i nch1 20 inch
16 :9 1.52 m2 .15m 2.93 m 3.48 m
The content of this manual are subject to change without notice
8
VISUAL INSTRUCTIONS
• Rear View
• Remote Control
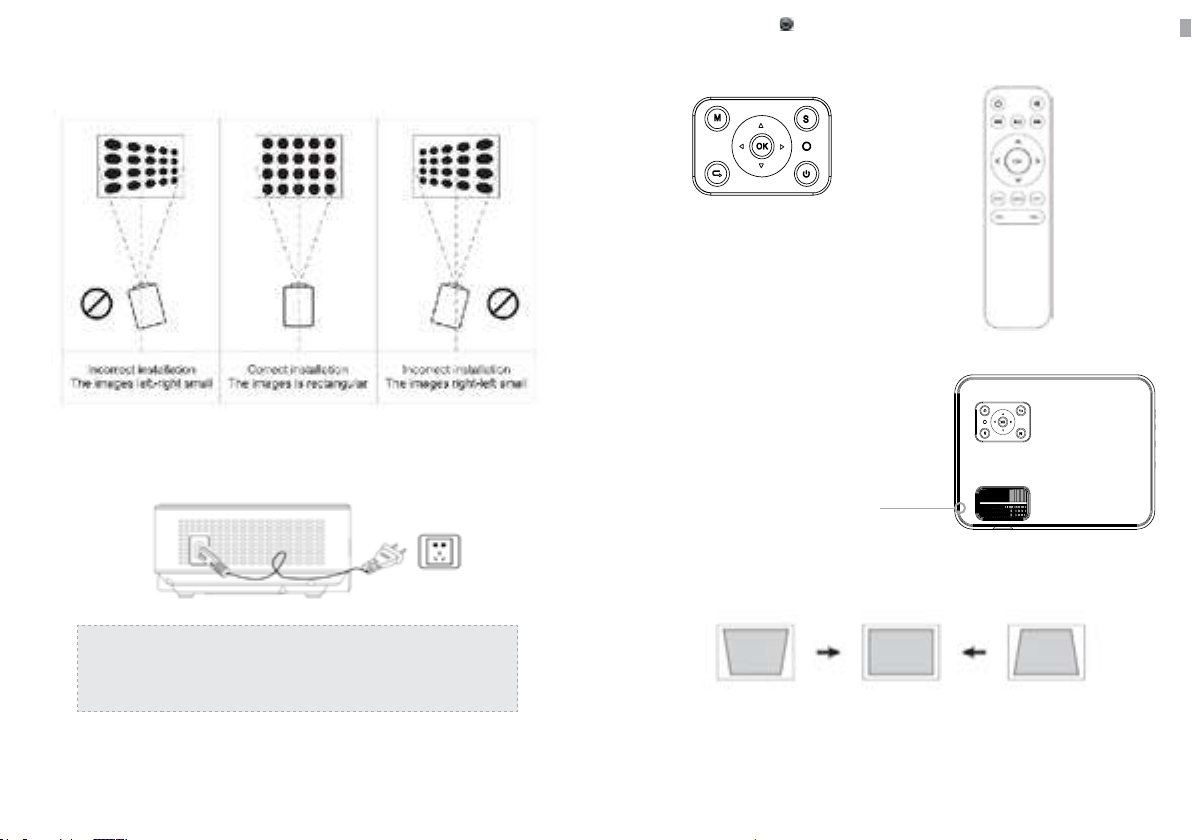
IR Receiver
VGA Port
Power Mute
Backward Forward Home / Play
Voice +
Enter
Menu
Source
Voice -
Arrow Keys
Analog TV Port
(Optional Function)
Ventilation Window, Be able to take away to clean
Note:
While using the remote control,
point it toward IR receiver.
The content of this manual are subject to change without notice
11
A. If the projected image is in a trapezoidal shape, it can be resolved by Keystone correction.
( Do Manual Keystone Correction )
A. On the control panel B. On the remote control
3. Press the “ power ” button ( ) on the control panel or remote control to turn on the projector.
4. Keystone and Focus
Keystone Correction
Manual Focus
The content of this manual are subject to change without notice
1. Before starting up the projector. Follow gure below to adjust trapezoid correction. Keep the
projector vertical with projecto,r screen and keep it on the same level.
2. Before starting up the projector. Follow gure below to adjust trapezoid correction. Keep the
projector vertical with projecto,r screen and keep it on the same level.
HOW TO USE
10
Note:
Pictures are only for your reference, dierent countries got dierent
power plug, please contact your supplier for more details, better
connect the projector rst.
The content of this manual are subject to change without notice

13
B. HDMI Connection
Support most device with HDMI slot. Press “Source” on the remote control, then choose the right
signal source “ HDMI “.
The content of this manual are subject to change without notice
12
B. the projected image may be blurry or dicult to see, this is due to lack of Focus adjustment with
the lens, please follow the processes below to adjust the Focus. ( Do Manual Focus, nd the most
sharpness picture on the screen )
signal source, then press Play / Pause button (
Or
5. Multimedia Connection:
A. Insert the USB ash driver into the USB port and choose the right
Note:
If the Keystone correction fail to resolve image shape, please reduce the vertical height of the
projector in relation to the center of the screen.
Note:
It is normal when sharpness in the central, blur in the edge.
( Press “ Source” on the remote control or “ S” on the control panel, then there is “ Input Source”
on the screen, choose “ USB “ )
The content of this manual are subject to change without notice

15
E. VGA Connection
Choose the “PC-RGB” source to connect computer with VGA cable, There is no sound coming out,
need to connect with amplier. Set up your laptop if still not sharing the screen.
The content of this manual are subject to change without notice
14
C. AV Connection
Use AV cable for connecting as follows, choose the “AV” source input.
D. Audio Out Connection
Connect the loud speaker as follows:
The content of this manual are subject to change without notice

17
ACCESSORIES LIST
While unpacking the package, please check and conrm all the accessories are accounted for.
Note: Pictures only for your reference, dierent countries got dierent power plug, please
contact your supplier for more details.
The content of this manual are subject to change without notice
16
F. MHL Function
Support Android Phone ( MHL-enabled devices ), iPhone.
The content of this manual are subject to change without notice

19
WARRANTY CARD
Thank you for purchasing our product ! Please read our warranty policy
listed below:
1. Projector by product Manual under normal working conditions for the use of, we provide you
with a one-year warranty service. (Projector lamp is 6 months warranty) .
2. The warranty period is from the date when you purchased our product.
3. Product warranty relating to the specic matters concerned, please contact dealers around.
4. The shipping cost is not included in warranty, Buyer is responsible for shipping cost After-Sale
service.
Please package properly if you need to return or need service, Buyer responsible for any damage or
loss in transit. In the 1st year warranty period, the occurrence of the following items, we reserve the
right to refuse service if below applied :
(1) Product failure or damage caused by improper use
(2) Electric shock or burn accident due to improper installation
(3) Non-maintenance service by damage overhaul
(4) Product label is damaged
Customer Name : _____________________________________________________________________________________
Product Number : ____________________________________________________________________________________
Serial Number : _______________________________________________________________________________________
Purchase Date: _______________________________________________________________________________________
Warranty Policy
User Information
The content of this manual are subject to change without notice
18
MULTIMEDIA FILE SPECIFICATION
Image Format
Support File Extension
JEPG, PNG, BMP, MPO .jpg / .png / .bmp
Audio Format
Support File Extension
MPEG1, MPEG2, LPCM, MP3 .avi / .ts / .dat / .vob / .wav / .mkv / .mp3 / .mp4
Video Format ( Bit Rate up to 30~40 Mbs )
Support File Extension
MPEG1, MPEG2, H.263, H.264, AVS,
VC1, MJPEG, RV30, RV40, HEVC
.dat / .ts / .mp4 / .mpg / .mpeg / .avi
/ .mkv / .mov / .wmv / .asf / .v / .3gp.
/ .3gpp / .tp / .trp
Doesn’t Support : Dolby AC3 / AAC, DTS, WMA, DivX, VC1, etc
Doesn’t support : MSVC / CRAM , MP42, GMC, IV32, RLE, cvid, RV20, DivX, RM, RMVB, VC1, FLV , etc.
Otros manuales para SP64
1
Tabla de contenidos
Idiomas:
Otros manuales de Proyector de strex


