starlight Xperience Manual de usuario

User Manual

Table of Contents
1) Introduction ..................................................... 4
2)Using Starlight Xperience ............................... 5
2.1 Turning on the Headset........................... 6
2.2 Putting on the Headset............................ 6
2.3 Using the Controller ................................ 7
2.4 Connecting the Controller ....................... 8
2.5 Recalibrating the Controller..................... 8
2.6 Launching a VR Experience.................... 9
2.7 Exiting a VR Experience ......................... 9
2.8 Connecting to Wi-Fi............................... 10
2.9 Turning off the Headset......................... 10
2.10 Cleaning the Headset.......................... 11
2.11 Charging the Hardware ....................... 12
2.12 VR Lying Down/Without a Controller... 13
2.13 Playing Left Handed............................ 14
2.14 Motion Sickness in VR ........................ 15
2.15 Tips ..................................................... 16
2.16 Admin Usage....................................... 18
!
!
3) Content..........................................................19
3.1 Preloaded Content ...................................20
4) FAQs .............................................................30
5) Additional Support .........................................31

4
1) Introduction
Thank you for piloting Starlight Xperience!
Starlight Xperience is a groundbreaking new
program from Starlight Children’s Foundation. With
your help, this program will transform the hospital
experience for kids by virtually transporting them out
of the hospital to anywhere in the world — or the
galaxy — they dream to go. Starlight Xperience
offers hospitalized kids a variety of fun, age-
appropriate and fantastic virtual reality experiences
geared toward entertainment and distraction.
Starlight Xperience features a suite of state-of-the-art equipment, including a wireless VR headset
that is easy to transport, quick to wipe clean and does not require Internet access for daily use,
making it highly accessible and easy-to-use in the healthcare environment.
The Starlight Xperience program is currently being piloted by a small number of forward-thinking
hospitals. Thank you for helping us evaluate this program so that it can be used to improve the life
and health of kids and families around the world.
!
5
2) Using Starlight Xperience
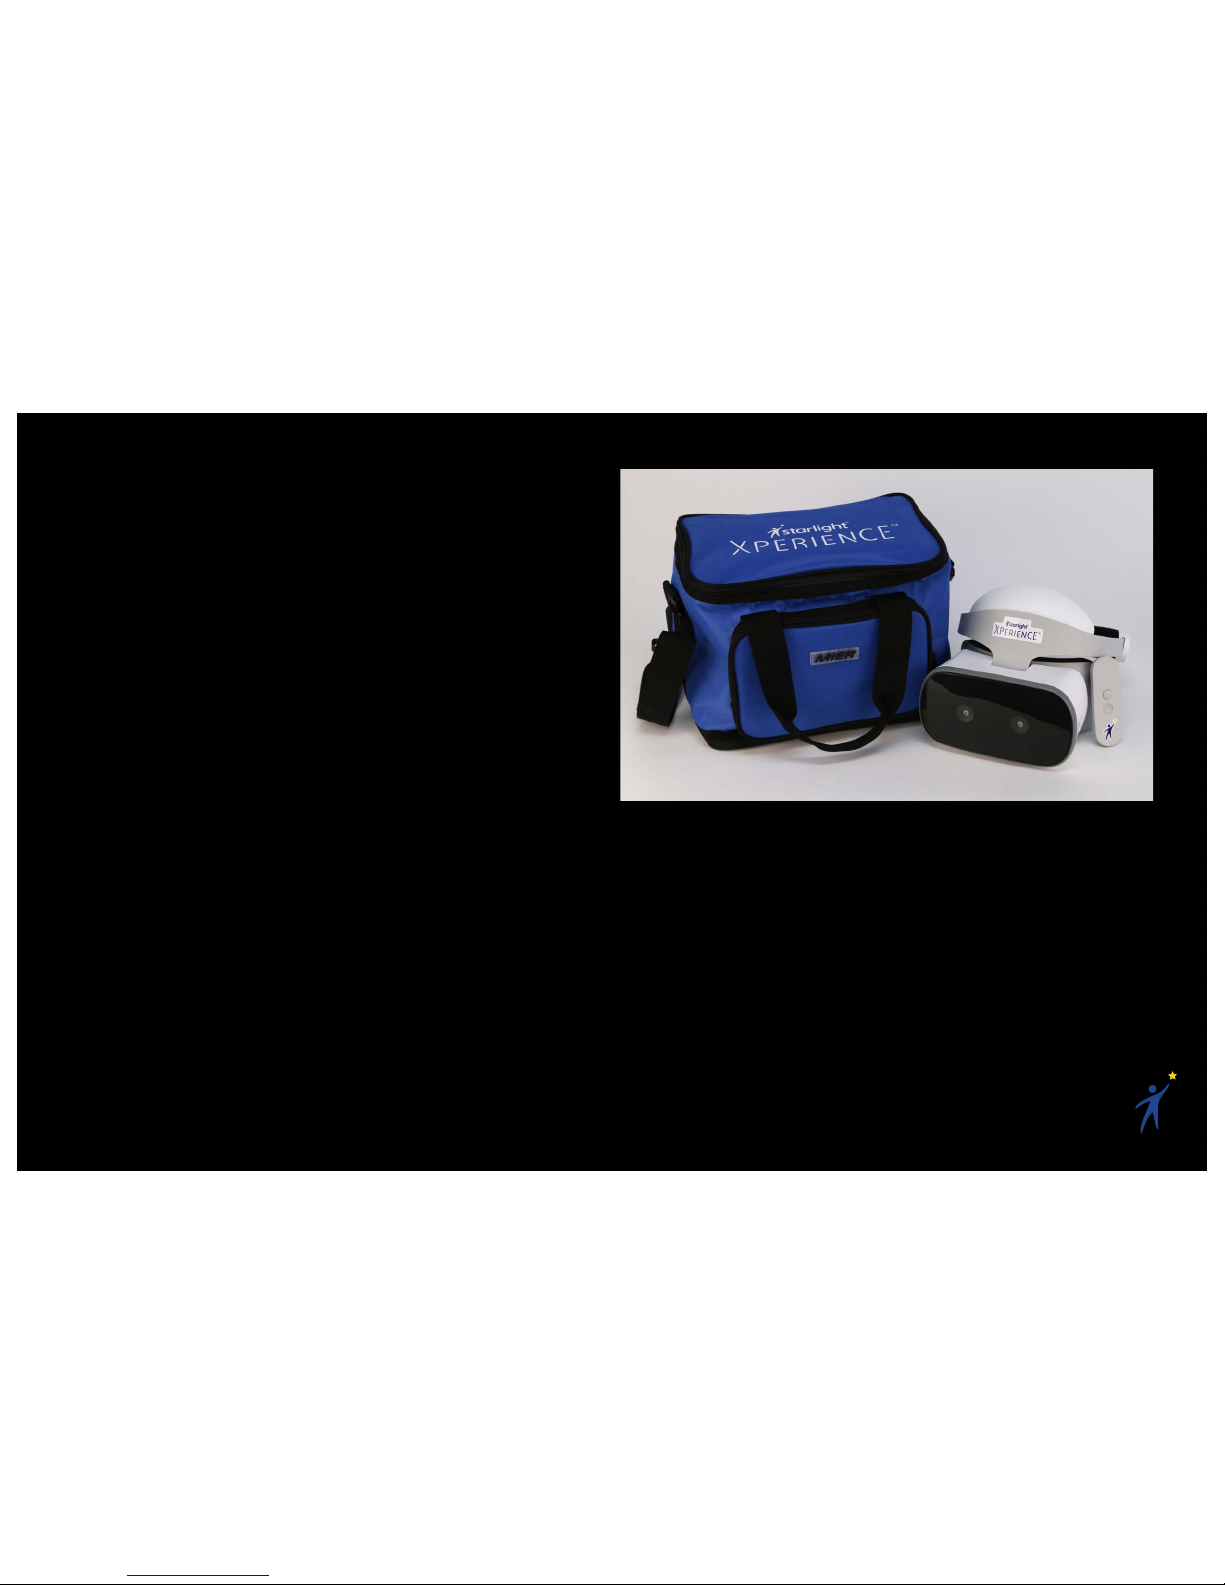
The Starlight Xperience kit includes:
•A Starlight customized Lenovo Mirage Solo
headset and controller
•20+ preloaded VR experiences
•Headset mounted, wipeable VR
headphones
•2 charging cables
•A carrying case

6
2.1 Turning on the Headset
1. Press and hold the power button
•A white indicator light will flash, then
remain steady
2.2 Putting on the Headset
1. Loosen the ratchet wheel on the back of
the headset
2. Put the headset to your face like a pair of
goggles, ensuring you can see the screen
clearly
3. Tighten the ratchet wheel so that the
headset is snugly resting on your forehead
Note: If the screen is not clear, hold down the
Headset Release Button on the bottom of the
headset and slide to adjust the screen’s distance
from your eyes.
Ratchet Wheel
Power Button

7
2.3 Using the Controller
For most applications, you will use the VR
controller to interact with the virtual world.
Becoming comfortable with pointing the controller
and using its buttons is important to have an
enjoyable VR experience.
1. Daydream Button
•Press to open the Daydream
Dashboard
•Press and hold to re-center your
headset and controller
2. App Button
•This button depends on the app you
are using. It is usually used to open
menus, pause, or go back
3. Touchpad
•Click or scroll the touchpad to
interact with your virtual world
4. Volume Buttons
Note: A virtual representation of your controller
will usually be visible while in the headset. This
can help you get your bearings.

8
2.4 Connecting the Controller
If your controller is not awake and connected, a
screen will appear in VR. Follow the on-screen
instructions to wake up and connect your
controller to the headset.
Note: Your controller and headset have been
paired ahead of time and marked with matching
numbers. Make sure you use the correct
controller and headset.
2.5 Recalibrating the Controller
If your controller and the virtual pointer ever feel
out of sync:
1. Point the controller forward
2. Click and hold the Daydream Button
Note: This will also re-center your view, so
ensure you are facing forward.

9
2.6 Launching a VR Experience
To launch an app from the Daydream Home:
1. Point at the “Library” button below the
white screen and click the Touchpad
2. In the Library, you can swipe through
pages of app icons. Point and click the app
you want to launch.
3. Have fun!
2.7 Exiting a VR Experience
1. Press the Daydream Button on
the controller to open the
Dashboard
2. From the Dashboard, you can click the
“Home” button to return to the Daydream
Home, or click the “Library” button to select
a new VR experience.
Daydream Home −Library Button
Dashboard −Home and Library Buttons

10
2.8 Connecting to Wi-Fi
Wi-Fi is not necessary to enjoy the majority of the
Starlight Xperience content, but it does allow you
to have access to new content and get automatic
updates. To connect to your Wi-Fi network:
1. Press the Daydream Button on the
controller to open the Dashboard
2. Click the Wi-Fi icon in the top right
3. Find and connect to your Wi-Fi network
2.9 Turning off the Headset
1. Press and hold the power button
•A white indicator light will flash, then
turn off
Power Button
Dashboard −Wi-Fi Button

11
2.10 Cleaning the Headset
When cleaning your Starlight Xperience kit, make
sure to refer to your facility’s policy for cleaning
electronic equipment.
See the following cleaning recommendations:
•Use sanitizing wipes to clean the
hardware; all parts of the Starlight
Xperience kit are wipeable.
•To prevent damage to any parts of the
hardware, use Hydrogen Peroxide based
sanitizing wipes.
•Alcohol-based wipes may be used on the
plastic and foam parts of the headset, but
not on the glass lenses or front cameras.
•When using wipes, wring out any excess
liquid before using them to prevent any
liquid from going inside the hardware.
•Do not spray liquid or aerosol cleaners
directly onto any hardware.
Hydrogen Peroxide based wipes,
like the Clorox Healthcare
Hydrogen Peroxide Wipe, are the
preferred method of sanitization.
Tabla de contenidos


