SpinTouch RapidScreen PLUS V2 Manual de usuario

TABLE OF CONTENTS
Quick Start Note………………………………………………………………………………….2
User Manual Note………………………………………………………………………………..3
Attribute Settings……..………………………………………………………………………….4
Software Settings……..………………………………………………………………………….5
Detailed Attribute Settings..……………...……………………………………………..…..6-10
Registration with the facial recognition system…………………………………..……11-13
Detailed Software Settings..……………...………………………………….….…………14-18
Email Alert Setup ………………........................................................................................19
Email Alert Via Text....…………………………………………………………………………..20
1
User Manual
In this User Manual, we're going to walk through how to set up the RapidScreen.
Right out of the box this unit will already be capable of scanning users and taking their
temperatures. Some changes may need to be made to the application based on your
individual requirements.
Compatible with the following model: RapidScreen Plus V2

Quick Start Guide
2
2
If you are just getting started you should first read the Quick Start Guide
that can be found here:
https://drive.google.com/file/d/1h2QsKpAeHWd-576qH3TgfJUGZIdCPkn8
/view?usp=sharing
The Quick Start Guide section of this User Manual is designed to give you
just the basic setup information you need to get started using the device
as a temperature scanner. It will not cover the advanced features, which
will be discussed further on in the User Manual here.

User Manual
2
3
The rest of this document covers the advanced features of the device and
also just document in detail the various menu options.
While it is good to read through these sections to get a better
understanding of how the device works, it is not necessary unless you run
into any issues and want to troubleshoot them.
You can download the eFace management software here:
https://drive.google.com/file/d/1dnpForzdvW5NnVb6da9L0N3KhrMS9LZU
/view
Please note that there is an additional document that is the user manual
for the eFace software itself.
You can find this user manual for eFace here:
https://drive.google.com/file/d/1CV7vPQ0guVP_BcdKSNxpJvBD7woGhV
Qr/view
Another important note about eFace is that you should NOT use the Kiosk
Settings section of eFace - the default values there are not what the
default values of the device are so if you change anything there and push
those changes to your device it will break the functionality until the device
is recovered.

ATTRIBUTE SETTINGS
● Server Connections – Connecting the kiosk to the Eface backend software for remote
management.
● Face Settings – Modify the configuration properties for scanning.
● Temperature Settings – Modify the configurations properties for temperature.
● Personal Registration – Register Employee/Staff to Eface database for facial recognition.
● Access Records – View and Export current records.
● Speech Settings – View and modify current speech settings
● Visitor Information – View basic information of visitor scans.
● Blacklist – View basic blacklist information
4
*** It is VERY important that you do NOT click on the
Synchronization Configuration button shown below at the top right
of the Attribute Settings screen - this button is currently glitched
and will cause problems

SOFTWARE SETTINGS
● General Settings - You can turn on card swiping, attendance, door opening, human
body induction, stranger mode and save
local information related settings according to your own needs
● Toggle Mode – Adjust network and stand-alone mode
● Timer Switch – On / Off timer setting for days of the week
● Volume Settings – Adjust the Volume setting of the kiosk
● Test Setup – Allows for testing different features such as lights and relay connection
● Software Upgrade – Allows for updating the .apk application
● Device Information – Displays information about the device
● Exit – Allows you to exit the .apk application.
5
*** It is VERY important that you do NOT click on the
Synchronization Configuration button shown below at the
top right of the Attribute Settings screen - this button is
currently glitched and will cause problems

ATTRIBUTE SETTINGS IN DETAIL
●Server Connection – See Connection Kiosk to Eface software.
●Face Settings – Be very careful what you change here, do NOT change the Distance value or
else it can crash the app. It is suggest that you turn OFF the Monocular Live option, then save
& restart.
●Face Parameters Settings
6

ATTRIBUTE SETTINGS IN DETAIL
1.Mask Detection – Turn on if you require people to wear mask on premise. If turned on the kiosk will
tell people who are not wearing a mask to wear a mask after taking their temperature. This will not
stop them from getting their temperature taken.
a. Masks Interception – If Mask Detection is on, Masks Interception will appear if you
require people to be wearing a mask before taking their temperature. If turned on the
kiosk will let people know to wear a mask to take temperature.
2.Monocular Live – Living body sensor. Setting to determine if a live body is present and not a photo or
phone image.
3.Detection Mode – When turned on it turns off the face recognition and everyone will be a stranger.
4.Camera Switch – Switches between Front and Rear camera. This setting should always be on REAR.
5.Distance – Setting to set how far away a person must be before the kiosk will start taking
temperatures.
6.Rotation – The way in which face recognition sees you, if the Kiosk is at an angle to a door they can
get people from the side view. Default setting should always be on 270.
7.Angle Preview – Similar to 6. Setting should always be on 270.
8.Face Frame Image - This mirrors the photo for saving, if you want to see the photos as camera sees it
or how someone sees it in real life. Default is Image.
9.Resolution – This is the resolution of the saved photo from the Kiosk.
10.Face Frame Angle – Default setting is Automatic.
11.Front Camera Image – Default setting is Image.
12.Rear Camera image – Default setting is No Image.
13.Capture Angle - the angle the photos are saved (related to someone setting the device up as people
walk by).
Default setting is 90.
14.Recognition Threshold – Setting for how accurate you want the face recognition to be 1-100.
15.Living Threshold - how accurate you want the detection of someone using paper photos or photos from
a phone.
16.Night Mode (screen fill) – This setting will put an outline around the person when they walk up to the
Kiosk so they only see themselves... to line up better with the IR sensor at night. 7

● Temperature Setting Be very careful what you change here. It’s best to lower the Effective
Temperature down to 95 and then do a save & restart, this will help you do the automatic
calibration option on this same screen.
1.Temperature Measuring peripherals – Most models use Serial matrix (MLX90621_BAA)
but you might have a model that uses (MLX90621_BAA_ZM)
8

2. Display Temperature Zone – This setting is if you would like to display the temperature after
the temperature is taken.
3. Temperature measurement serial port – Should always be set to ttyS3.
4. Temperature measuring rate – Should always be set to 115200.
5. Temperature unit – Choose between Fahrenheit or Celsius.
6. Temperature measuring time – Enter in the time frame for the kiosk to start taking
temperature measurements
7. Automatic calibration - set different time to compensate different temperature, improve
the accuracy of temperature measurement.
8. Fever temperature – Select the temperature threshold for triggering an alert
9. Effective temperature - Only when the detected temperature is higher than this
temperature, the detection result will be displayed, otherwise it will be not be shown.
10. Alarm sound – Whether you would like the kiosk to trigger the built-in alarm.
9
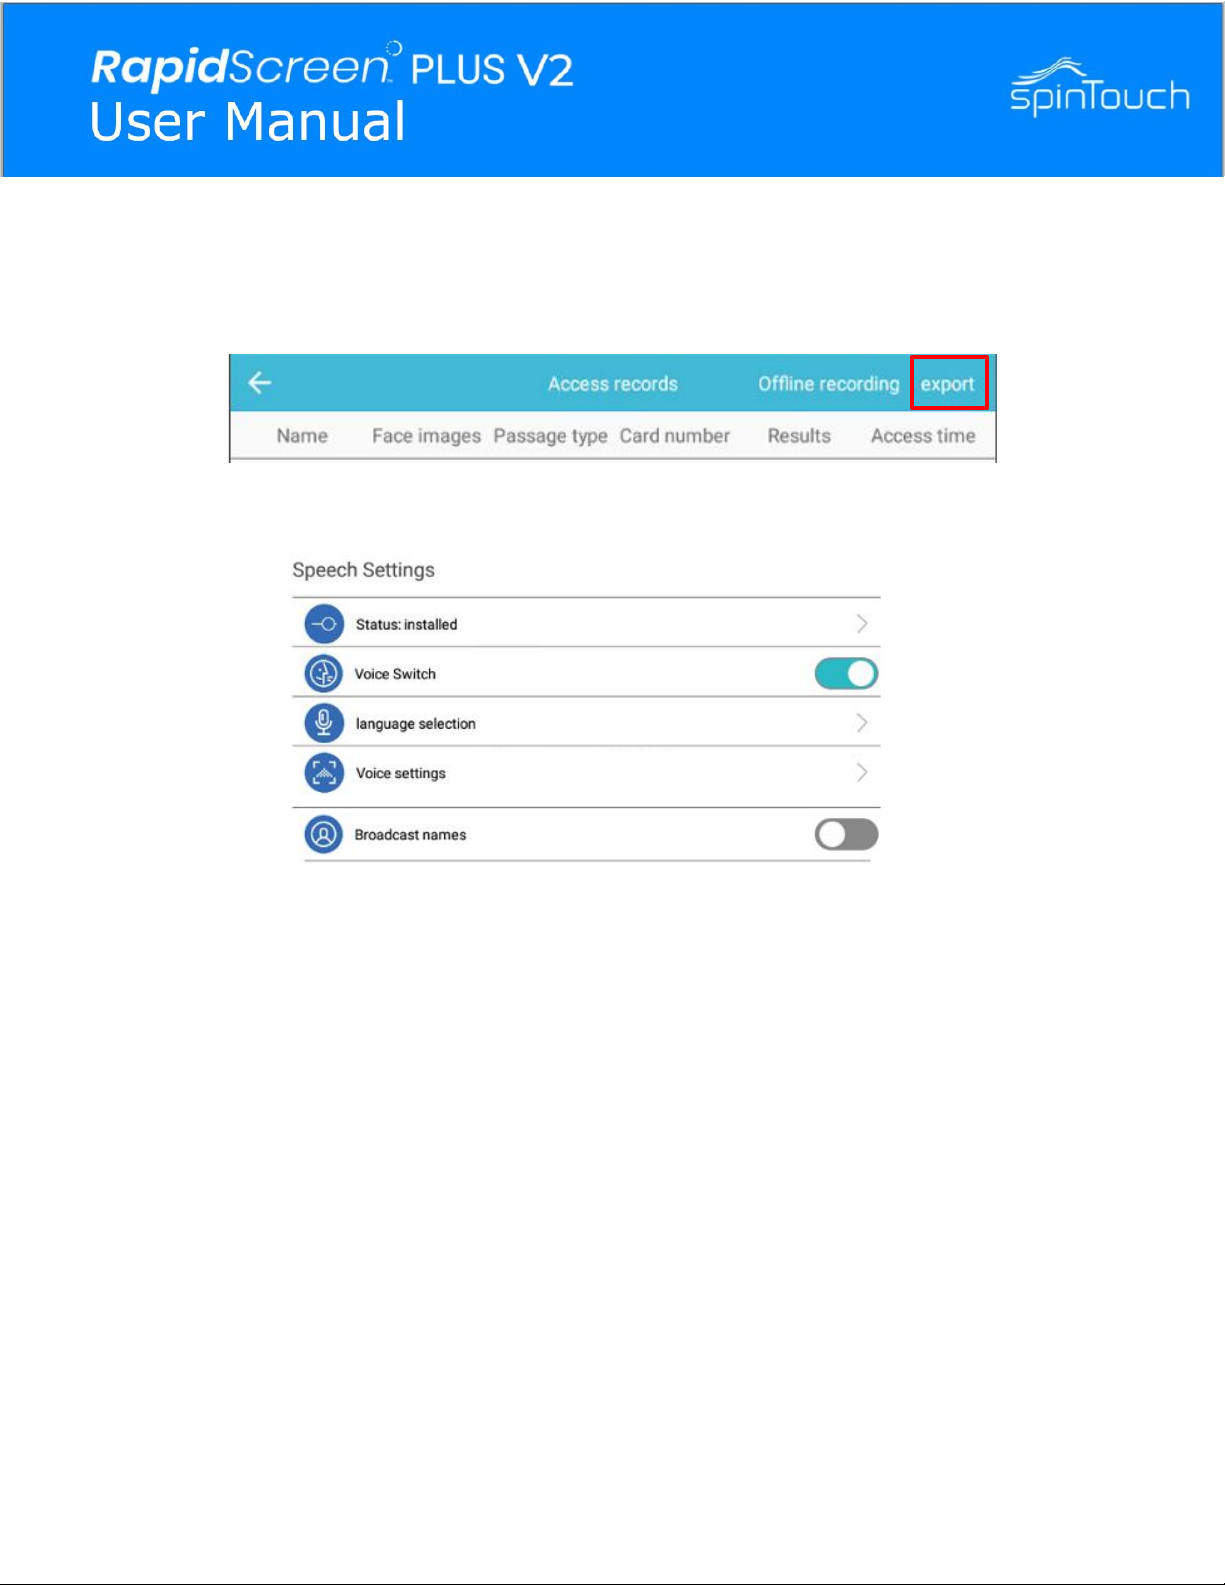
● Access records
This will allow you to view all the records that the kiosk has taken. Selecting Export will
allow you to save all the records to a connected USB drive to one of the kiosks USB ports.
● Speech Settings
1. Status: Installed – Determines whether the speech settings are currently installed.
2. Voice Switch – Sets if you want voice turned on or off
3. Language Selection – This will allow you to choose the default language.
4. Voice Settings – This will allow you to change some of the voice aspects such as
Speech rate and Pitch etc.
5. Broadcast names – Whether or not you want names of personnel announced.
● Visitor Information – This will allow you to view the visitors that are being scan (visitors need
to be added to Eface in order to view them here)
● Blacklist – This will allow you to view the blacklist personnel that are being scan (blacklist
need to be added to Eface in order to view them here)
10
Otros manuales para RapidScreen PLUS V2
1
Este manual sirve para los siguientes modelos
1
Tabla de contenidos


