Solder
the
capacitors
together,
working
as
swiftly
as
possible
so
as
not
to
damage
the
parts.
Cut
the
leads
of
the
smaller
parts
off
I
leaving
the
leads
of
the
larger
part
extending
on
either
end.
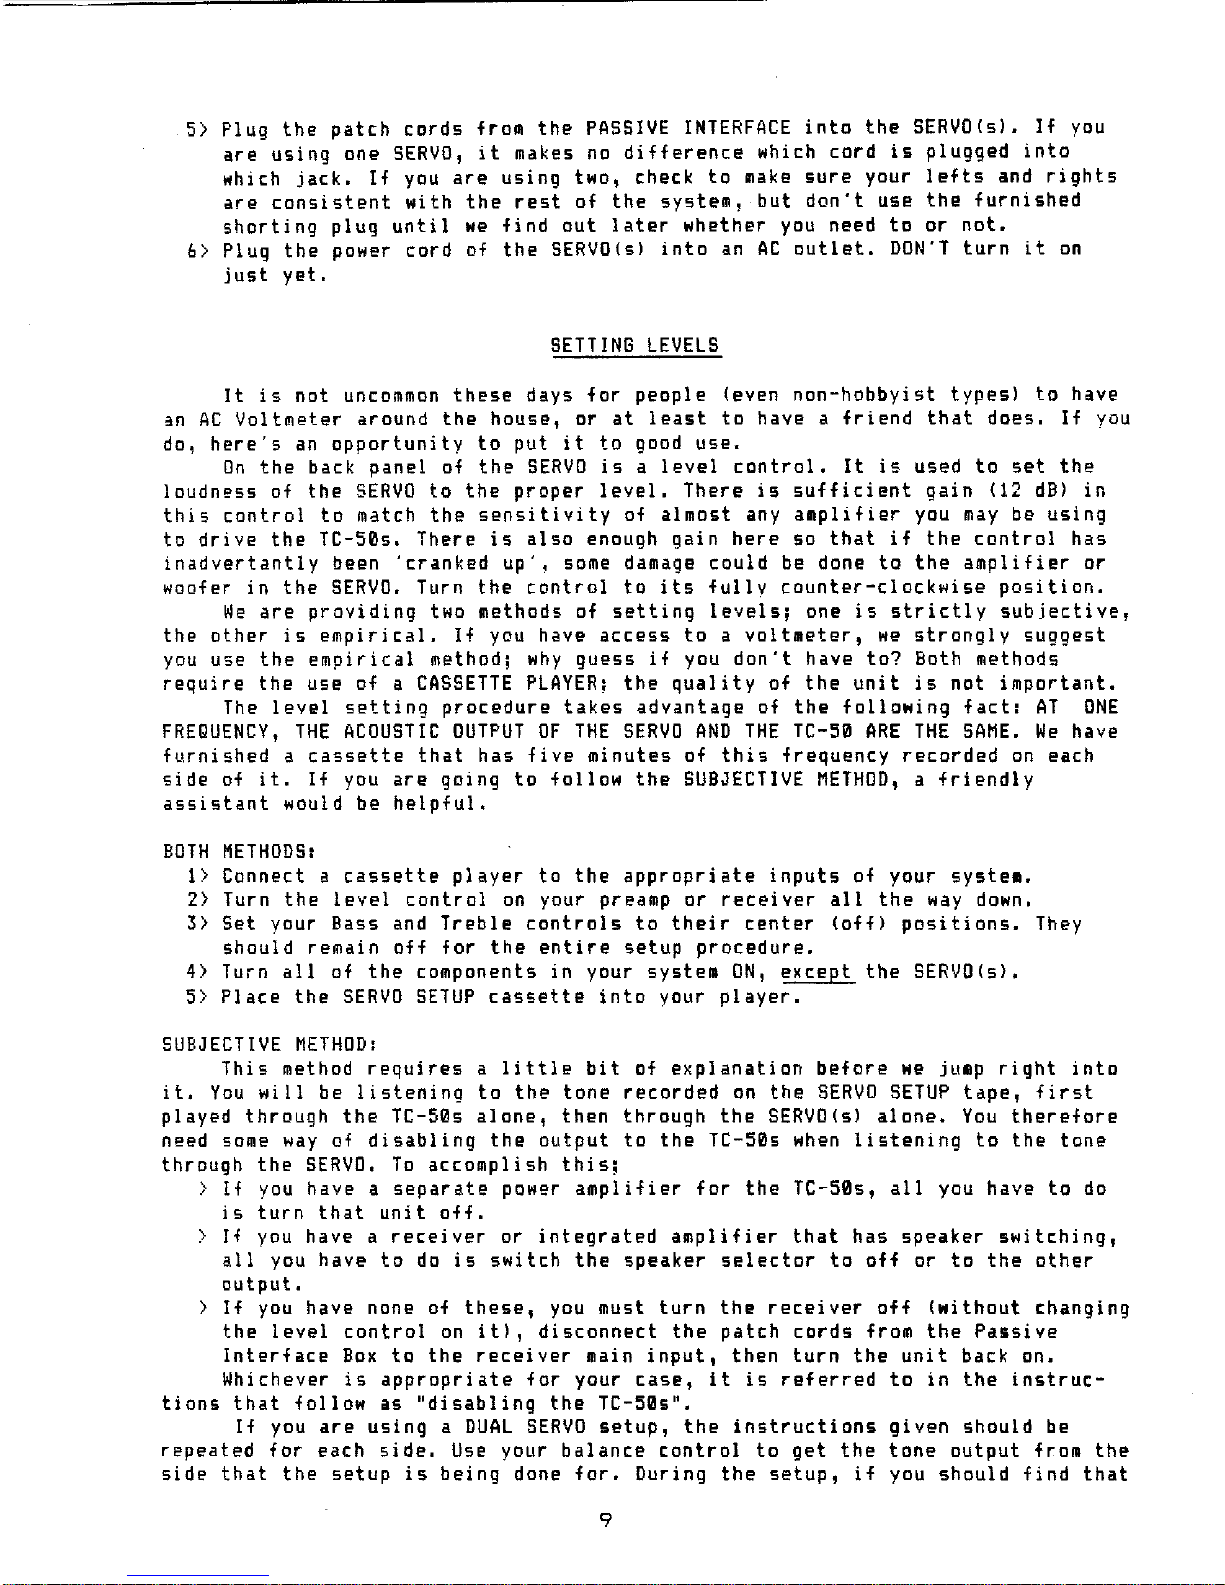
Before
installing
the
parts
into
the
PASSIVE
INTERFACE
box,
take
alook
at
FIGURE
3,
which shows
the
correct
orientation
of
the
parts
and
their
connection
inside
the
box. The
installation
procedure
will
be
described
for
one
capacitor,
and
should
be
repeated
for
the
other
as
well
•
.......................................................................................
......................................................................................
.......
.
............................................
..
.••.....................................
.........................
/'".
,.,.,.,..,.,.,.,..,.
..
-.
..
...........
.......................... ..
.........................................................................
.
.........................................................................
.
.........................................................................
.
......................................................................... .
..................
............................
FIGURE 3
CAPACITOR
INSTALLATION
Place
the
box
so
that
the
insides
aro
exposed.
Cut
the
leads
of
the
capaci-
tor
so
that
the
total
length
from end
to
end
is
just
shy of
the
long
dimension
of
tho
box.
Bend
one end of
the
leads
to
form a
small
hook.
Hook
the
load
through
the
small
hole
in
the
CENTER
POST
of one of
the
phono
jacks
at
the
long
end of
the
box,
and
the
other
end
through
the
center
post
of
the
phono
jack
directly
opposite
it.
Do
not
cross
the
leads
of
the
two
parts;
if
they
touch
each
other,
you
will
convert
your
wonderful
stereo
into
amonaural
system,
although
it
is
not
likely
to
do
any damage.
Crimp
the
leads
loosely
onto
the
posts,
and
solder
them.
Now
put
the
top
onto
the
box,
securing
it
with
the
screws
provided,
and
you're
done!
MAKING
THE
CONNECTION
Place
the
completed
PASSIVE
INTERFACE
behind
your
other
components. Turn
all
of
the
components
in
your
system
OFF.
With
patchcords,
connect
the
output
of
your
preamplifier
to
the
jackS
marked "IN"
on
the
PASSIVE
INTERFACE,
making
sure,
as
always,
to
keep your
'lefts'
and
'rights'
consistent
(if
you
don't
know
your
left
from
your
right,
your
SPICA
dealer
is
qualifiod
to
help
you).
Connect
the
jacks
marked
"SATELLITE
OUT'
to
the
input
of
the
power
amplifier
that
is
driving
the
TC-50s. Connect a
long
set
of
patchcords
to
the
jacks
marked
·SERVO
OUT",
and
let
them be
for
the
moment.
6