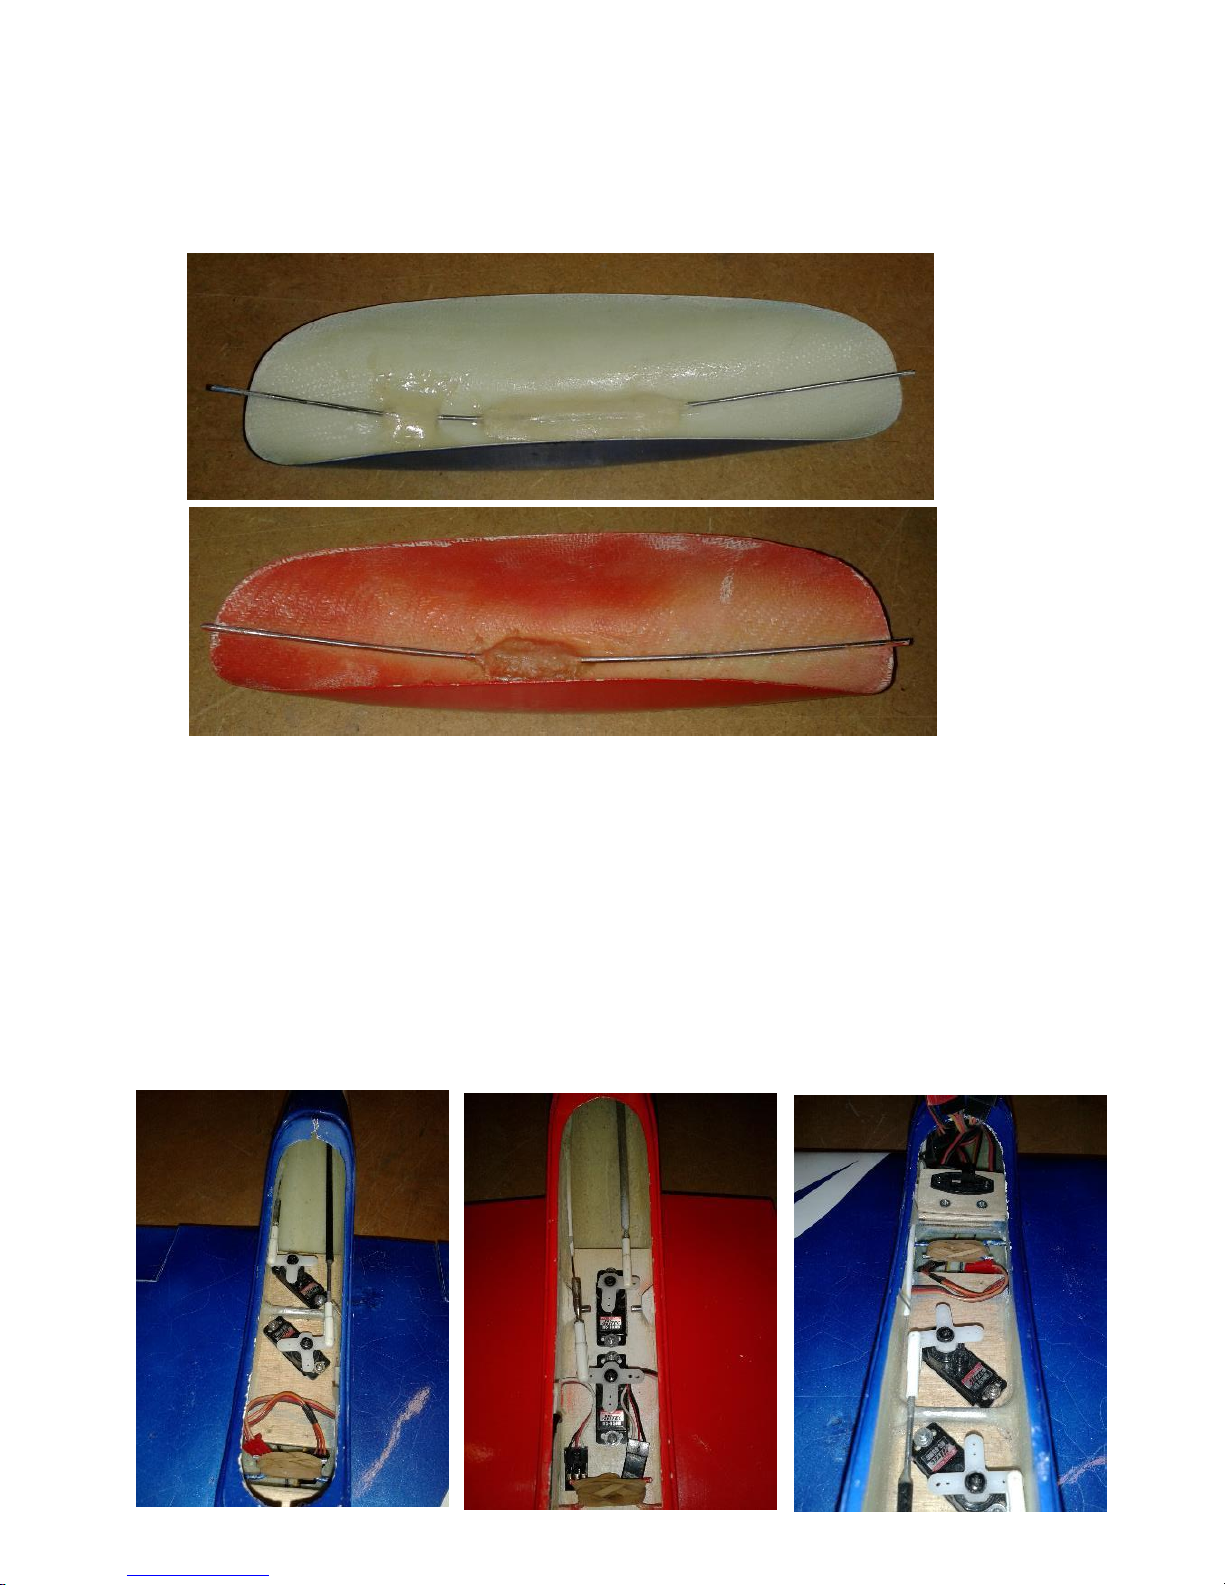
15. The Battery and receiver can be installed directly in front of the wing inside the fuselage, but
installation is easier and more practical to remove and keep the installation neat and tidy by
fastening them onto a ply or plastic card plate that slides into the front of the fuselage in front of the
main wing joiner. My radio switch is installed on another small plywood plate and once screwed into
place, actually hold the radio plate secure.
16. To balance the model after covering / painting and with the gear installed, Lead can be cut and put
into the extreme nose of the fuselage. Assemble the model and use a small plastic bag taped to the
front of the fuselage nose where you want the lead to be and add weight until the desired balance
is achieved.
The way I make my nose weight is carry out the above to estimate the amount of lead required. I
then make a mould from slightly damp sand by pressing the nose of the fuselage (wrapped in Cling
Film) into the sand to form the shape of the nose and remove the fuselage.
Melt and pour lead into this sand mould and wait until fully cool before extracting the lead and filing
the rough surface to fit inside the nose perfectly.
WARNING: Melting lead is particularly dangerous and should not be attempted unless you have all
the necessary equipment, heat source and protective clothing and also should be done outside.
DO NOT pour lead into the fuselage, it will cause a fire and ruin your fuselage, and probably burn
you severly.
Alternatively you can add small amount of lead into the nose until you get the balance right. For fine
tuning, further lead can be added and taped to the battery plate so this can be removed later if
required.
Check and set up the controls as per the plan.
Flaps can be programmed into the aileron if desired but I would suggest no more than a few
degrees either flap (Lift setting) or reflex (Speed setting) depending on what you want. Please note
you will also need some elevator compensation for any flap settings used.
Up going ailerons can also be used as a type of CROW / BUTTERFLY braking for landing, operated
from the Throttle control of your transmitter. This control is best if proportional control is available
rather than using a switch.
Up aileron “CROW”movement to approximately 10 to 15 Degrees, which should be just enough to
get the model to sink in a flat attitude with Elevator compensation. Please note that you will still
require further up going aileron movement with aileron input to maintain roll control during braking.
And please, do not try to input too much movement as this may stall your servo. Stay within the
servo range of movement. The exact amount of required crow brake -vs- aileron movement can only
be attained through trial and error.