Page 3 of 4 | seima.com.au
6 SECURING THE PAN ON THE FLOOR
Cement fixing (optional fixing #1)
If using cement bedding, level the pan while the cement mixture
is workable. Fix pan to floor using a sand cement mixture of 3:1
to a depth of 60mm. Do not use lime or fast-drying cement.
Important: Allow at least 24 hours for the cement mixture
to set before using the toilet.
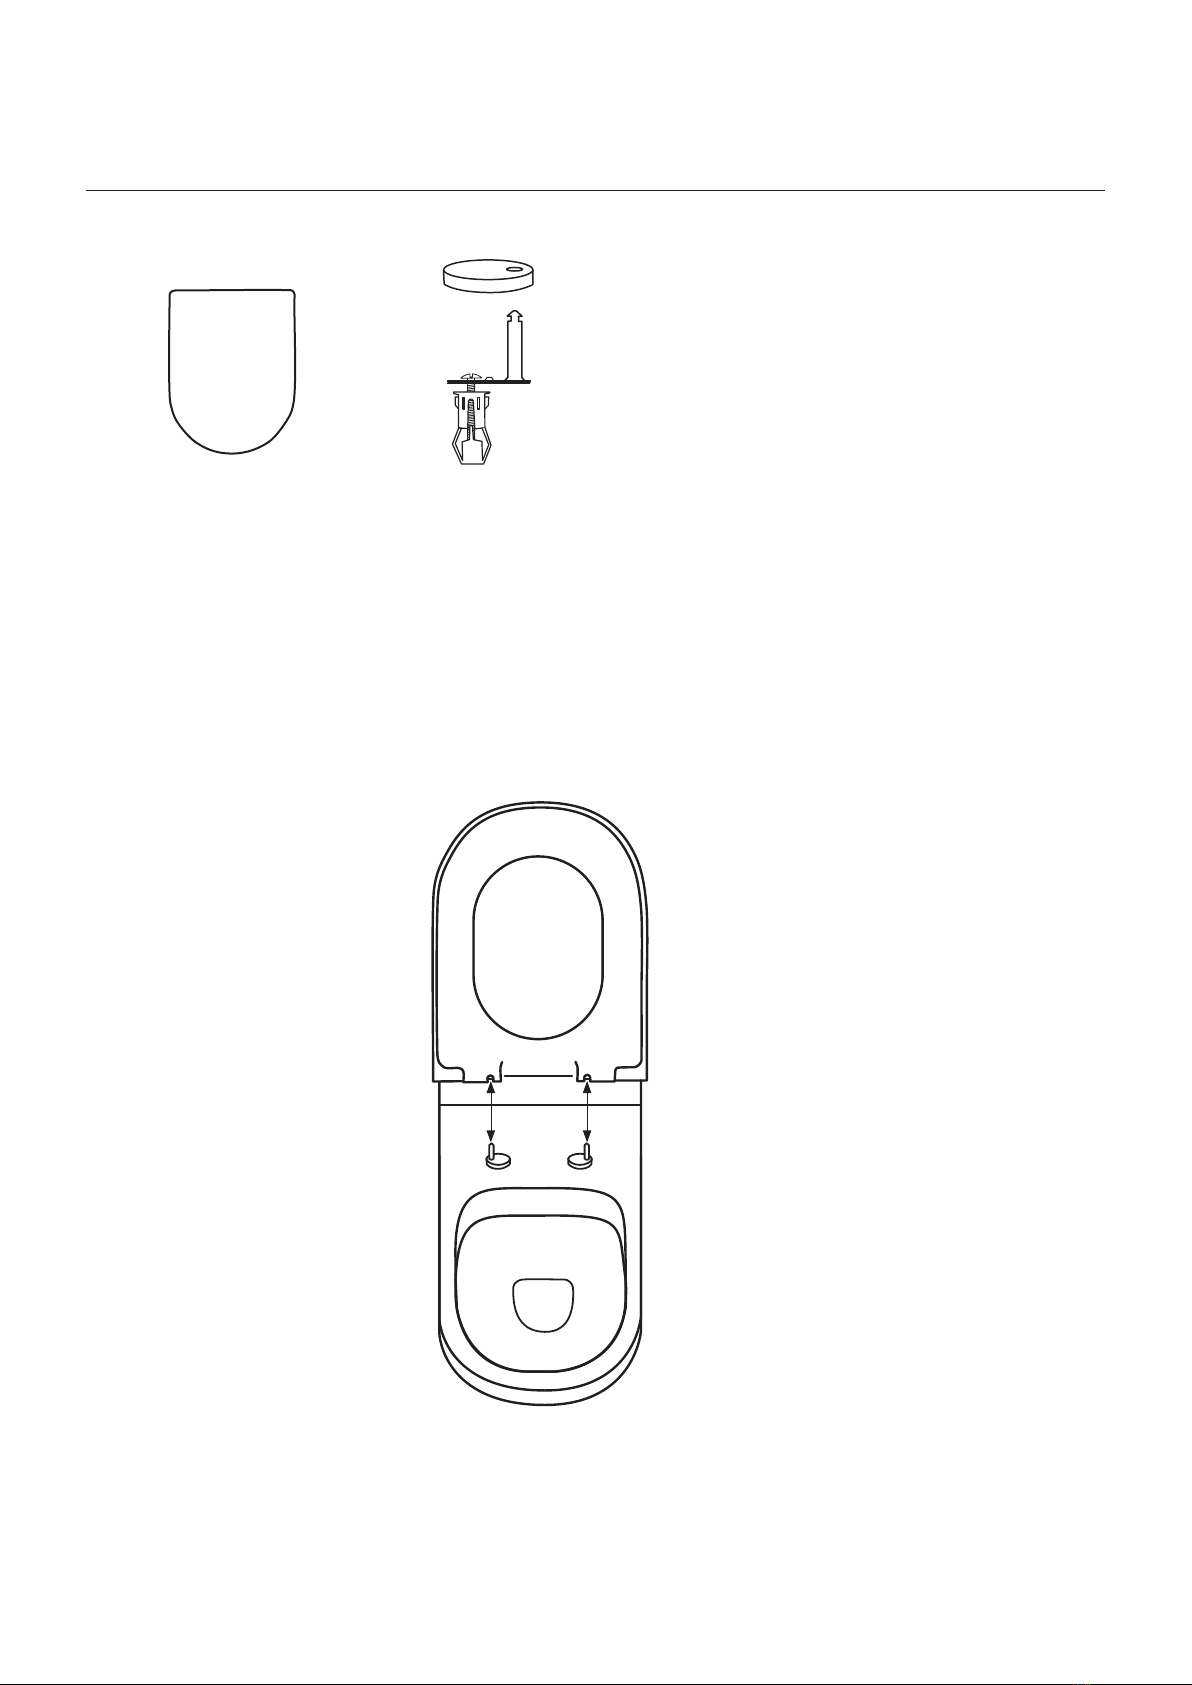
Bracket fixing (optional fixing #2)
Bed the pan with acetic cured silicone sealant, ensuring that
the pan is level. Then position the concealed fixing brackets in
line with the bracket fixing holes. Screw the floor bolts in place
through the base of the brackets. Then secure the pan to the
brackets using the plastic pan plugs and rebated screws. The
chrome caps can be used to cover the plugs on each side of the
pan.
Important: Do not over-tighten the bolts or screws as this may
cause the ceramic to crack and break.
7 FIXING THE CISTERN TO THE PAN
(Note: The cistern fixes directly onto the pan and does not
require wall fixing.)
First check the alignment of the cistern and pan attachment
holes — place the cistern onto the pan and ensure that the holes
align. The back of the cistern and pan should line up so that the
assembled toilet suite will align with the wall. Now remove the
cistern.
Place the rubber seal onto the plastic pipe outlet at the base of
the cistern and ensure it is securely attached. Locate the cistern
outlet (with rubber seal) onto the pan, ensuring a good fit.
If using Bottom Entry inlet plumbing, refer to Step5 and install
the back entry inlet valve.
Now secure the cistern to the pan using the two bolts with seals
in the cistern/pan attachment holes.
Flush the lines and connect the water supply and check the
operation of the cistern.
8 FITTING THE CISTERN LID
Fit the flush button into the cistern lid, with the half flush on the
left and full flush on the right. Ensure that the rubber feet of the
flush button connect and line up correctly with the flush valve
inside the cistern.
Fit the cistern lid and push the buttons to check operation.
9 OPERATION AND MAINTENANCE
Press the left side half flush to save water and the full flush as
required.
Clean the toilet with liquid detergent and a damp cloth.
Do not place water additives inside the cistern as this may have
chemicals that damage the valves and impair the functionality
of the cistern.
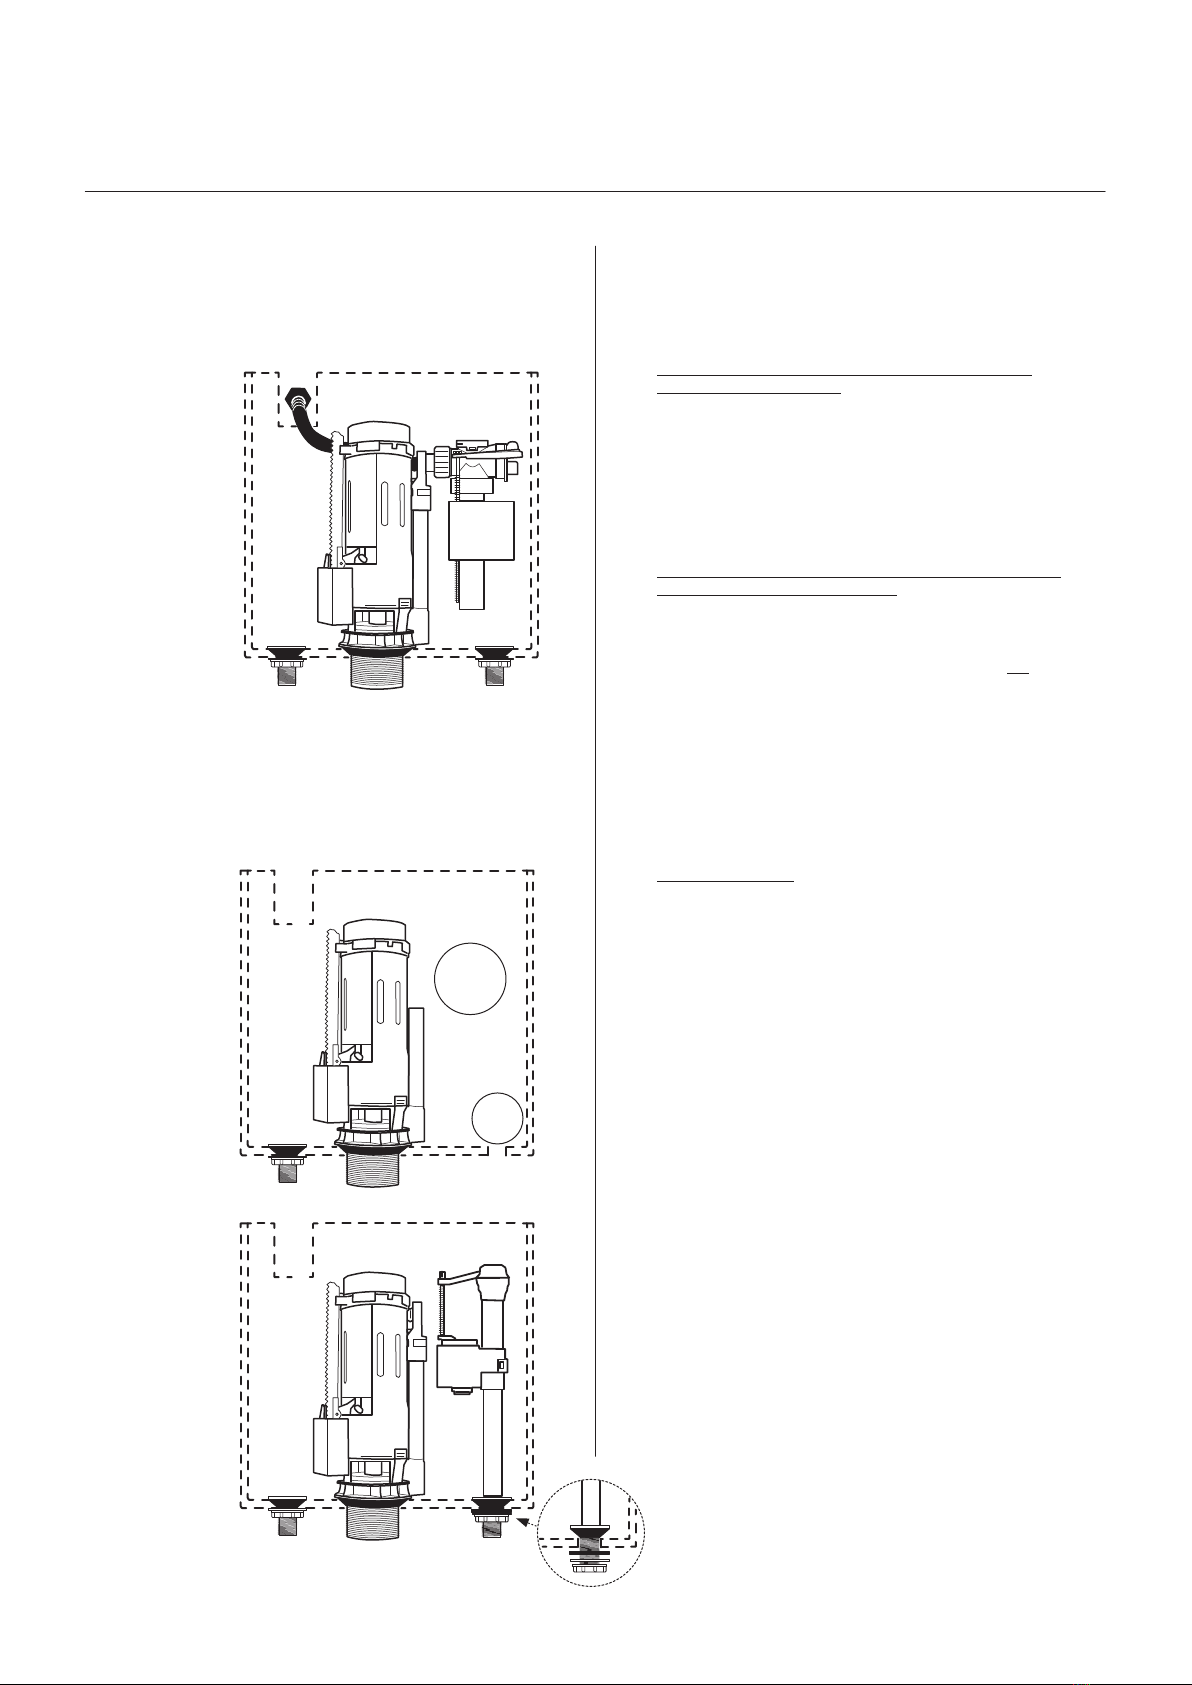
4 BACK ENTRY INSTALLATION
Connect the flexible hose to the ½” BSP nipple in the wall outlet. Run
the flexible hose behind the flush valve, ensuring that the hose does not
obstruct the operation of the flush valve.
5 CISTERN SET-UP CAN BE ADAPTED FOR
BOTTOM ENTRY INLET PLUMBING
First remove two items: the back entry inlet valve and the plug in the
base of the cistern. Next, install the bottom entry inlet valve with plug in
the hole in the cistern base.
For Back Entry Inlet,
attach the loose end
of the flexible hose
to the ½” BSP nipple
water inlet in wall.
back entry
inlet
valve
cistern
flush valve
DIAGRAM B
The cistern setup after
the back entry inlet
valve and base plug
have been removed.
DIAGRAM C cistern
flush valve
Next, install the
bottom entry inlet
valve with plug
into the hole in the
cistern base. Place
the conical rubber
seal inside the cistern.
Outside the cistern
thread on the flat
rubber seal, white
plastic disc and white
plastic wing nut in
that sequence.
DIAGRAM D cistern
flush valve
bottom entry inlet valve
remove
plug
remove
back entry
inlet valve
(flexible hose not supplied)