SB Scandinavia EasySplicer Manual de usuario

USERS MANUAL
EasySplicer
1

Table of contents
Introduction......................................................................................................................................3
Disclaimer........................................................................................................................................3
Application.......................................................................................................................................3
Fusion splicer components...............................................................................................................4
Basics...............................................................................................................................................4
Order of operation............................................................................................................................4
Connecting the splicer to power......................................................................................................4
Starting the splicer...........................................................................................................................4
Fusion splicer menus.......................................................................................................................4
ain menu.......................................................................................................................................6
Setup menu......................................................................................................................................7
Fiber type menu...............................................................................................................................7
Set clock menu.................................................................................................................................8
Preparing the fiber...........................................................................................................................9
Protective sleeve..............................................................................................................................9
Stripping the fiber............................................................................................................................9
Cleaning the fiber...........................................................................................................................10
Cleaving the fiber...........................................................................................................................11
Splicing..........................................................................................................................................13
Cleaning the v-groove of the fusion splicer...................................................................................16
Oven maintenance..........................................................................................................................17
Technical data................................................................................................................................18
2

Introduction
The EasySplicer incorporates all the best a fixed v-groove splicer can offer.
N TE: EasySplicer is a high precision instrument and should always be handled with care!
Disclaimer
SB Scandinavia AB reserves the right to modify the product in any way without prior
customer notification or any other form of notice.
In no event shall SB Scandinavia AB be liable for any damages of any type, incidental,
indirect, consequential or other, originating from or relating to this manual or the
information contained herein. While SB Scandinavia AB tries to make the user manual
complete and accurate, it may contain mistakes, and the user uses it solely at his or her
own risk.
Application
Splicing and protection of most common types of SMF and MMF.
Fusion splicer components
The following components are included and standard for splicing in the field:
Item Description Quantity
1 EasySplicer 1
2 Power supply 1
3 Fiber cleaver 1
4 Fiber holders 250µm 1 pair
5 Fiber holders 900µm 1 pair
6 Stripper 1
7 Carrying bag 1
8 Users manual on CD 1
3

Basics
N TE: The EasySplicer is a rugged field instrument designed to
withstand field environment. However, to ensure best
performance, it is important to keep maintenance as described
later in this manual.
Order of operation
· If available, connect the splicer to a power source.
–
Please watch the attached videos to learn how to operate the EasySplicer
in a fast and easy way !
· Turn on the splicer
· Select proper splice program
· Run calibrate process with a piece of fiber.
· Prepare the fibers
· Splice the fibers
· Analyze the splice
· Remove the fiber
· Protect the splice
Connecting the splicer to power
Connect the power supply if power is available. r use the internal battery.
Starting the splicer
Start the splicer by pressing the large button until the splicer starts.
Fusion splicer menus
The basic menu looks like this:
MENU Enter the menu system described below.
RESET Reset the alignment motors to start position.
SPLICE Start splicing.
4

Main menu
EXIT
Exit menu.
CLEAN ELECTRODES
Run the clean program to remove dirt on electrodes.
This should be done at least every 20
th
splice.
CALIBRATE
Start automatic environmental compensation.
This should be done every time the environment changes.
The splicer will adjust this calibration a small step every
splice but when changing environment this calibration will
be needed. To prepare for this calibration strip and clean a
piece of fiber and place it all the way through the v-grove
and then start the calibration. The P R value will be updated.
TURN OVEN ON
Manually run the oven program. Normally, when a splice is done
next step is to move the fiber with a sleeve to the oven and press
the OVEN button.
SETUP
Setup various things shown below.
INFO
Shows miscellaneous information of the splicer.
5

Setup menu
FIBER TYPES
Change the fiber type to splice.
SET CLOCK
Set the internal clock.
OVEN
Set the oven time.
LANGUAGE
Set menu language.
FIBER POSITION
Change fiber position when replacing cleaver.
EXIT
Exit menu.
6
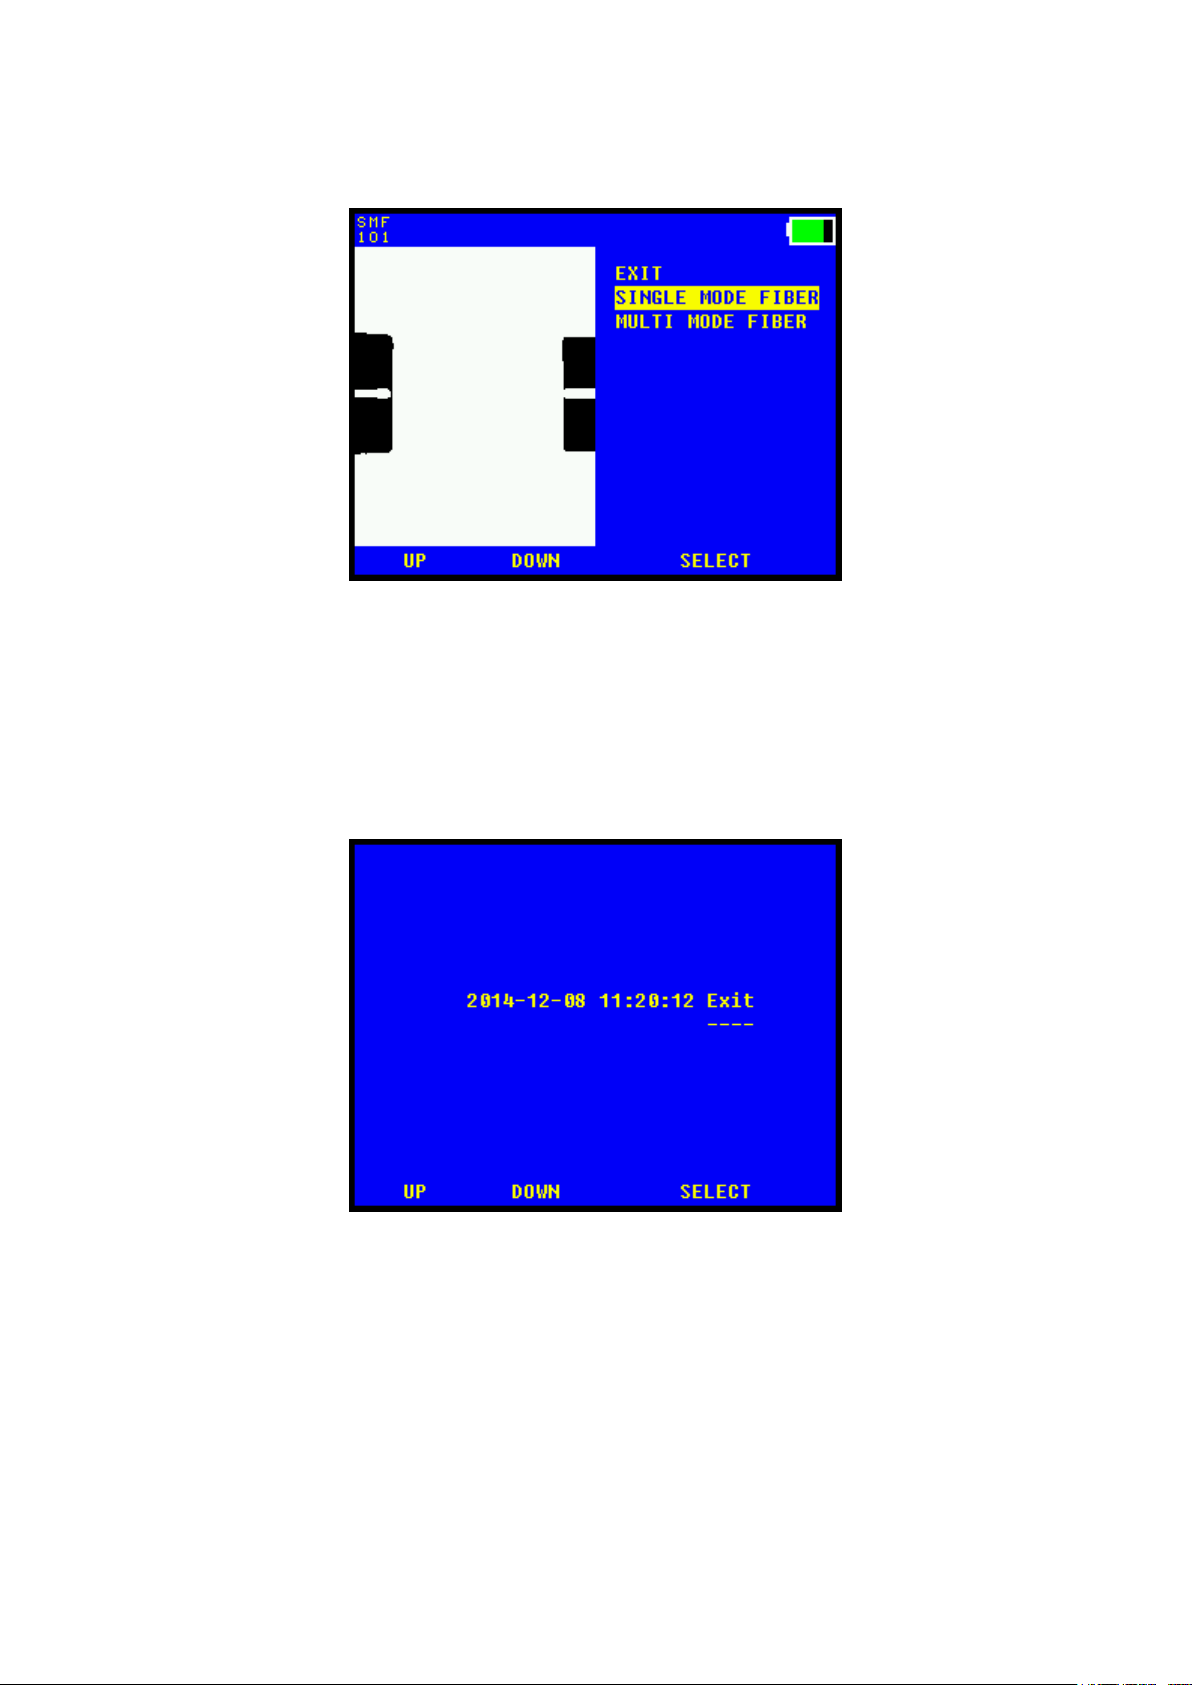
Fiber type menu
SINGLE MODE FIBER
Setup splicer for splicing SMF.
MULTI MODE FIBER
Setup splicer for splicing MMF.
EXIT
Exit menu.
Set clock menu
UP
Changes selected items up one step.
DOWN
Changes selected items down one step.
MOVE
Steps to next item.
hen Exit item is selected, chose Exit button to set the new time.
7

CAL. FIBER POS
Starts automatic calibration of fiber zero point setting.
Put fibers in their holders and place them in the splicer before starting.
SAVE NEW POS
If the fibers are visible and in the correct position like in the picture
above the new position can be saved.
8

reparing the fiber
Often, incorrect handling or preparation causes splice loss. It is crucial to keep tools
and fiber clean; the invested time used in fiber and tool handling is more than
compensated for in reduced troubleshooting effort.
rotective sleeve
Before preparing the fiber for splicing, make sure to put the protective sleeve in place.
Stripping the fiber
Hold the stripping tool to the edge of the fiber holder. Press the handles together and
pull firmly away from the fiber holder to remove the coating.
9

Cleaning the fiber
Use a pair of tweezers equipped with cotton buds soaked in alcohol (according to
picture) or a similar tool.
Press the tweezers together and clean the fiber with by moving the tweezers from the
fiber holder towards the end of the fiber. Repeat, but rotate the tweezers.
A squeaking sound indicates that the fiber is clean
10
Tabla de contenidos
Manuales populares de Sistema de soldadura de otras marcas


TAFA
TAFA 30*8B35 Manual de usuario

Lincoln Electric
Lincoln Electric INVERTEC V350-PRO CE Manual de usuario

ESAB
ESAB Buddy Arc 145 Manual de usuario

CIGWELD
CIGWELD 636804 Guía rápida

Red-D-Arc
Red-D-Arc DC-400 Manual de usuario

Hobart Welding Products
Hobart Welding Products Spool Gun DP 3035-10 Manual de usuario


