Sauder Portage Park 426295 Manual de usuario

sauder.com
NOTE: THIS INSTRUCTION
BOOKLET CONTAINS IMPORTANT
SAFETY INFORMATION.
PLEASE READ AND KEEP FOR
FUTURE REFERENCE.
sauder.com
CONTACT US FIRST
BEFORE MAKING ANY RETURNS TO THE STORE.
sauder.com
CONTACT US FIRST
BEFORE MAKING ANY RETURNS TO THE RETAILER.
Visit sauder.com/service to order replacement parts, view video assembly tips, or chat with a live rep.
Prefer the phone? Give us a ring at 1-800-445-1527.
Customer Service is available Monday-Friday - 9 a.m. to 5:30 p.m. EST (except holidays)
Sauder.com
Share your journey!
English pg 1-9
Français pg 10-11
Español pg 12-13
Lot # 560524 01/20/21
Purchased: __________________
Storage Organizer
Portage Park Collection | Model 426295
For things 'n such.
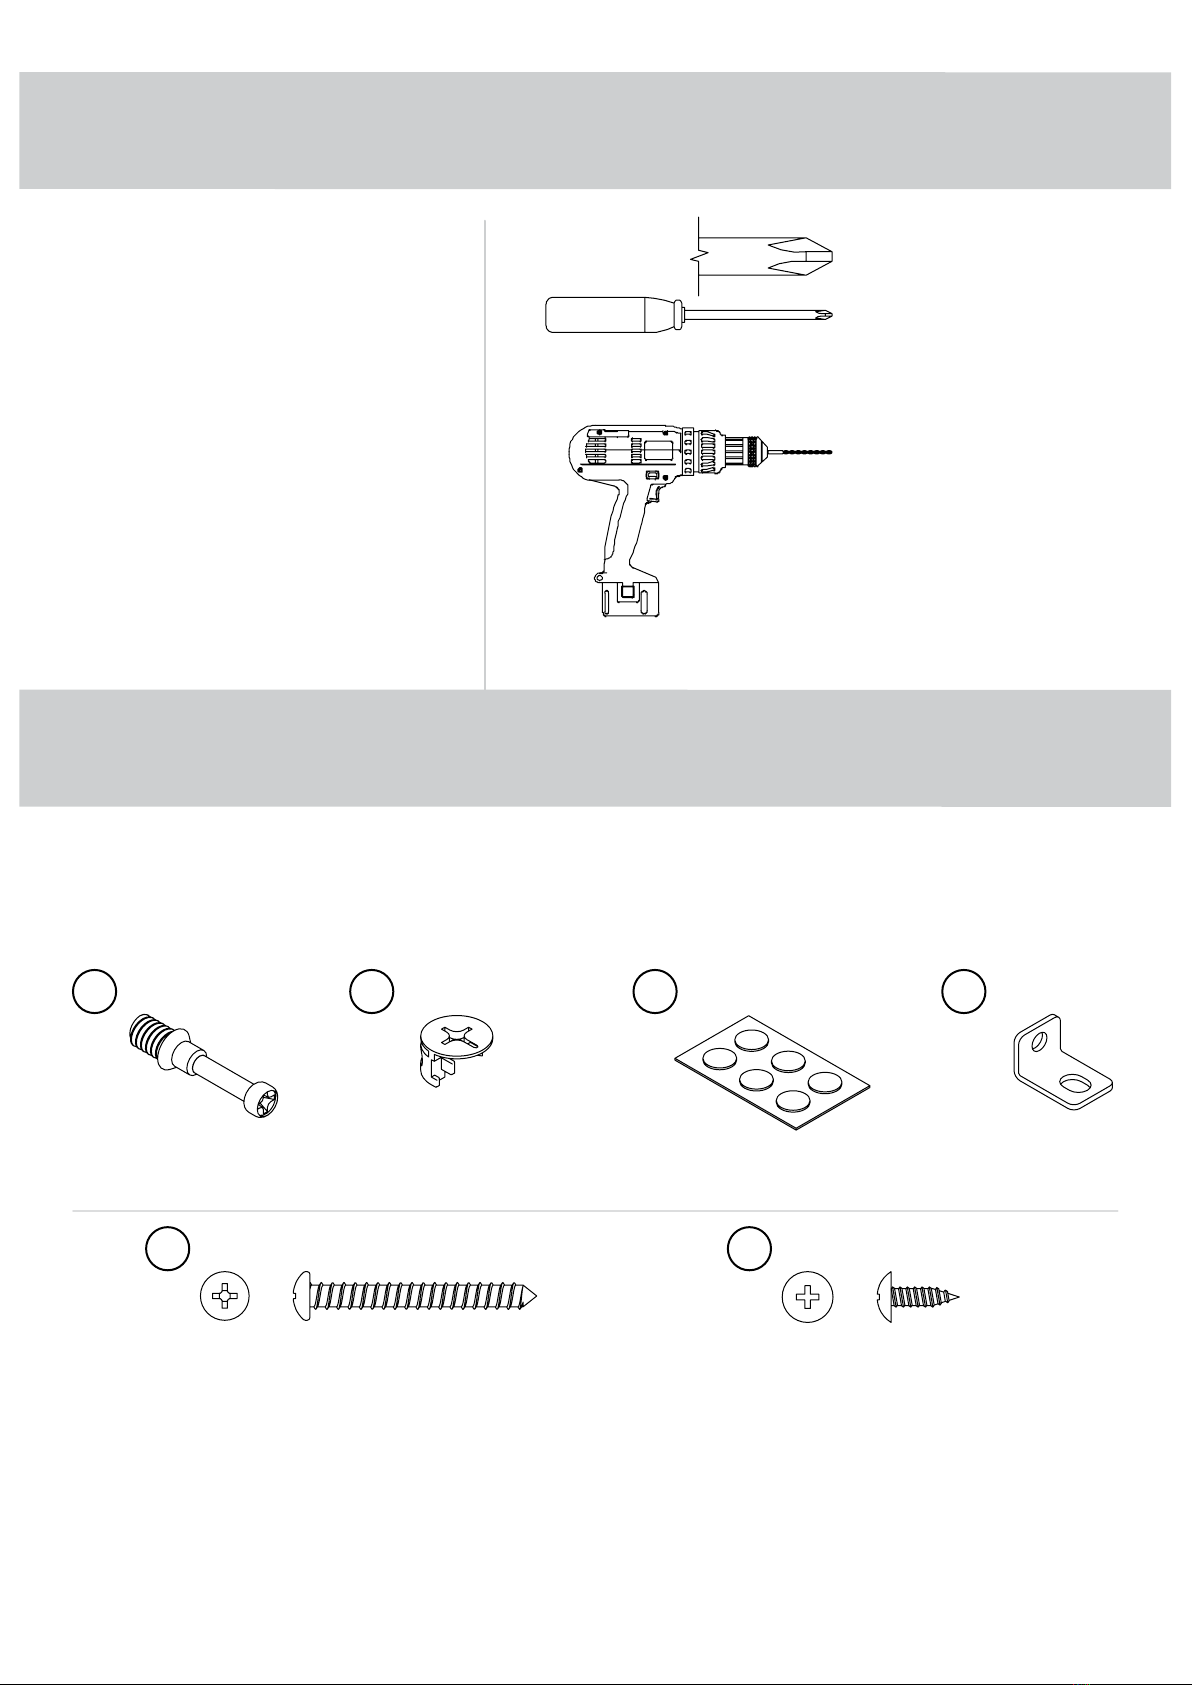
No. 2 Phillips Screwdriver
Tip Shown Actual Size
Table of Contents Assembly Tools Required
Hardware Identification
Part Identification
Hardware Usage Guide
Assembly Steps
Français
Español
Safety
Warranty
2
3
4
5-9
10-11
12-13
14
15
Hardware Identification
åScrews are shown actual size. You may receive extra hardware with your unit.
Page 2 www.sauder.com/service 426295
CAM SCREW - 13
1HIDDEN CAM - 13
2APPLIQUE CARD - 3
3
1-9/16" PAN HEAD SCREW - 4
5
Electric drill with 3/16" bit
(ONLY in indicated step)
BRACKET - 4
4
1/2" PAN HEAD SCREW - 8
6

Part Identification
åWhile not all parts are labeled, some of the parts will have a label or an inked letter on the edge
to help distinguish similar parts from each other. Use this part identification to help identify similar parts.
Now you know
our ABCs.
A TOP (1)
B LEFT END (1)
C UPRIGHT (1)
D RIGHT END (1)
E SHELF (1)
F BACK (1)
Page 3www.sauder.com/service426295
A
B
C
D
E
F

Hardware Usage Guide
HOW TO USE A HIDDEN CAM & CAM SCREW OR CAM DOWEL
NOTE: Various CAM SCREWS or a CAM DOWEL may be used.
Cam Screws Cam Dowel
Turn the CAM SCREW or
gently tap the CAM DOWEL
until the shoulder is against
the surface of the part.
1.
Hidden Cam
Arrow
Push a HIDDEN CAM into
the part. The arrow in the
HIDDEN CAM must point
toward the hole in the
edge of the board.
Hole
2.
3.
1
2
Insert the CAM SCREW or CAM DOWEL into the
HIDDEN CAM. Tighten the HIDDEN CAM.
Page 4 www.sauder.com/service 426295

Step 1 Look for this icon. It means a video assembly tip is
available at www.sauder.com/service/tips
Find the numbered video or scan the QR code.
å Assemble your unit on a carpeted floor or on the
empty carton to avoid scratching your unit or the floor.
å Turn thirteen CAM SCREWS (1) into the TOP (A)
and ENDS (B and D).
å Push thirteen HIDDEN CAMS (2) into the ENDS (B
and D), UPRIGHT (C), and BACK (F).
Page 5www.sauder.com/service426295
1
1
(13 used)
AD
B
D
B
C
F
2
Arrow
2
Arrow
Arrow
2
(13 used)

å Fasten the BRACKETS (4) to the LEFT END (B) and
UPRIGHT (C) exactly as shown. Use four 1/2" PAN
HEAD SCREWS (6).
å Fasten the ENDS (B and D) to the BACK (F). Tighten
four HIDDEN CAMS.
Step 2
Page 6 www.sauder.com/service 426295
1
D
B
F
Edge with
HIDDEN CAMS
B
C
4
Edge with
HIDDEN CAMS
1/2" PAN HEAD SCREW
(4 used for the BRACKETS)
6

Step 3
Page 7www.sauder.com/service426295
1
AD
B
F
å Fasten the TOP (A) to the ENDS (B and D), UPRIGHT (C), and
BACK (F). Tighten nine HIDDEN CAMS.
å Fasten the SHELF (E) to the BRACKETS on the LEFT END (B)
and UPRIGHT (C). Use four 1/2" PAN HEAD SCREWS (6).
å Peel APPLIQUES from the APPLIQUE CARDS (3) and stick
them onto each visible HIDDEN CAM.
B
C
E
3
C
Surface
with
HIDDEN
CAMS
1/2" PAN HEAD SCREW
(4 used for the BRACKETS)
6
Finished edge

Step 4
Page 8 www.sauder.com/service 426295
å Your Hutch was made to fasten to the 426275 Lateral File
and the 426293 2-Shelf Bookcase.
å Open the box of the bottom unit, locate the TOP, and
place it on packing foam or magazines flat on the floor.
å With a drill and 3/16" drill bit, finish drilling through the
holes shown.
426275 Lateral File Top
Drill through
these two holes.
CAUTION
Make sure you have
packing foam or
throw away material
underneath the tops
near the drill area.
426293 2-Shelf Bookcase Top
Drill through
these two holes.
Drill through
these two holes.
Drill through
these two holes.

å Fasten the TOP of your base unit to the ENDS (B and D). Use four 1-9/16" PAN HEAD SCREWS (5).
å NOTE: You should start each SCREW a few turns before completely tightening any of them.
å NOTE: Please read the back pages of the instruction booklet for important safety information.
å This completes assembly. Clean with a damp cloth. Wipe dry.
å Now, finish building the base unit that your Hutch will be attached to.
Step 5
Page 9www.sauder.com/service426295
And to celebrate, why not share your success story at sauder.com or
1-9/16" PAN HEAD SCREW
(4 used in this step)
5
Base unit TOP
D
B
Surface with more holes
15 lbs.
35 lbs.

Noter la date d’achat
de cet élément et
conserver le livret pour
future référence. Pour
contacter Sauder en
ce qui concerne cet
élément, faire référence
au numéro de lot et
numéro de modèle en
appelant notre numéro
sans frais.
Lot nº : ____________
Date de
l'achet : ____________
LISTE DE PIÈCES
REFERENCE DESCRIPTION QUANTITÉ
LISTE DE PIÈCES
REFERENCE DESCRIPTION QUANTITÉ
NOUS CONTACTER EN PREMIER
AVANT D'EFFECTUER TOUT RETOUR AU MAGASIN.
Nous faisons de notre mieux pour nous assurer que votre meuble
arrive dans d’excellentes conditions. Nos représentants du service
Clientèle sont aimables et prêts à vous aider au cas où une pièce
aurait été endommagée ou manquerait (ou si vous aviez besoin
d’aide pour l’assemblage). Composez ce numéro d’appel gratuit:
1-800-445-1527
Du lundi au vendredi, de 9 heures du matin à
5:30 heures du soir (horaire Côte Est)
(sauf jours fériés)
Si une pièce a besoin d’être remplacée, la pièce de remplacement
sera envoyée dans les 48 heures. (Sauf week-ends et jours fériés)
Utilisez les instructions d’assemblage en français avec les
schémas étape par étape du manuel d’instruction en anglais.
Chaque étape en français correspond à la même étape en
anglais. Comparer la “Liste de pièces” ci-dessous avec la “PART
IDENTIFICATION” du manuel en anglais pour vous familiariser
avec les pièces avant l’assemblage.
REMARQUE : CE MANUEL D’INSTRUCTIONS CONTIENT
D’IMPORTANTES INFORMATIONS RELATIVES À LA SÉCURITÉ.
À LIRE ET CONSERVER POUR TOUTE RÉFÉRENCE FUTURE.
1 VIS D'EXCENTRIQUE ............................................ 13
2 EXCENTRIQUE ESCAMOTABLE.................. 13
3 FICHE D'APPLIQUÉS...............................................3
4 CONSOLE.........................................................................4
5 VIS TÊTE GOUTTE DE SUIF 40 mm..........4
6 VIS TÊTE GOUTTE DE SUIF 13 mm............8
A DESSUS...............................................................................1
B EXTRÉMITÉ GAUCHE...............................................1
C MONTANT..........................................................................1
D EXTRÉMITÉ DROITE..................................................1
E TABLETTE..........................................................................1
F ARRIÈRE ..............................................................................1
Organisateur de RangementModèle 426295
Page 10 www.sauder.com/service 426295
Otros manuales de Organizador de Sauder


