ROCKNA AUDIO WAVEDREAM Manual de usuario
ROCKNA AUDIO WAVEDREAM Digital to Analog Processor
___________________________________________________________________________________
ROCKNA WAVEDREAM - user guide
Thank you for buying Rockna Wavedream digital audio processor. You have now one of
the finest D/A converter available on the market.
The Wavedream was designed to give you countless hours of musical enjoyment.
The package you received should contain:
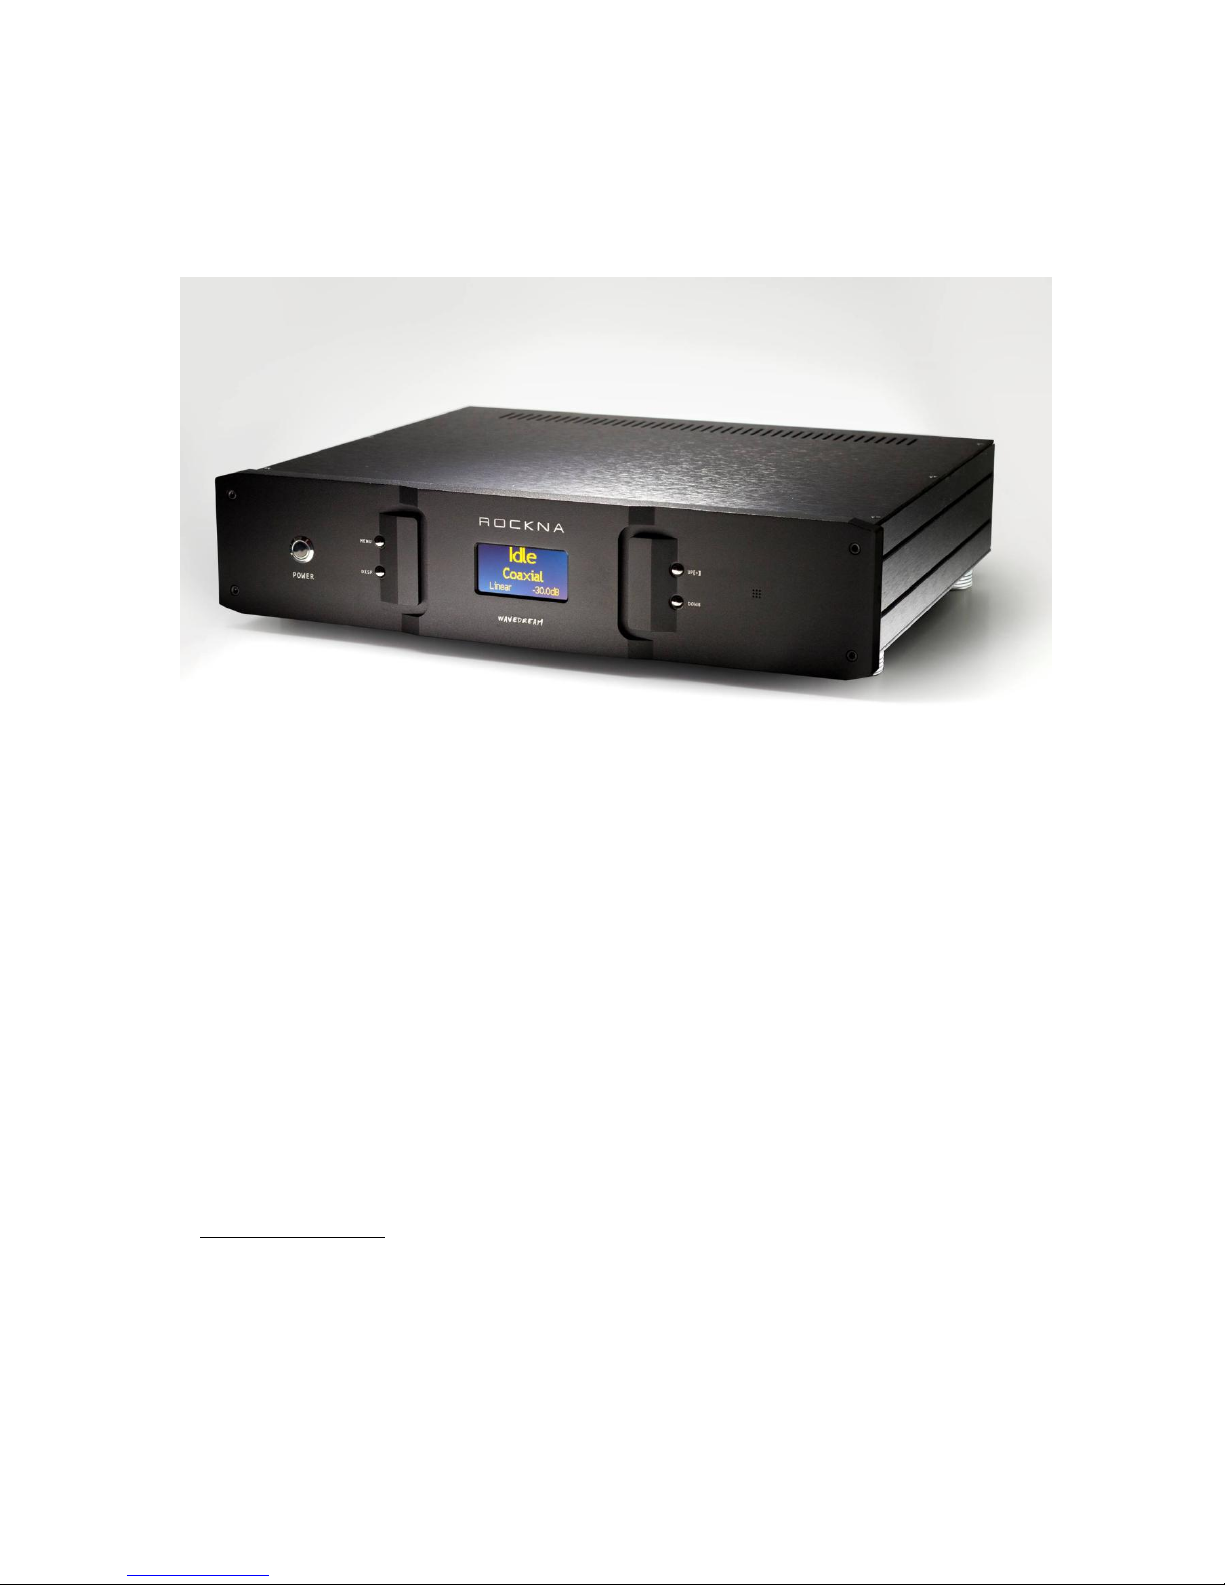
-Rockna Wavedream processor, black anodized
-Power supply cord
-Infrared remote control
Safety Precautions:
1) This device is meant for indoor use only.
2) Protect device from excessive heat, humidity and liquid filled objects, such as vases.
3) Clean only with dry cloth.
4) Do not remove product covering. This may cause an electric shock even if the device is not
plugged in.
5) Use earth grouded outlet if applicable.
ROCKNA AUDIO WAVEDREAM Digital to Analog Processor
__________________________________________________________________________________
_
6) Before plugging any cables in the device, make sure it is turned off.
7) Do not move the device while operational.
8) Lightning or static electricity can affect normal operation of the apparatus. Make sure that
it is unplugged during a thunderstorm. If the device is affected by one of these conditions
and stops behaving as it should, a power reset usually resumes it’s normal operation.
9) Power off or unplug the power cord if the device is not to be used for a long period of
time.
PRODUCT DESCRIPTION :
Digital to analog converter with variable analog outputs
Inputs are : AES/EBU, S/PDIF, USB, HD-Link1, HD-Link2
Outputs are: Single ended and XLR balanced audio outputs
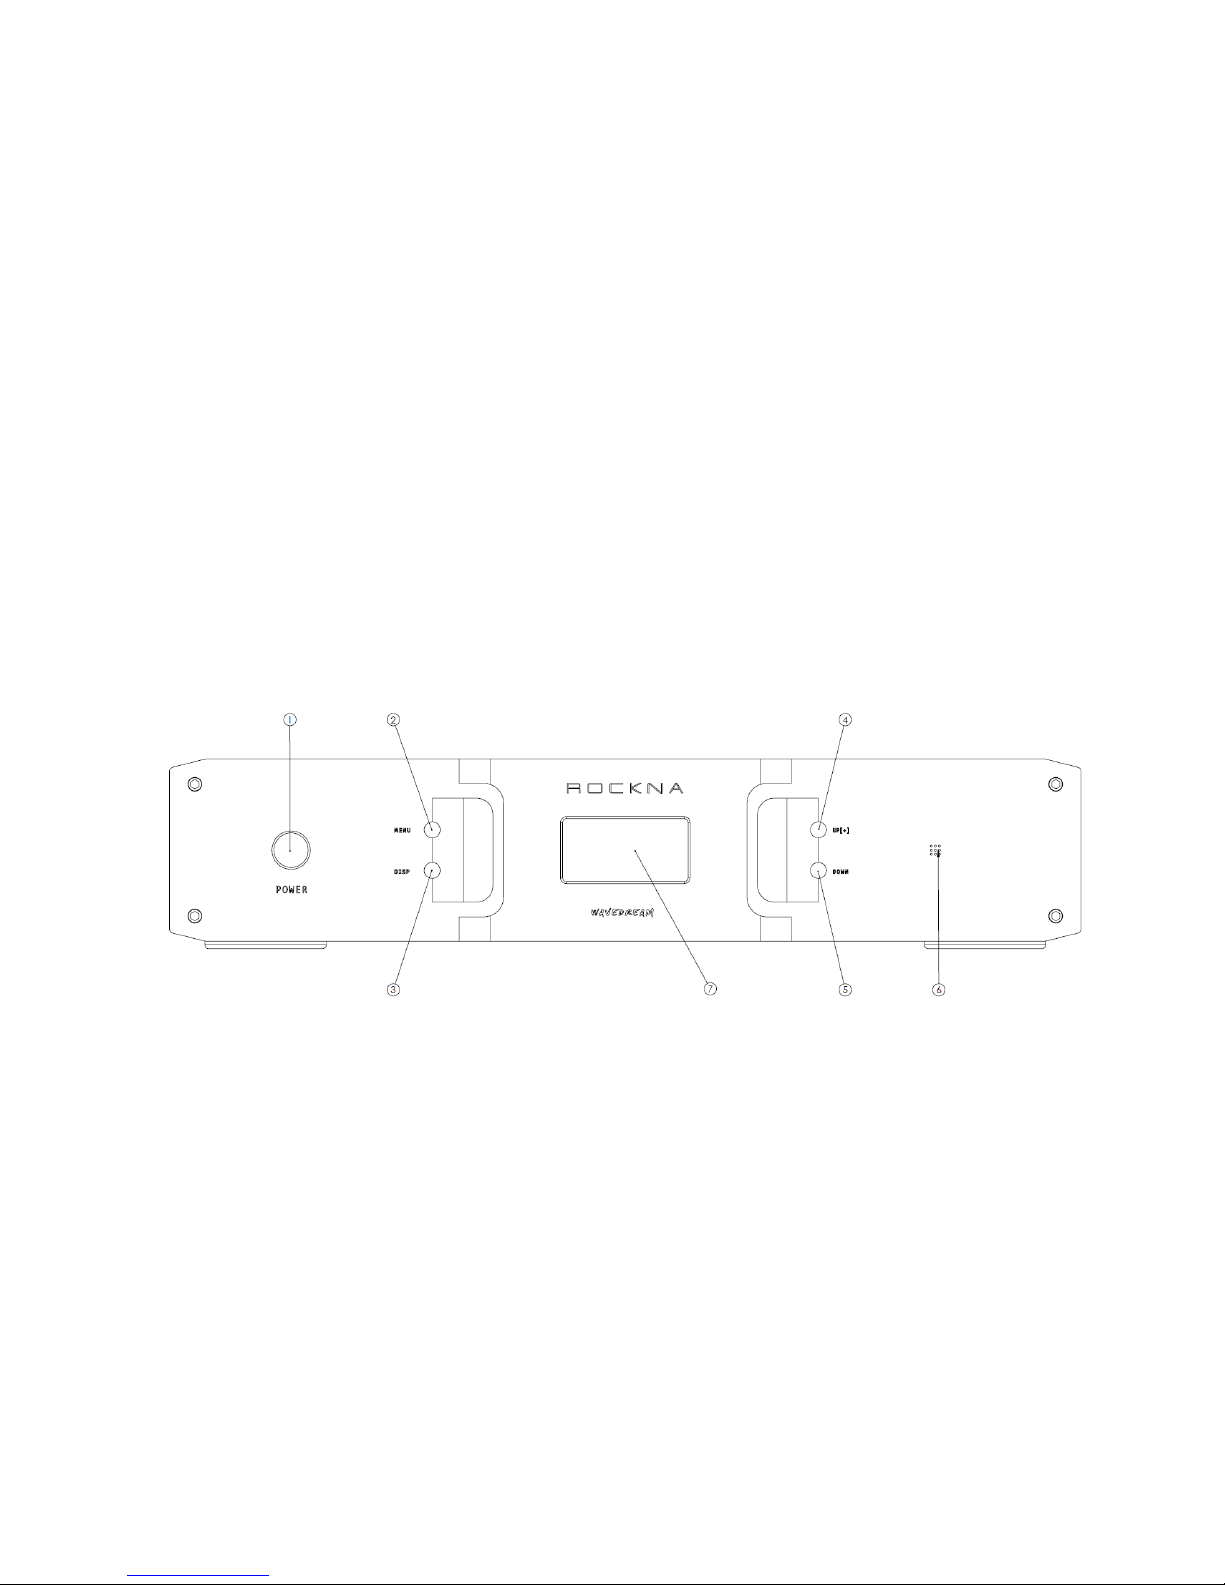
FRONT VIEW :
LEGEND :
1) Power switch
2) Menu button (see using the menu section, similar function on remote control)
3) Display intensity button (similar function on remote control)
4) Up (+) button (similar with remote)
5) Down (-) button (similar with remote)
6) IR sensor
7) OLED display
ROCKNA AUDIO WAVEDREAM Digital to Analog Processor
__________________________________________________________________________________
_
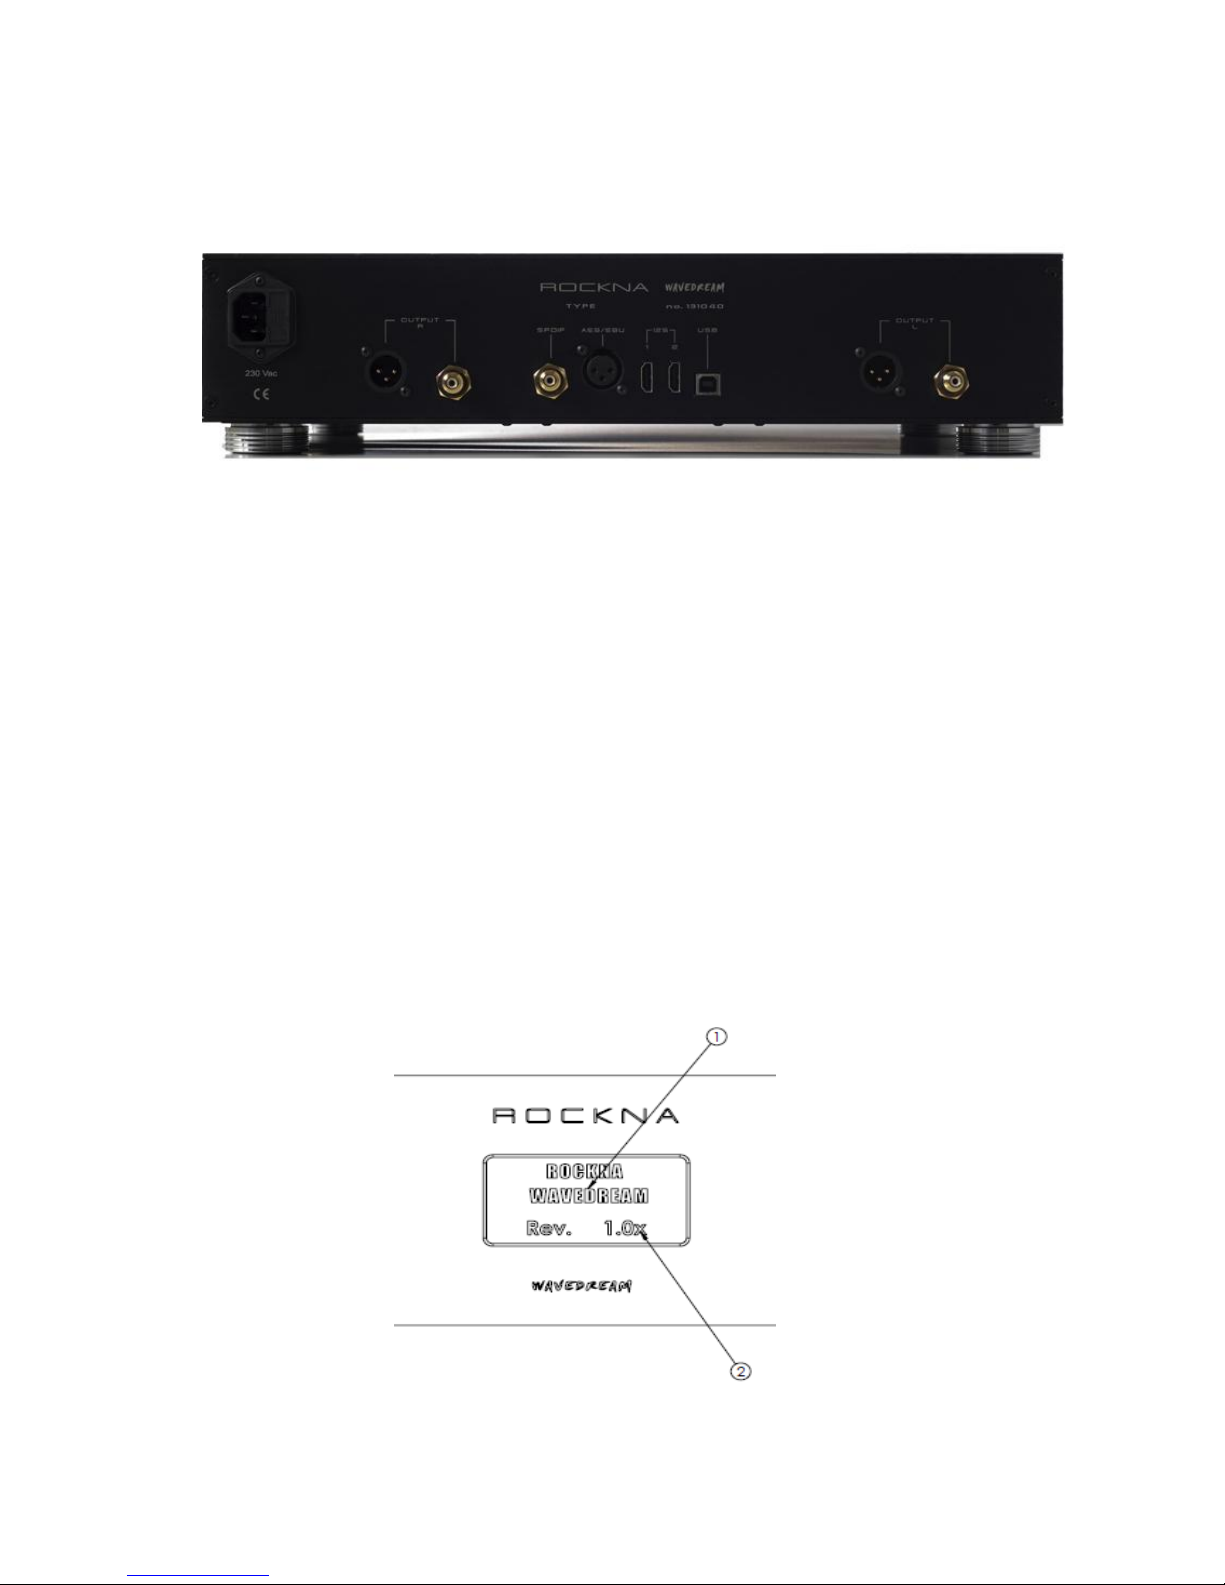
BACK VIEW :
The conenctors on the back panel are self-explanatory.
POWERING UP
1) Connect the Wavedream to the mains.
2) Connect the necessary inputs and outputs.
3) Make sure you power up the Wavedream before the power amplifier you are using
and shut it down after the power amplifier. In respect to signal purity path, the dac
does not have muting relays in the signal path. Therefore, occasional pops can occur
on powering up/shutting down. It is recommended to respect the above described
power sequence.
4) On powering up, you should see a splash screen for a few seconds. The splash screen
will contain “ROCKNA WAVEDREAM” name (1) together with firmware version (2).
The firmware version is in format a.bs or a.bx, where a.b = firmware version; s comes
from single ended, x from balanced.
ROCKNA AUDIO WAVEDREAM Digital to Analog Processor
__________________________________________________________________________________
_
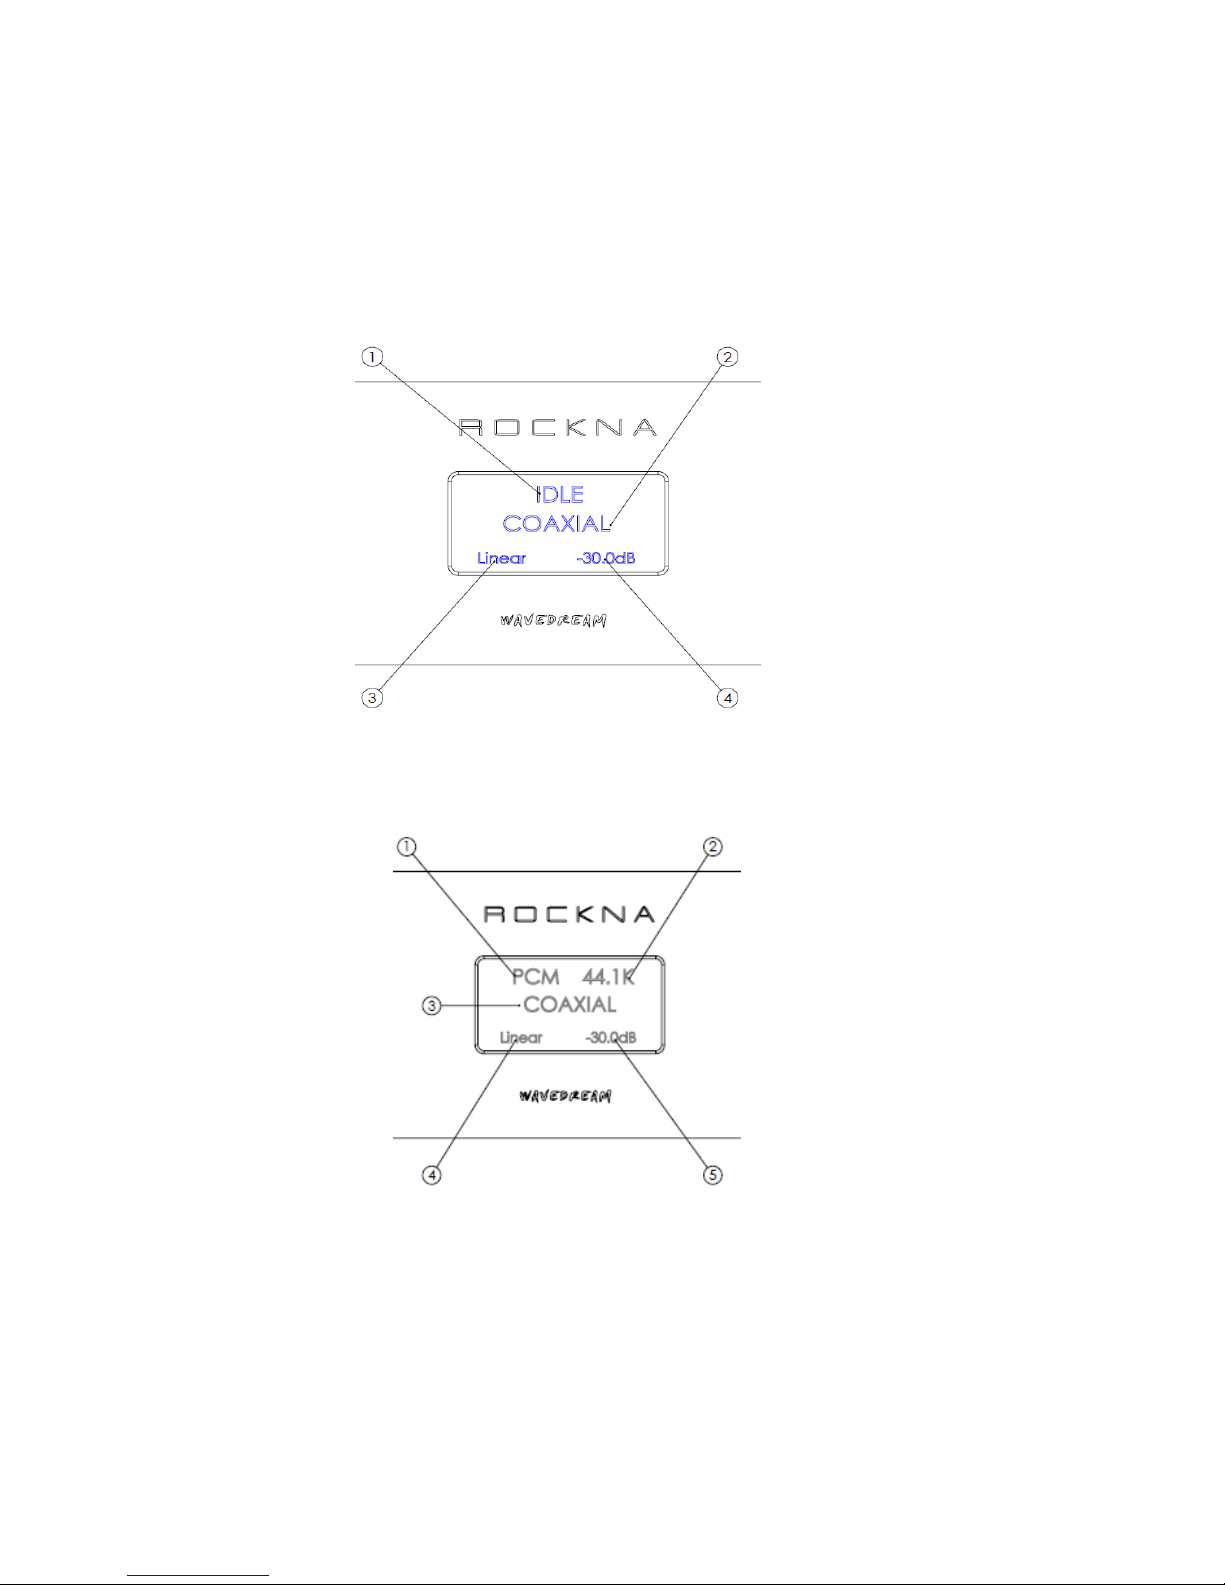
5) After a few seconds, the welcome screen is replaced by the default screen. The default
screen (no input signal) will show the status(1), data type, sample rate, active
input(2), filter type(3) and volume setting(4).
DEFAULT SCREEN, IDLE (no signal)
DEFAULT SCREEN, SIGNAL PRESENT
1- Data type (can be PCM or DSD)
2- Sample rate (can be 44.1, 48, 64,128, 96, 176.4, 192, 352, 384)
3- Active input
4- Filter type
5- Volume setting
ROCKNA AUDIO WAVEDREAM Digital to Analog Processor
__________________________________________________________________________________
_
USING THE MENU
A short press on the menu button [ (2) on the front view ] will acces the menu. A long
press will exit the menu and return to the default screen. Similar functionality is found
on menu button from the remote control.
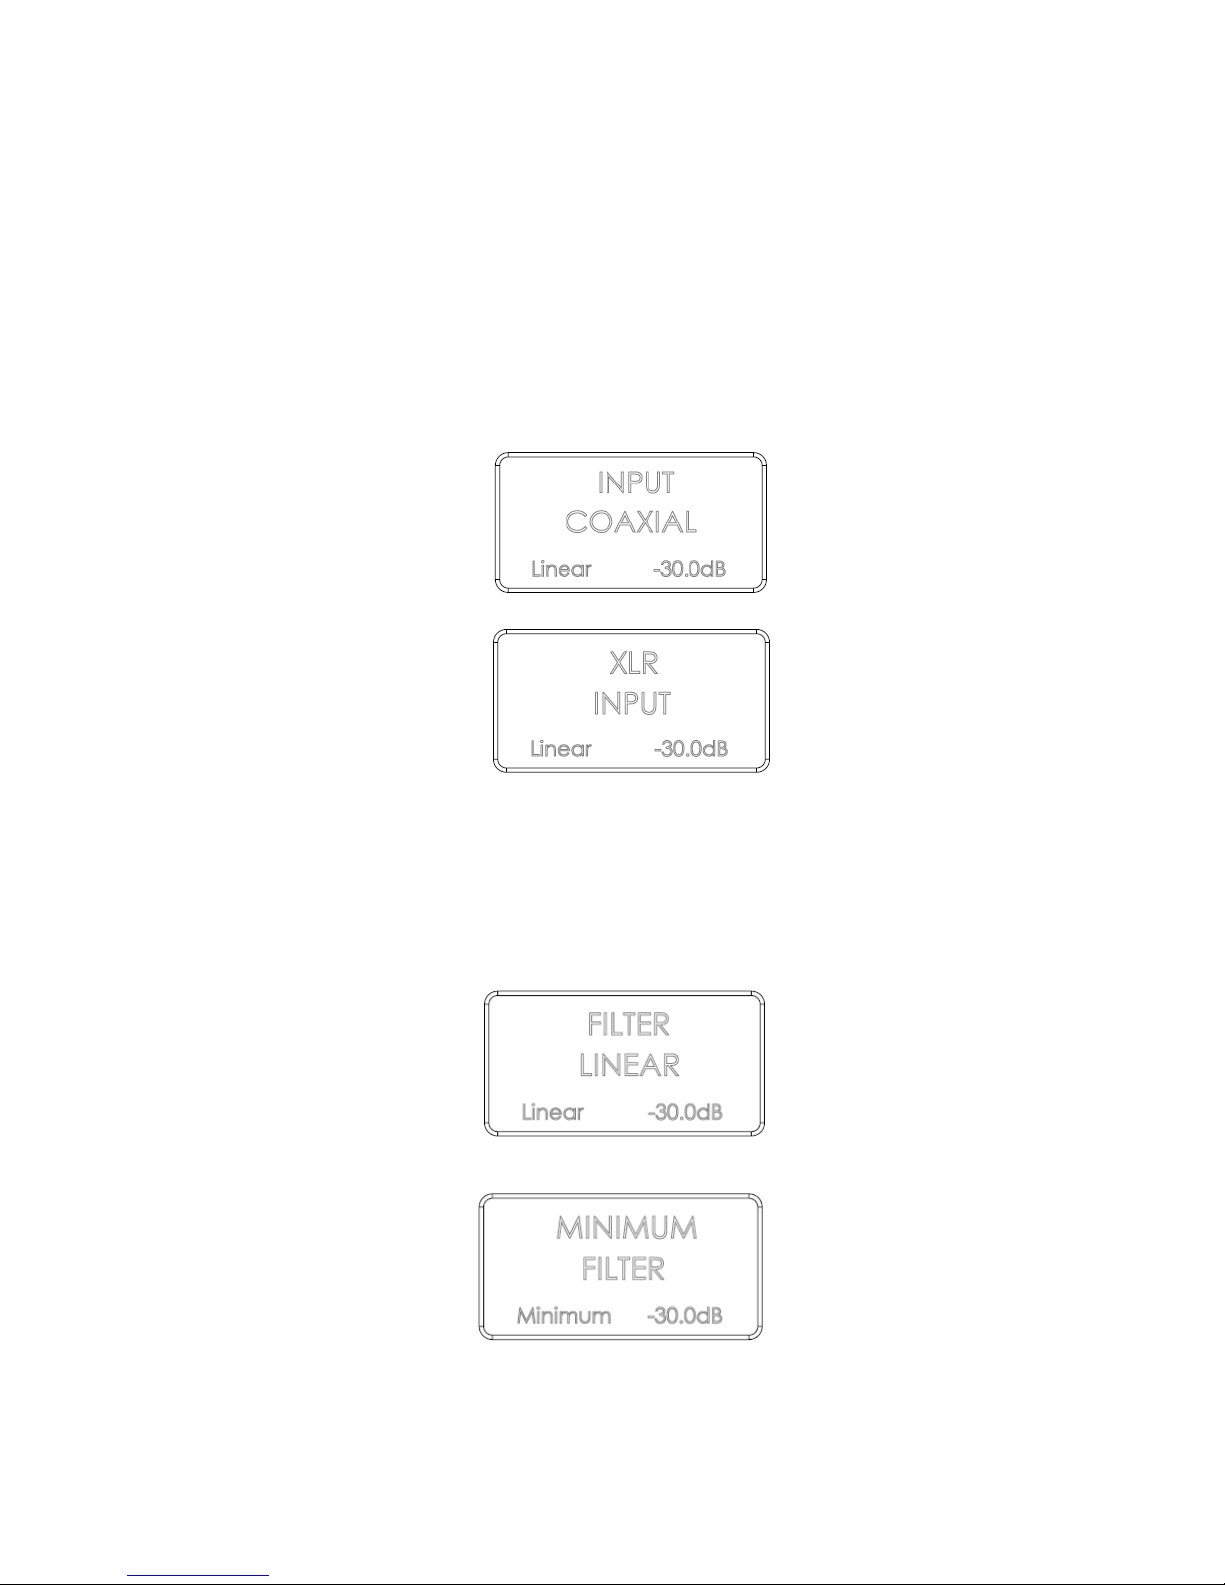
1st press –will allow to change the active input. Screen changes as below. Now you can
use the +/- buttons to select a different input.
After pressing +/- buttons, input has changed. Navigate through input list to select the
desired input. Available options are Coaxial, XLR, USB, HD-Link1 and HD-Link2. You can
continue to navigate in the menu by a further short press on the menu button, or you can
exit the menu with a long press.
2nd press –will allow to select the digital filter response. The screen changes as below.
ROCKNA AUDIO WAVEDREAM Digital to Analog Processor
__________________________________________________________________________________
_
Filter type changes if +/- buttons are pressed. Available options are Linear, Minimum,
Hybrid and Off. You can navigate further in the menu with a further short press or exit by
long press.
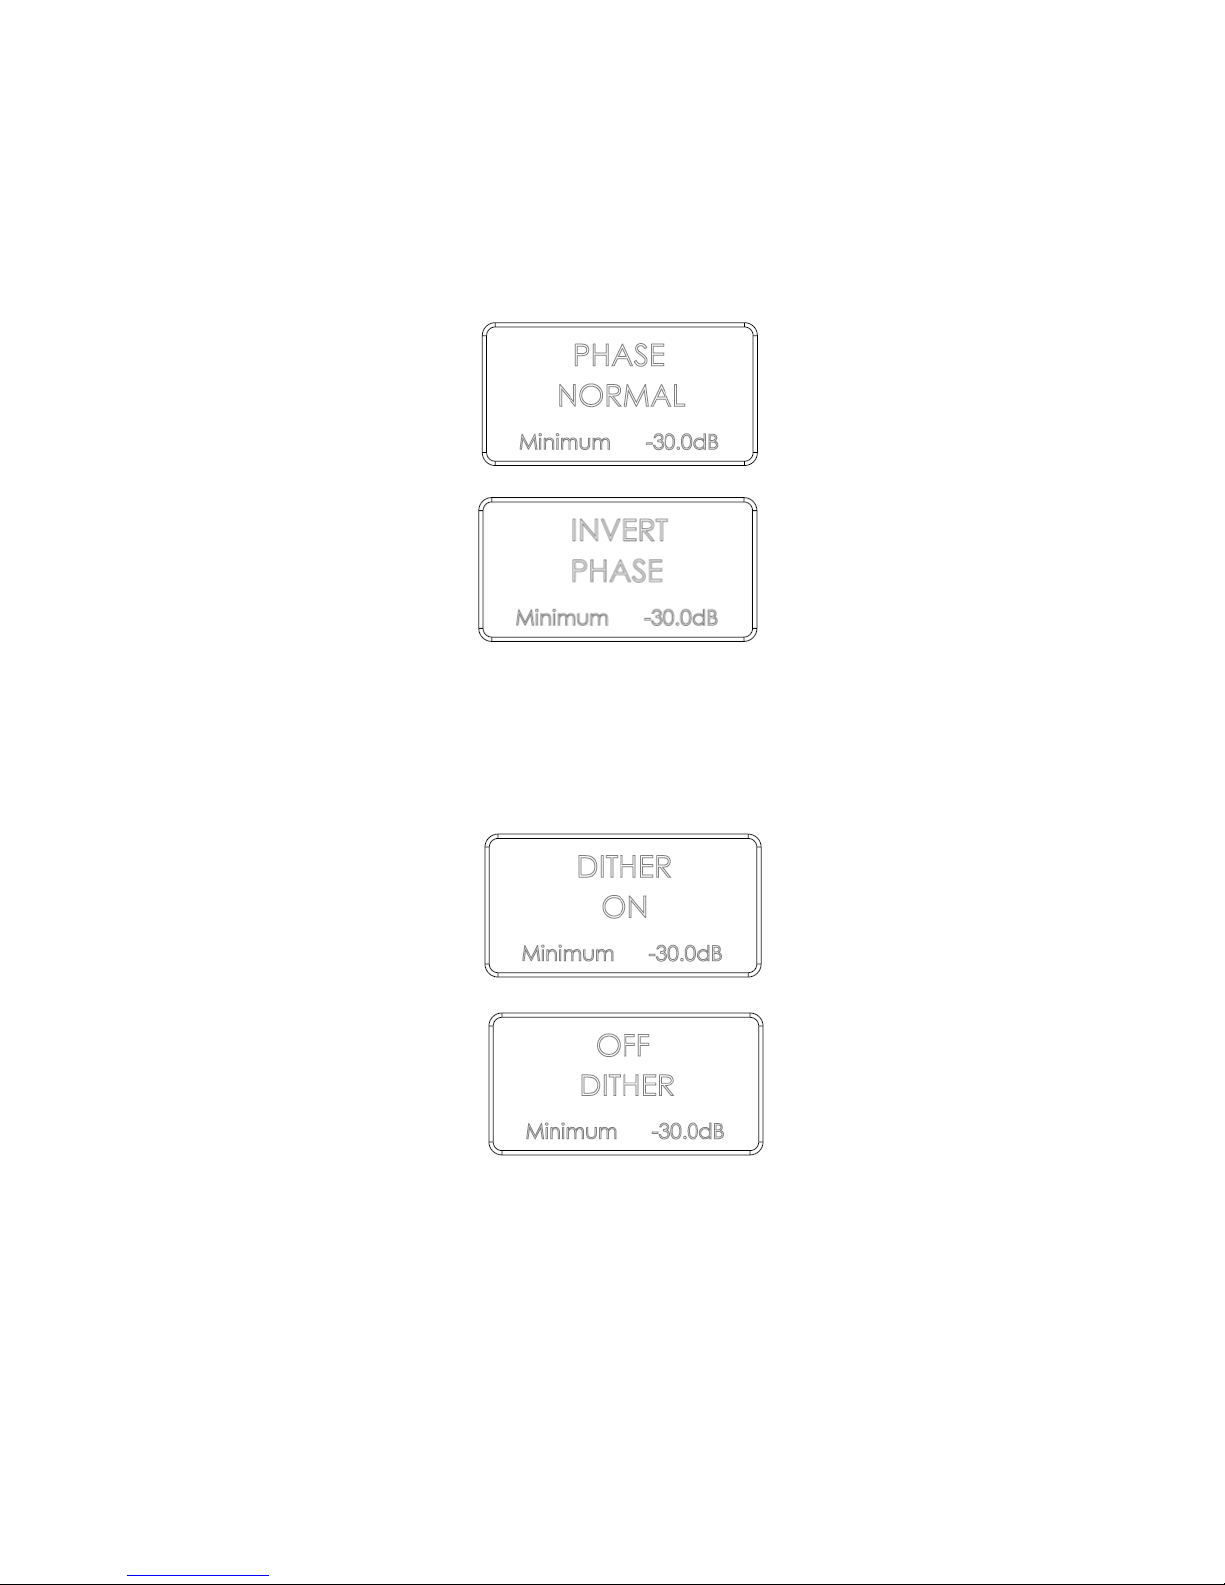
3rd press –will allow the change of the absolut phase of the output signal. See below
screens.
After pressing the +/- buttons, phase is changed. Available options are Normal and Invert.
You can further navigate in the menu with a short press or exit with a long press.
4th press –will allow enable or disable the dither generator. The screen will change as
below.
Dither setting changed. Available options are On and Off. You can further navigate in the
menu with a short press or exit with a long press.
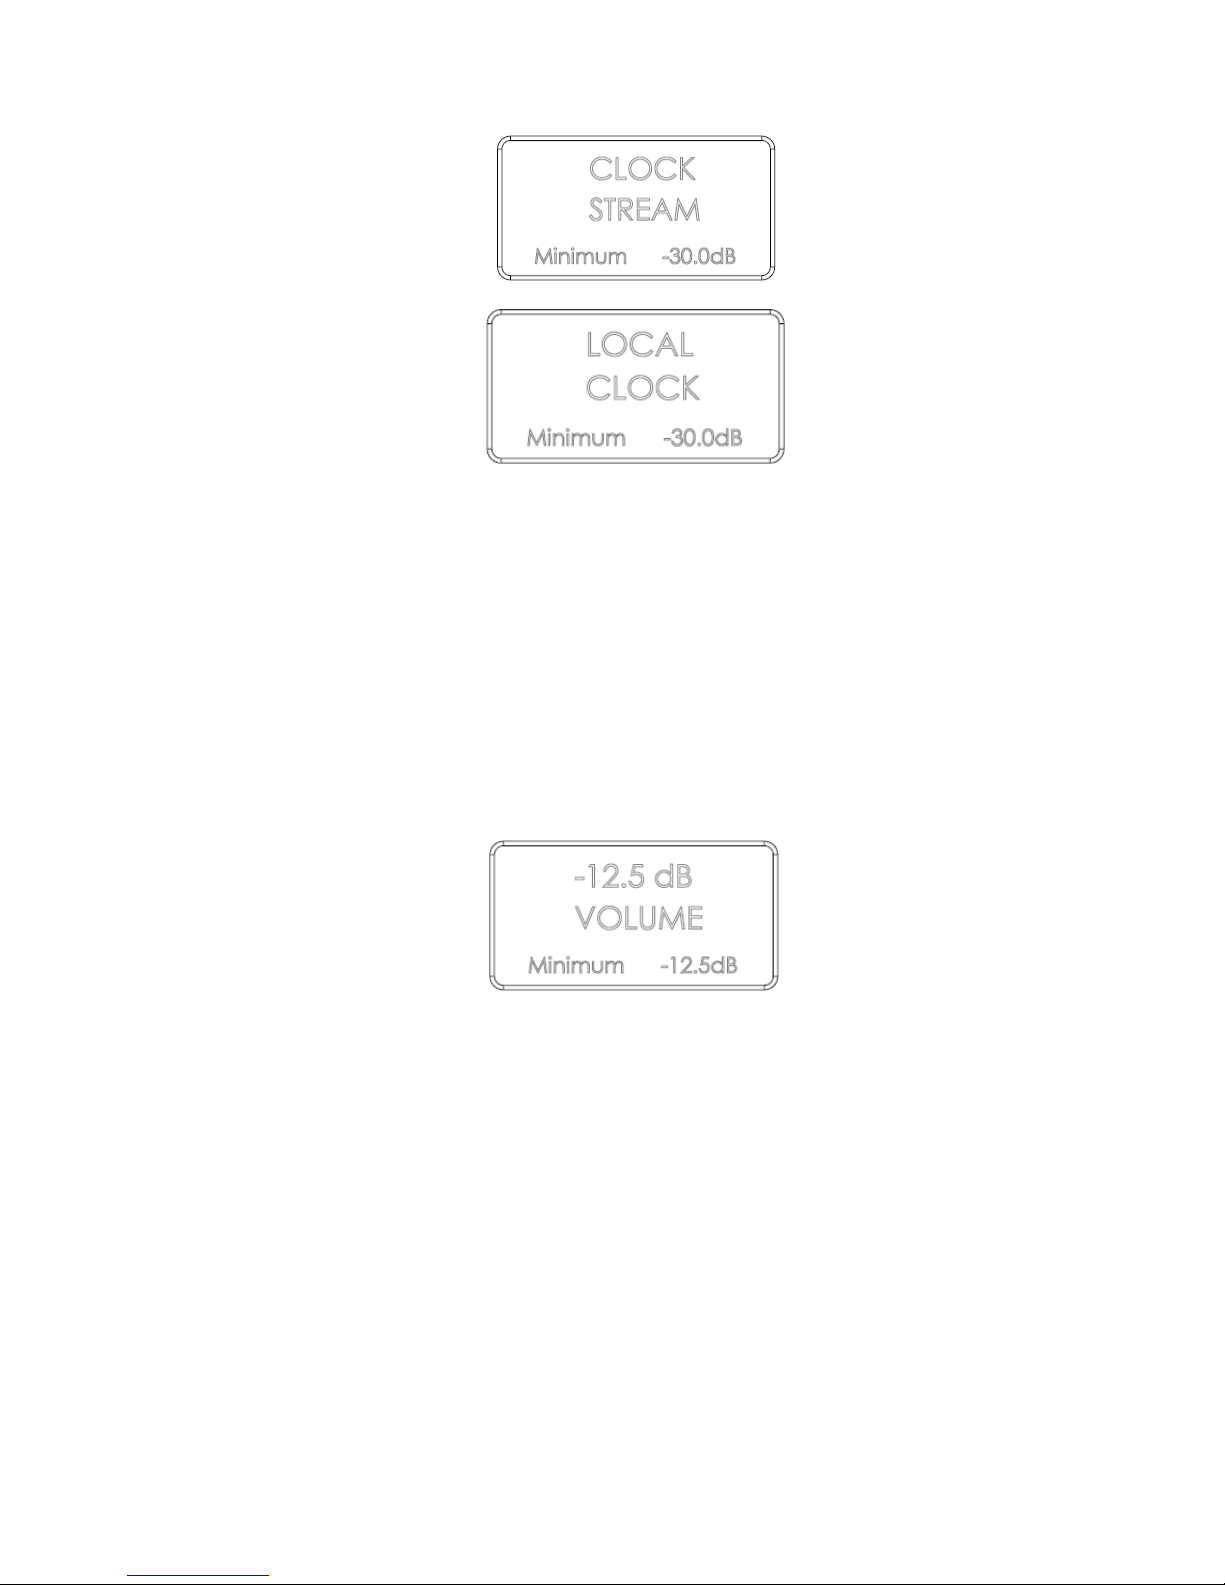
5th press –will allow to alter the digital PLL settings. The screen appears as below.
ROCKNA AUDIO WAVEDREAM Digital to Analog Processor
__________________________________________________________________________________
_
PLL clock settings after change. Avalable options are Stream and Local. You can further
navigate in the menu with a short press or exit with a long press.
A 6th press will go the input change menu. Long press to exit.
VOLUME CONTROL
While in default screen, the +/- buttons will allow direct change of the volume setting.
Default volume setting is -30 dB. The volume can be changed with a resolution of 0.5 dB
steps, from -127.5 dB (minimum) to 0 dB (maximum). When volume setting is changed, a
temporary screen is displayed like below.
DISPLAY INTENSITY
Display intensity can be altered by direct press on the DISP button [ (3) on front view ].
There are 8 brightness levels, available in cycle.
ROCKNA AUDIO WAVEDREAM Digital to Analog Processor
__________________________________________________________________________________
_
USB CONFIGURATION
Rockna Wavedream DAC is up-to-date with all available resolution formats. For the
computer playback side, please consider the following informations.
Recommended software players:
1) Foobar2000
2) Jriver
3) Jplay
4) Audiogate
5) Audirvana Plus
Under Win XP environment, kernel streaming (KS) is recommended for PCM, and ASIO
for DSD playback.
Under W7/8 environment, WASAPI or ASIO mode is recommended for both PCM and DSD
playback.
USB Driver Installation Details (Windows XP 32/64, Windows 7 32/64)
Do not connect the USB cable to the computer before driver installation! If you have already
connected the dac to the PC, click Cancel on the screen that has showed up and remove the USB
cable.
1. Go to product’s page on www.rockna-line.com
2. Download the compatible drivers.
3. Unpack zip archive.
4. Enter your OS folder.
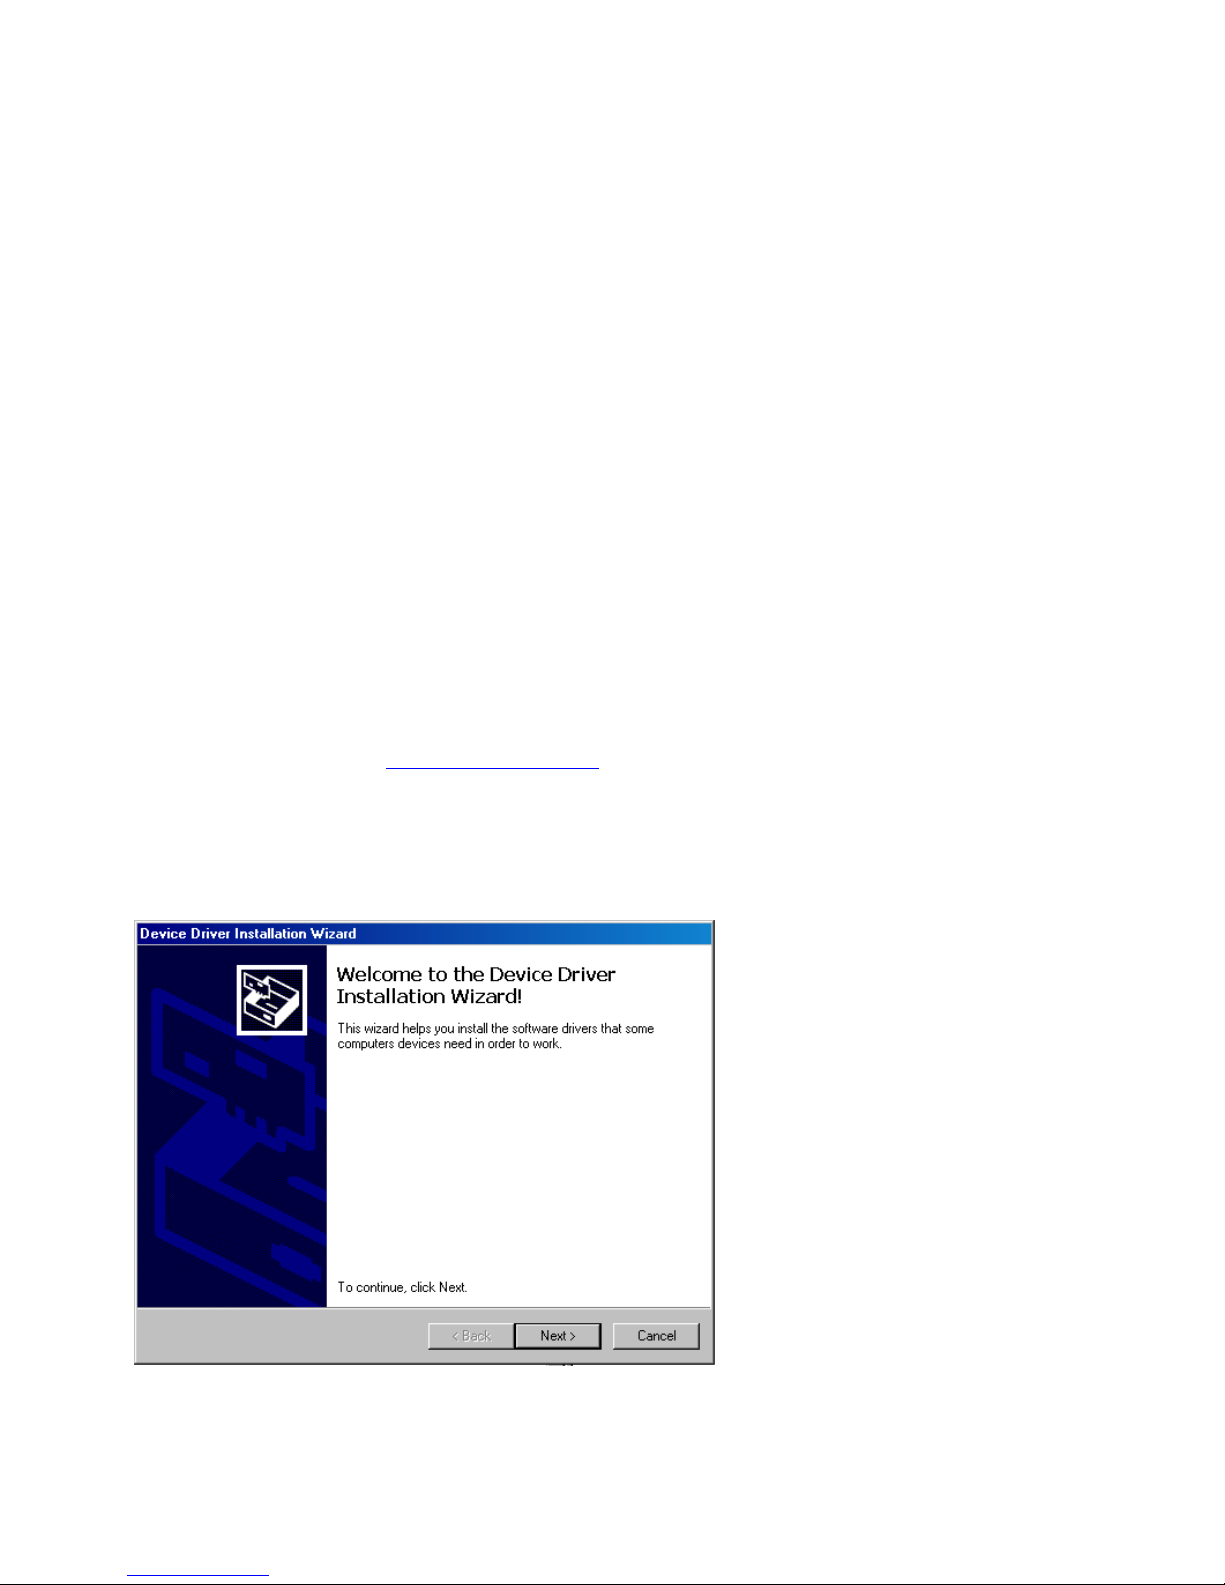
5. Launch Setup32.exe for 32bit OS or Setup64.exe for 64bit OS.
6. After the application launches, click Next:

ROCKNA AUDIO WAVEDREAM Digital to Analog Processor
__________________________________________________________________________________
_
7. Wait for the driver to be copied and then click Finish:
8. Connect the dac to the PC. In the dialog below, select “No, not this time” and then click “Next”.
ROCKNA AUDIO WAVEDREAM Digital to Analog Processor
__________________________________________________________________________________
_
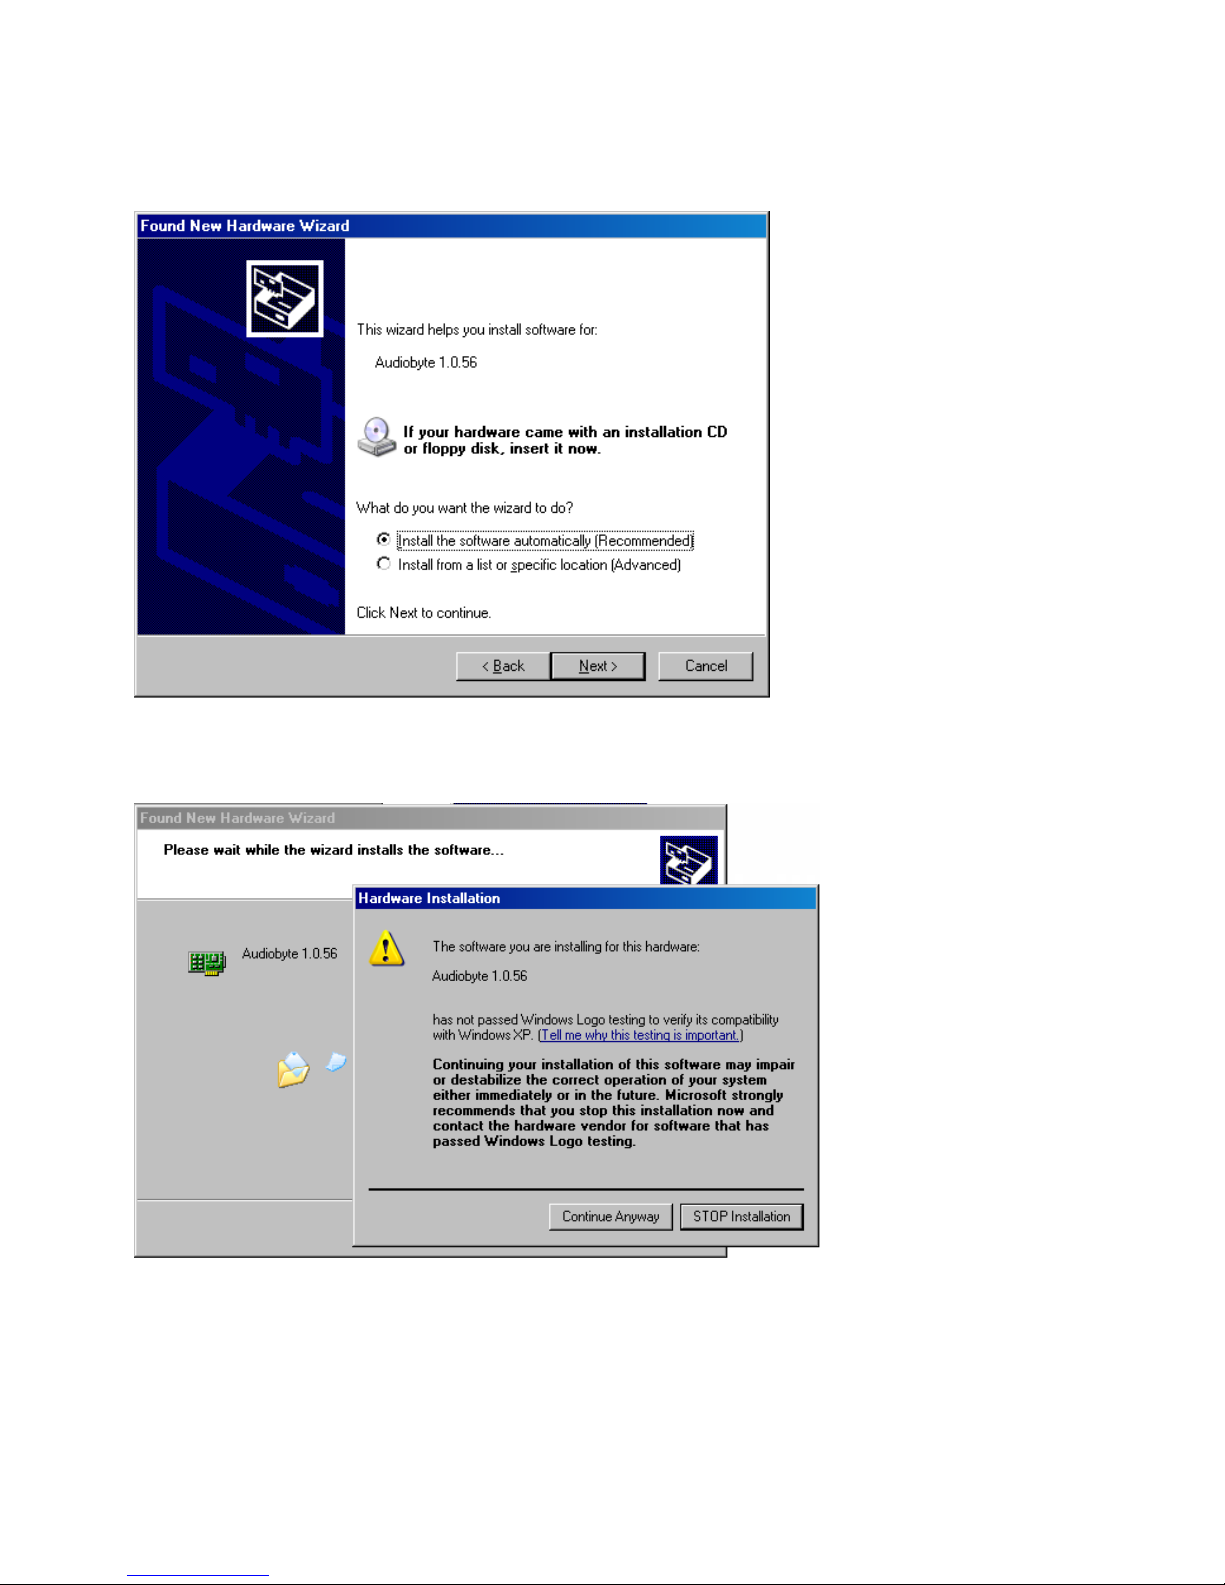
9. In the new window select “Install the software automatically” and click “Next”.
10. Click the “Continue Anyway” button.
Tabla de contenidos


