Remote Solution TSR750 Manual de usuario

Comfortable use with touch screen
User's Manual
TSR750

General Information
IMPORTANT INFORMATION ON SAFE AND EFFICIENT OPERATION
READ THIS INFORMATION BEFORE USING TSR750
I Section 15.19 Labelling requirements.
This device complies with part 15 of the FCC rules.
Operation is subject to the following two conditions:
(1) This device may not cause harmful interference and
(2) This device must accept any interference received, including interference
that may cause undesired operation.
I Section 15.21 Information to user.
7KHFKDQJHVRUPRGL¿FDWLRQVQRWH[SUHVVO\DSSURYHGE\WKHSDUW\UHVSRQVLEOHIRU
compliance could void the user’s authority to operate the equipment.
I IMPORTANT NOTE :
7RFRPSO\ZLWKWKH)&&5)H[SRVXUHFRPSOLDQFHUHTXLUHPHQWVQRFKDQJHWR
the antenna or the device is permitted. Any change to the antenna or the device
FRXOGUHVXOWLQWKHGHYLFHH[FHHGLQJWKH5)H[SRVXUHUHTXLUHPHQWVDQGYRLGXVHU¶V
authority to operate the device.
NOTICE

www.remotesolution.co.kr
Chapter 1 | Preparing to Use the Product
Contents
Product Features 5
Safety Precautions 6
Components 8
Parts Diagram 9
Recharging and Turning Power On/Off 13
6FUHHQ&RQ¿JXUDWLRQ
Display Structure 17
<DEVICES> Mode 19
OPERATING SET-UP 20
PHOTO 29
SETTING 30
Chapter 2 | Learning to Use the Menus

5
I
$IBQUFS]1SFQBSJOHUP6TFUIF1SPEVDU
P
roduct Feature
s
I Product Features
T
ouch screen that facilitates usa
g
e convenience
1
2
3
4
5
S
im
p
le user inter
f
ace that
p
romotes intuitive us
e
/
RZSRZHUFRQVXPSWLRQWKDWH[WHQGVEDWWHU
\
OLI
H
Distinctive desi
g
n includin
g
a 3.5-inch color LCD
RF f
u
n
c
ti
o
n th
a
t
e
n
ab
l
es
m
u
lti-r
oo
m
co
ntr
ol
P
r
oduc
t
Fea
t
u
r
es
Product Features ........................................... 5
S
afety Precaution
s
About the Power Supply...................................... 6
About the Product........................................... 7
C
om
p
onents
Standard .................................................. 8
Sold Separately ............................................ 8
Parts Diagra
m
Remote ................................................... 9
Remote .................................................. 10
Cradle ................................................... 11
RF Receiver & IR Converter (Optional) ......................... 12
R
echar
g
in
g
and Turnin
g
Power On/Off
Recharging with an Adapter .................................. 13
Turning the Remote Control Power On/Off ...................... 13
$IB
Q
UFS
1
SF
Q
BS
J
O
H
UP6TFUIF1SPEVDU
I 6
$IBQUFS]1SFQBSJOHUP6TFUIF1SPEVDU
7 I
$IBQUFS]1SFQBSJOHUP6TFUIF1SPEVDU
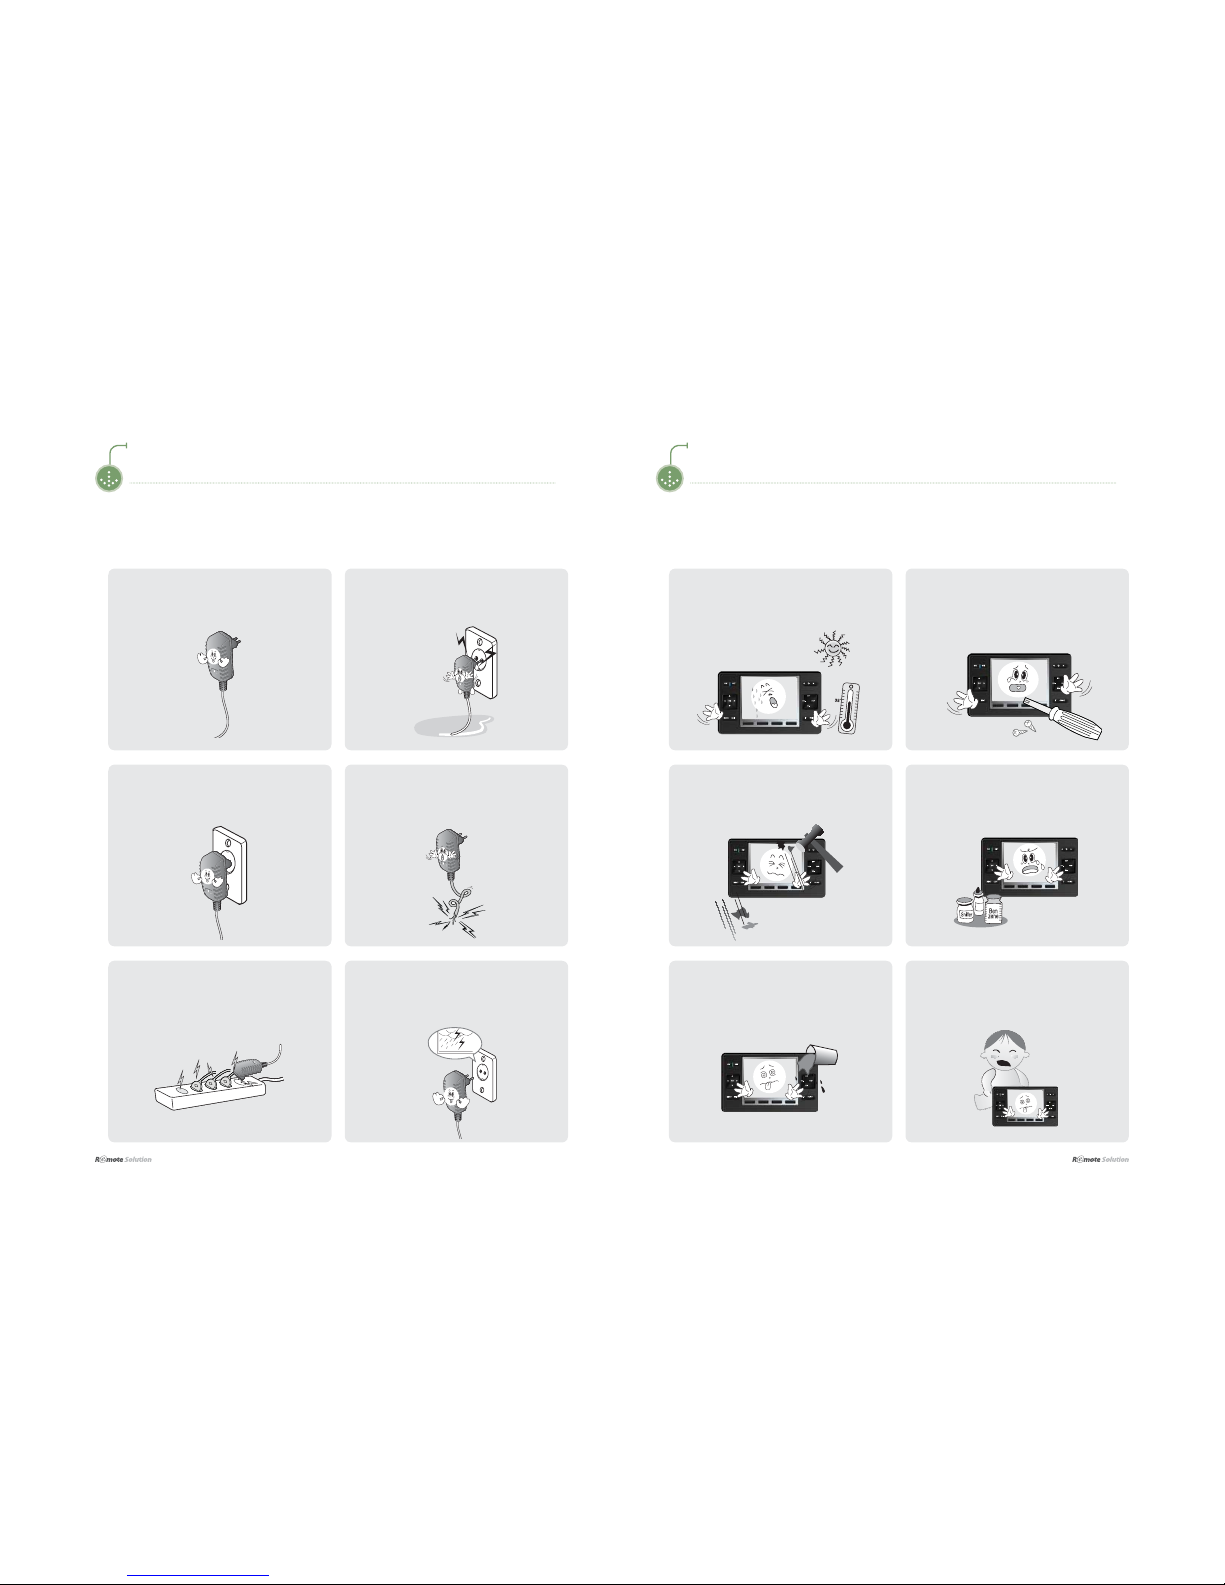
Safety Precautions
The following information is included to promote user safety and prevent any possible injury or
property damage. Please read the directions carefully and use the product correctly.
I About the Power Supply
Safety Precautions
I About the Product
Do not allow foreign objects or liquid to get
inside the product.
This can result in damage to the product.
Do not allow children to play with the
remote.
If the product is dropped, this can cause
damage or injury.
Do not place heavy objects on the product.
This can cause breakdown or damage to the
product.
Clean the product with a soft, dry cloth.
'R127XVHDQ\ÀDPPDEOHFOHDQHUVRU
chemicals.
This can cause damage to the surface of the
product.
Do not use the product in high temperatures
or high humidity.
This can cause damage to the product.
Do not disassemble the product.
This can result in damage to the product.
0DNHVXUHWKHSOXJ¿WVWLJKWO\LQWRWKHRXWOHW
Loose plugs can cause electric shock.
Do not fold the power cable or place
anything heavy on it.
This can result in electric shock.
Do Not use too many plugs in a single
power outlet.
This can result in electric shock.
Unplug the power plug during electrical
storms.
Lightning can cause an electric shock.
Do NOT touch the power plug with wet
hands.
This can result in electric shock.
Only charge using the power supply
provided.
An incorrect power supply can cause damage
to the product.

I 8
$IBQUFS]1SFQBSJOHUP6TFUIF1SPEVDU
9 I
$IBQUFS]1SFQBSJOHUP6TFUIF1SPEVDU
Parts Diagram
The diagram may differ with the purchased product.
I Remote (Front)
1ON,OFF POWER Enters POWER [ON/OFF] CODE for the set device
2ARROW Enters [UP/DOWN/LEFT/RIGHT] CODE for the set device
OK OK Enters OK and/or ENTER CODE for the set device
3
MENU MENU Enters MENU CODE for the set device
EXIT EXIT Enters EXIT CODE for the set device
4
PAGE FLIP Flips to [NEXT/PREVIOUS] page shown on the device screen
HOME Moves to the HOME screen
5
CH ,CH
CHANNEL Enters CHANNEL [UP/DOWN] CODE for the set device
VOL ,VOL
VOLUME Enters VOLUME [UP/DOWN] CODE for the set device
6
MUTE Enters MUTE CODE for the set device
GUIDE INFORMA-
TION Enters INFO CODE for the set device
7 FUNCTION 1, 2, 3, 4 Moves directly to Page [1, 2, 3, 4] on the set device
*The FUNCTION key can be set in the manager.
LCD Screen
Components
Components may be replaced without any prior notice in the interest of improving product quality or
performance. The components shown here in the manual may differ from the components included
with purchase.
I Standard
I Sold Separately
CradleMain Unit Adapter
USB Cable Product Manual
RF Receiver Adapter 4CH IR Flashers &
RS232 Cable
SETUP CD

I 10
$IBQUFS]1SFQBSJOHUP6TFUIF1SPEVDU
11 I
$IBQUFS]1SFQBSJOHUP6TFUIF1SPEVDU
I Remote (Rear)
1Remote Control Receiver Used when using a wireless remote control.
2Cradle connector Connects to the cradle.
3Power Sets power on/off
4USB Port Connects to a USB cable
I Cradle
Cradle
DC 5.0V
/PUF
ŶThe LED turns red during charging, and blue when charging is complete.
DSSUR[aKRXUV
Ŷ Recharging time can vary.
Parts Diagram
The diagram may differ with the purchased product.
Parts Diagram
The diagram may differ with the purchased product.

I 12
$IBQUFS]1SFQBSJOHUP6TFUIF1SPEVDU
13 I
$IBQUFS]1SFQBSJOHUP6TFUIF1SPEVDU
I RF Receiver & IR Converter (Optional)
Adaptor Specs : DC 12V, 300mA
Receives RF signals from the main remote control and converts them to IR signals.
IR Signal Indicator. LED
The IR Signal Indicator LED becomes lit when the receiver power is turned on.
When RF pairing between the RF Receiver and remote control is successfully
completed, the IR code is transmitted.
DC12VRS232 Connector
Recharging and Turning Power On/Off
I Recharging with an Adapter
I Turning the Remote Control Power On/Off
Control using the power switch at the bottom rear of
the remote control.
Insert the adapter cable into the cradle and then plug the other end into a power outlet.
/PUF
In case that overvoltage, over 6V, impacts the remote
control unit, the product does not work by the operation
of the protective circuit. In order to resume the remote
control unit’s operation, remove the battery and then
reinsert it to the unit.
Parts Diagram
The diagram may differ with the purchased product.
IR Flasher Connector

www.remotesolution.co.kr
$IB
Q
UFS
-
FBSO
J
O
H
UP6TFUIF.FOV
T
6
FUHHQ&RQ¿
J
XUDWLR
Q
Main Screen .............................................. 16
Display
S
tructure
REMOTE - Screen . . . . . . . . . . . . . . . . . . . . . . . . . . . . . . . . . . . . . . . . . 17
<DEVICES> - TV Screen .................................... 18
<DEVI
C
E
S
> Mod
e
<DEVCIES> - Using the TV Remote Control ..................... 19
O
PERATIN
G
S
ET-
UP
BRAND(CODE) SET-UP (TV Remote Control Setting) ............. 20
CODE LEARNING ......................................... 23
SELECT SIGNAL BETWEEN IR/RF ........................... 25
PAIRING THE REMOTE CONTROL WITH THE RECEIVER ........ 27
PH
O
T
O
PHOTO DISPLAY ......................................... 29
S
ETTIN
G
SETTING Main Screen...................................... 30
SYSTEM SET-UP ......................................... 31
START PROGRAM ........................................ 32
DISPLAY MODE SET-UP WHILE CHARGING ................... 33

I 16
Chapter 2 | Learning to Use the Menus
17 I
Chapter 2 | Learning to Use the Menus
Screen Configuration Display Structure
I REMOTE - Screen
I Main Screen
Press the menu icons on the remote control LCD screen following steps 1 2 to open the menu.
Device Settings
Menu
1REMOTE Moves to the device group to be controlled.
2PHOTO Moves to the playback menu for image files.
3SYSTEM Moves to the system settings menu.
1 Menu
Moves the <DEVICES> selected by the user.
2 Device Settings Moves to the device settings menu.
(refer to page 00 for setting instructions)
Tabla de contenidos
Otros manuales de Mando a distancia de Remote Solution


