Ray display Pico Projector Manual de usuario


Table of Contents
1 The Ray Pico Projector
Installation Preparation
2 Ray Box Contents
3 Ray Features
4 Getting Started with Ray
Basic Connections
Setup Information
5 Watching Videos
5 Connecting Equipment
8 Charging Ray
8 Specification
9 Safety and Cleaning
Handling Ray
Repairing Ray
10 Using the Ray USB Power Adapter
11 Important Maintenance & Operating Information
12 Regulation Compliance
13 Battery Replacement
14 Disposal and Recycling Information
15 Warranty
i

Congratulations on choosing the
Ray
Projector Display. Thank
you for your support. For optimum benefits, please read the
instruction manual carefully before using the
Ray Projector
and
keep it for future reference. Heed all warnings and follow all
instructions. We hope you will be fully satisfied and enjoy the
Ray Pico Protector
to share your videos, photos and
presentations with friends and business associates anywhere,
any time. The small battery operated
Ray Pico Projector
,
convenient to store and carry on business/personal trips,
produces a large 60 inch picture for excellent viewing.
Installation Preparation:
For best results it is advisable to learn how to correctly utilize the Ray
Pico Projector and its numerous products including:
•Digital cameras—to show pictures to friends and family.
•Camcorders— to share family videos with friends.
•iPhone, video iPod, MPEG3, MPEG4 or portable DVD players—to
present pictures and videos.
•Notebook or netbook computers—to project professional
presentations or entertainment videos.
The
Ray
Pico Projector
1

Ray
Box Contents
2
1
3 4
7
6 8
1.
Ray
Pico Projector
2. AC adapter with mini USB Plug—Input: 100-240V
~50-60Hz Output: 5V 2000mA
3. Tripod
4. Audio Video Cable: 2.5mm 4-pole to 2.5mm 4-pole
5. Audio Video Cable: 2.5mm 4-pole to 3.5mm 4-pole
6. Audio Video Cable: 2.5mm 4-pole to 3.5mm 4-pole-
Black Cable with White Band ( maybe a White Cable)
7. RCA Audio\Video Cable: 2.5mm 4-pole AV jack to
RCA connectors
8. RCA Coupler
9. User manual
9
5
2
Please check and identify the supplied accessories.

Ray
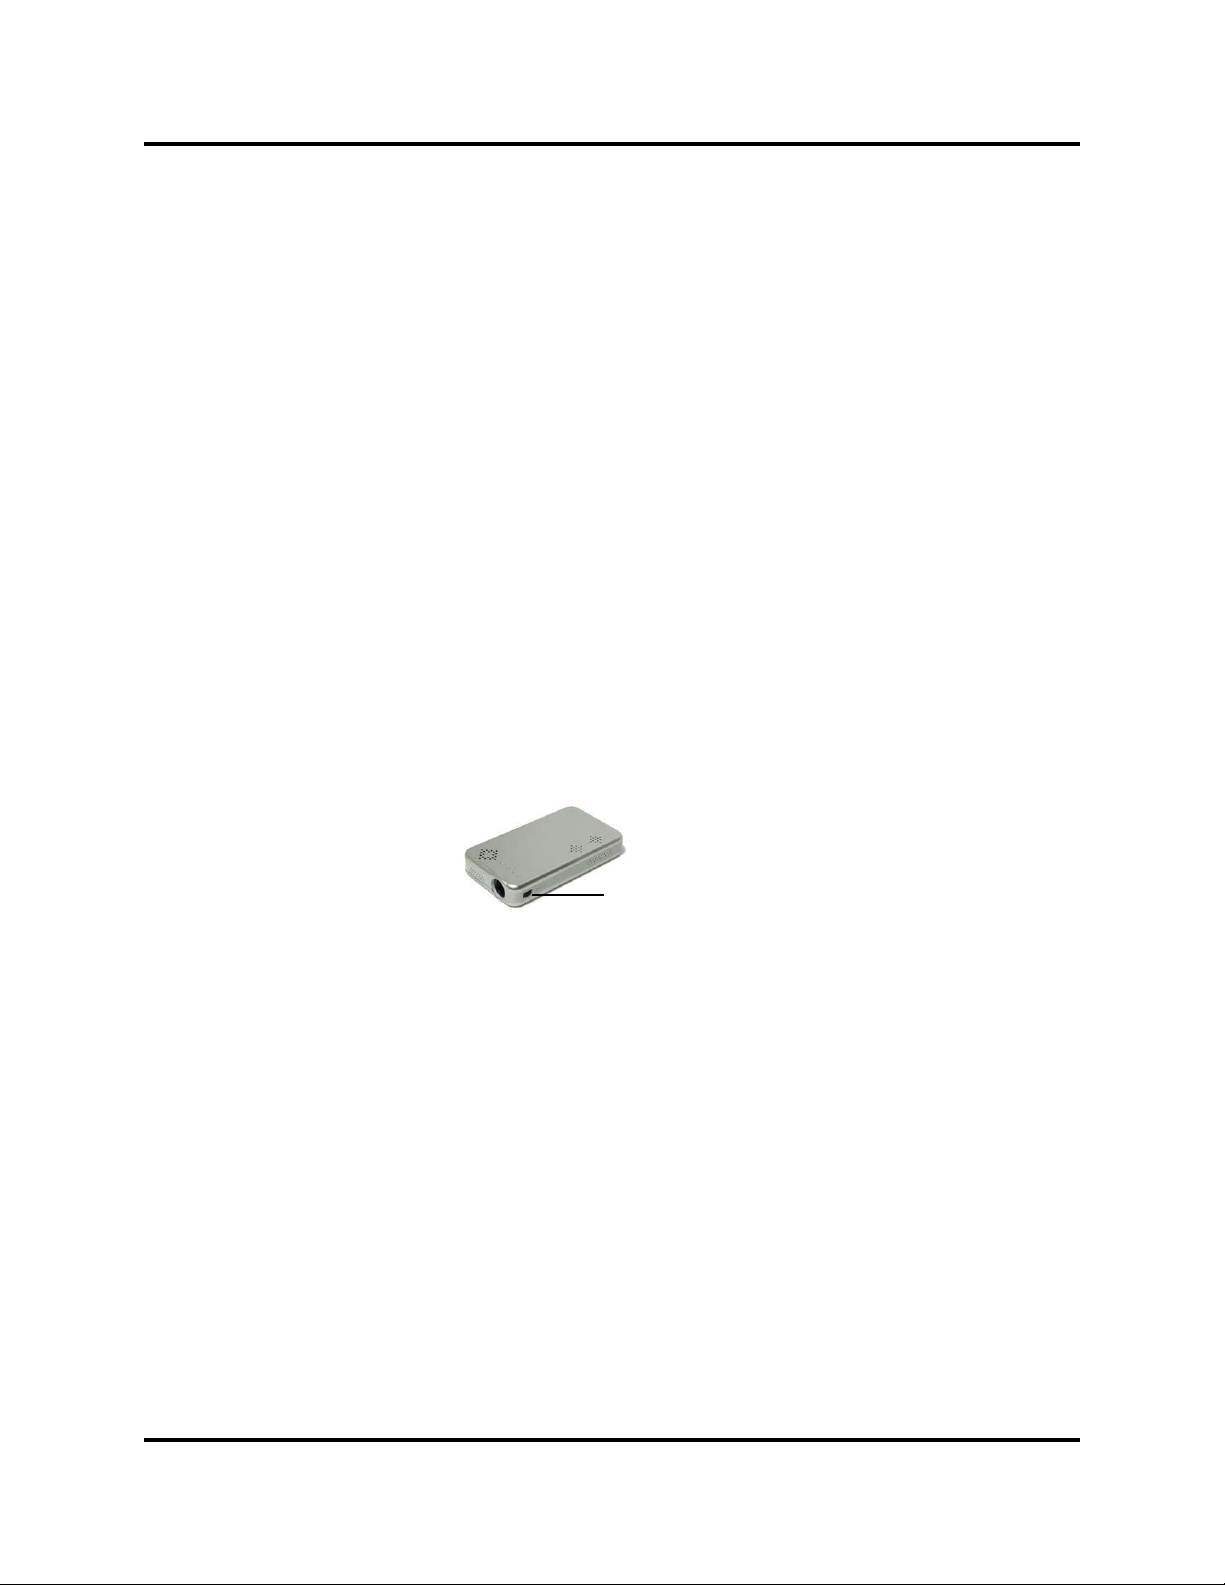
Features
Right Speaker
Focus
On/Off
Tri Pod Attachment
Bottom View
Ray Projector Controls and Features
Power/Charge
Heat Vent
Lens
Power Input
TV Input
Left Speaker
3

Basic Connection:
The connection diagram represents the installation.
To activate the
Ray
Pico Projector
, connect any TV video output from a
camera, camcorder, iPod®, iPhone™, MPEG Video player, or phone to
the TV input terminal of the BEAM.
4
Getting Started with
Ray
Set-up Information:
Slide the ON/OFF switch to the ON position. The Power/Charge Light
will flash at a rapid rate about once every 1/2 second (approximately
120 flashes per minute). If the AC adapter is not attached and the light
does not flash, the Pico Projector Battery must be CHARGED.
Flashing Light
OFF ON

If the Pico Projector battery is discharged (DEAD), plug the AC Adapter
into an electrical outlet and connect the mini USB plug to the Projector.
The Power/Charge Light will start flashing once every second (60
flashes per minute) indicating the AC Adapter is connected to the Pico
Projector.
AC Adapter USB Power
Watching Videos:
Video output from MP3/MP4 video players, cell phones, cameras, cam-
corders, portable DVD players and other video players have a standard
video output cable which connects to a standard TV.
The TV connection has three color coded connectors:
•Yellow is Video
•White is the Left Speaker
•Red Is the Right Speaker
Connecting Equipment:
The RCA connectors and couplers are color coded to assist in connect-
ing the cables.
• Plug the RCA Audio\Video Cable, ( item 5) into the RCA Coupler,
(item 7).
• Plug the connector attached to the camcorder, iPod, iPhone, cell
phone, portable DVD player and other products with RCA plug
outputs, into the RCA coupler as shown.
RCA TV Connections
5

57
iPod, Cell
Phone, DVD
Input
RCA Coupler
Item 7
RCA Audio/
Video Cable
Item 5
Yellow Yellow Yellow
White White White
Red Red Red
Input
Standard cables have been included as an alternative to the RCA
connection, to directly connect the video source to the
Ray Projector.
*Black with White Band
Video Source
Video Source/Product Cable Color
iPod, Zune®White
ARCHOSTM, COWON,
ZEN Vision
Black
Cameras and camcorders do not always have three RCA plugs. Cameras
without sound typically have a single yellow plug for video while some with
sound have two RCA plugs — yellow for video and white for audio. To
operate the Ray, match camera or camcorder RCA connectors to the RCA
coupler (item 7).
6
*Some Products are shipped with a White Cable replacing the Black with White Band
Cable
IMPORTANT:
Make sure the video player, camcorder, camera, MP3 or MP4 player has
the TV out enabled and/or turned on. Consult the video player iPhone, or
phone user manual for instructions on enabling the TV output.
Typically the TV out will be found in the SETTINGS or TOOLS menu.
For Example:
Put iPOD in Video Menu and select Video Setting
TV Out On
TV Signal NTSC
Widescreen Off
When the
Ray
is turned on (power light flashing) and the video player is
turned on and connected to the
Ray,
point the projector at a desired area
for image projection. Rotate the FOCUS thumb wheel located on the side
of
Ray
to adjust the focus of the image.
Audio:
Ray speakers are controlled by the video player. Volume control for the
speakers is located on the video player. To regulate the Ray’s volume, use
the volume button on the video player.
Focus
7
Tabla de contenidos


