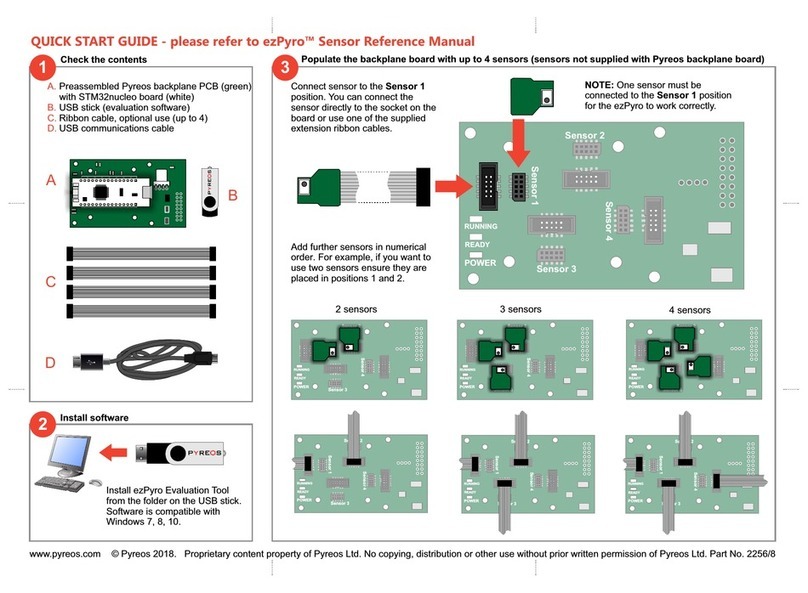
Pyreos ezPyro dPYEGE01 Manual de usuario

Rev. 1.0
ezPyro™ Gesture / Motion
Evaluation Kit User Manual
For low cost, low power, non-contact mid IR
gesture and motion/presence sensing

ezPyroTM Gesture/Motion Evaluation Kit User Manual
Page 2 of 20 © Copyright Pyreos Ltd. 2020 ezPyroTM User Manual Rev. 1.0
CONTENTS
1INTRODUCTION ............................................................................................................................................ 3
2GETTING STARTED ........................................................................................................................................ 3
2.1 HARDWARE VARIANTS .......................................................................................................................................................................................3
2.2 KIT CONTENTS .................................................................................................................................................................................................. 4
2.3 MINIMUM SYSTEM REQUIREMENTS .......................................................................................................................................................................4
3INSTALLATION .............................................................................................................................................. 4
3.1 INSTALL THE EZPYROTM SOFTWARE........................................................................................................................................................................ 4
4INSTALLING THE ST MICROCONTROLLER USB DRIVER .................................................................................... 5
5INSTALLING .NET 4.5 FRAMEWORK ............................................................................................................... 5
5.1 CONNECT THE DEMO KIT .....................................................................................................................................................................................5
6RUNNING THE SOFTWARE............................................................................................................................. 6
6.1 DIFFERENT VARIATIONS......................................................................................................................................................................................7
7NAVIGATING THE MENUS ........................................................................................................................... 10
7.1 ALGORITHM TAB ............................................................................................................................................................................................ 10
7.2 ASIC CONTROL TAB........................................................................................................................................................................................ 11
7.3 WAKE-UP TAB ...............................................................................................................................................................................................12
7.4 GO TO SLEEP .................................................................................................................................................................................................13
7.5 SYSTEM TAB ................................................................................................................................................................................................. 14
8GESTURE DETECTION MODE........................................................................................................................ 15
8.1 GESTURE TRIGGER THRESHOLD OPTION................................................................................................................................................................ 15
8.2 GESTURE DETECTION ALGORITHM PEAK SPREAD....................................................................................................................................................15
9PRESENCE RECOGNITION MODE.................................................................................................................. 16
9.1 THE MAIN MENUS..........................................................................................................................................................................................17
9.2 PRESENCE ALGORITHM.....................................................................................................................................................................................17
10 POWER MODE ............................................................................................................................................ 18
11 SAVING DATA TO CSV FILE........................................................................................................................... 19
12 ABOUT ....................................................................................................................................................... 20
13 FURTHER INFORMATION AND SUPPORT...................................................................................................... 20
Please note: the information contained in this document is subject to change without further notification.

ezPyroTM Gesture/Motion Evaluation Kit User Manual
Page 3 of 20 © Copyright Pyreos Ltd. 2020 ezPyroTM User Manual Rev. 1.0
1Introduction
This document describes the ezPyroTM Gesture/Motion Recognition Evaluation Kits and the related software. The
purpose of these kits is to enable engineers and technicians to carry out simple and effective evaluation of ezPyroTM
Gesture/Motion sensors, experiment with a sample Gesture/Motion Recognition algorithm, and to capture
measured data to a PC.
There are four variants of the ezPyroTM Gesture/Motion Recognition Evaluation Kit, see Table 1.
The kits are based on the ST microelectronics STM32F303K8 microcontroller.
Please note: The software discussed in this document can only be used with the ezPyroTM Gesture/Motion
Recognition Evaluation Kits.
2Getting Started
2.1 Hardware Variants
Evaluation Kit
Name
Evaluation
Kit Code
Number of
Pixels
Aperture
size
Optics
Algorithm
ezPyroTM Long
Range Gesture
dPYEGE01
2x2
1.65 mm
Lens
(f=6.35mm)
Directional
ezPyroTM Mid-
Range Gesture
dPYEGE02
2x2
0.90mm
Window
Only
Directional
ezPyroTM
Motion/Presence
Recognition
dPYEMO01
1
1.65mm
Lens
(f=19.5mm)
Non-
Directional
ezPyroTM Motion
Direction
dPYEMO02
2x2
1.65mm
Lens
(f=19.5mm)
Directional
Table 1: ezPyroTM Motion/Gesture Recognition Evaluation Kit variants
Figure 2: ezPyroTM Long Range Gesture Kit
Figure 1: ezPyroTM Mid-Range Gesture Kit
Figure 3: ezPyroTM Motion Kits

ezPyroTM Gesture/Motion Evaluation Kit User Manual
Page 4 of 20 © Copyright Pyreos Ltd. 2020 ezPyroTM User Manual Rev. 1.0
2.2 Kit contents
1. ezPyroTM Gesture/Motion Evaluation Kit
2. Micro USB-to-USB cable
3. ezPyroTM Gesture/Motion Recognition software (Setup file included in software package)
4. USB drive with software and documentation
2.3 Minimum system requirements
1. Microsoft® Windows PC (all versions supported currently)
2. GB of RAM
3. 450 MB of available hard-disk space for installation, additional free space required for storing CSV files
4. 1024x768 display (1280 x 1024 recommended)
5. Local administrative rights to install device drivers
6. .NET Framework 4.5
7. 1 free USB port
3Installation
3.1 Install the ezPyroTM software
From the software pack included with the kit, select the “setup.exe” file that has this icon. This will start the
installation process.
Follow the on-screen instructions and enter the information required.
Figure 4: Installer window

ezPyroTM Gesture/Motion Evaluation Kit User Manual
Page 5 of 20 © Copyright Pyreos Ltd. 2020 ezPyroTM User Manual Rev. 1.0
As part of the installation process a check will take place to see if .NET Framework 4.5 is present. If not, the setup
routine can be cancelled and the .NET framework 4.5 can be downloaded from Microsoft’s website.
A driver is needed for the STM32F303K8T6 microcontroller. This is included in the software package.
4Installing the ST Microcontroller USB Driver
The USB supplied contains a folder called “en.stsw-link009.zip”. Extract the files and run either the application
“dpinst_amd64.exe” if you have a 64bit system or “dpinst_x86.exe” if you have a 32bit system. This will install the
USB driver for the ST microcontroller that is connected to the ezPyroTM board.
Once the driver has been installed the USB cable can be connected between the ezPyroTM Board and the computer.
Once connected the green light on the ezPyroTM board will be on constantly and the red light will flash (The
microcontroller is the inverse of this, red is on constantly and green flashes).
5Installing .NET 4.5 framework
If you do not have the .NET 4.5 framework installed on your computer, then use the installer provided
(“dotnetfx45_full_x86_x64”) in the software package.
5.1 Connect the demo kit
Connect the USB cable to the kit and Windows PC.
You may see a message suggesting you are required to install a device driver. Follow the on-screen instructions and
download a driver from Windows Update or install from the software package provided.

ezPyroTM Gesture/Motion Evaluation Kit User Manual
Page 6 of 20 © Copyright Pyreos Ltd. 2020 ezPyroTM User Manual Rev. 1.0
6Running the Software
Double clicking on the .exe file will open the application. This will open the window shown below:
To connect to the demo kit, select the Device -> Connect to Device
This will open a window with all available devices on COM ports.
Connect to the port that is listed once the device is connected. If more than one COM port is listed this can be
checked by disconnecting the device and refreshing the list. Re-connect and refresh the list then select the COM port
that has appeared and click OK.
Once the device has been selected the software runs through a calibration sequence, during which the arrow that
indicates a gesture direction will spin round and then vanish upon completion of the calibration. This is required
when using the device without a method of stopping drafts from running across the device.
Figure 5: Main window with no device connected
Figure 7: Connecting to an ezPyroTM device
Figure 6: Com Port selection

ezPyroTM Gesture/Motion Evaluation Kit User Manual
Page 7 of 20 © Copyright Pyreos Ltd. 2020 ezPyroTM User Manual Rev. 1.0
6.1 Different Variations
The software will work out when it is plugged in which kit it is attached to. The left side of the window then shows
the current sensing mode. The button for the active mode, gesture, direction, or presence, is highlighted in blue.
Using kits dPYEGE01, dPYEGE02 or dPYEMO02 allows access to gesture/direction and presence sensing. dPYEMO01
only allows access to presence sensing.
Figure 9: Gesture Recognition (dPYEGE01 and dPYEGE02)
Figure 10: Presence Recognition (dPYEMO01)
Figure 8: Motion Direction (dPYEMO02)

ezPyroTM Gesture/Motion Evaluation Kit User Manual
Page 8 of 20 © Copyright Pyreos Ltd. 2020 ezPyroTM User Manual Rev. 1.0
The main window includes four scopes
which show the signals produced by each
of the pixels in the sensor as shown in
Figure 11. The scope settings can be
altered using the sliding scales on the x-axis
and the y-axis.
Figure 11: Scope layout
By selecting Oscilloscope Full View in the Options menu, the sliding scales can
be removed.
Figure 12: Options menu
This allows the scopes to be view without
distraction.
Figure 13: Scope layout - full view

ezPyroTM Gesture/Motion Evaluation Kit User Manual
Page 9 of 20 © Copyright Pyreos Ltd. 2020 ezPyroTM User Manual Rev. 1.0
The main window also contains a console which displays detected messages as well as any changes or errors, such as
initial start-up mode or conversion to presence sensing.
Figure 14: Window console

ezPyroTM Gesture/Motion Evaluation Kit User Manual
Page 10 of 20 © Copyright Pyreos Ltd. 2020 ezPyroTM User Manual Rev. 1.0
7Navigating the Menus
The main window contains 4 sections: Algorithm, ASIC Control, Wake-Up, and System
7.1 Algorithm Tab
Figure 15: Algorithm tab window
The algorithm tab gives the user access to some basic settings that can be changed.
Window Size: This is window width in samples used to detect event. A larger window width allows slower
events to be detected. A smaller window width means that an event is still registered in the scopes, but the
direction icon might not activate.
•Range: 10 to 2000
•Typical: 400
Detection Threshold: This is how high the peak value must be before the event is recognised as valid.
•Range: 1 to 20
•Typical: 3
Peak Speed
Once altered these can be reset to the default values using the Set Defaults button at the bottom of the tab window.
Este manual sirve para los siguientes modelos
3
Tabla de contenidos
Otros manuales de Accesorios de Pyreos