PROIETTA CASE AF10 Manual de usuario

!
!
!
INSTRUCTION MANUAL"
"
CASE AF10 / AF20
WARNING:"
Read this instruction manual carefully before using the
product!
Thank you for choosing a PROIETTA product!

INDEX
!
1) SAFETY INFORMATION!
2) MODELS!
3) VENTILATION SYSTEM!
4) USAGE INSTRUCTIONS!
4.1) CASE TILT ADJUSTMENT!
4.2) HANGING INSTALLATION!
4.3) INSTALLATION IN PORTRAIT FORMAT!
4.4) POWER CONNECTION!
4.5) FIXING THE VIDEO PROJECTOR!
5) MAINTENANCE!
6) CAUSE AND SOLUTIONS OF POSSIBLE PROBLEMS!
7) PROIETTA APP INSTALLATION!
8) PROIETTA CONTROL BOARD (LED SIGNALLING OPERATION)!
9) WARRANTY!
10) DECLARATION OF CONFORMITY!
11) DISPOSAL OF UNUSED PRODUCT!
1!
2!
4!
5!
5!
5!
5!
6!
7!
8!
9!
10!
13!
15!
16!
16!

SAFETY INFORMATION
Read the following security information carefully before performing any operations. The
product described in this manual is an outdoor protective case for video projectors.!
Any other use is not provided by the manufacturer and therefore relieves him of any
liability for damages arising from misuse. !
Be sure to securely attach the protective case to an architectural element that ensures its
stability and reliability. All elements used for installation (screws, bolts, brackets, etc.)
must always be adjusted to the load they need to support.!
Use an M12 bolt with a self-locking nut and use a security chain in the event of a
suspended installation.!
The protective case should always be connected to the power supply even when the
video projector inside is turned off. This ensures constant ventilation during hot days or
maintaining a warmer temperature on cold days, ensuring that the projector works
properly. !
For proper use, before using the protective case, read carefully the instruction manual of
the video projector that you plan to install inside. The minimum temperature sustained by
the protective case is -25°C. The maximum temperature supported is 5°C lower than the
maximum operating temperature shown in your projector's instruction manual.!
e.g. A video projector with an operating temperature from 0°C to 45°C —> operating
temperature insured by the protective case: from -25°C to 40°C.!
Do not place objects on the power cable and in case of damage to the manufacturer for
replacement in order to avoid dangers of electrocution.!
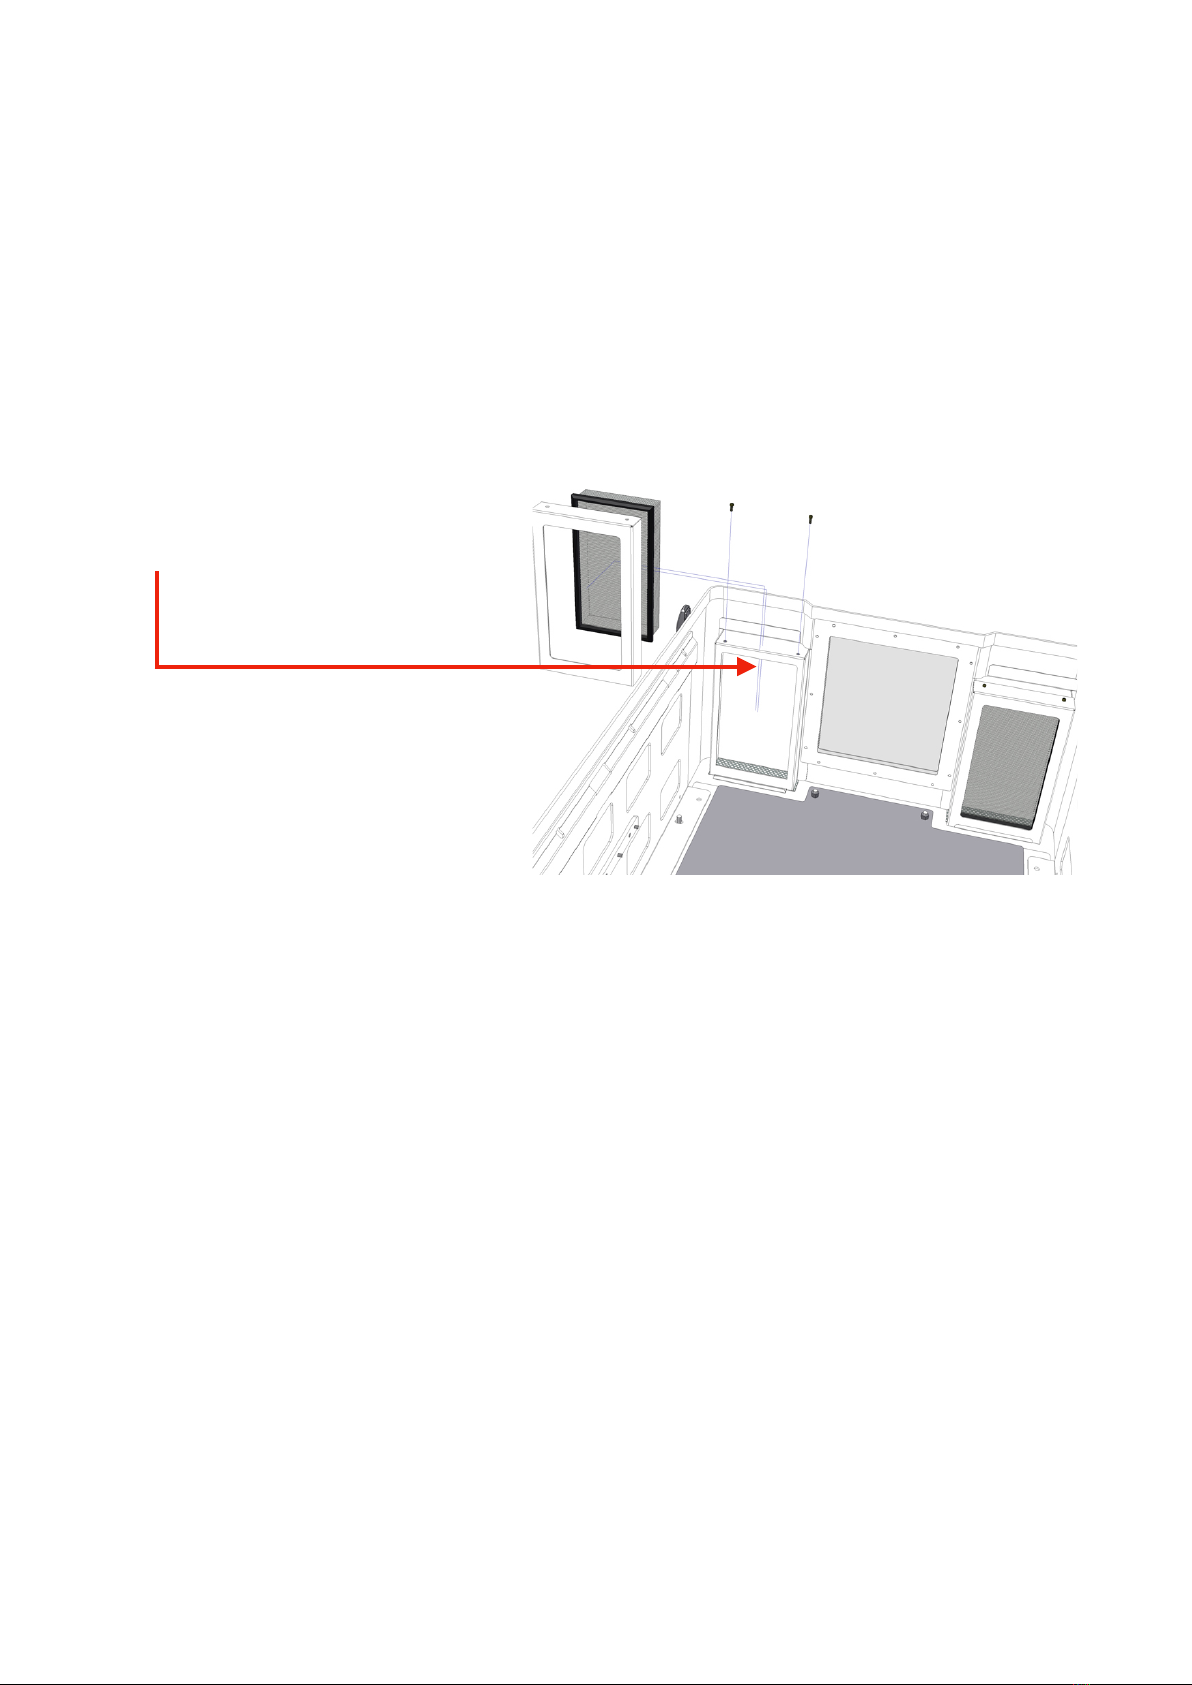
The only maintenance operation allowed in warranty is the replacement of the filters. Any
other repairs must be carried out solely by the manufacturer, who denies any
responsibility for unauthorized interventions.!
Air intakes should never be covered or clogged with any material. Be sure to provide
adequate ventilation to the case to protect it from overheating. The protective case
should not be placed in a closed installation or in a compartment that is too small and
without enough ventilation.!
Never touch the protective case and all its components with wet hands.!
Never place the protective case on flammable and/or combustible surfaces.!
1

MODELS
Maximum dimensions of the video
projector insertable in the CASE AF10
2
AF10

Do not insert a bigger projector video than the measurements indicated for each type of
protective case. Choosing an undersized case, compared to the video projector placed
inside, can result in insufficient ventilation and irreversible damage to the device itself.!
AF20
3
Maximum dimensions of the video
projector insertable in the CASE AF20

VENTILATION SYSTEM
The air enters in the case at outdoor ambient temperature (T INLET AIR) from the filter-
equipped air intakes located at the bottom of the case (there is only one air intake for the
AF6 model). !
The temperature inside the protective case is measured by a probe that:!
-when the temperature rises above a certain value drives the fan;!
-when the temperature drops below a certain value drives the heating system.!
The air enters in the case at outdoor ambient temperature, it’s mixed with the temperature
inside T1 and is finally ejected on the back of the case at temperature T2 (T2 > T1).!
The rear fan of the protective case is necessary to extract the hot air emitted by the
projector. The fan on the front of the protective case (in the bottom) is to inject air to cool
it down. Only AF32 and AF40 models have this fan, in the AF6, AF10, AF20 the air is
automatically sucked inside the case by the internal ventilation system.!
Air intakes should never be covered or clogged with any material. Be sure to
provide adequate ventilation to the case to protect it from overheating. The
protective case should not be placed in a closed installation or in a
compartment that is too small and without enough ventilation.!
Inlet Air
Outlet Air
4

USAGE INSTRUCTION
CASE TILT ADJUSTMENT
Adjust the inclination of the protective case according to the instructions of the manual of
use of the installed projector video.!
The case can be tilted no more than 20 degrees up or 20 degrees down relative to the
horizontal plane. Contact Proietta Support in case you need to tilt it more.!
HANGING INSTALLATION
The protective case must always be installed with filters facing the ground; it doesn’t have
to be installed upside down.!
Even in this type of installation the case can be tilted no more than the measures written
on “Case Tilt Adjustment” paragraph.!
INSTALLATION IN PORTRAIT FORMAT
It is not possible to install the protective case sideways. !
Contact Proietta Support for installations that require vertical positioning (portrait format)
of the video projector.!
5

POWER CONNECTION
Connect your case to the current according to the security rules currently in force in your
country/region.!
"
The supply voltage must be: 220-240 V, 50-60 Hz and the supply line must be protected
by an efficient grounding link and is equipped with a bipolar switch with differential
thermal 0.03 A safety. !
For safety reasons it’s essential to leave the film applied on top of the glass to avoid the
fall of dangerous pieces of glass in case of breakage. Cut only the area affected by the
projection beam.!
"
!
!
CABLE INPUT BELOW THE CASE
Place the signal cables in the
appropriate input below the case
and make sure to establish the press
to prevent water from entering!
6
E
D
E) Sealed input
for signal cables
(hdmi/audio/
ethernet).
D) Power cable
for main outlet
included.

FIXING THE VIDEO PROJECTOR
!
!
Take as a reference the video projector fastening holes by helping with the semi-
transparent paper; mark the placement of the holes in the projector screws.!
Remove Plate A from the main one, mark the holes onto plate A from the paper and drill
according to the diameter of the screws of your video projector. !
On the opposite side of Plate A use a countersink (1) to create a hole to insert a flat-
headed conical screw. !
Attach the video projector to Plate A using the appropriate screws (2) for your video
projector (choose flat conical head screws) and insert both into the case. !
12
7

MAINTENANCE
!
FILTERS AND SEALS!
It’s important to keep the intake filter clean for good ventilation, otherwise it may be
inefficient and as a result the lamp may last less than stated and the projector may get
damaged or stop working unexpectedly. "
Clean the filters frequently, their replacement depends on the environment in which the
protective case is placed.
REMOVING FILTERS:"
Unscrew the frame to remove filters!
Check the seals regularly. "
If the seals are damaged, do not use the protective case because the water could enter
inside the case and damage the video projector causing an electric shock."
Contact the Proietta Support for any spare parts: www.proietta.com.
8
Este manual sirve para los siguientes modelos
1
Tabla de contenidos
Otros manuales de Proyector de PROIETTA


