9PROBRITE.COM
Please call 1-844-507-5651 or email support@probrite.com for further assistance.
8
Visit www.probrite.com/install for installation video tutorials and product support
C
CC
A
Installation (continued)
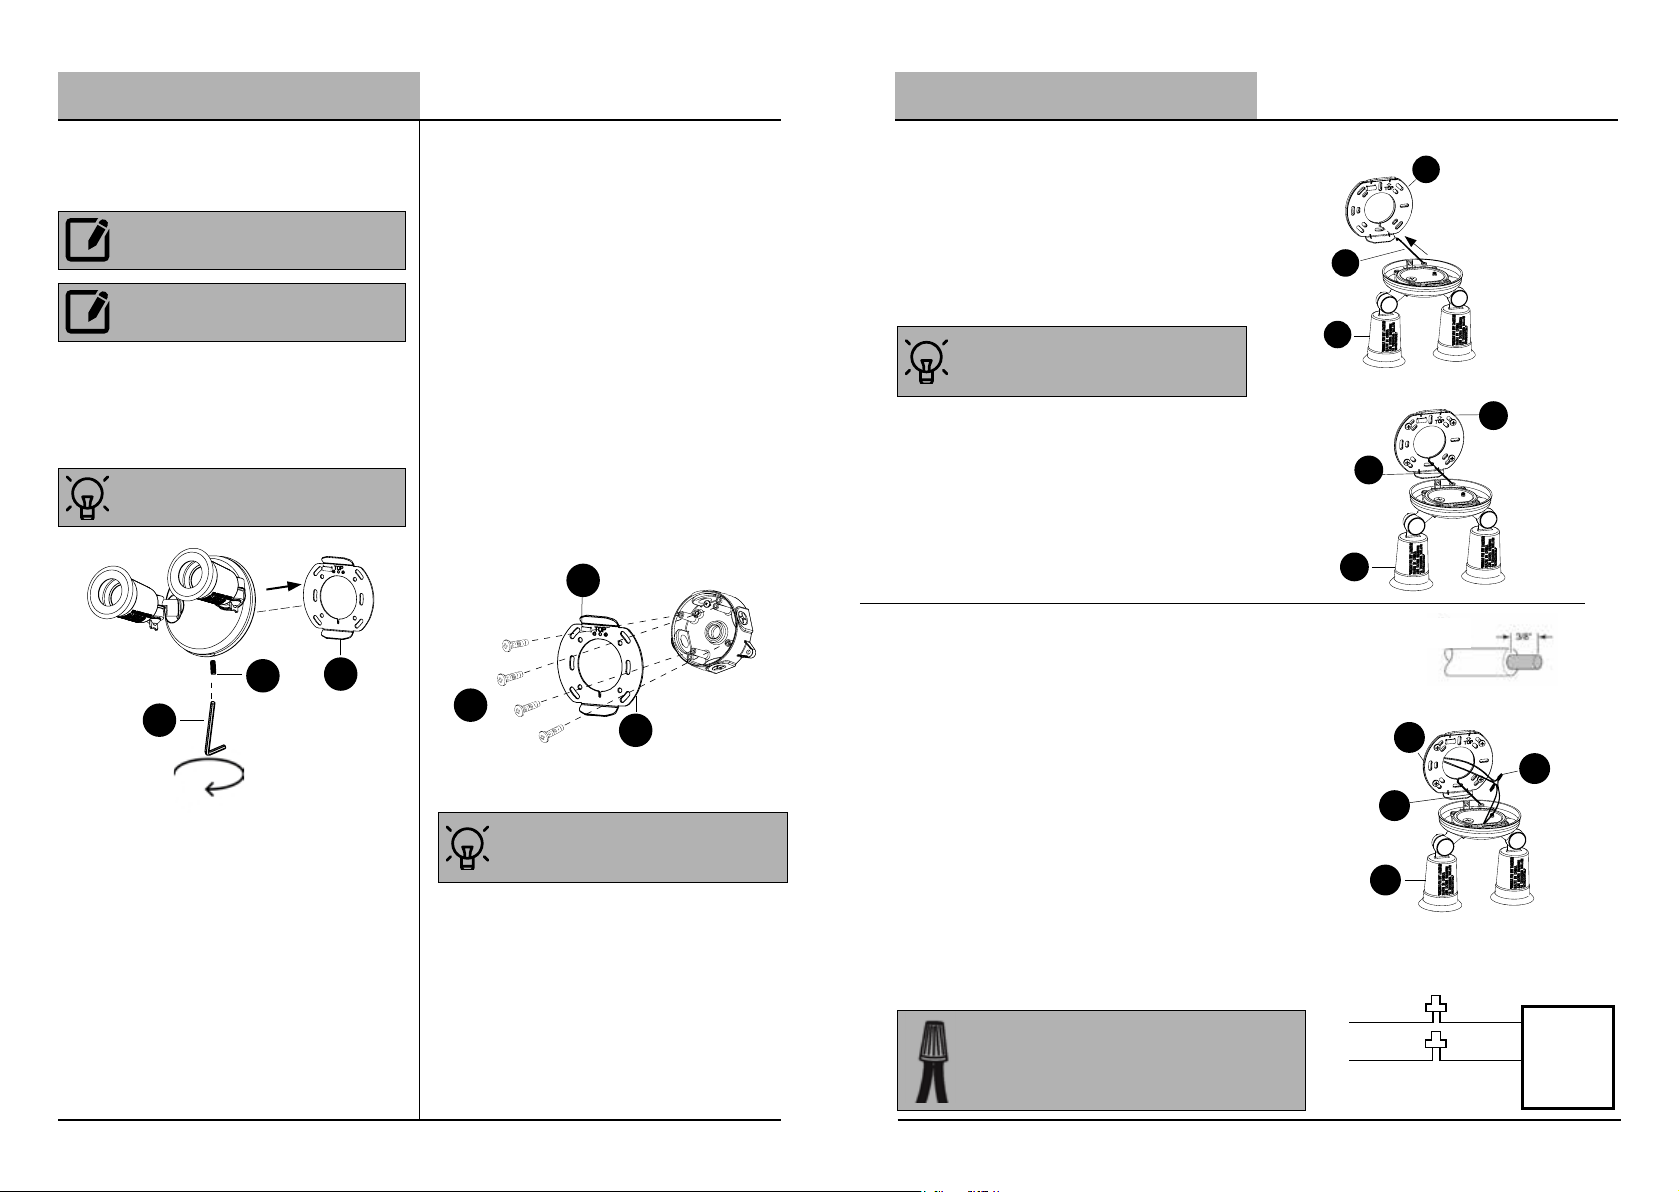
7Mounting the light
fixture
☐Once the fixture is wired, place the light
fixture (A) onto the mounting plate (D)
so the top sloped grove on the plate
rests on the top sloped grove on the
back of the fixture.
☐Verify the fixture is flush with the wall.
☐Tighten the mounting plate tightening
bolt (C) until the bolt firmly pushes
against the mounting plate (D).
8Caulking around the
light fixture
☐Caulk around the mounting plate (D)
and surface with silicone sealant (not
included).
9Installing bulbs and
adjusting the light heads
☐After fixture is securely mounted, install
two PAR halogen or LED bulbs (sold
separately) into the lamp heads.
☐Loosen the thump screw, then use your
hand to pan and tilt each individual light
head on the fixture (A) to point towards
the direction desired. Tighen the screws
under each lamp head to fix the desired
angle.
☐From the breaker and switch, turn power
back ON to the light fixture to check if it
lights up.
D
NOTICE: Failure to properly caulk around the
surface and mounting plate (D) could lead
to water damage and is not covered under
warranty.
NOTE: When attaching this fixture (A) to an
external, surface mount junction box, caulk the
inside of the light fixture before attaching to the
mounting plate (D).
A
Care and Cleaning
☐Shut o main power supply before cleaning the product. To prolong the original
appearance, clean the light fixture with clear water and a soft, damp cloth only.
☐Do not use abrasive cleaners or cleaners that contain alcohol. Do not apply paints,
solvents, or any other chemicals on this light fixture. They could cause a premature
deterioration of the finish and may void the warranty.
☐Do not spray the light fixture with a hose or power washer.
Troubleshooting
If Light does not come on:
☐Verify that the power is turned ON from the circuit breaker and wall switch.
☐Verify the wiring for the fixture is done properly.
☐Verify the line voltage is correct.
This is a limited warranty oered by Probrite for a period of three years from the date of
purchase to its customers. Probrite warrants to customers that the products will be free from
defects in material and workmanship. The obligation of Probrite under this warranty is limited
to the provision of replacement of products and is extended to the original purchaser of the
product on presenting valid purchase receipt or other proof of date of original purchase
acceptable to Probrite. The receipt is required for rendering the warranty performance. Any
warranty claims without original proof of purchase would not be accepted. It should be noted
that the warranty does not apply to Probrite products that have been altered or repaired
by unauthorized personnel, have been subjected to neglect, abuse, misuse or accident or
damages caused during shipping. Any other products not manufactured by Probrite which
have been supplied, installed and/or used in conjunction with Probrite products are not
covered under this warranty. Any damages caused by replacements bulbs, LEDs or corrosion
or discoloration of brass components are also not covered by this warranty.
Limitation of Liability:
In no event Probrite shall be liable for indirect, consequential, incidental or special damages,
or lost profits. Probrite is not liable for any claims or damage arising out of or connected
with the manufacture, sale, delivery, use, maintenance and repair or modification of Probrite
products, or supply of any replacement parts that, exceed the purchase price of Probrite
products giving rise to a claim. Labor charges to remove or install the fixtures will not be
accepted.
To Claim:
Please contact PROBRITE customer service at 1-844-507-5651 or email
copy of the purchase receipt and a brief description of the problem.
3-Year Limited Warranty
WARNING: Risk of fire. Keep the lamp heads
at least 12 in. from combustible materials.
CAUTION: Keep lamp heads 30° below
horizontal to prevent water damage and
electrical shock.
IMPORTANT INFORMATION: PAR Halogen/LED
bulbs are sold separately. If you need to
purchase please contact your retail store.