Prestigio Data Safe III Manual de usuario

Data Safe III
USB2.0 External HDD
User Manual
Version 1.0

Table of Contents
1Getting Started
1.1 Safety Precautions
1.2 System Requirements
1.3 Package Content
1.4 Product Views
1.5 Product Feature Overview
2Operating Instructions
2.1 Basic Functions
2.1.1 Plug & Play Feature
2.1.2 To Read & Write
2.1.3 To Remove Device
2.2 Using SecureDrive EX Software
2.2.1 To Install SecureDrive EX
2.2.2 Setting Your Own Password
2.2.3 To Lock/Unlock Security Section
2.2.3.1 To Lock Security Section
2.2.3.2 To Unlock Security Section
2.2.4 To Safely Remove Data Safe III
2.2.5 Setup Options
2.2.6 To Uninstall SecureDrive EX
2.2.7 Other Functions
2.3 Using One Touch Backup (OTB)
2.3.1 To Install PCCloneEX
2.3.2 Regular File Backup Functions
2.3.2.1 To Backup File
2.3.2.2 To Restore File
2.3.2.3 To Delete Backup File
2.3.3 Quick Launch
2.3.3.1 To Backup File using Quick Launch
2.3.4 To Backup File using One Touch Backup
2.3.5 File Manager
2.3.6 Setup
2.3.7 Other functions
3Appendix
3.1 Product Specifications
3.2 Supporting OS

3.3 Disclaimer
3.4 Trademark Acknowledements
1. Getting Started
Thank you for purchasing Data Safe III, a stylish HDD Enclosure. You
have made an excellent choice and we hope you will enjoy all of its capabilities. The
product offers a new concept of mobile data storage which features safety and user
friendliness. Please read through the user manual carefully before using the
product, and follow all of the procedures in the manual to fully enjoy all features of
the product.
To use SecureDriveEX security software and PCClonEX backup
software, please download the setup files from official Prestigio
website indicated below onto your PC desktop.
URL: http://www.prestigio.com/product/downloads
Group of Products: Data Storage
External Hard Drives: Data Safe III
File Names: SecureDriveEX_1_01_XXX_Prestigio.xxx
PCClonEX_Lite_2_01_XX_Prestigio.xxx
SecureDrive EX Serial Key: Please refer to Yellow Sticker at the last page of
Quick Guide
1.1 Safety Precautions
Please observe all safety precautions before using Data Safe III. Please
follow all procedures outlined in this manual to correctly operate the device.
Warnings: This mark indicates actions that could lead to
serious injury to personnel operating the device or
damage to the device if ignored or handled
incorrectly.
zDo not attempt to disassemble or alter any part of the device that is not
described in this guide.
zDo not place the device in contact with water or any other liquids. The device is
NOT designed to be liquid proof of any sort.
zIn the event of liquid entry into interior of device, immediately disconnect the

device from the computer. Continuing use of the device may result in fire or
electrical shock. Please consult your product distributor or the closest support
center.
zTo avoid risk of electrical shock, do not connect or disconnect the device with
wet hands.
zDo not place the device near a heat source or directly expose it to flame or
heat.
zNever place the device in vicinity of equipments generating strong
electromagnetic fields. Exposure to strong magnetic fields may cause
malfunctions or data corruption and loss.
1.2 System Requirments
Below are minimum hardware and software requirements that must be satisfied to
ensure the device function properly.
zComputer : IBM PC/AT Compatible Personal computers
zSupported OS:
IBM PC Compatible :
-Microsoft Windows XP / Vista
Mac OS :
-Mac OS 9.x and 10.x or higher (FAT32 format only)
Linux :
-Linux 2.4 or higher (FAT32 format only)
zCPU: Pentium or above
zMemory: Minimum of 32MB of RAM
zDisplay card: Compatible with VESA standard
zUser Authority: Administrator
zFree hard disk space – no less than 16 MB
NOTE:
zWindows 98 SE does not support default mass storage driver.
1.3 Package Content
Name/Description Quantity
HDD Enclosure Main Unit 1
25cm USB Cable 1
60cm USB Cable 1
Stylish Carrying Case 1
Quick Guide and Yellow Serial Key Sticker 1

1.4 Product Views
Front View
POWER LED
R/W LED
Top View
COPY ON/OFF Switch USB Port
1.5 Product Feature Overview
zClassy Stylish Coated Craftsmanship
Data Safe III brings luxury and simplicity into your daily digital
lives.
zMaximum Data Security (SecureDrive EX)
With SecureDrive EX application software, you can protect your device
with password log-in and partition your device into “Public” and “Security”
sections.
Public Section – Public Section does not support password protection.
You can still perform every basic function described in the “Basic
Functions” section.
Security Section – Security is not accessible without security login.
Only login software is available in the section when locked. Please
note that AP Area cannot be read/written when locked.
2. Operating Instrucitons
Warnings: The device is fully compatible for basic functions
with computers specified at “System Requirements”
session, however, both SecureDrive EX and PCClone

EX DO NOT work on Mac OS and Linux OS.
2.1 Basic Functions
2.1.1 Plug & Play Feature
When you connect the device into the USB port of your computer, a “Removable
Disk” icon will appear in the file manager window as shown above. On
Macintosh machines, you can notice the disk icon in the “Desktop” once you
plug in the device into the USB port.
In Linux OS, you can mount the device executing the following instructions.
■Execute cd/etc/sysconfig/ (cat/etc/sysconfig/hwconf | more)
■Check the device information in hwconf,write down the mount point.
■Make a directory in/mnt (ex: mkdir/mnt/usbHD)
■Then, execute mount/dev/sda1 /mnt/usbHD (if mount point was .dev/sda)
2.1.2 To Read & Write
You can retrieve or store files in the device as operating with a hard disk. The
read/write operation of the device is the same as that of a hard disk.

2.1.3 To Remove Device
To minimize risks of data loss on Windows XP and Vista OS, please follow the
removal procedures as follows:
You can find the safe removal icon in your computer’s notification
area.
Double click the “safe removal” icon; the “Unplug or Eject Hardware”
window will pop up.
You can select the device you want to remove. Then, click the [Stop]
button. You can safely unplug the device from the USB port of your
computer after.
Warning: Before removing the USB device, make sure the
LED is not flashing. There is traffic going on
between the host computer and the USB device
when the LED flashes quickly. Do NOT remove the
USB device at this moment. Violation may cause

data loss or even damages to the Data
Safe III.
Warning: If you do not follow the safe removal procedures on
Windows, Windows Windows XP and Windows Vista
operating systems, data loss may occur due to “write
cache” issue.
On Macintosh operating systems, you can drag the removable disk icon into the
trash. This action will perform the “Eject” function.
On Linux operating system, please follow the “demount” procedure to demount the
device.
2.2 Using SecureDrive Ex Software
With SecureDrive EX application software, you can protect your device with
password and partition your device into “Public” and “Security” sections.
Warning: The Partitioning action will delete all the data in the
device. The action is not reversible. Please back up
all necessary data, and close all the active programs
and windows on the computer before performing
this action.
2.2.1 To Install SecureDrive EX
Warning: SecureDrive Ex is only able to handle one device
at one time. The SecureDrive EX may not perform
properly or even cause data loss if more than one
device is being worked on.

1. Connect Data Safe III
to the host computer by the USB
cable provided.
2. Double click on “Setup.exe” in
“SecureDriveEX” folder to start
installation.
3. Please click on the SecureDrive EX
License Agreement and read
through the agreement for legal
usage.
4. Place a check in the box and then
click "Next".
5. A dialog box will pop asking for
firmware update confirmation. All
data will be deleted permanently
if executed. Click “Yes” to
continue or click “No” to cancel
firmware update.
6. The firmware update process
should not take more than 1
minute depending on the host
computer capability.
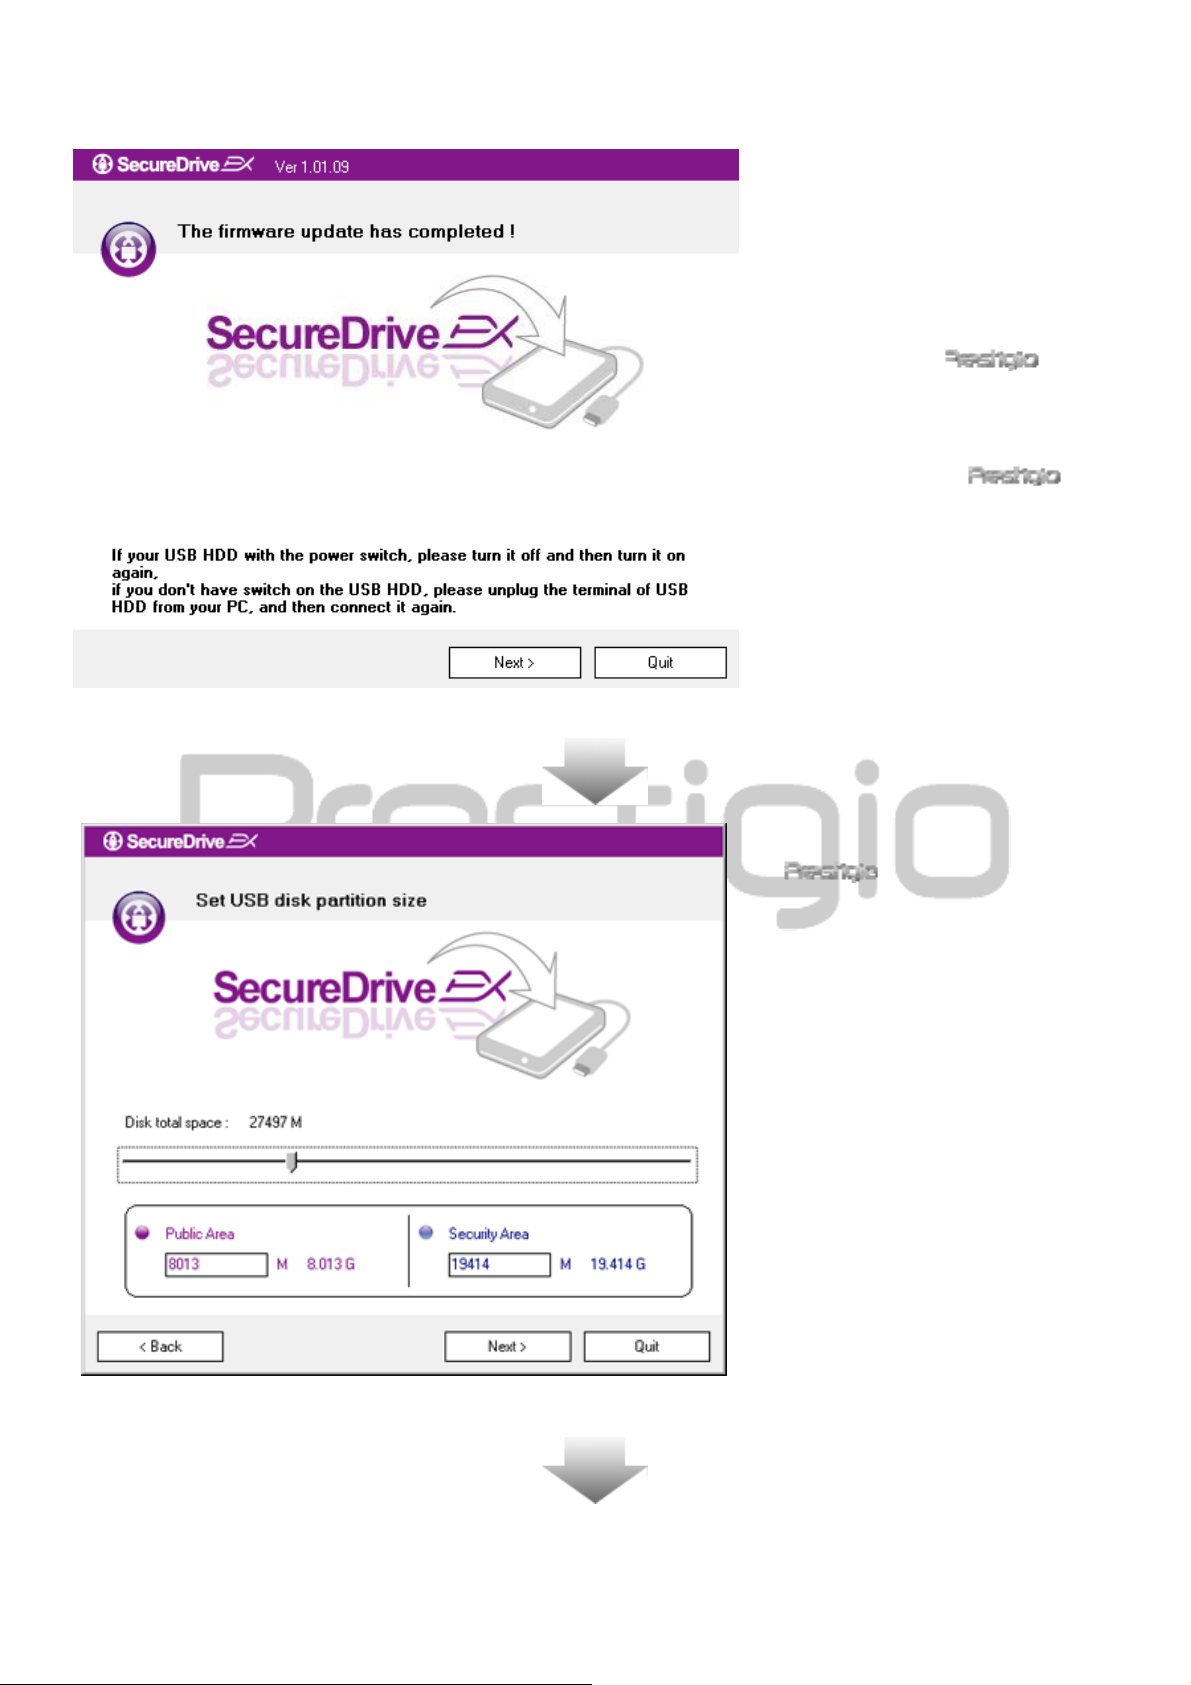
7. When the process is completed,
please turn off Data
Safe III and disconnect it from the
host computer.
8. Please reconnect
Data Safe III to the host
computer and turn on its power to
proceed.
9. As shown in the diagram,
Data Safe III storage
will be divided into two sections,
namely security section and public
section.
10.
T
he capacities of two sections can
be adjusted by clicking and
dragging the pointer horizontally.
You can also customize a specific
size by typing into the appropriate
box.
11.Click “Next” to continue the
partitioning process.
Otros manuales para Data Safe III
1
Tabla de contenidos