philippi BTM2 Manual de usuario

Battery/Tank Monitor BTM2
philippi elektrische systeme gmbh www. philippi-online.de
Neckaraue 19 info@philippi-online.de
D-71686 Remseck am Neckar Tel: +49 (0)7146/8744-0
OPERATING INSTRUCTIONS
Battery/Tank Monitor BTM2
Thank you for purchasing the Battery / Tank Monitor BTM2.
This gives you one of the most advanced and accurate battery / tank monitors available on the
market.
Battery monitor:
You can see at a glance:
- the current state of charge
- charge and discharge currents
- the battery voltage
- the remaining operating time until the adjustable capacity alarm of the main battery
- the voltage of up to 2 additional batteries
- the currents of a solar system and the charger (optional)
and have the possibility
- connect a second shunt SHP to measure e.g. the current of the solar system.
- connect a philippi charger ACE to monitor the charging process.
- set an alarm when the capacity of the main battery falls below a threshold
- set an alarm when the voltage falls below or exceeds a threshold.
- connect the monitor to an NMEA 2000 network and display the battery and tank levels on the
plotter.
Tank monitor:
You can see at a glance
- the current fill levels of up to 4 tanks
and have the possibility to
- set an alarm threshold for each tank (full or empty alarm)

Battery/Tank Monitor BTM2
REV 1A - FEB 2022 - Software Version 1.xPage 2
1 General information
1.1 V purpose of use
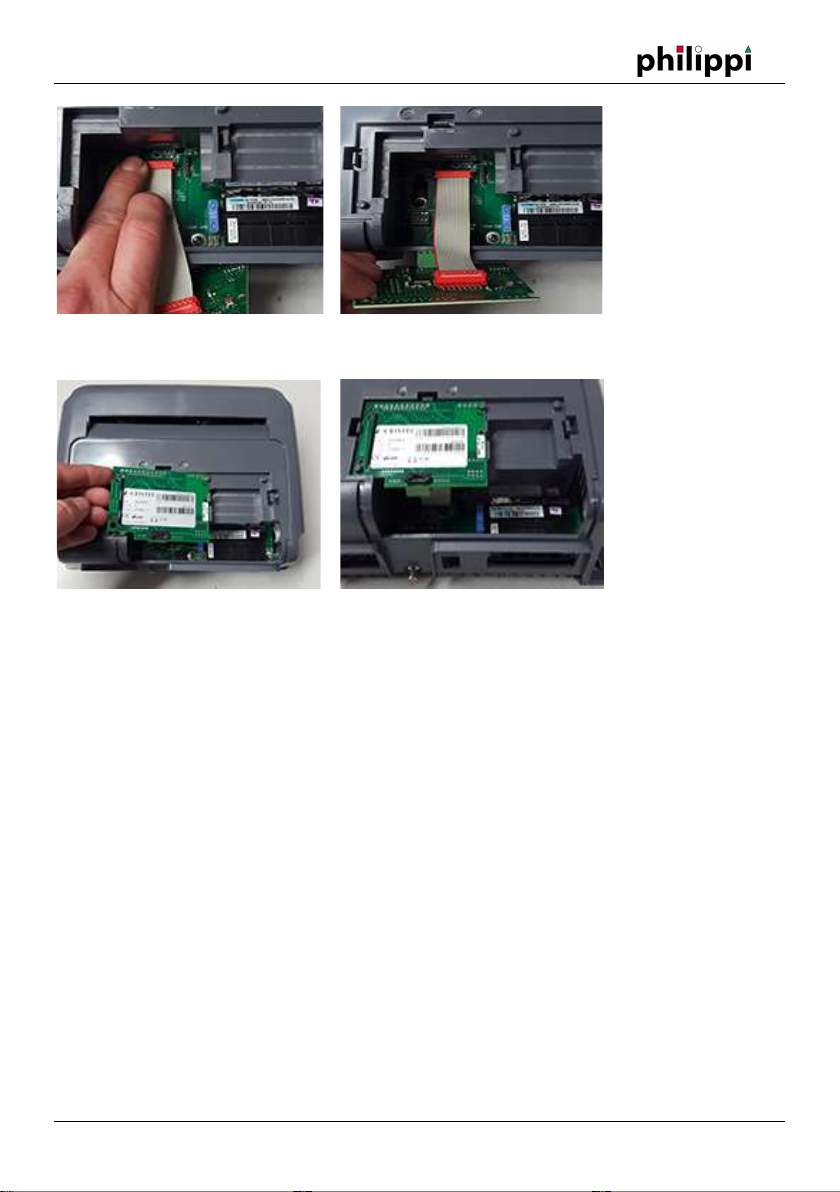
The battery/tank monitor BTM can only be operated in conjunction with the shunt SHE-348 on
extra-low voltage DC 8-32V. It is designed for use on yachts and may only be operated in enclosed
spaces protected from rain, moisture, dust and condensation. Never use the battery/tank monitor
in locations where there is a risk of explosion from gas or dust. The battery/tank monitor is not
suitable for outdoor installation.
1.2 L Scope of delivery
- Battery/Tank Monitor BTM2
- 3 Plug-in terminals (2x MVSTB 2.5- 3 and 1x 9-pole)
- 2 fuse holder ASH1 with fuse FSS 1A
- These operating instructions
Optional accessories (not included in the scope of delivery):
SHUNT SHE 348 for battery capacity detectionOrder no.: 0 7003 0348
SHUNT SHP 348 for solar power measurement Order no.: 0 7003 0351
Temperature sensor Temp-BT Order no.: 0 5900 3480
Battery charger interface ACE-LIN Order no.: 0 8000 4975
N2K cable for NMEA 2000 connection Order no.: 5 0411 1140
1.3 RECOMMENDED FUEL SENSORS (not included)
To measure the fill level, we recommend the immersion tube sensor of the TGT or TGW series for
fuel and fresh water as well as the ultrasonic sensor UTV for faeces tanks and the flow rate sensor
DFS (fresh water only). For deep tanks up to 200 cm and a very precise measurement, the pressure
sensor TDS200 (water/diesel/faeces) or TDW200 (water/faeces).
However, these sensors are not included in the scope of delivery.
Sensors from other manufacturers can also be connected. The display is configured to the
connected sensors in SETUP. Furthermore, an adjustment to the tank geometry is possible in order
to correctly display the actual tank content.
Please note: only with the DFS
flow sensors is the litre display accurate, as litres are also measured here. With all
other sensors, this is only a conversion of the measured fill level and, depending on the
sensor accuracy, can never be accurate to the litre!
Fresh water:
-Flow sensor (1x) DFS Order no.: 7 0003 0304
-immersion tube sensor TGW 200-800 Order no.: 6 6011 7xxx
-Pressure sensor TDN 200 / TDT 250 Order no.: 6 6025 1208
Petrol:

Battery/Tank Monitor BTM2
REV 1A - FEB 2022 - Software Version 1.xPage 3
-immersion tube sensor TGT 200-800 Order no.: 6 6011 7xxx
Diesel:
-immersion tube sensor TGT 200-800 Order no.: 6 6011 7xxx
-Pressure sensor TDS 200 / TDT 250 Order no.: 6 6026 1206
Grey water/ black water:
-Pressure sensor TDN 200 Order no.: 6 6025 1208
-Ultrasonic tank sensor UTV 20-80 Order no.: 7 0219 35xx
recommended accessories for
ultrasonic sensor:
-Sound guide tube UFT 40 (40cm long) Order no.: 7 0219 9400
-Sound guide tube UFT 80 (80cm long) Order no.: 7 0219 9800
-spacer ring UTS 25 (25mm high) Order no.: 7 0219 9025
-Fuse holder incl. fuse 1A for
measuring leads
ASH1A Order no.: 6 0030 3411
1.3 Warranty
Warranty is granted for a period of two years from the date of purchase. Defects due to
incorrect connection liquids leaking into the unit or oxidation due to condensation liquids leaking
into the unit or oxidation due to condensation
lightning strike excluded
Subsequent costs and natural wear and tear are not covered by the warranty.
When asserting claims under guarantee and warranty, a detailed description of the defect is
essential. Detailed information facilitates and accelerates processing. Please understand that we
cannot accept shipments that are sent to us freight collect.
1.4 Disclaimer
Compliance with the operating instructions as well as the conditions and methods during
installation, operation, use and maintenance of the battery/tank monitor BTM cannot be
monitored by philippi elektrische systeme gmbh. Therefore, we do not accept any responsibility or
liability for losses, damages or costs resulting from incorrect installation and improper operation.
1.5 Quality assurance
During production and assembly, the units undergo several checks and tests. Fabrication,
inspections and tests are carried out according to established protocols. Each unit has its own
serial number. Therefore, never remove the type plate. The assembly and testing of all units is
carried out entirely in our factory.
2 S ich safety instructions

Battery/Tank Monitor BTM2
REV 1A - FEB 2022 - Software Version 1.xPage 4
- No modifications may be made to the unit, otherwise the
CE mark
- The battery/tank monitor may only be connected by qualified electricians. -
Before connecting the battery/tank monitor, disconnect the battery leads.
- Ensure that the polarity of the batteries is correct!
- The power supply line to the monitor and shunt must be fused.
- This appliance is not intended for use by children.
These installation and operating instructions are part of the component delivery.
They must be kept in a safe place - important for later maintenance work - and
passed on to any subsequent owners of the unit.
3. Assembly and installation
3.1 Monitor
Mount the battery monitor in a protected,
dry and clearly visible place so that it can be
read at any time. The required mounting cut-
out is 85x85 mm, the required minimum
depth is 35mm. On the rear side there is a 3-
pole terminal for the power supply of the
monitor and the communication line to the
shunt SHE and SHP. The tank sensors are
connected via the 9-pole terminal. A
potential-free relay contact is available via
the 2-pole terminal.
A software update can be loaded onto the
monitor via a micro-SD card on the back.
The power supply to the monitor can be interrupted at any time without losing battery status data,
as this is stored in the SHE 348 shunt.
Therefore, the shunt SHE 348 should be permanently connected to the battery. If the monitor is
switched off, the shunt SHE goes into sleep mode and the current consumption of the shunt drops
to 2 mA. This is not a particular load on the battery. However, if the battery system remains
without charge for more than 3 months, the shunt should also be disconnected from the battery.
The following figure gives an overview of the connection of the monitor and the shunt SHE 348.

Battery/Tank Monitor BTM2
REV 1A - FEB 2022 - Software Version 1.xPage 5
The LIN bus connection between the monitor and the shunt is made via a 1-wire cable. This can
also be any or an existing cable. For mechanical reasons, the cable cross-section should be min.
1mm² and max. 1.5 mm².

Battery/Tank Monitor BTM2
REV 1A - FEB 2022 - Software Version 1.xPage 6
3.2 Shunt SHE for battery monitoring
Mount the shunt SHE 348 in a protected, dry place as close as possible to the battery. The shunt
must be connected in the MINUS path of the battery.
Install the active shunt SHE 348 as close as possible to the service battery. However, avoid the
shunt making contact with the positive - terminal of the batteries. Connect the side of the shunt
marked B- to the negative terminal of the main battery using a short, thick cable (35-70 mm²).
Connect the negative terminal of up to two starter batteries to the side of the shunt marked V-.
Note: If the main battery consists of several batteries connected in parallel, their common negative
terminal must be connected to the side of the shunt marked B-. The negative cables of the starter
batteries are connected to the other side (V-) of the shunt. We recommend that all negative
connections of the consumers, charging devices and the negative terminals of the starter batteries
are combined on a ground busbar and that a short cable is laid from there to the V- connection of
the shunt.- Connect the measuring lead of the shunt to the positive terminal of the main battery
via an inline fuse holder (1A). This line measures the voltage of the main battery and
simultaneously supplies the shunt with current.
It is important that no other cables are connected between the B- terminal and the
battery MINUS terminal, otherwise not all currents will be detected and the battery
management system will not work. All cables of the vehicle electrical system
including the connection cable to the starter battery must be connected to the V
side of the shunt SHE 348.
After applying the operating voltage to pin +1, the shunt goes into operation and indicates the
operating status via the integrated LED:
- Rapid flashing during firmware update of the shunt SHX
- Flashing every 1 sec. Normal operation
- Flashing every 5 sec. Sleep mode (power saving mode) when monitor off
The following connections are available on the shunt at the 5-pin connector:
Consumers, charging sources, starter
batteries
Monitored battery group

Battery/Tank Monitor BTM2
REV 1A - FEB 2022 - Software Version 1.xPage 7
1: Battery voltage measuring lead (+1) and at the same time power supply for shunt
This line is absolutely necessary for the function of the shunt and should only be disconnected
during winter storage to enable a complete recording of the battery capacity. Due to the very low
current consumption in sleep mode, the shunt does not place any additional load on the battery.
2: Voltage (+2) second battery group
Optional connection of a voltage measurement of a second battery group (starter battery), this is
then displayed as a second battery group on the monitor.
3: T-: Minus temperature sensor (brown wire) T+: Plus temperature sensor (blue wire)
Optional temperature sensor (Temp-BT) for recording the battery temperature. The temperature
sensor should be fixed to the outside of the battery housing. The temperature sensor has no active
influence on the capacity calculation or charging, but is only used for information.
4: LIN bus communication with display
The BLS monitor communicates with the SHE 348 shunt and the ACE charger via this line.
3.3 Shunt SHP for current measurement
Mount the optional shunt SHP for measuring the solar current or similar in a protected, dry
location as close as possible to the battery. The shunt must be connected in the MINUS path of the
solar system.
Connect the negative pole of the solar system to the side of the shunt marked V-.
The following connections are available on the shunt at the 5-pin connector:
1: Battery voltage measuring lead (+1) and at the same time power supply for shunt
This line is absolutely necessary for the function of the shunt and can be disconnected at any time
when the monitor is switched off.
4: LIN bus communication with display
The BTM2 monitor communicates with the SHP shunt via this line. This line can be realised with
any cable, preferably with 1 mm² cross-section.
3.4 Interface ACE-LIN (optional accessory)
To communicate the BTM2 monitor with an ACE series charger, an ACE-LIN interface must be
inserted into the ACE charger. For the models ACE 12/60 and ACE 24/30, the integrated monitor
must be removed and replaced with the interface ACE-LIN.
Removing the front charger cover and preparing the cable gland

Battery/Tank Monitor BTM2
REV 1A - FEB 2022 - Software Version 1.xPage 8
Remove the cover Break out the metal tongue with flat-nose pliers
Inserting the rubber cable grommet Inserting the cover and the cable.
Inserting the interface board ACE-LIN
Make sure that the ACE charger is disconnected from the
AC mains before starting work.
After removing the front cover, the setting of the DIP switches must be adjusted for operation with
the CAE-LIN interface.
The ACE chargers are equipped with DIP switches to adjust the charging
characteristic individually to the batteries. Only if the DIP switches of the
charger are set to ABCD = "1111", the charging characteristic can be adjusted
from the monitor BLS. Then it is also possible to set a user-defined
characteristic curve. Otherwise, the characteristic curve set via the DIP switches
applies.
For the electrical connection of the interface board, the 16-pin connector of the ribbon cable must
be plugged into the matching red connector on the main board of the charger ACE.

Battery/Tank Monitor BTM2
REV 1A - FEB 2022 - Software Version 1.xPage 9
The interface board is held in place by three plastic clips on the housing.
Wiring LIN line to monitor BLS / shunt SHE
The communication connection "LIN" of the interface ACE-LIN is connected to the connection "LIN"
of the shunt SHE 348 and the monitor BLS via a 1-wire connection cable. This can be decided
according to the local installation conditions. The order of the units on the "LIN" line is irrelevant.
Since the "LIN" connection on the ACE-LIN interface is duplicated, it is advisable to lay one LIN line
from the monitor to the charger and the other from the charger to the shunt. The ideal conductor
cross-section for the "LIN" cable is 1mm².
IMPORTANT: The monitor, the shunt and the charger must have the same negative potential, i.e.
be connected to a common negative point (battery negative).

Battery/Tank Monitor BTM2
REV 1A - FEB 2022 - Software Version 1.xPage 10
3.5 Electrical connection tank sensor
Up to four tanks can be monitored
simultaneously.
However, if fewer tanks are monitored, the
first tank sensor is connected starting at
connection TG 1 (e.g. with 2 tank sensors,
only connections TG 1 and TG 2 are used).
Resistance sensor (e.g. TGT/TGW) and active
tank sensor (e.g. pressure probe TDS) can be
connected in mixed form.
The connection is made according to the
adjacent diagram
A flow sensor DFS can only be connected to
DFS (DFS + /Minus/DFS S)!
ATTENTION: If
the power supply (red line) of the ultrasonic
tank sensor is not via the BTM, but directly
via the DC on-board power supply, the supply
line must be protected with a 1A fuse!
The minus lines of the tank sensor must be
connected to the minus (-) terminal to avoid
incorrect measurements.
4. settings on the monitor
To access the settings, press the cogwheel symbol in the main screen at the bottom
centre.
4.1 Password protection (PIN) of the Setup
menu
Afterwards, you will be asked to enter the PIN, which is "1234"
by default.
After successful entry with subsequent confirmation
"OK" takes you to the settings menu.
Tabla de contenidos
Otros manuales de Monitor de philippi


