NewLine TC-51D Manual de usuario

Manual
FULL HD VISUALIZER
Model: TC-51D
- 1 -
Please follow these precautions:
1.To prevent fire or shock hazard, do not expose the unit and power adapter to rain or
moisture.
2.To prevent electrical shock, do not open the cabinet. Refer to qualified personnel for
service only.
3.Do not use the unit continuously for more than 24 hours with camera auto focus on. It
may cause damage to the camera lens.
4.Be careful not to spill water or other liquids onto the unit, or allow combustible or metallic
objects to get inside the cabinet.
5.Unplug the AC power cord from the wall outlet when it is not in use for an extended period of
time.
6.Clean cabinet with a soft cloth lightly moistened with a mild detergent.
7.Clean lens carefully with an air spray or soft dry cloth to avoid scratching.
8.Do not use accessory power adapter and power cord to other equipment, they are
special for this product.
9.Avoid interchanging arm lights and back light frequently.
10.Remove the camera lens cap before power the unit on.
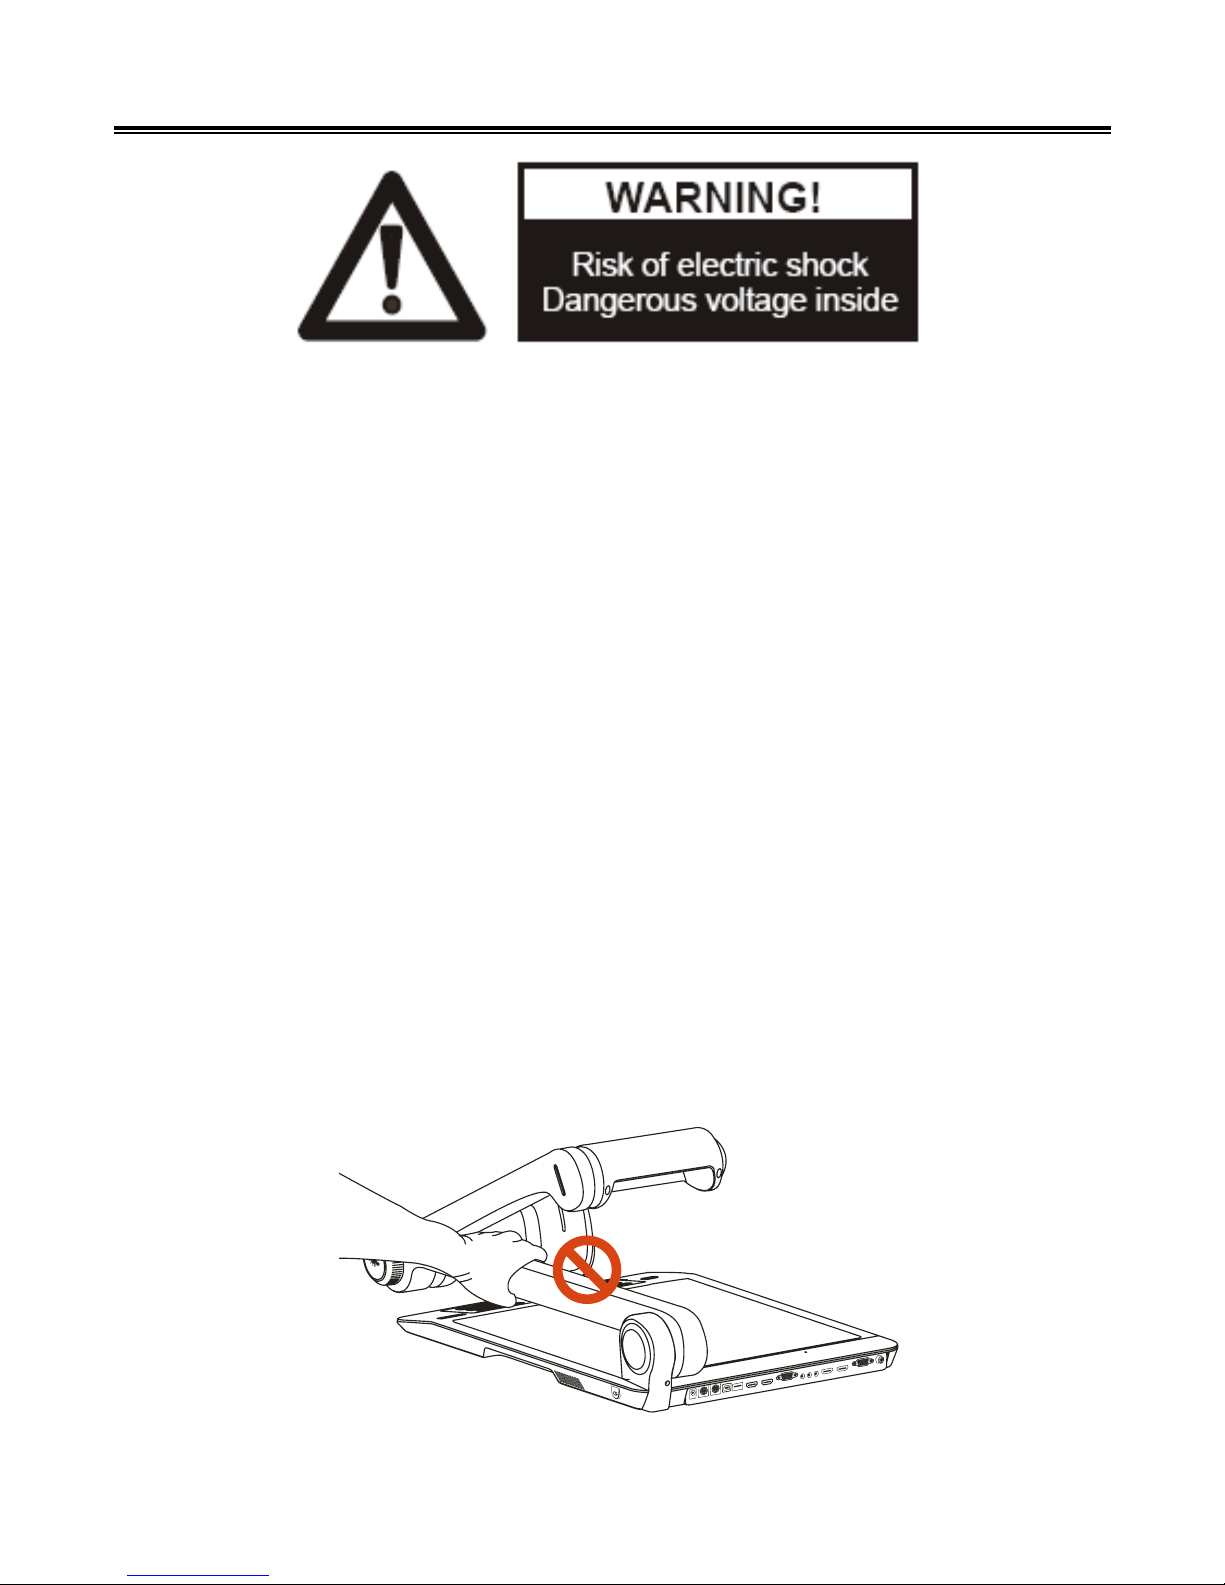
11.To prevent injury, do not put your hand between Lamp Arm and Camera Arm.
Precautions

- 2 -
Contents
Precautions
Contents
Understand the Visualizer
Control Panel
Remote Control
Basic Preparations
Making Connections
System diagram 8
Connect power source 8
Connect to a projector 9
Connect to a desktop computer 9
Connect USB 10
Connect a Wireless Tablet 11
Connect VIDEO OUT 11
Connect to an external microphone 12
Menu Operating Instructions
Operation the Visualizer by tool bar 13
Setting the Visualizer 13
Basic Operation
PAL/NTSC video outputs 14
Working on the stage 14
Working outside the stage 14
Light 15
Working with negatives 15
Focusing 15
Freezing image 16
Brightness adjustment 16
White balance adjustment 16
1
2
4
5
6
7
8
14
13

- 3 -
Auto adjustment 16
Text/image mode 16
Color and b&w mode switch 16
HDMI/VGA/CAM inputs 16
Projector on/standby 16
Projector inputs selection 17
Image rotation 17
Image reversion 17
Infrared remote control 17
Installing Visualizer software 17
USB Port
USB image/video capture 18
Controlling Visualizer by computer 18
Controlling Projector by Visualizer
Folding the Unit
Trouble Shooting
Specifications
25
24
23
18
19

- 4 -
Understand the Visualizer
Knowing the parts
2
5
1
3
4
6
7
Arm Lamp Brightness Control
Arm Lamp
Zoom In/Zoom Out
Camera Head
IR Receive Area
Built-in MIC
SD Card Slot
11
10
13
12
14
8
9
Work Stage
Pilot Light
Control Panel
LCD
Anti-theft Slot
Connection Panel
Camera Stand
2
5
1
3
4
6
7
1110 13
12
14
89
2
5
1
3
4
6
7
1110 13
12
14
89

- 5 -
Control Panel
Button Operation Instruction
Button Function
Power on Visualizer (Press and hold 3 seconds to turn off).
Capture a still image and save in RAM or SD Card (Default).
Record a video clip and save in SD Card ( Press it again to stop recording).
Power on Projector (Press and hold 3 seconds to turn off).
Re-display stored images and videos.
Freeze the image (Press again to unfreeze).
Select Projector output signal.
Select Visualizer output signal.
Flip the current image (Press again to normal).
Rotation the image 0°, 90°, 180°, 270°.
To show or hide the tool bar.
To auto adjust brightness, auto white balance and auto focus.
Move the cursor Left/Focus far.
Move the cursor Right/Focus near.
Move the cursor Up.
Move the cursor Down.
Confirm key.
Switch between XGA, SXGA, WXGA, 720P and 1080P.
Control the arm lamp and back lamp on/off.

- 6 -
Remote Control
Power on Visualizer (Press
and hold 3 seconds to turn
off)
To auto adjust brightness,
auto white balance and
auto focus
Setting the Visualizer
Select Visualizer output
signal
Select and confirm key
Capture a still image and
save in RAM or SD Card
(Default)
To show or hide the tool bar
Record a video clip and
save in SD Card ( Press
again to stop recording)
Freeze the image (Press
again to unfreeze)
Re-display stored images
and videos
Increase the arm lamp
brightness
Decrease the arm lamp
brightness
Control the arm lamp and
back lamp on/off
Zoom In
Zoom Out
Flip the current image
(Press again to normal)
Move the image up
Move the image down
Rotation the image
0°,90°,180°,270°
Power on Projector (Press
and hold 3 seconds to turn
off)
Select Projector output
signal
Switch between
XGA,SXGA,WXGA,720P and
1080P
OK

- 7 -
Basic Preparations
Set up Visualizer
1.Place one hand firmly on the base of the Visualizer, while carefully lifting up the
camera stand using the other hand.
2.Set up arm lamp and camera head to desired position.

- 8 -
Making Connections
Before making any connection, please ensure that the Visualizer along with all other
equipment to be connected are turned off.
● System diagram
● Connect power source
Plug in the power adapter to the device DC 12V IN power socket first and then connect
the AC power cord to a stand 100V~240V AC power source.
1. The type of power adapter is depending on your countries/regions.
2. Be sure to use the power adapter come with the machine.
3. No wet hands to touch the plug.
4. Be sure to plug the power adapter and AC cord in place.

- 9 -
● Connect to a projector
Connect the HDMI OUT 2 port to the projector's HDMI IN port using the HDMI cable.
You can also control a projector using the controls on the Visualizer by connecting the
projector to the Visualizer using a 6Pins-9Pins RS232 cable.
● Connect to a desktop computer
Mode 1: Connect VGA cable and audio cable
1. Use VGA cable to connect VGA IN port on the Visualizer to the VGA OUT port on
the computer.
2. Use Audio cable to connect AUDIO IN port on the Visualizer to the AUDIO OUT port
on the computer.
3. Use Audio cable to connect AUDIO OUT port on the Visualizer to the amplifier.
Note: 1.You can also connect the VGA OUT port to the projector's RGB IN port using the
RGB cable.
2.The HDMI OUT 1 always output HDMI IN 1 signal.
Tabla de contenidos


