Neway CL7677 Manual de usuario

COLOR TFT LCD MONITOR
User Manual

General Information
Thank you for choosing our TFT LCD (liquid crystal display) monitor. This product
employs integrate circuits, low power consumption, and no radiation emission. It has
fashion designed appearance and good portability. The TFT LCD screen is the most
suitable display for VGA, VCD, DVD, and GPS on vehicles or vessels. Moreover,
this product is able to be used in office, at home, or other proper positions. Please
enjoy the benefits of convenience, safety, and space-saving from this TFT LCD
monitor in different ways.
To ensure the best use of this product, please read this manual carefully
beforehand.
CAUTIONS
1. Please use the adapter attached in the accessories.
2. Please do NOT expose this product to direct sunlight, heat, or humid
conditions.
3. Please keep away from strong light while using this product in order to obtain
the clearest and the most colorful pictures.
4. Please avoid heavy impact or drop onto the ground.
5. Please do NOT use chemical solutions to clean this product. Please wipe with a
clean soft cloth to maintain the brightness of the surface.
6. Please follow the instructions and trouble-shootings to adjust the product. Other
improper adjustment may result in damage. Any further adjustment must be
performed or conducted by a qualified technician.
7. Please unplug the power and remove the battery if long-term no-use, or thunder
weather.

Table of Contents
1. PRODUCT DESCRIPTION -----------------------------------------
2. REMOTE CONTROL-------------------------------------------------
3. POWER SOURCE ----------------------------------------------------
4. BATTERY INSTRUCTION-----------------------------------------
5. SETTING MENU -------------------------------------------------
6. ACCESSORIES --------------------------------------------------------
7. PARAMETER ----------------------------------------------------------
8. TROUBLESHOOTING ----------------------------------------------
9. REMARK---------------------------------------------------------------
1
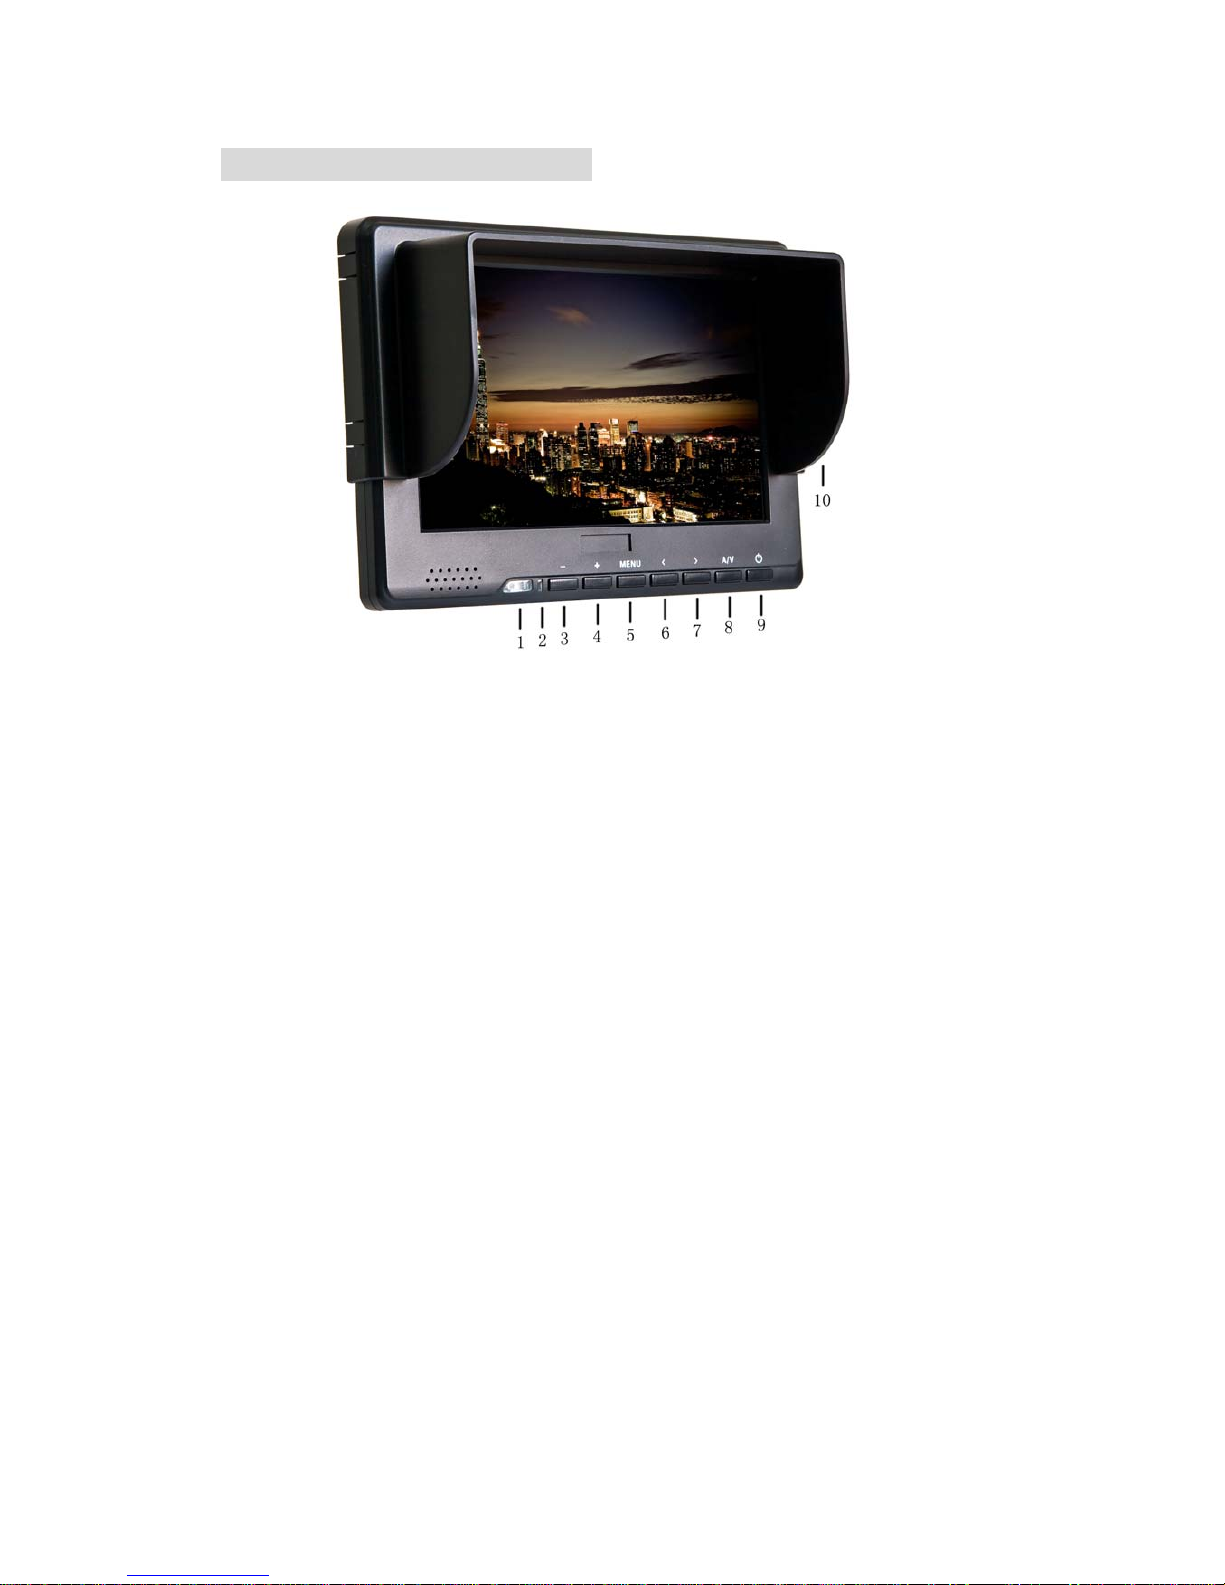
1. PRODUCT DESCRIPTION
1.Infrared signal receiver (work with remote controller)
2.Battery indicator light: red while standby; green while working
3.–: Volume down, or value down while using menu setting functions
4.+: Volume up, or value up while using menu setting functions
5.MENU:To activate OSD (on-screen display) menu; long press to zoom
in/out pictures automatically when receiving HDMI (High-Definition
Multimedia Interface) signals
6.<: Selection key, to select items on OSD menu.
7.>: Selection key, to select items on OSD menu. Press to adjust brightness
among 6 levels.
8.A/V: circularly switch among HDMI, YPbPr, Video 1, Video 2, and SDI
(optional).
9.Power ON/OFF switch.
10.Sun shade.

2
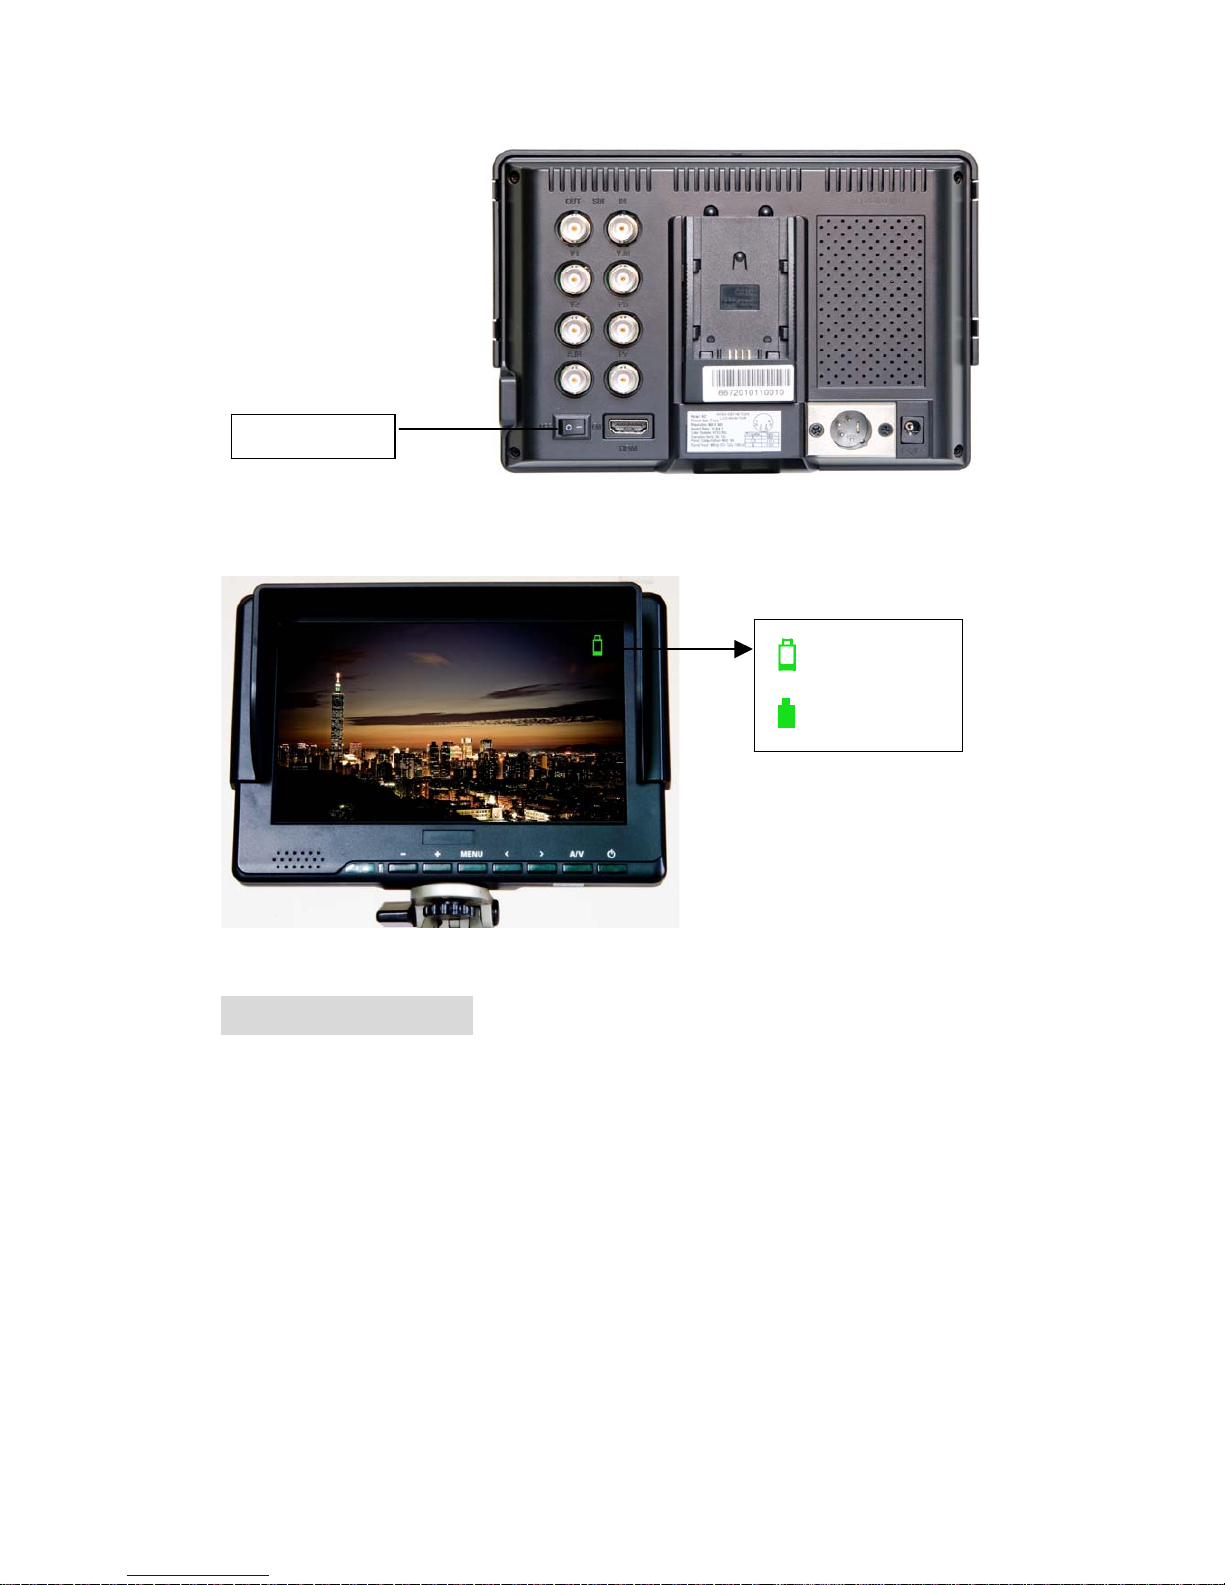
11.Mounting socket (right side)
12.SDI (Serial Digital Interface) signal input
13.SDI signal output
14.Y signal input
15.Video 1 signal input
16.Pb signal input
17.Video 2 signal inpu
18.Pr signal input
19.Audio signal input
20.Battery power on/off switch

3
21.HDMI (High Definition Multimedia Interface) signal input
22.4-pin XLR DC power input
23.DC power input
24.Battery slot
25.Mounting socket (bottom)
2. REMOTE CONTROLLER
1.Power
2.Mute button
3.Display switch among HDMI、YPbPr、Video 1, Video 2, and SDI
(optional, must with necessary equipment) circularly
4.MENU: enter menu function setting
5.▲: Up move; or change brightness among 6 levels
6.▼: Down move
7.◄: Left move; or volume down; or increase the function values in
menu settings
8.►: Right move; or volume up; or decrease the function values in
menu settings

4
3. POWER SOURCES
This product package comes with a 12V/1.5A DC adapter plug in to the DC
power input (See PRODUCT DESCRIPTION 23).
Another option of power source is using batteries. The product package comes
with two types of batter slots (See BATTERY INSTRUCTION). The recommended
batteries are Panasonic DU21 and Sony QM91D.
Also, this product is capable to use the power from your camcorder via the 4-pin
XLR interface (See PRODUCT DESCRIPTION 22).
4. BATTERY INSTRUCTION
1.Battery slot and battery
The included two battery slots available for two types of batteries (See the
pictures below).
Picture: two types of battery slots
Picture: two types of batteries corresponding to the upper two slots
2.Battery power control
The battery switch controls whether to use battery power or not. Keep off while not
using battery.
Suggestion: Better take off the battery for long-time not using this product.
5
2.Battery volume
An icon of battery volume displays on the screen while using battery as power source.
5. SETTING MENU
Before setting the menu functions, please make sure the device is connected correctly.
When power on, press MENU on the device (See PRODUCT DESCRIPTION 5) or
on the remote controller (See REMOTE CONTROLLER 4). The menu of function
setting will display on the screen.
Press >/< buttons on the device or ▼/▲buttons on the remote controller to select
items on the left of the display. Then press + / – buttons on the device or ►/◄buttons
on the remote controller to change the values.
The following pictures are the setting displays of different modes.
1.OSD YPbPr/HDMI/SDI setting menu
20. Battery Switch
Battery power low
Battery power full

6
Picture: YPbPr/HDMI/SDI setting screen
2.OSD AV setting menu (Video 1/Video 2)
The auto-detected AV format displays at the bottom of the screen.
Picture: AV setting screen
3.Miscellaneous setting menu under YPbPr/HDMI/SDI modes, enter via
item to a new page.
Picture: Miscellaneous setting screen

7
4.Icon description:
Icon Name Function
Brightness Adjust the level of brightness
Contrast Adjust the level of contrast
Saturation Adjust the level of saturation
Tint Adjust the tint of image
OSD H-Position Adjust the on-screen-display horizontally
OSD V-Position Adjust the on-screen-display vertically
Reset Select “Yes” to reset the adjustment as
manufacture parameters.
Color temperature Choose the color temperature. Options:
User, 6500ºK, 7500 ºK, or 9300 ºK.
Red
Green
Blue
Note: Only can available under “User”
mode to meet the color value you need.
Language Choose language between English and
Chinese
Miscellaneous Enter to next page (See picture below) for
miscellaneous selections
Exit OSD Select “Exit” to quit the on-screen-display
menu.
Picture over-turn
horizontally
Horizontally over-turn picture to left or
right.
Picture over-turn
vertically
Vertically over-turn picture up or down.
Display mode Shift display mode between 4:3 and 16:9.
Sharpness Adjust the sharpness of picture
OSD Duration Adjust the display duration of OSD from
5-100 seconds.
Tabla de contenidos
Otros manuales de Monitor de Neway


