Lightware L-1020 Manual de usuario

1
Lightware L-1020 Projector User’s Guide
Thischapterwillexplaintheset-upandconnectionproceduresforyour
projector, including information pertainingtobasicadjustmentsand
interfacingwithperipheralequipment.
Getting Started
Insert the power cord into the AC input socket of your projector, as
shown in Figure 1. Connect the other end of the power cord to an AC
outlet.
Upon connecting to power, the projector will enter the
Live State*
the
Lamp Age LED, the Lamp Status LED and the Power On/Standby LED
will flash on then off then on again. The fan will turn on and the lamp
will light. During this time the projector keypad and the remote control
will be inactive. After approximately 12 seconds the remote control
and the projector keypad will become active and all projector functions
will become accessible.
*For an explanation of the projectors operational states see page A-4 in
theappendix.
Powering Up The Projector
Figure1:PowerConnection

2Lightware L-1020 Projector User’s Guide
Set the resolution of your computer display to XGA (1024x768) or
lower.
DisconnectthePCmonitorcablefrom the computer monitor output
connectionon yourcomputer.
Connect the supplied 15 pinVGA signal cable to your projector
ComputerIn
connectoras shown in figure 2.
Connect the other end of the cable to the monitor output connection of
yourcomputer.
Note: If you wish to view your computer and projected images
simultaneously,usethe 15-pin HD gender changer toconnect
the computer monitor cable to the projector
Monitor Out
connector.
Connecting to an IBM Compatible Desktop PC.
GettingStarted
Figure2:PC Desktop Connection
Monitor Loop Through
Connector
ComputerIn

3
Lightware L-1020 Projector User’s Guide
Connecting to an IBM Compatible Laptop PC
Set the resolution of your laptop display to XGA (1024x768) or lower.
Connect the supplied 15 pinVGA signal cable to your projector
Computer In
asshowninfigure3.
Connect the other end of the cable to the external monitor output
connectorofyourcomputer.
Activate the laptop’s external monitor (VGA) port. This is usually
accomplished using the Fn key in conjunction with one of the function
keys (Fn+F4 for example).
Note: See page A-15 in the appendix for a list of laptop manufacturers
and the methods they use to activate the laptop’s external
monitorport.
Figure3: PC LaptopConnection
ComputerIn

4Lightware L-1020 Projector User’s Guide
GettingStarted
Connecting to a Mac Desktop Computer
If your Mac has a separateVGA output port, connect the supplied 15
pinVGA cable to that output port and connect the other end of the
VGA cable to the
Monitor In
connector on the projector.
In the Mac O/S control panel, set the mirroring option to ON and
designate the external monitor as the active monitor. For more
informationonthe mirroring function see page A-13intheappendix.
If your Mac does not have a separateVGA output port, then discon-
nect the monitor cable from the computer monitor output connector
andconnectthe Mac adapter (available upon request)tothemonitor
output connector on the computer as shown in figure 4. Connect the
suppliedVGA cable to the output side of the Mac adapter. Set the dip
switches on the Mac adapter to match the output requirements of your
Mac. See page A-11 in the appendix for help in setting the dip
switches.
Note: If you wish to view your computer and projected images simulta-
neously,youcan use the built-inmonitor loop-through connec-
tion of the projector to connect to your Mac monitor.Connect
theMac loop-through adapter (availableuponrequest) to the
projector
MonitorOut
connector. Connect yourMac monitor
cableto the output side of the loop-through adapter.
Figure4:Mac Desktop Connection
Monitor Out Connector
ComputerIn

5
Lightware L-1020 Projector User’s Guide
Connectthe Mac adapter (availableuponrequest*) to the laptop
external monitor output port. Connect the suppliedVGA cable to the
output side of the Mac adapter shown in figure 5. Connect the other
end of theVGA cable to the L-1020
Monitor In
connector.Set the dip
switches on the Mac adapter to match the output requirements of
your Mac. See page A-11 in the appendix for help in setting the dip
switches.
Differentmodelsof Mac Computers havedifferentrequirementsfor
using an external monitor. For more information on connecting to an
externalmonitoror projector see page A13 intheappendix.
Connecting to a Mac Laptop Computer
*To request a Mac adapter, call Lightware technical support at
1-800-445-9396.
ComputerIn
Figure5:Mac Laptop Connection

6Lightware L-1020 Projector User’s Guide
GettingStarted
Thereareseparate audioinputconnections forcomputer andVCRon
yourLightwareL-1020.
To connect to your computer audio output, plug one end of the sup-
pliedstereo-audio cable (3.5mm maleconnectorson each end) into
the audio output jack of your desktop computer or the speaker output
jack of your laptop. Connect the other end of the stereo audio cable to
the computer
Audio In
jack of the Lightware L-1020 as shown in figure
6.
TheL-1020has the capability of providing anaudiosignalto powered
external speakers via the 3.5mm
Audio Out
jack.
Connecting to Computer Audio
Figure6:Audio Connection
Audio in
Audio Out

7
Lightware L-1020 Projector User’s Guide
The L-1020 accepts both composite video and S-video inputs from a
video player as well as stereo audio inputs.
Usethe three wire compositevideo/stereo-audiocable, shipped with
your projector, to connect to your video player video and audio outputs
as shown in figure 7. The color coded red and white connectors are for
audioandthe yellow connector isforcompositevideo.
If you are using an S-video source instead of composite, the compos-
itevideocablewillremainunused,asshowninfigure8.
Connecting to a Video Player
Figure 7:Audio /Video Connections
Figure8: S-videoConnection
S-Video Cable
Unused Video Cable

8Lightware L-1020 Projector User’s Guide
Connecting the Remote Mouse
To control yourcomputermousefromtheprojector’sremotecontrol,
usethe followingprocedure:
1. Turn off your computer.
2. Disconnect the standard mouse from the mouse port on your
computer.
3. Connect the remote mouse interface cable between the 9 pin DIN
oftheprojector and the appropriate mouse connector(serial,PS2,
ADB) on your computer, as shown in figure 9.
4. Make sure that your projector is connected to power and then
powerup yourcomputer.
For most applications the above procedure is all that is required. If
youareencountering difficulty, please referto
ConfiguringYour
RemoteMouse
onpageA-8 in the appendix.
Note:ADB adapters for Macintoshcomputersare available upon
requestat no charge. Contact yourdealeror Lightware at 1-800-
445-9396.
Figure9: Remote MouseConnection
GettingStarted

9
Lightware L-1020 Projector User’s Guide
Powering up the Projector
Besuretheprojectorisproperlyconnectedtopowerandtheprojector
is in the
Sleep
state
*.
Press the
Power On/Standby
button and the projector will enter the
Live
state
*
with the lamp on and the fan at high speed. (The lamp
takes approximately 30 seconds to reach full brightness.)
The projector uses a group of default settings at startup. These
default settings can be modified through choices made in the menus.
Seepage17
Menus.
Thedefault settingsprovidean on-screenStartuplogo forthefirst five
seconds and then select the data input source. If no data source is
present the projector will select a video player input source. If no
input source is detected, the image projected will default to the Startup
logo. If no Startup logo was selected in the features menu then the
screen will be blank.
Caution: Ultra High Pressure lamps need to be in a stable condition
prior to turning them on or off. To protect the lamp and the
projector,Lightware has designed protective delays into the
power up and power down circuitry. After first turning on the
lamp, a 30 second timer prevents prematurely turning it off. After
turning off the lamp, a 60 second timer prevents turning it on
prematurely. Please do not attempt to bypass these delays.
*for more information on the operational states of the L-1020, see
OperationalStates
onpageA-4 in the appendix.
Tip:
If you are connected to a laptop and are not projecting an image you
may have not properly activated the external video output port. See
Laptop External Video Port Activation on page A-15 in the appen-
dix
.
This chapter describes how to operate your projector. It includes informa-
tion on how to adjust the projector, use the remote control, and how to
access and use the on-screen menus.
Operating the Projector
10 Lightware L-1020 Projector User’s Guide
OperatingtheProjector
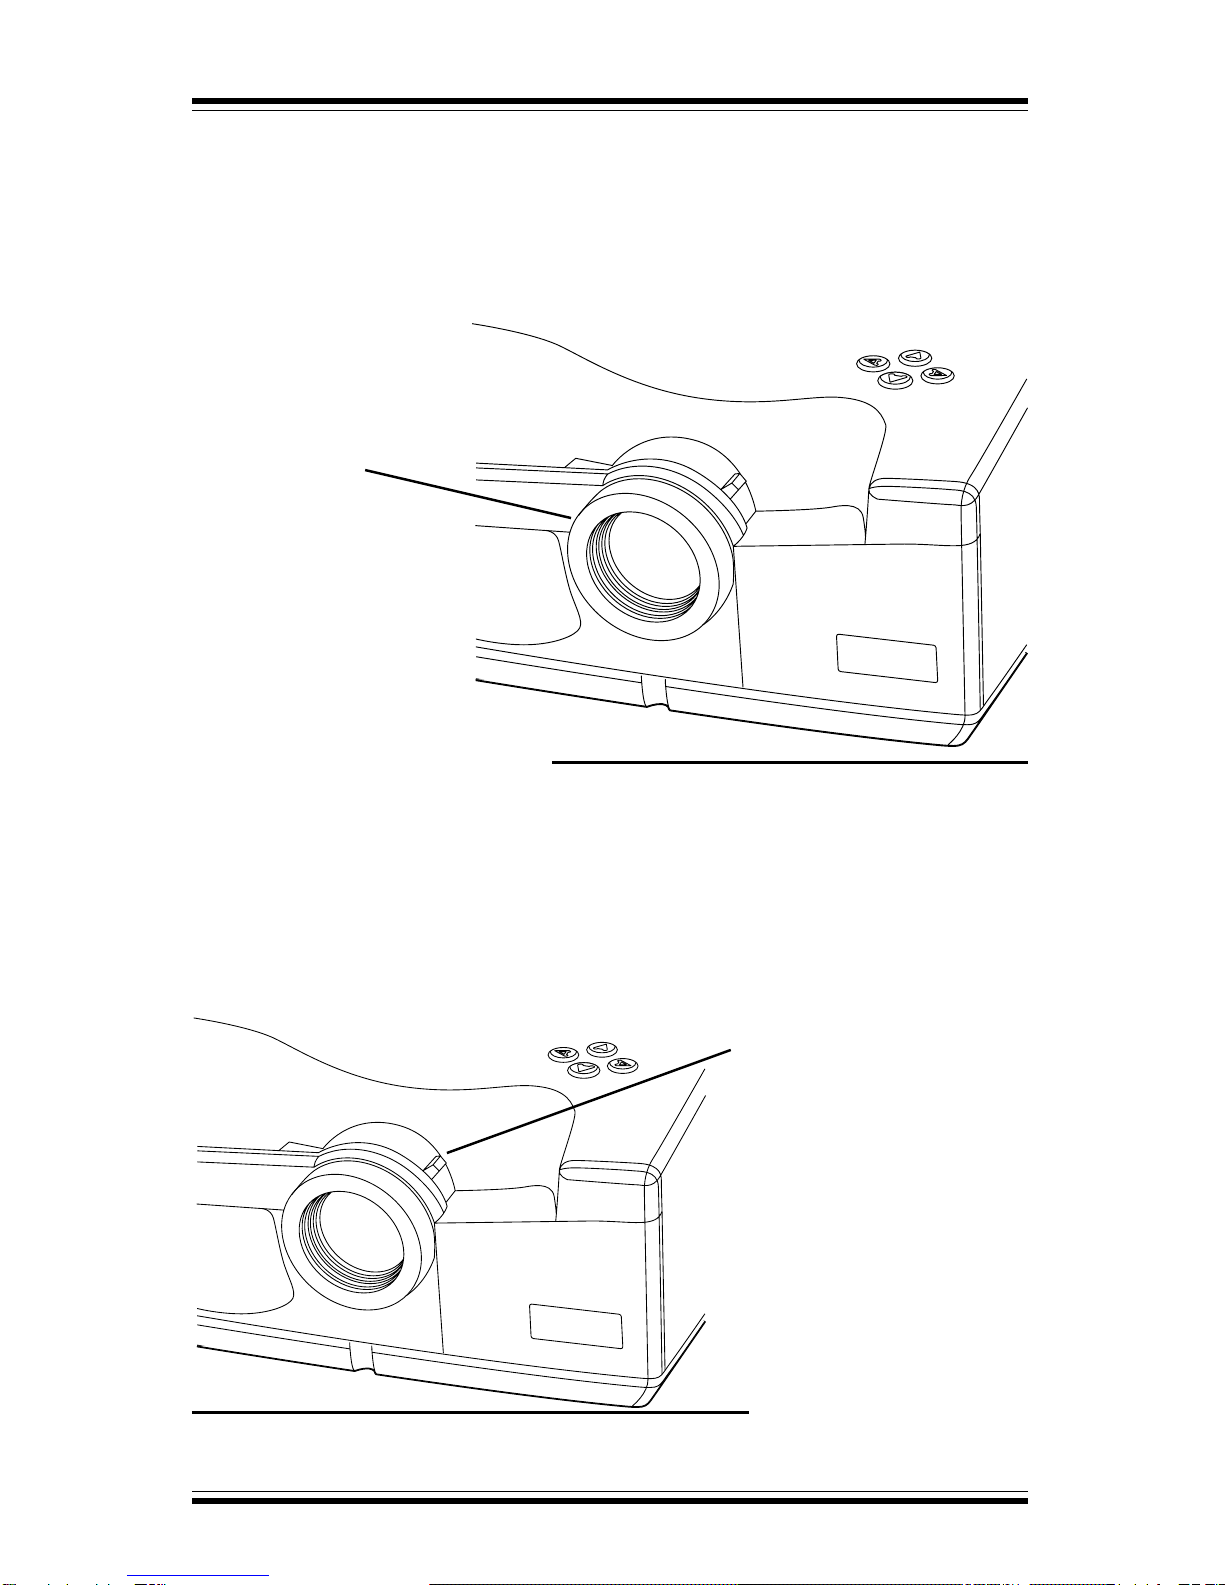
Adjusting Focus
To adjust focus, rotate the focus ring, as shown in figure 10, until the
image is clear.
Adjusting Image Size
To adjust the size of the projected image, move the zoom ring tab,
shown in figure 11, until the image is the desired size. For a chart
showing distance to screen vs image size refer to page A-21 in the
appendix.
Figure 10: Focus Adjust
Figure 11: Image Size Adjust
Zoom Ring Tab
Focus Ring
Tabla de contenidos
Otros manuales de Proyector de Lightware


