Kubo 9.7 Manual de usuario


2
Instruction Manual
Dear client,
Thank you for purchasing this product.
The quality of this appliance has been certied by several laboratory tests. This instruc-
tion manual is provided to simplify the use of the appliance. The instructions guarantee
quick and safe use.
Please read the instructions and safety measures described in this manual carefully.
We wish our clients great satisfaction in using their new appliance.
Index
1. Safety Instructions 3
1.1. Power Energy 4
1.2. Power Cord and Other Cables 4
1.3. Humidity and Water 4
1.4. Cleaning 4
1.5. General Precautions 4
2. Use and operation 5
2.1. Shapes and Keys 5
2.2. Button description and application 6
2.3. Desktop 7
2.4. App interface introduction 9
2.5. Upgrade Player Driver 14
2.6. Common troubleshooting 15
3. Specications 16
4. Aftermarket 17
5. Environment Conservation 17

3
1. Safety Instructions
WARNING
RISK OF ELECTRIC SHOCK
DO NOT OPEN
Warning: to avoid the risk of electric shock, do not remove the cover. The interior does not
contain any parts that can be repaired by the user. Ask for assistance by qualied personnel.
Important Warnings
Before using your appliance read this instruction manual carefully and keep it in a safe
place as you may need to consult it in the future.
Before powering on your appliance, and to ensure correct use, do not use it if:
• It has fallen on the ground;
• You notice any evidence of damage;
• Any anomaly occurs during its operation.
To avoid hazards and deterioration of your appliance through incorrect use it is advisable
to read the instructions carefully and attentively.
Your appliance must not be used for other purposes than those described in the instruc-
tion manual. Safety is only guaranteed for household use and not for commercial use.
Incorrect use is not covered and automatically voids the warranty.
Assistance
If there is a malfunction take your appliance to a qualied technician for assistance.
This appliance can be used by children from the age of 8 years
old and by persons with reduced physical, sensory or mental
capabilities or lack of experience and knowledge if they have
been given instruction in using the appliance safely and if they
understand the hazards involved. Children must not play with
the appliance. Cleaning and maintenance must not be carried
out by children without supervision.
These instructions are also available on www.suporteworten.pt

4
1.1 Power Supply
Make sure the mains voltage is compatible with the appliance voltage. If this is not the
case consult the vendor or Customer Support Service.
1.2. Power Cord and Other Cables
Turn off the device when not in use.
Do not roll up or pull the cord to disconnect the appliance, and do not use it to twine the
appliance. Keep the cord away from warm surfaces.
Never use the appliance if it has a damaged cable or socket, or if it is not working properly.
If the power cord is damaged, do not use your appliance. Take it to technical assistance
for replacement.
1.3. Humidity and Water
Do not use your appliance in humid places. Do not allow the appliance to become
wet under any circumstances as this may be dangerous. TO AVOID FIRE HAZARD OR
ELECTRIC SHOCK DO NOT EXPOSE YOUR APPLIANCE TO HUMIDITY OR WATER. Do not
place your appliance under water (for example to wash it).
1.4. Cleaning
Before cleaning make sure the appliance is powered off and the plug is disconnected
from the mains power supply.
Always allow the unit to cool down before cleaning.
1.5. General Precautions
• Do not use the player in exceptionally cold or hot, dusty, damp or dry environments.
•Do not drop the player while using it.
•Please charge your battery when
A . Battery power icon shows an empty icon;
B. The system automatically shuts down and the power is cut off immediately
when you switch the unit back on;
C. There is no response if you press any key
•Please do not disconnect the power supply abruptly when the player is being
formatted or in the process of uploading or downloading. This may lead to a
program error.
• When this unit is used as a portable disk, the user must store or export les using
the proper le management operation method. Any improper operation method
may lead to the loss of les for which this Company cannot be liable.
•Please do not dismantle this unit by yourself. If there are any questions, please
contact the dealer.
•There will be no notice in the case of any change in the functions and performance
of this product.

5
2. Use and Operation
2.1. Shapes and Keys
1. Front camera
2. Earphone socket
3. USB socket
4. HDMI socket
5. SD card socket
6. MIC
7. Power switch
8. Volume Add and subtract key
9. Rear camera
10. Loudspeaker
10 10
1
246
5 3
7
8
9

6
2.2. Button description and application
Note: The keyboard is optional (not included) and will be used according to product
conguration.
1. Tablet xture: easy alignment and tablet
xture.
2. Keyboard form: QWERTY keyboard and
excellent typing comfort.
3. Base: folding tablet base.
Use of tablet with the keyboard
7
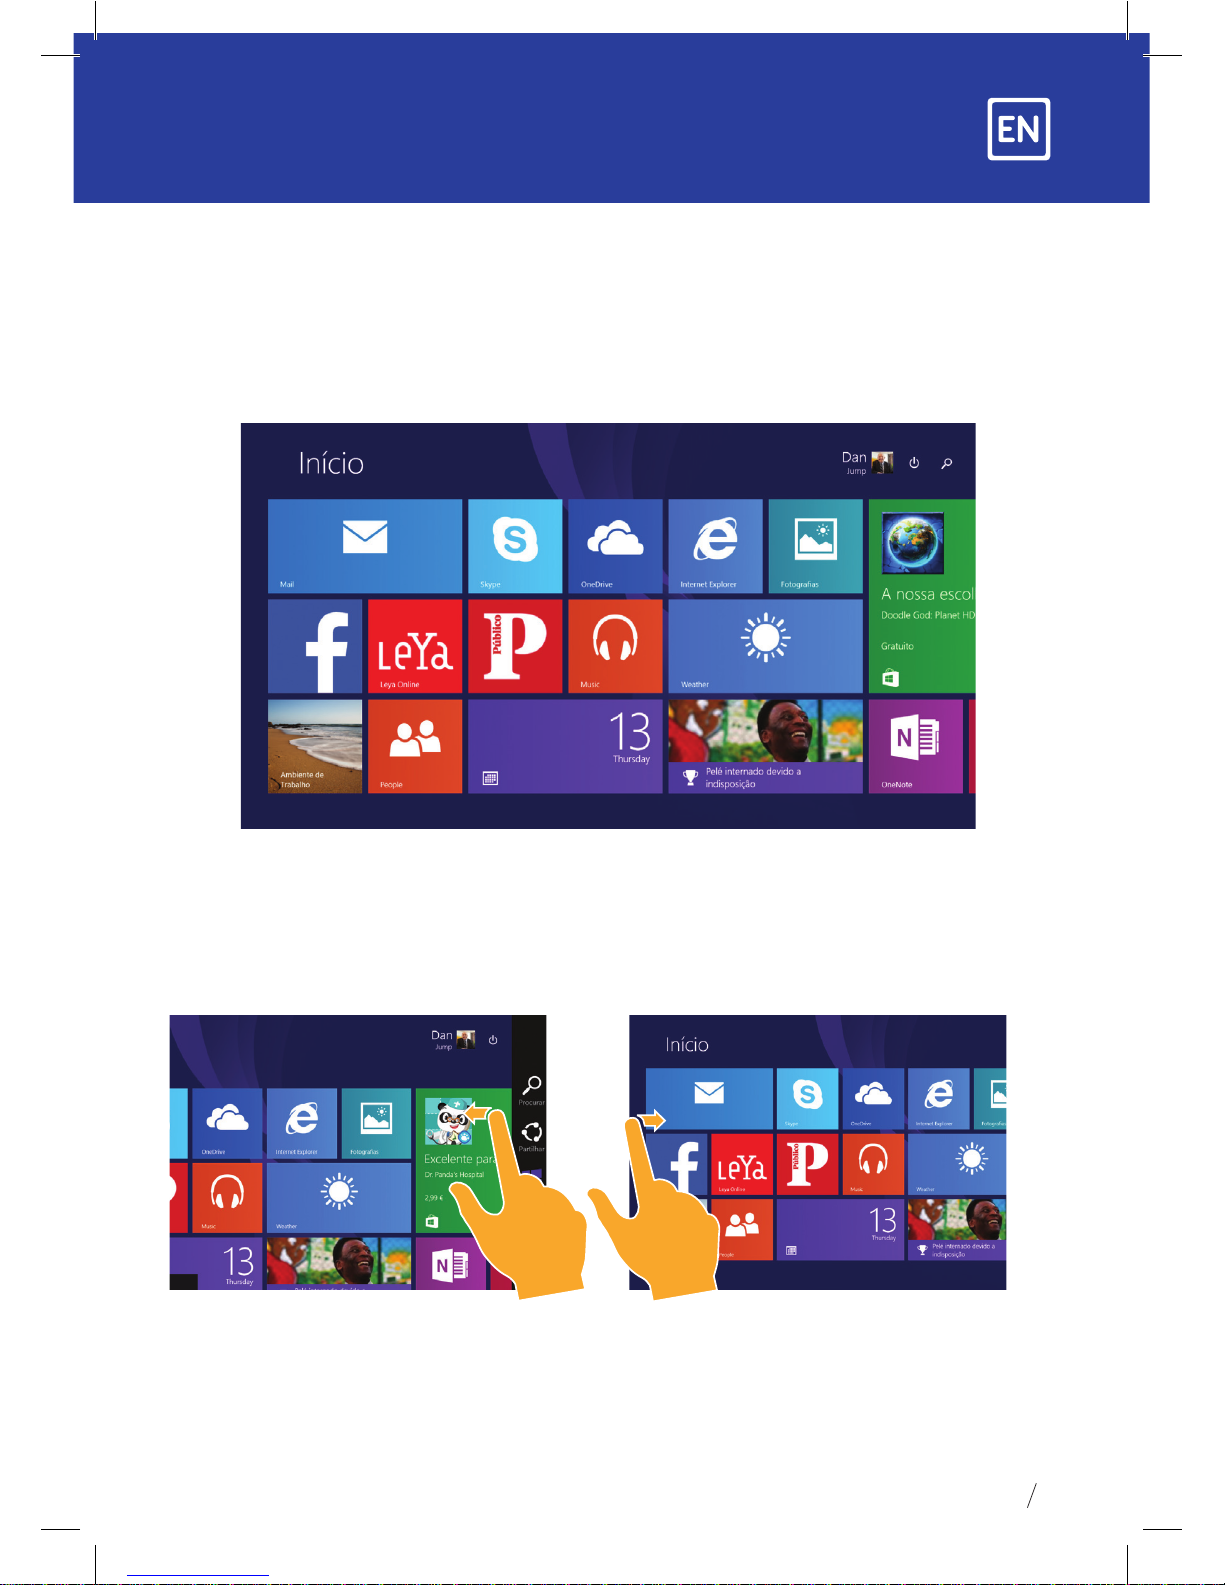
2.3. Desktop
1. The desktop presentation: On the Windows 8.1 start screen you can see many
applications in xed positions as in the picture that will display in the form of a “magnet”
with easy one-click access.
Before using full applications login to your Microsoft account rst.
2. Picture slide application
Slide to the right Slide to the left
Slide from the left side to the right
side of the screen in order to open
the running application screen.
Slide from the right side to the left
side of the screen to open the menu bar.

8
Zoom Out Zoom In
Bring two ngers together
on the touch screen to shrink.
Move two ngers apart
on the touch screen to zoom in.
Sliding down Sliding ngers
On the start screen, slide down
from the top to display
Customization options.
Slide from the center of the screen
to the left or to the right to move
around the screens.
Sliding down
At the bottom of the screen slide upwards to
show the application or screen options.

9
2.4. App interface introduction
On the start screen you can also expand to see all applications available by sliding upwards.
If you want to place more applications on the start screen please touch lightly as in
(1) and hold the application magnet for about 1 second, let go, select (2) to place the
application on the start screen.

10
To remove or delete an application, (1) lightly touch and hold the application magnet for
about 1 second, and then release it, select (2) the attribute column and remove from the
screen, delete, etc. The application can be closed.
Side menu bar
Slide from the right side of the screen to the left, to unlock the Side menu bar including:
start, equipment, share and search.
Tabla de contenidos
Idiomas:


