KIFFE K1 Manual de usuario

K 1 Operating Manual
BA1.indd 1 20.04.2017 11:39:26

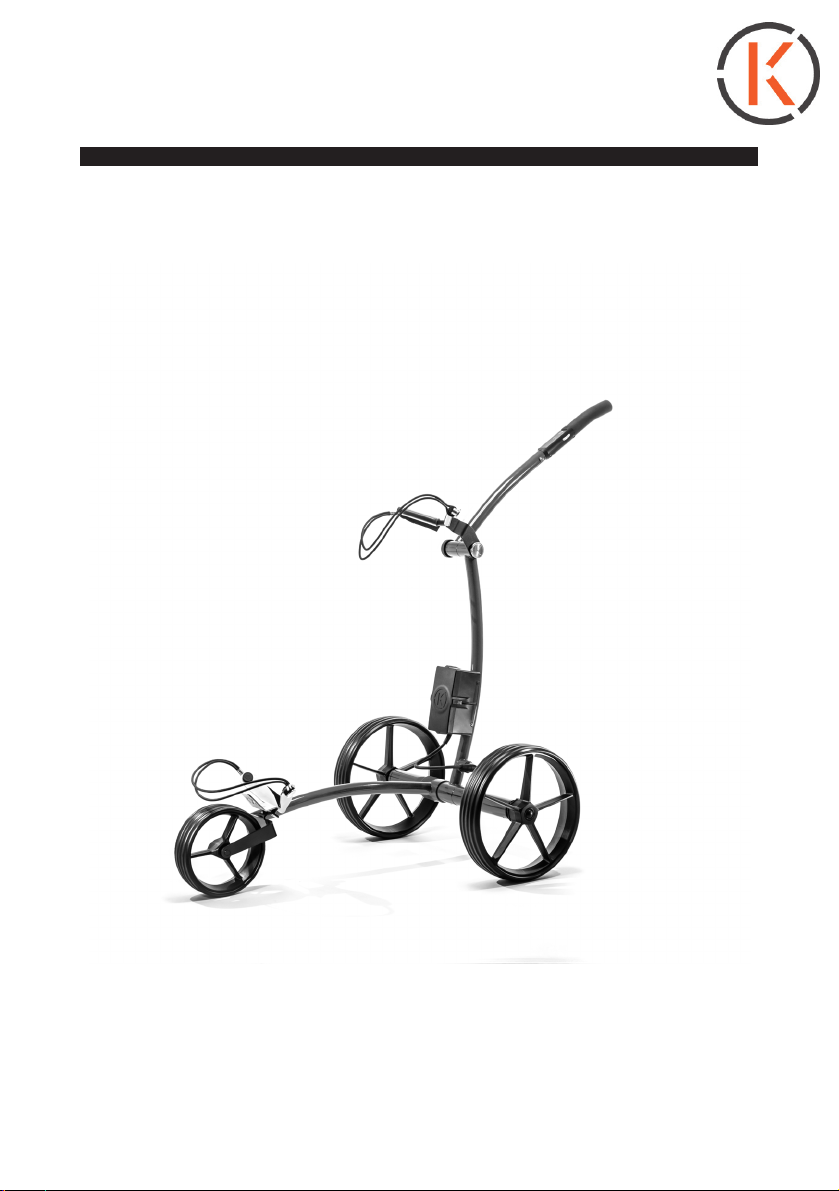
K1 control unit in detail
battery capacity display (3 LED‘s
show the battery status)………...................
..............................start and stop
........ speed regulator
(stageless and continuous)
electronic freewheel mode..........................
(manoeuvring against the running
direction)
K 1 Operating Manual
BA1.indd 2 20.04.2017 11:39:32

K 1 Operating Manual
Congratulations on your KIFFE K1!
We are of the opinion that no golfer deserves mediocre equipment.
And that‘s exactly why we at KIFFE Golf Manufaktur produce
technically superior trolleys with perfect craftsmanship, and we
attach the utmost importance to well-thought-out functionality and
ease of use with each of our models, so that you can concentrate on
one thing only: Your Game.
For it to remain that way in the long term, please follow the
instructions in this manual. Should you have any further questions,
please contact our service department at:
We wish you many special moments with your trolley and a good
game always!
yours KIFFE Golf Manufaktur
___________________________________________
After receiving your trolley, please check:
● thepackagingforpossibleshippingdamage
● hecompletenessofthescopeofdeliveryasperthedelivery
note
● thetrolleyforvisibledefects/damage
Please report any visible defects, transport damage or incomplete
deliveries in writing without delay, but at the latest within two working
days after delivery:
● bye-mailat:[email protected]or
● byfaxat:0049-7420-91395-20
Please take into account that complaints received later can unfor-
tunately no longer be acknowledged.
KIFFE Golf Manufaktur GmbH - www.kiffe-golf.de - service@kiffe-golf.de
BA1.indd 3 20.04.2017 11:39:32
KIFFE Golf Manufaktur GmbH - www.kiffe-golf.de - service@kiffe-golf.de
K 1 Operating Manual
....... upper steering rod,
individually adjustable
control unit .....
knob for fastening the height -
adjustable steering rod ...............................
..........xedupperbagrestwith
secure mounting points
..... battery in hard cover with
magnetic connector
............. solid GRP
wheels, emovable
by pressing a button
lower bag rest.....
lower steering rod ...............
BA1.indd 4 20.04.2017 11:39:35

Trolley packed All the trolley components
Charger from power grid Connection charger - battery
KIFFE Golf Manufaktur GmbH - www.kiffe-golf.de - service@kiffe-golf.de
K 1 Operating Manual
Only when a noticeable re-
sistance has been overcome
when connecting to the battery
and charger are correctly con-
nected. Charging can begin.
Charge the battery for 24 hours
uninterrupted before using the
trolley for the rst time!
BA1.indd 5 20.04.2017 11:39:36

Drive axle Back side of drive wheel
Open the push button, place the
wheel on the drive axle
Press the push button (= lock)
Trolley with attached, locked drive
wheels (push button closed)
K 1 Operating Manual
KIFFE Golf Manufaktur GmbH - www.kiffe-golf.de - service@kiffe-golf.de
Put the front wheel (open) on the
front axle. Maintain distance from
axle shank and lock with the push
button. Set the trolley upright.
BA1.indd 6 20.04.2017 11:39:36

Attaching the upper steering rod
Mount the battery with the cable
down on both the stems of the
steering rod
To avoid impurities, do not place
theplugontheoor.
Battery connection by magnetic
connector. Flahing signal at the
control unit indicates battery con-
nected.
KIFFE Golf Manufaktur GmbH - www.kiffe-golf.de - service@kiffe-golf.de
K 1 Operating Manual
BA1.indd 7 20.04.2017 11:39:41

Place the golf bag on the trolley
Attach the bag onto the upper bag
rest by hooking the bag elastic over
the mounting point.
ATTENTION: The bag rest ist rigid,
so it cannot be customized.
Attach the bag onto the lower bag
rest by hooking the bag elastic over
the mounting point.
K 1 Operating Manual
KIFFE Golf Manufaktur GmbH - www.kiffe-golf.de - service@kiffe-golf.de
BA1.indd 8 20.04.2017 11:39:41

Operation/Maintenance
1. Switching the trolley on
Switch on by briefly pressing the
start / stop button "K". The charge
status indicator lights up.
3 x green = full charge, reduced to
2 x green when consumed,
1 x green, orange, red = emptyp
The trolley is ready to start when
the LED‘s above the „K“ light con-
stantly. (= Battery charge indicator:
comprises a total of 3 LED‘s)
2.Thetrolleyisstartedbyturning
the speed control wheel. This will
increase or slow down the speed.
The speed controller (continuous
wheel) can be operated both form
left as well as from the right.
KIFFE Golf Manufaktur GmbH - www.kiffe-golf.de - service@kiffe-golf.de
K 1 Operating Manual
BA1.indd 9 20.04.2017 11:39:46

3. The trolley has a speed memory: It saves the last speed you drove it
at(bybrieypressingthestart/stopbutton.
4. The trolley has both a manual and an electronic freewheel. The elect-
ronic freewheel is set by pressing a key on the control unit. Press the
button above „K“ button to do this. The LED next to the key lights up
white. The drive is thereby switched off. This driving
mode is required to maneuver the trolley against the
running direction. The manual freewheel is recom-
mended for using the trolley without a battery. This
mode is activated as follows:
1. Unlock the drive wheels and pull
them outwards about 1 cm.
2.Re-lockintheoutergroove
proleoftheaxlebymeansof
the push button.
5. The trolley has a cruise control, which keeps the set speed even when
the trolley drinving downhill. In sloping terrains, the trolly must be
parked crosswise to the slope in order to avoid rolling away.
KIFFE Golf Manufaktur GmbH - www.kiffe-golf.de - service@kiffe-golf.de
K 1 Operating Manual
BA1.indd 10 20.04.2017 11:39:46
Otros manuales de carrito de golf de KIFFE


