Keith McMillen Instruments QuNexus Manual de usuario
QuNexus Reference Manual
QuNexus Version 1.1.1
July, 2013
Keith McMillen, Conner Lacy, Nick Wang, Evan Adams, Jimmy Allison, Jasmin Blasco, Diane
Douglas, Tom Ferguson, Steven Fruhwirth, Paul Gaeta, Ingmar Gorman, Christian Heilman,
Matthew Hettich, Sarah Howe, William Leach, Daniel McAnulty, Jon Short, Carson Whitley, and
Steve Wright
1

Copyright 2007-2013 Keith McMillen Instruments a wholly owned subsidiary of Kesumo LLC. All rights
reserved. Made in USA.
No part of this manual may be reproduced or transmitted in any form or for any purpose without the
express written permission of the copyright holders.
The content of this manual is furnished for informational use only, is subject to change without notice,
and should not be construed as a commitment by Keith McMillen Instruments. Every effort has been
made to ensure that the information in this manual is accurate. No warranties, express or implied, are
made with regard to the quality, suitability or accuracy of this document. Keith McMillen Instruments
reserves the right to change the contents of this document and/or the associated products at any time
without the provision of prior notice to specific persons or organizations. Keith McMillen Instruments
shall not be held liable for damages of any kind arising from the use, or the inability to use this product
or its documentation, even if the possibility of such damage is known.
Product and brand names contained in this document are used for identification purposes only. Keith
McMillen Instruments, the Keith McMillen Instruments Logo, the QuNexus and QuNexus logo are
trademarks of Kesumo LLC. Apple, Finder, GarageBand, Logic, Mac, MacBook, Macintosh, Mac OS and
QuickTime are trademarks of Apple Inc, registered in the U.S. and other countries. Windows is a
registered trademark of Microsoft Corporation in the United States and other countries. Intel is a
registered trademark of Intel Corporation or its subsidiaries in the United States and other countries.
SONiVOX is the brand name trademark of Sonic Network, Inc. VST and ASIO are trademarks and
software of Steinberg Media Technologies GmbH. Reason, ReWire, Recycle and REX2 are trademarks of
Propellerhead Software AB. All other product and company names are trademarks or registered
trademarks of their respective holders. All other names and designations of companies, products,
trademarks, or brands used in this document are the registered property of their respective holders.
2

Table of Contents
Chapter 1 Welcome
1.1 Questions or Feedback? Contact us!
1.2 What’s in the QuNexus Package?
Chapter 2 QuNexus Hardware / Getting Started
2.1 Connecting QuNexus
2.2 Input/Output Routing
2.2.1 USB
2.2.2 MIDI
2.2.2.1 The KMI MIDI Expander
2.2.3 CV
2.2.3.1 Cable Connections
2.2.3.2 CV Cable Kit
2.2.3.3 CV Data
2.2.3.4 Converting CV Input from +/- 10V to 0V/5V
2.2.3.5 Dual Expression and Sustainer Inputs
2.2.4 Converting Data Types
2.3 Left Side Buttons
2.3.1 The Oct Buttons
2.3.2 The Bend Pad
2.3.3 The Shift / Preset Button
2.3.3.1 Selecting Presets
2.3.4 Togl A, Velo B, Pres C, & Tilt D
2.4 Data Sources and Sensor Output
2.4.1 Factory Presets
2.4.2 CoMA Mode
2.4.2.1 CoMA Mode Mapping Guide
2.5 Live Edit Mode
2.6 Controlling LEDs
Chapter 3 QuNexus Editor
3.1 System Requirements
3.2 Installing the Software
3.3 Updating the Firmware
3.4 Main Window Overview
3.5 Saving Presets
3.5.1 Importing and Exporting Presets
3.6 Menu Bar
3.7 Sensitivity
3.7.1 Per Key Sensitivities
3.8 Keyboard Layer
3.8.1 Types
3.8.2 Sources
3.8.3 Gain, Offset, Curve, Min, and Max
3.8.3.1 View/Edit Tables
3.8.4 Out
3
3.8.5 MIDI Channel
3.8.6 Channel Rotation
3.8.7 Toggle
3.8.8 Transpose
3.8.9 LEDs Local/Remote
3.8.10 Program Change
3.8.11 Bend Range
3.8.12 Key Priority
3.9 Controller Layer
3.9.1 Sensor Settings
3.9.1.1 Participate
3.9.1.2 Controller Layer Sources
3.9.1.3 Controller Layer Toggle
3.10 CV Layer
3.10.1 CV Output (MIDI to CV)
3.10.2 CV Input (CV to MIDI)
3.10.3 CV Trims
Chapter 4 Troubleshooting
4.1 Connectivity Trouble
4.1.1 Touchy USB Connection
4.2 CV Trouble
4.2.1 Steps to Convert MIDI to CV
4.2.2 Audible High Pitched Noise in Computer Audio when using CV
4.2.3 QuNexus LEDs Light Up Erratically When Receiving CV
4.3 Firmware Trouble
4.3.1 QuNexus Doesn’t Do Anything After a Firmware Update
4.3.2 Firmware Update Freezes or Doesn’t Work
4.3.3 General Firmware Information and Suggestions
4.3.3.1 Unplug Other USB Devices
4.3.3.2 Try a New Micro-USB Cable
4.3.3.3 “Hotplugging” on Windows
4.3.3.4 Don’t Send MIDI to QuNexus During an Update
4.3.3.5 If Things are Working Fine, DON’T Update Right Before your Show
4.3.3.6 Manually Updating Firmware
Safety Precautions
4
Chapter 1 Welcome
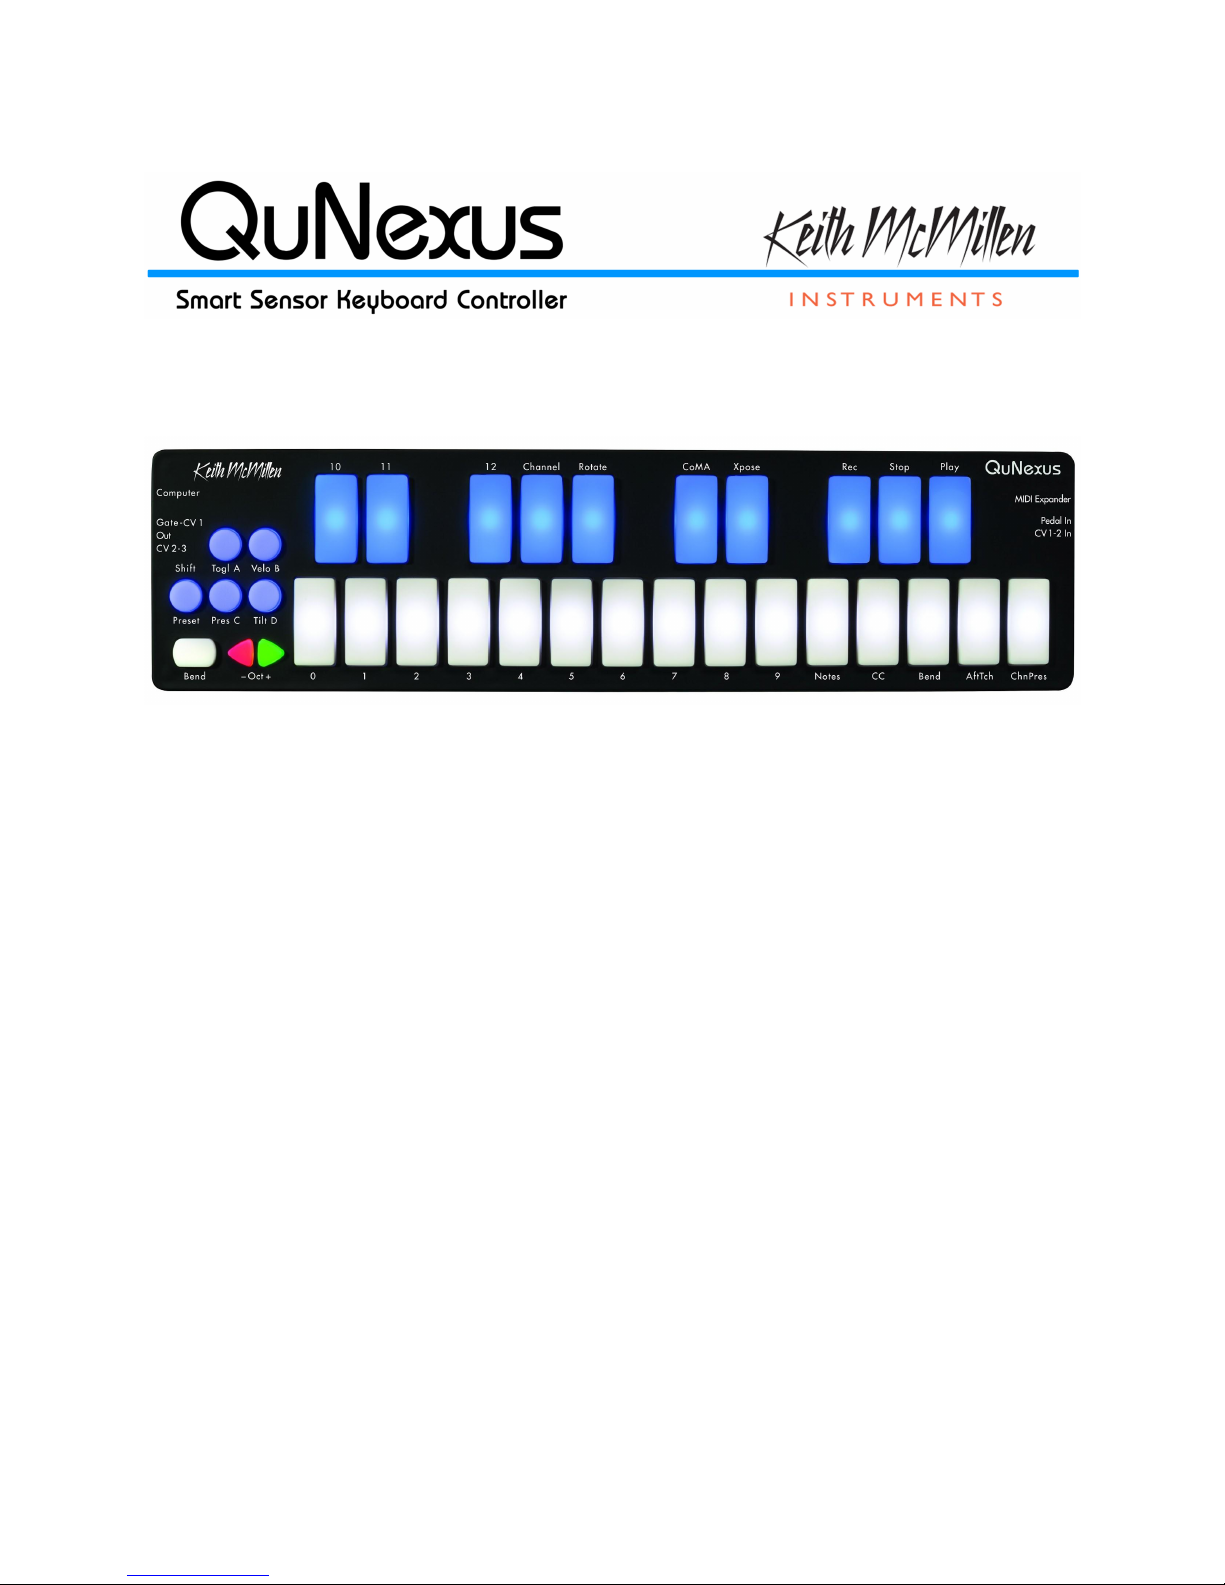
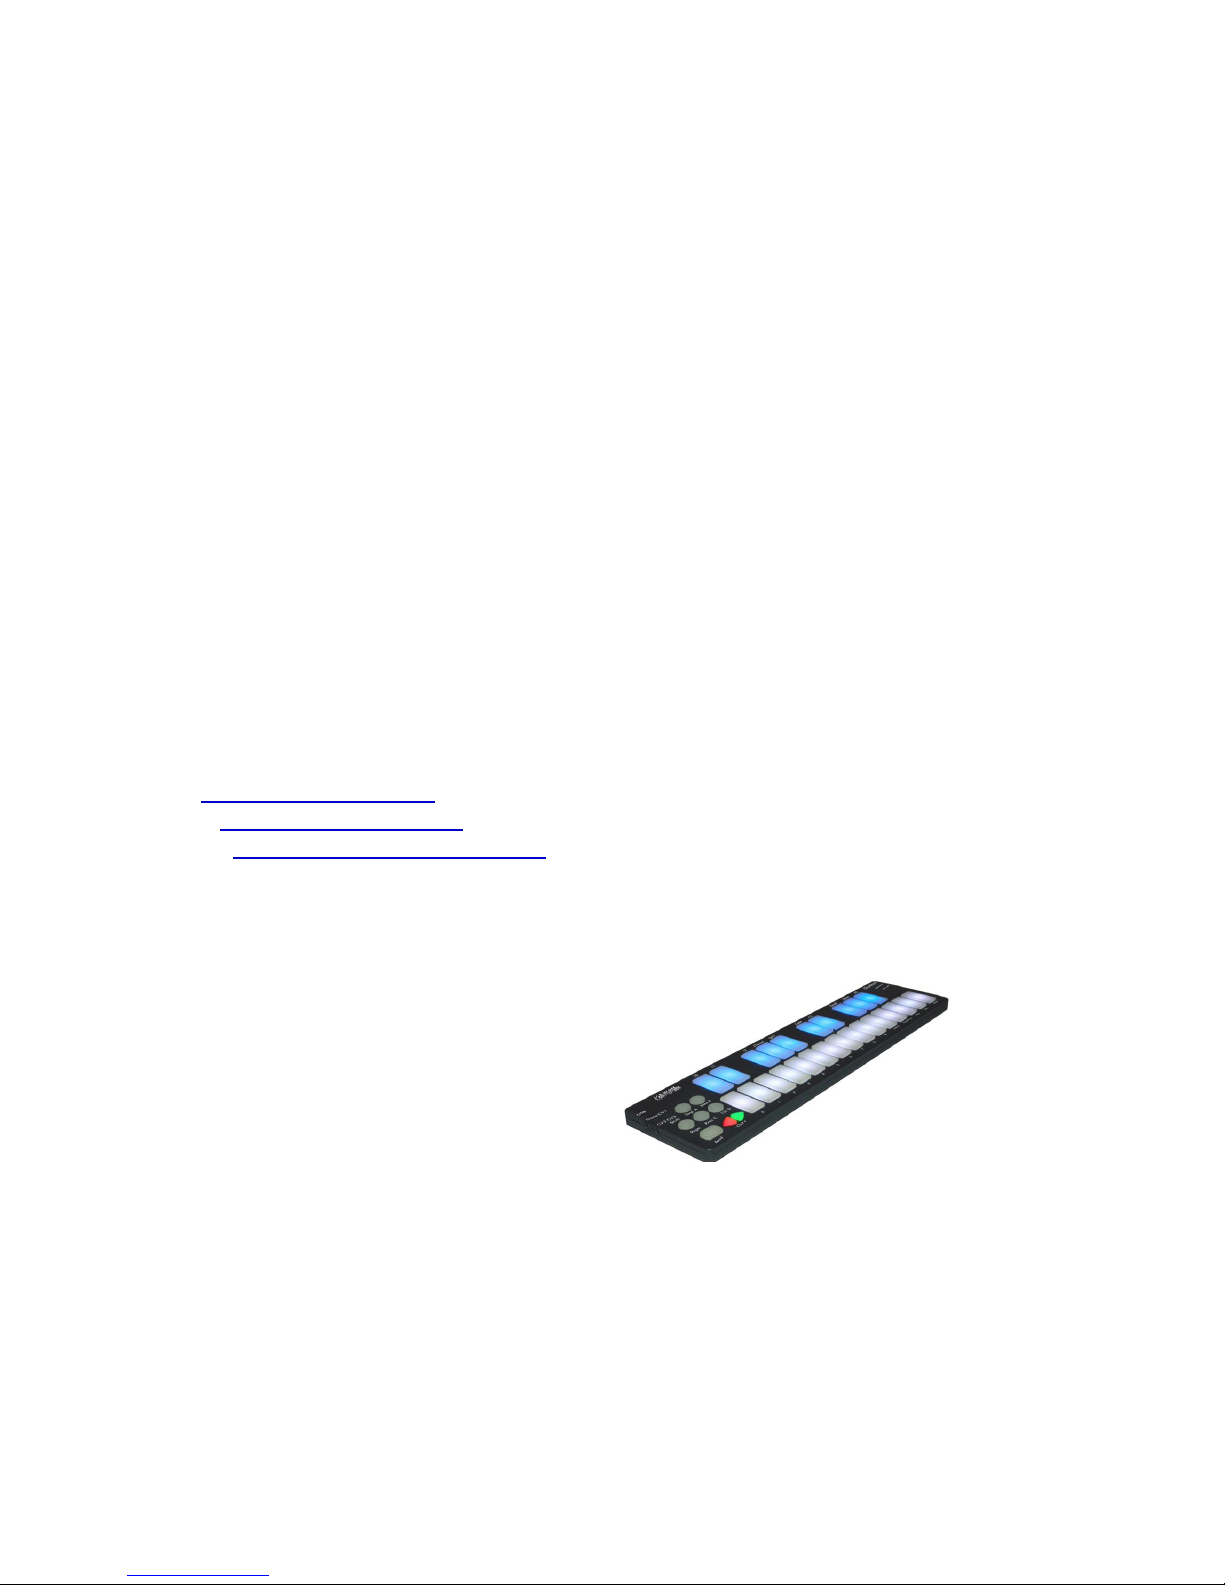
QuNexus is a vividly illuminated keyboard controller that is fun for beginners and a must for
professionals. 25 touch-sensitive keys detect finger pressure, velocity, and tilt, giving you an
unprecedented degree of musical control. Blue and white LEDs with 16 levels of brightness give
you valuable feedback. Use the toggle feature to build chords and create your own step
sequencer or arpeggiator with LED feedback.
QuNexus is your hub for new and vintage technology. Plug into your computer, iPad (Apple
Camera Connector required), or Android tablet via USB. Control hardware via 5-PIN MIDI (MIDI
Expander required) or control your modular synthesizers with the included CV inputs and
outputs.
In this manual you will find detailed information to help answer all of your questions about
QuNexus hardware and software.
1.1 Questions or Feedback? Contact us!
If at any time you have any questions, please contact us:
Web: www.keithmcmillen.com
Forum: forum.keithmcmillen.com
Support: www.keithmcmillen.com/support
1.2 What’s in the QuNexus Package?
When you open up the box you should find:
•(1) QuNexus
•(1) USB A-to-Micro cable (1 meter)
5
Chapter 2 QuNexus Hardware / Getting Started
QuNexus is a class compliant USB device that does not require a driver or software to function.
Out of the box QuNexus has everything needed to get started. We also provide a QuNexus
Editor application (for Mac and Windows), which allows further customization (discussed in
Chapter 3). This chapter is a guide to getting started using QuNexus out of the box and will
provide detailed information about how to use the hardware features of QuNexus.
Dimensions: 12.8” x 3.3” x 0.43” (inches).
325mm x 84mm x 11mm
Weight: 0.76lb/345g
There are no user serviceable parts inside QuNexus. Attempts to open the enclosure will void
the warranty.
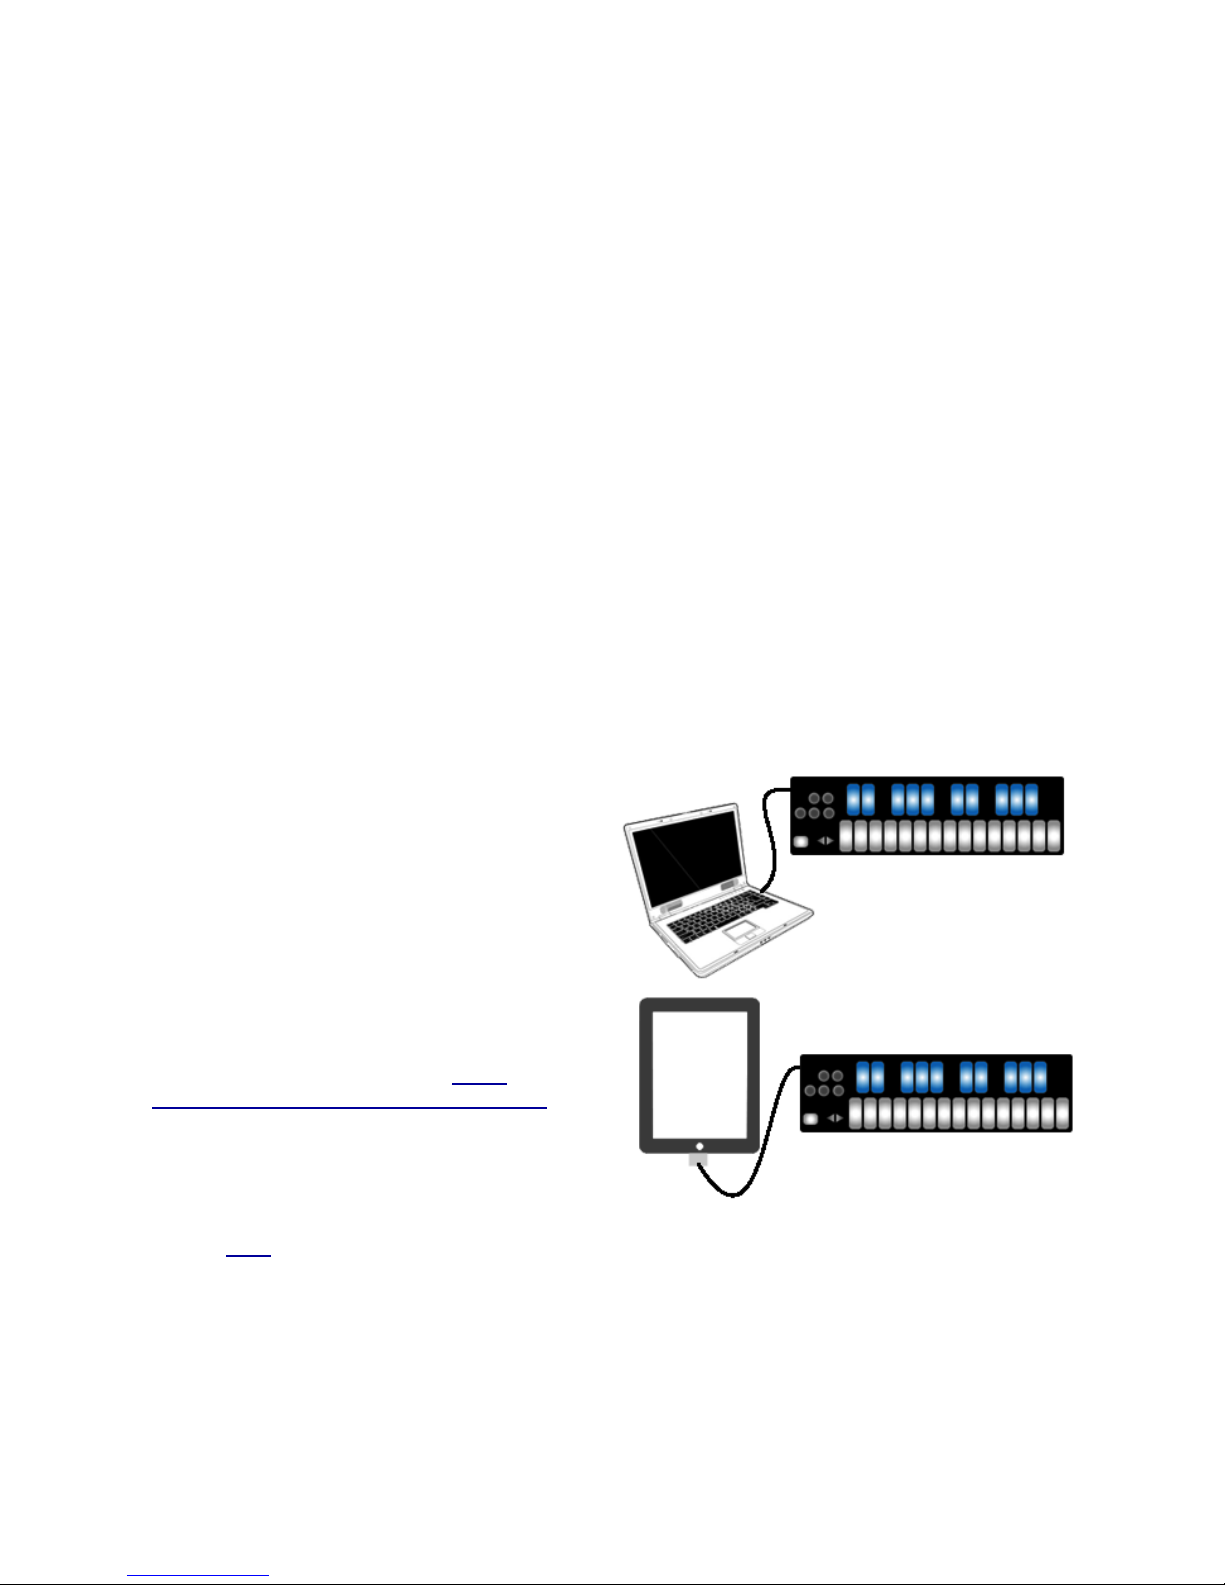
2.1 Connecting QuNexus
Connect QuNexus to a computer:
This image shows QuNexus set up to send
MIDI data to a computer. Use a USB A-to-Micro
cable to connect the QuNexus micro port to a
USB port on a computer. QuNexus will receive
power from the computer.
These images are not to scale.
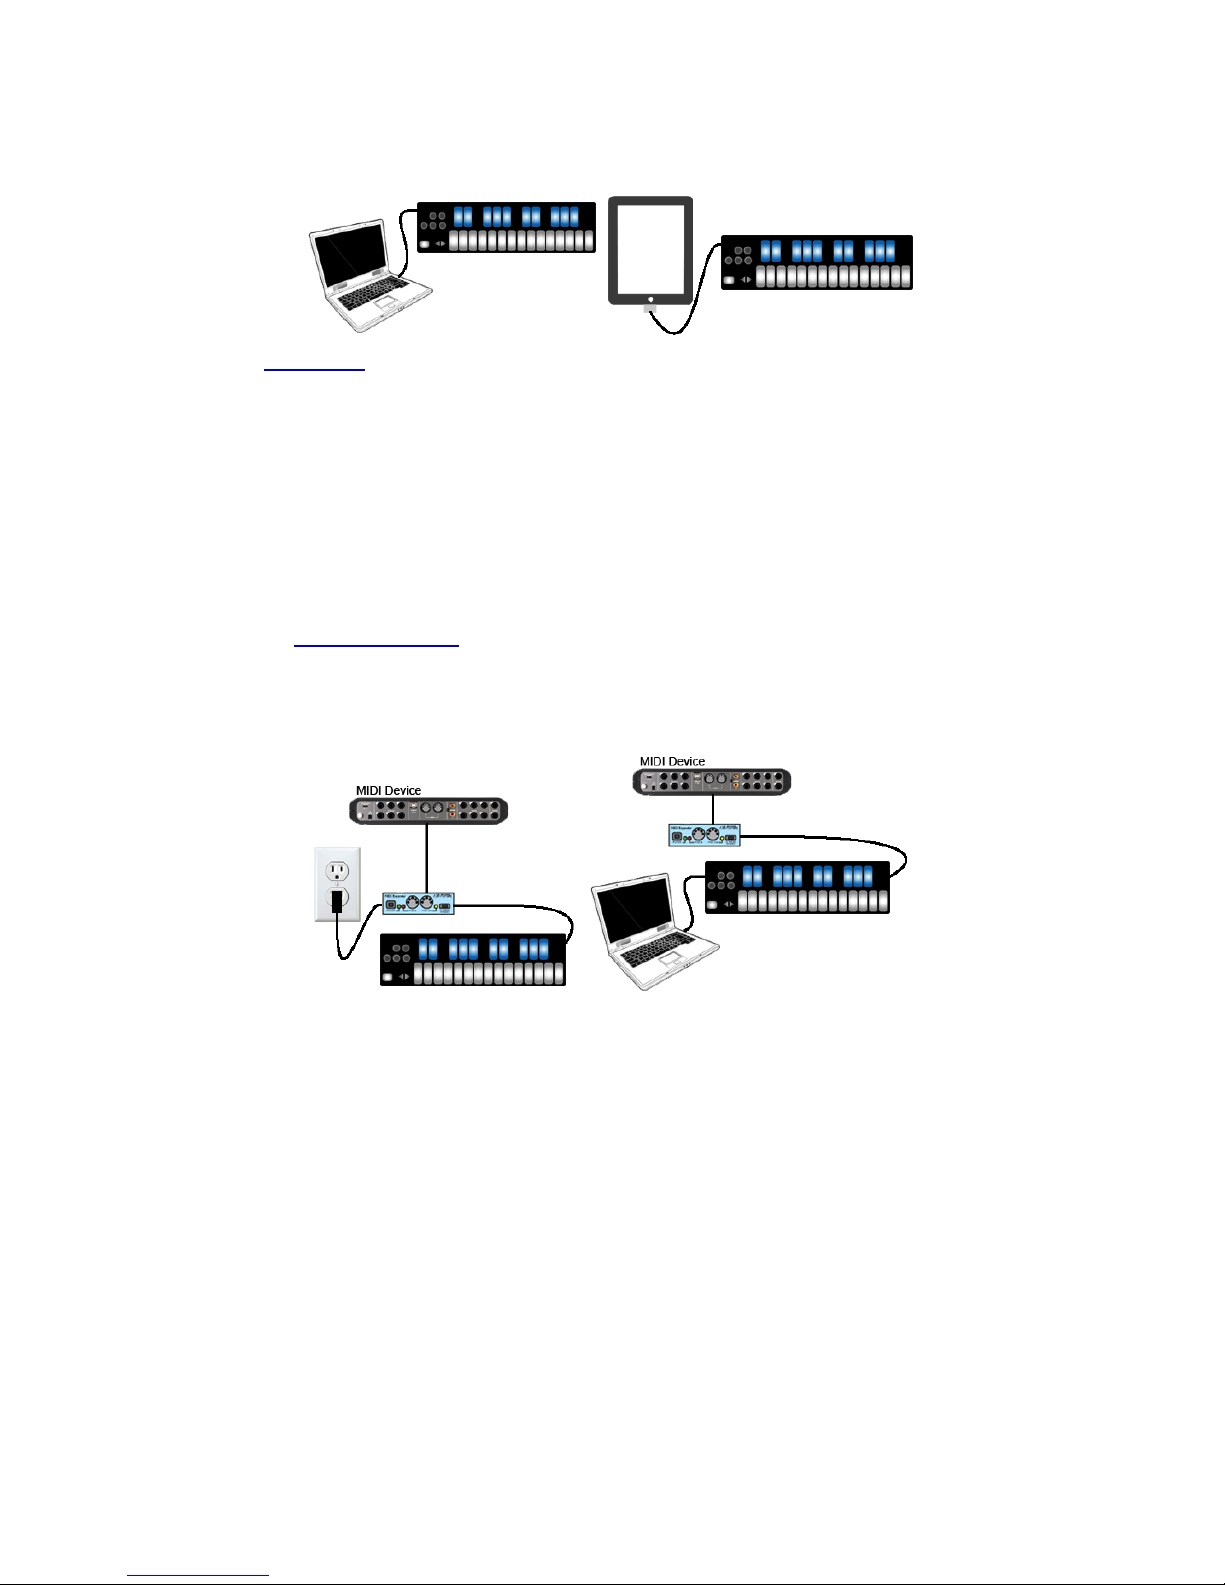
Connect QuNexus to an iPad:
The image shows QuNexus connected to an
iPad via USB. You will need the iPad Camera
Connection Kit (sold by Apple: http://
store.apple.com/us/product/MC531ZM/A).
Attach the camera connector to the iPad and
then use a USB A-to-Micro cable to connect the
QuNexus micro port to the camera connector.
See the USB chapter for more information.
6
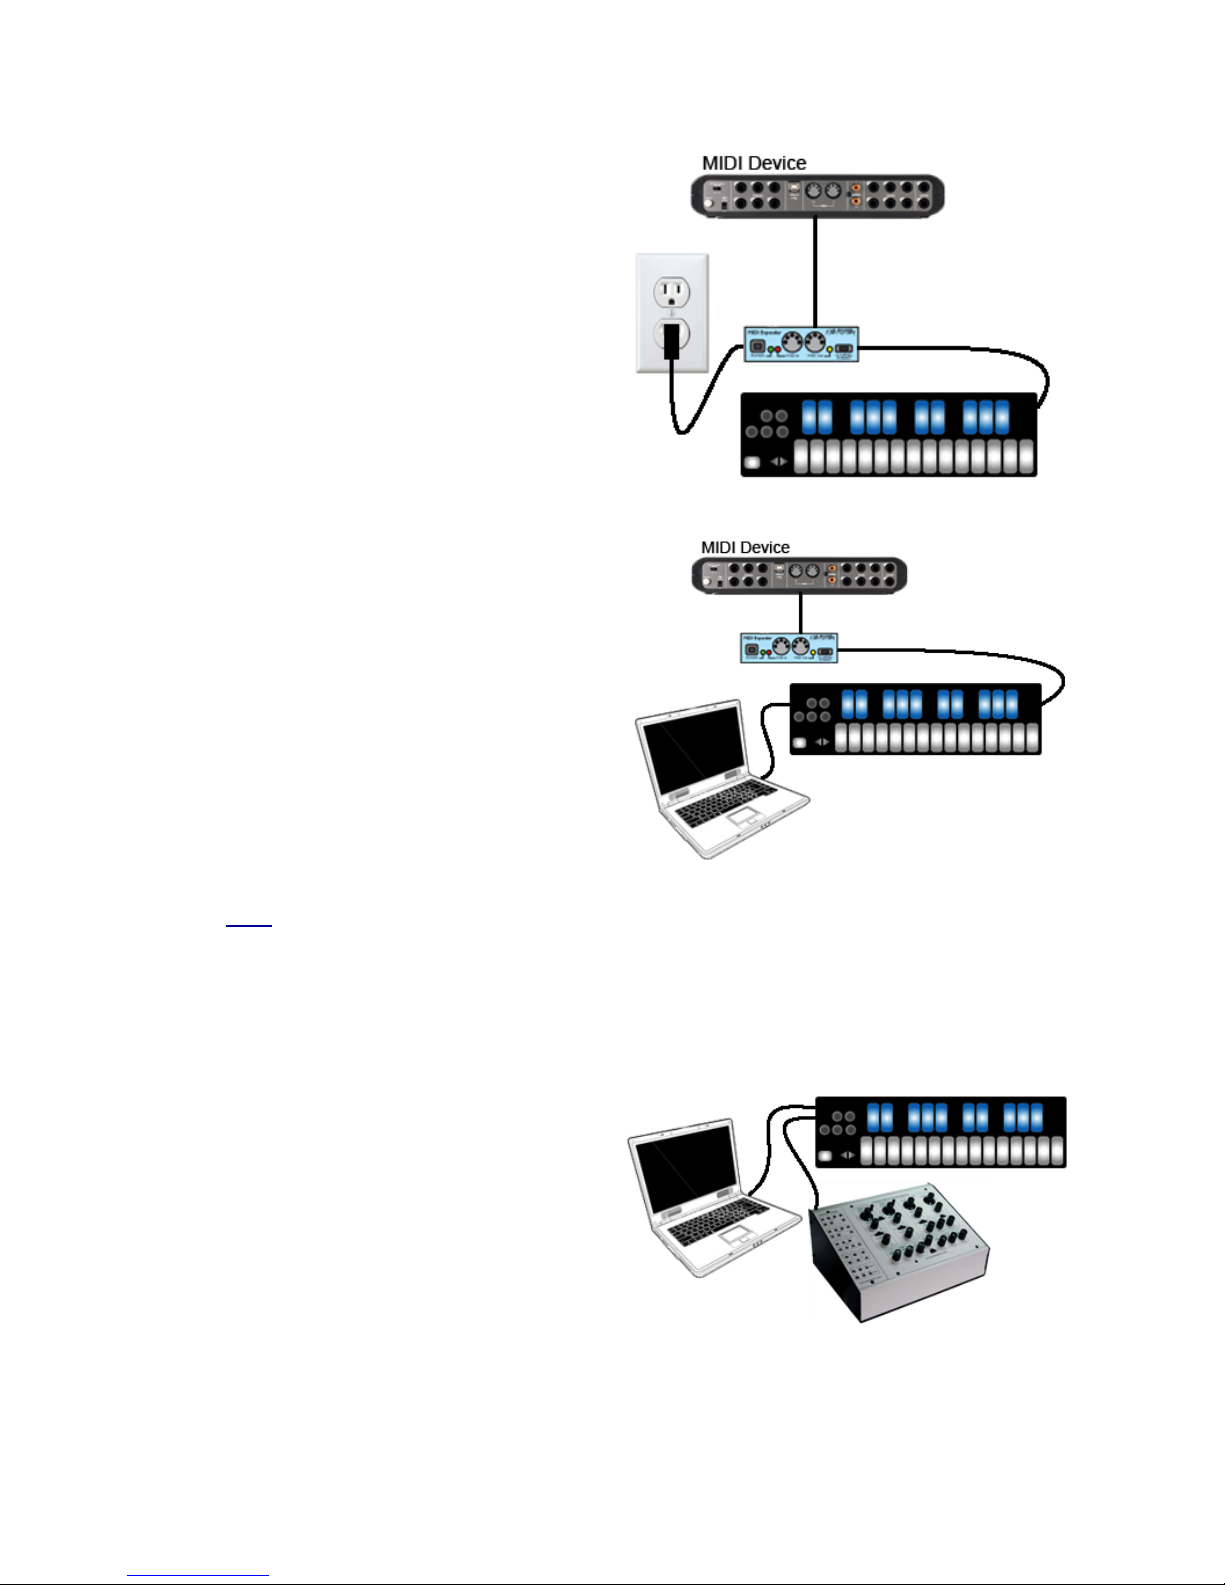
Connect QuNexus to MIDI hardware:
The image shows QuNexus connected to a
hardware MIDI device via our MIDI Expander
(sold separately):
1. Use a USB A-to-Mini cable to connect
the QuNexus Mini port (on the right side
of the QuNexus) to the USB “Expand”
port on the MIDI Expander.
2. Connect the power supply to the MIDI
Expander USB “Power” port.
3. Connect the MIDI Out on the Expander
to the MIDI In on a synth or other MIDI
device.
Connect QuNexus to MIDI hardware
(Powered by Computer):
The image shows QuNexus connected to a
Computer and a hardware MIDI device via our
MIDI Expander (sold separately):
1. Use a USB A-to-Mini cable to connect
the QuNexus Mini port (on the right side
of the QuNexus) to the USB “Expand”
port on the MIDI Expander.
2. Use a USB A-to-Micro cable to connect
the QuNexus micro port to a USB port on
a computer. QuNexus will receive power
from the computer.
3. Connect the MIDI Out on the Expander
to the MIDI In on a synth or other MIDI
device.
See the MIDI chapter for more information.
Connect QuNexus to Synthesizers or other CV devices:
The images to the right below show QuNexus connected to a CV device. There are 3 different
ways to set this up:
Powered by a Computer (or iPad):
1. Use a USB A-to Micro cable to connect
the QuNexus Micro port to a USB port
on a computer or iPad. This connects
the QuNexus to power.
2. Use a cable that is compatible with your
CV device’s CV ports. Using adapters if
needed, make sure one end can plug
into one of the stereo 1/8in. CV out ports
on the QuNexus.
3. Plug your cable into the “Gate-CV1 Out”
port on the left side of the QuNexus.
Plug the other end into the desired
destination on your CV device.
7
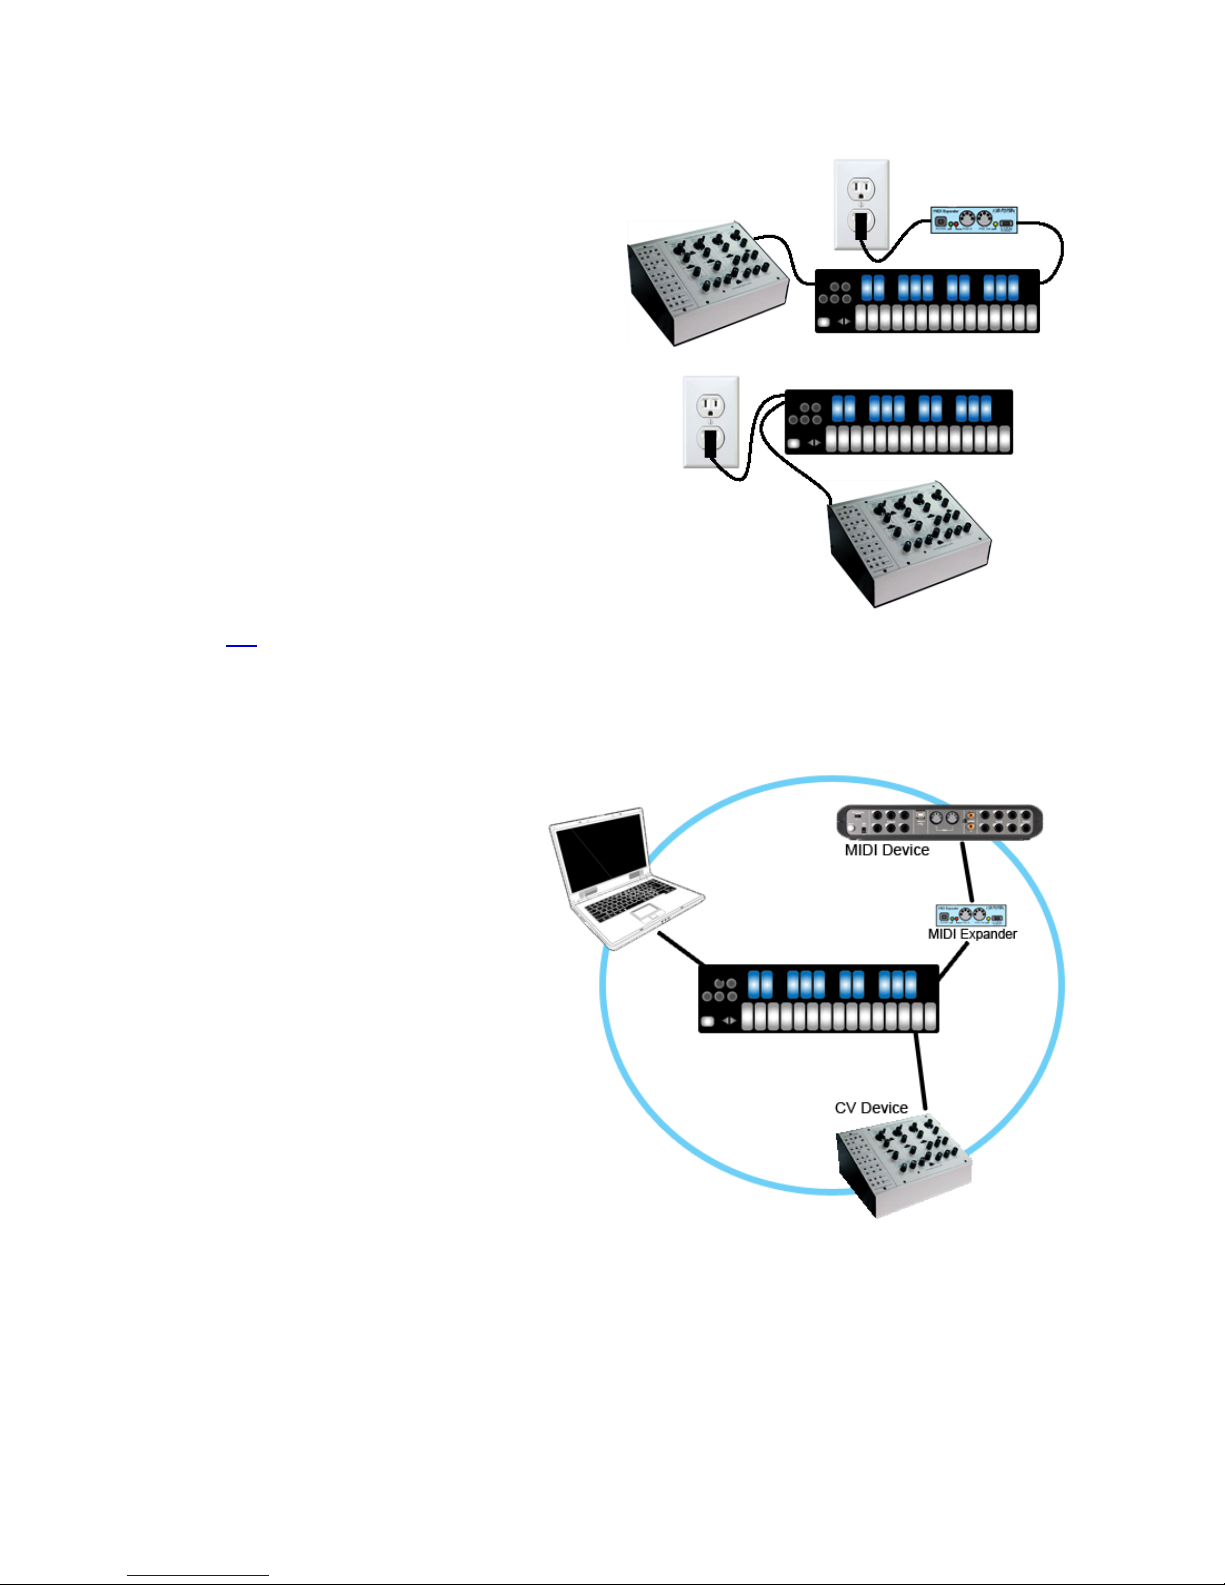
Powered by KMI MIDI Expander:
1. Use a USB A-to-Mini cable to connect
the QuNexus Mini port (on the right side
of the QuNexus) to the USB “Expand”
port on the MIDI Expander.
2. Connect the power supply to the MIDI
Expander USB “Power” port.
3. See steps 2 and 3 from the “Powered by
a Computer” steps.
Powered by USB Power Supply:
1. Use a USB A-to-Mini cable to connect
the QuNexus Mini port (on the right side
of the QuNexus) to a USB Power
Supply.
2. Connect the Power Supply to a power
outlet.
3. See steps 2 and 3 from the “Powered by
a Computer” steps.
See the CV chapter for more information.
2.2 Input/Output Routing
QuNexus can output USB, Control
Voltage, and MIDI (using a KMI MIDI
Expander - sold separately). Each of
these data types can be routed to one
or both of the other data types.
The image to the right shows the
QuNexus as the hub of three types of
devices. The black lines represent the
physical connections that are made
between each instrument. The blue
circle represents the possible
communication between each
instrument when using the QuNexus as
the central device in the setup.
The subchapters below will focus one at a time on each data type’s communication with
QuNexus and then provide detail about converting one data type to another.
8
2.2.1 USB
QuNexus is connected and powered using the Micro USB port on the left side of the QuNexus.
It is a class compliant USB device and does not require a driver. This allows for maximum
compatibility with an extremely wide range of other devices.
QuNexus has 3 virtual MIDI ports that communicate with the computer. Port 1 is the main port
on which the QuNexus sends and receives MIDI data to and from the computer or iPad. Port 2
and 3 can be used for this purpose as well but are also used for communication with other
devices. Port 2 is used for the KMI MIDI Expander (sold separately) and Port 3 is used for CV.
A computer or iPad can control the QuNexus LEDs by sending MIDI data into the QuNexus on
Port 1 (see the Controlling LEDs chapter for more information).
2.2.2 MIDI
The KMI MIDI Expander is required to send and receive MIDI Data via 5-pin MIDI devices. The
MIDI Expander can be used with or without a computer or iPad connected. Power is supplied to
QuNexus from the MIDI Expander’s power port when the MIDI Expander is plugged into a
power outlet. If connected to a computer (or iPad) and a MIDI Expander, power is supplied to
the QuNexus from the Micro USB port instead of the Expander.
9
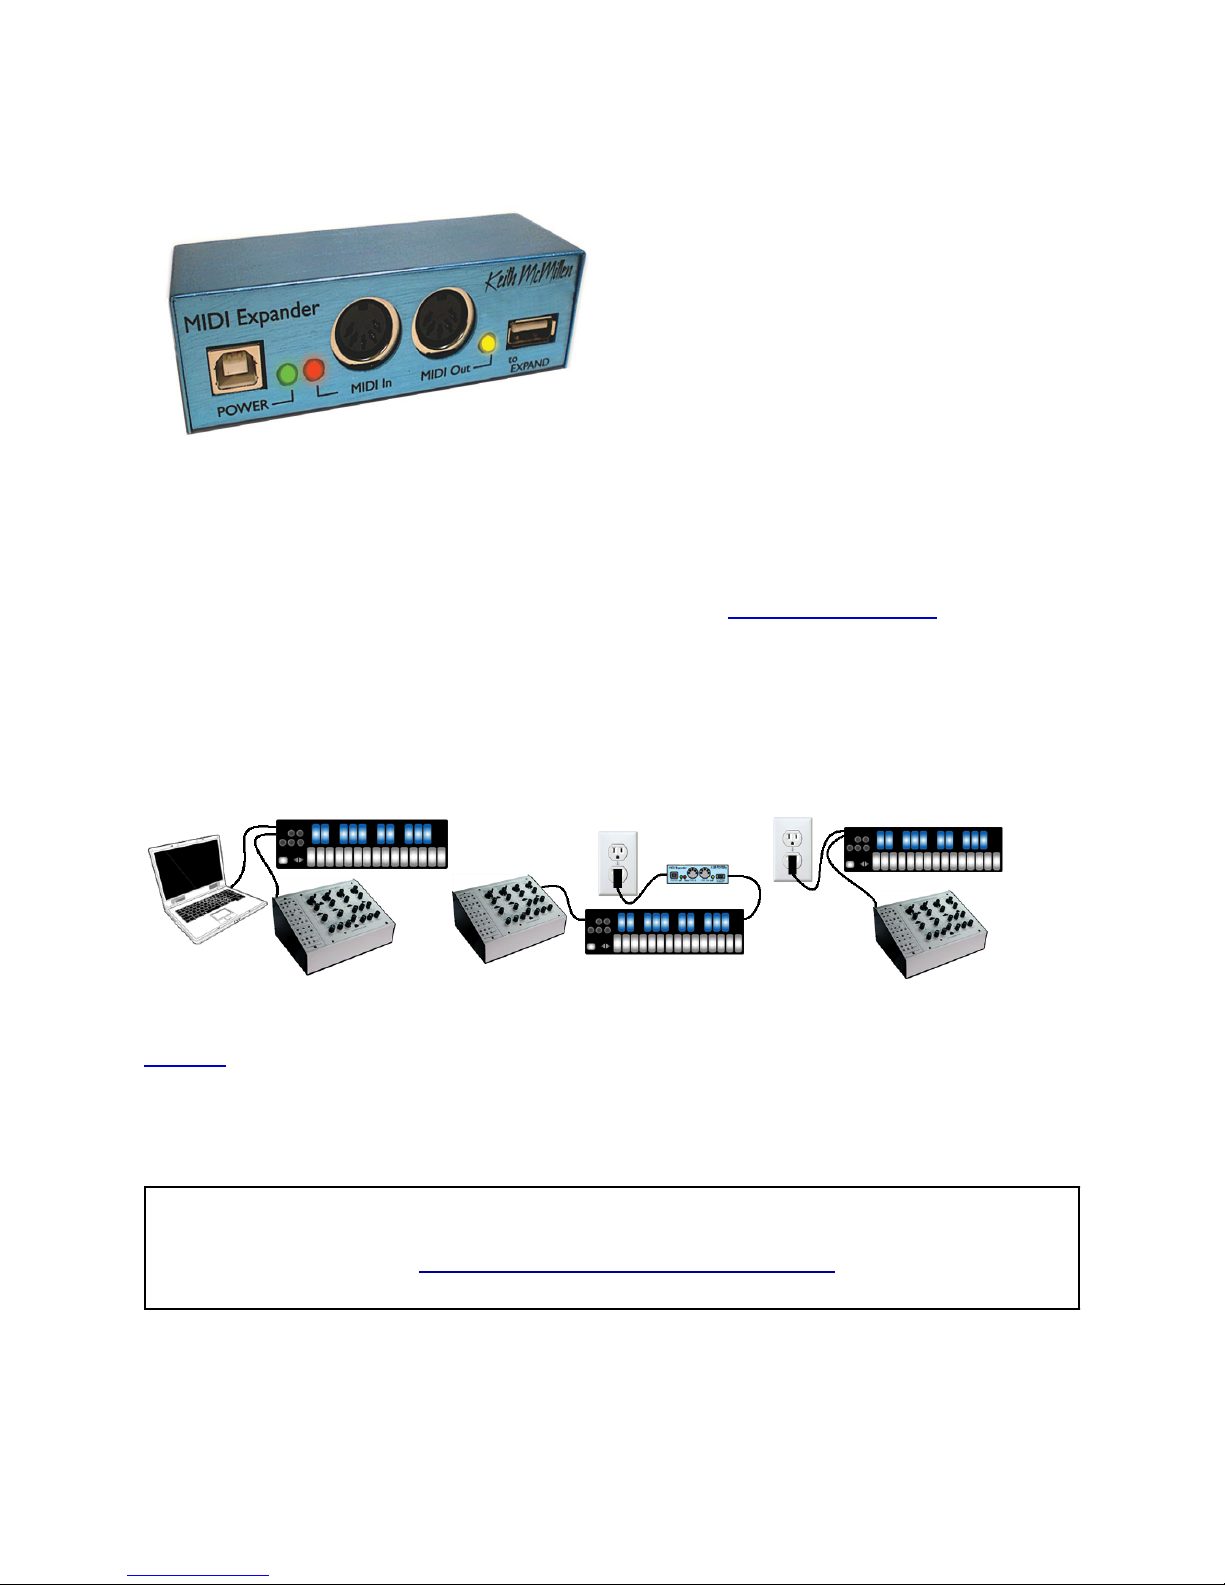
2.2.2.1 The KMI MIDI Expander
Dimensions: 4” x 1.25” x 1.25” (inches).
Weight: 2.5 oz.
The KMI MIDI Expander is an optional
accessory, which enables use of QuNexus with
hardware MIDI devices. Plug the receiving MIDI
device into the MIDI Out port and QuNexus will
send MIDI data through a regular 5-pin MIDI
cable.
To use QuNexus with the KMI MIDI Expander follow these steps:
1. Connect a QuNexus to the KMI MIDI Expander (see Connecting QuNexus for
instructions).
2. Plug MIDI devices into the MIDI Expander using 5-pin MIDI cables. The QuNexus will
now send and receive MIDI messages through the MIDI Expander.
2.2.3 CV
QuNexus can communicate with synthesizers or other CV devices using Control Voltages.
Connect QuNexus to CV devices using a cable that is compatible with your CV device’s CV
ports. Using adapters if needed, make sure one end can plug into one of the stereo 1/8in CV out
ports on the left side of QuNexus. QuNexus’ CV input port (on the right side) requires one end to
be a 3.5 mm TRRS (like the ones used for Apple iPhone headsets).
Warning: QuNexus' CV In is uni-polar. If you send it a bi-polar signal, half of the signal will
be clipped and can cause malfunctions in extreme cases. Sending a signal above 5 Volts is
also unsupported. See the Converting CV Input from +/- 10V to 0V/5V chapter for information
on how to make a converter.
The following section provides more detail about the cable connectors needed for QuNexus CV.
10
Otros manuales para QuNexus
3
Tabla de contenidos
Otros manuales de Teclado electrónico de Keith McMillen Instruments

Keith McMillen Instruments
Keith McMillen Instruments K-Board Pro 4 Manual de usuario

Keith McMillen Instruments
Keith McMillen Instruments K-Board Pro 4 Hoja de especificaciones

Keith McMillen Instruments
Keith McMillen Instruments QuNexus Manual de usuario

Keith McMillen Instruments
Keith McMillen Instruments QuNexus RED Manual de usuario


