KaiDeng PANTONMA K80 Manual de usuario
PANTONMA
FEATURING:
The materials and specifications stated in this instruction manual are for
reference only.
2.4Ghz QUADCOPTER
1. Four-Rotor design allows great speed and maneuverability for both Indoor
and outdoor use.
2. Built-in 6-axis Gyro ensures excellent stability.
3. Modular design for convenience of module upgrade and increasing ease
of maintenance.
4. Auto Hover/Auto Launch/Auto landing/obstacle avoidance function.
5. 360-degree 3-dimensional stunt and tumbling function.
6. WiFi Photo/Video.
7. 0.3MP camera Photo/Video
8. 2 MP camera Photo/Video
9. 5 MP camera Photo/Video
10. 5.8G FPV real time transmission

PANTONMA K80
Keys Introduction Of K80 Remote Controller
Specification of K80
Preparation Before Flight
Basic Operation Guide
Special Function Button Guide
CF Mode
Upgrade Component (Selective Buying)
Parts For Drone(Selective Buying)
Trouble shooting
-1-
Catalog
2
3
4
4-9
9
10-11
11-12
13
13-14
14
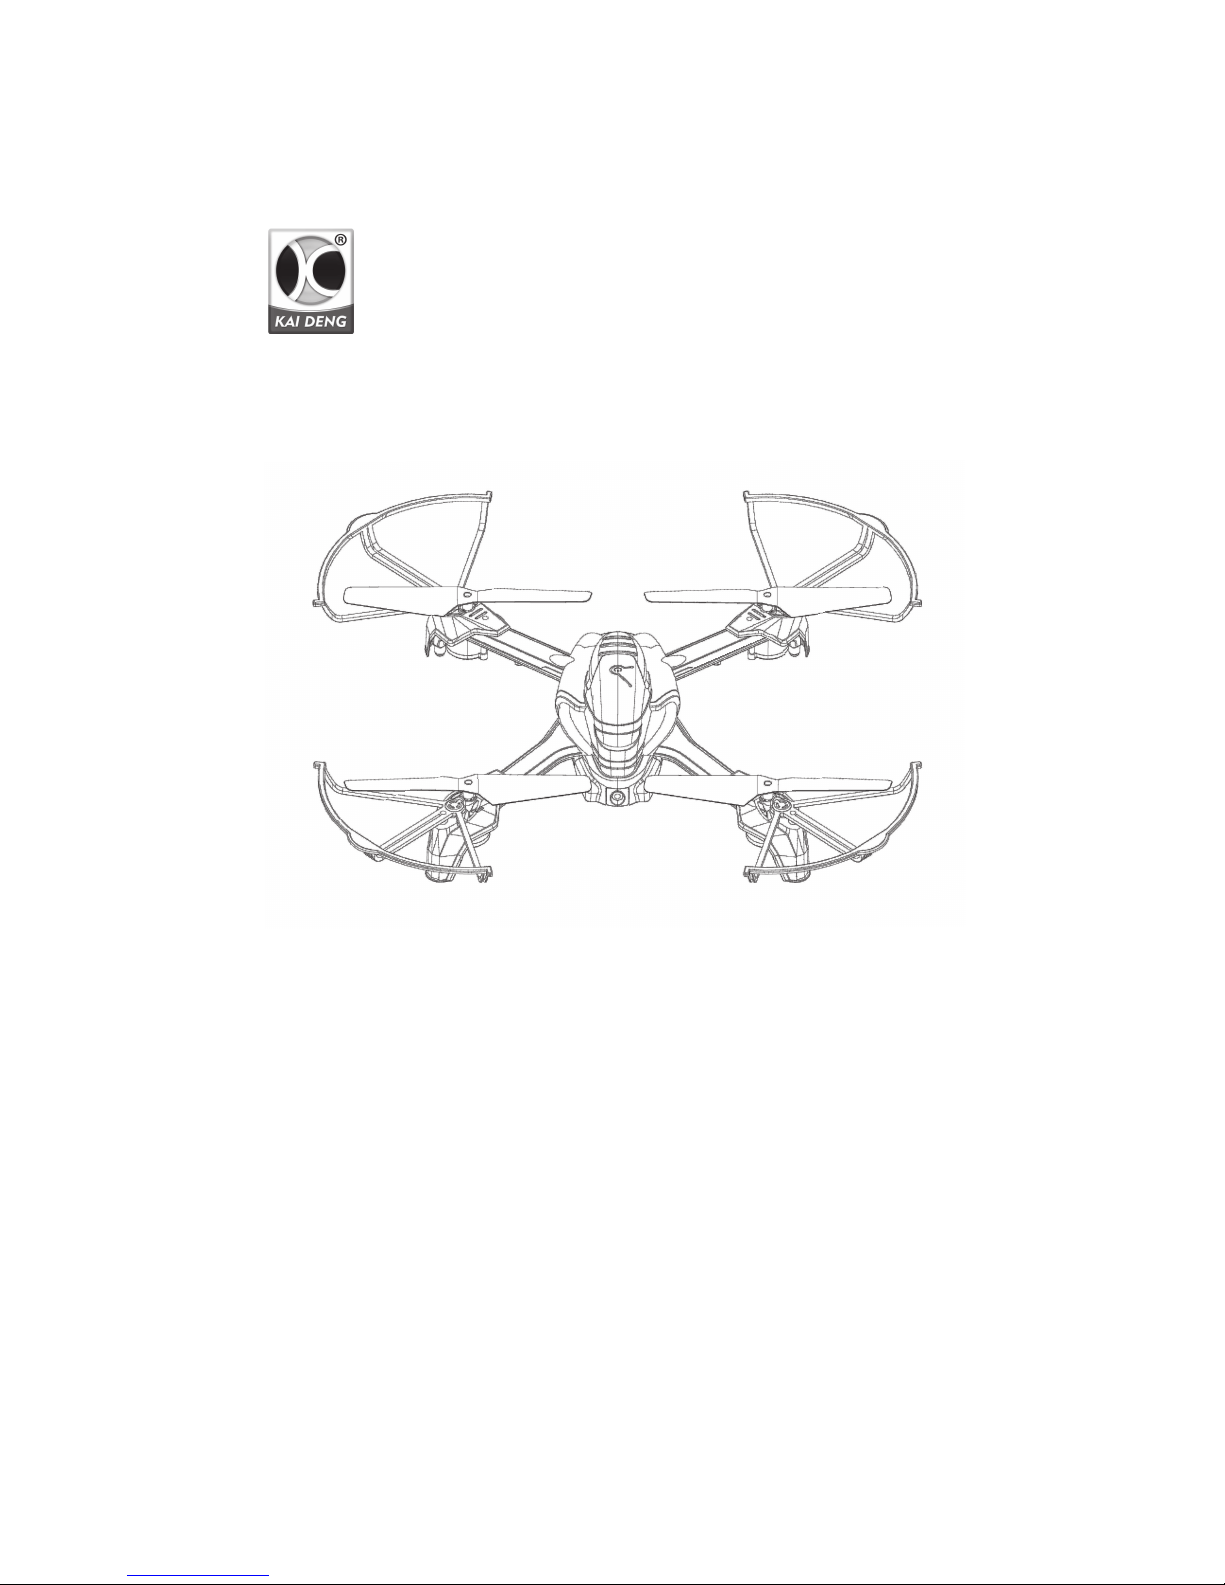
PANTONMA K80
Wonderful design and seperatable module could win player's favor.
High pixel and stable flying could bring much more entertainment.
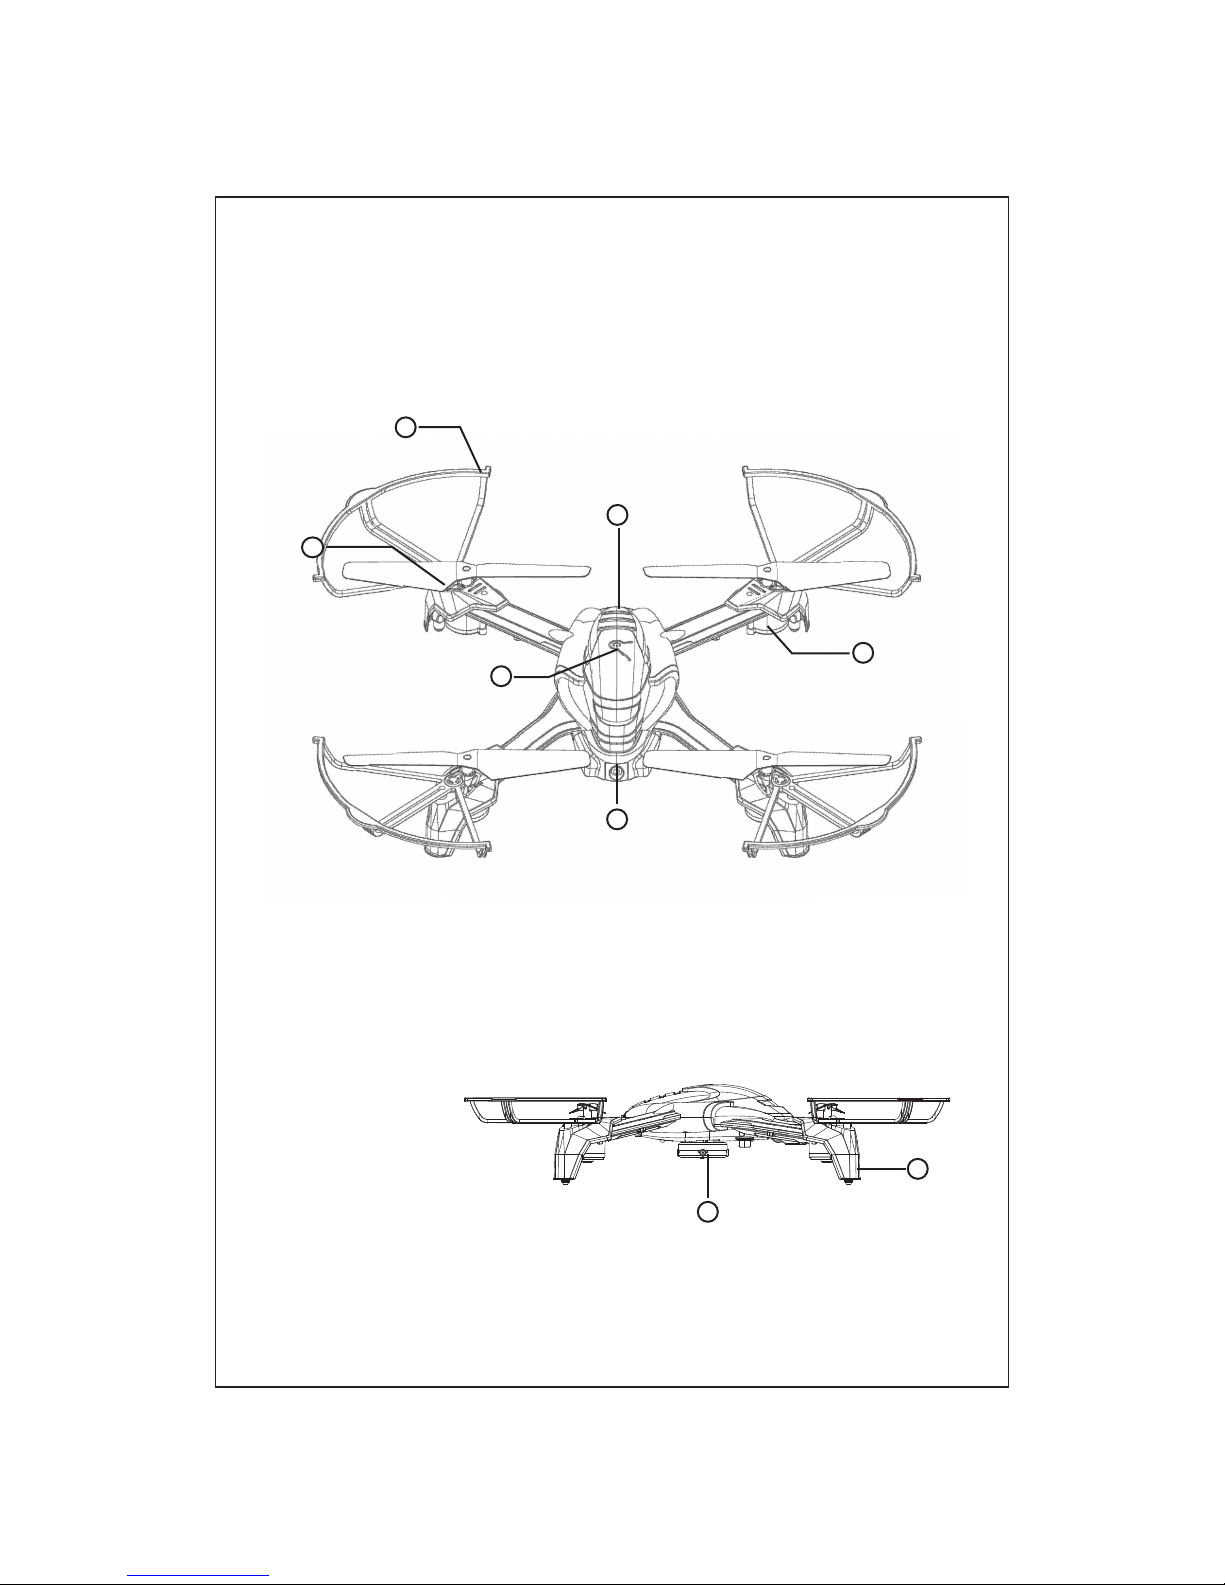
1.Protect Shield
2.Propeller
3.Power button
(long press 1.5s
to power on/off)
4.Camera Module
5.Motor
6.Battery Module
7.Obstacle avoidance module
8.Landing Gear
-2-
7
1
2
3
4
5
6
8

Keys Introduction Of K80 Remote Controller
1.Charging indicator
2.Throttle control stick
3.Left/right turning trimmer
4.Power switch
5.Camera lens up
6.Camera lens down
7.3D filp
8.Charging socket
9.CF mode
10.Led light control switch
11.Backward trimmer
12.Forward trimmer
13.Left/right side-fly trimmer
14.Long press before power on
to switch the left/right control stick
(The remote controller makes a
sound DI indicating the switch success.)
15.Direction control stick
16.Power indicator
17.One key to launch/auto
landing(long press 3 seconds
to stop)18.Speed switch(Slow speed-
one sound DI/middle speed –
two sound DI DI/ high speed –
three sound DI DI DI)19.Short press to take photo/long
press to record video (Point: the
drone will blink one time when
taking photo/blink three times
when recording/blink two times
when saving the photo or video)
20.One key to return
-3-
Fantastic design and multifunction are spoken highly of! Stretchable
handset could fit different screens. Let's go and see!
1
2
3
4
5
67
8
9
10
11
12
13
14
15
16
17
18
19
20
-4-
LWH
Weight
Max Flight Time
Operating Temperature Range
Lens Angle Control Range
SD Card Types
Battery Capacity
LWH
Weight
Max Transmission
Charging Type
Operating Temperature Range
Battery Capacity
225X120X50mm
154.3g
80m
USB
0ćto 40ć
80mAh(built-in Li-
poly battery)
Specification of K80
Ɣ$LUFUDIW
Ɣ5HPRWH&RQWUROOHU
330X330X68mm
Aprx 135g(Standard version)
6.5 MIN
0ćto 40ć
90°
4G Micro SD Card
650mAh
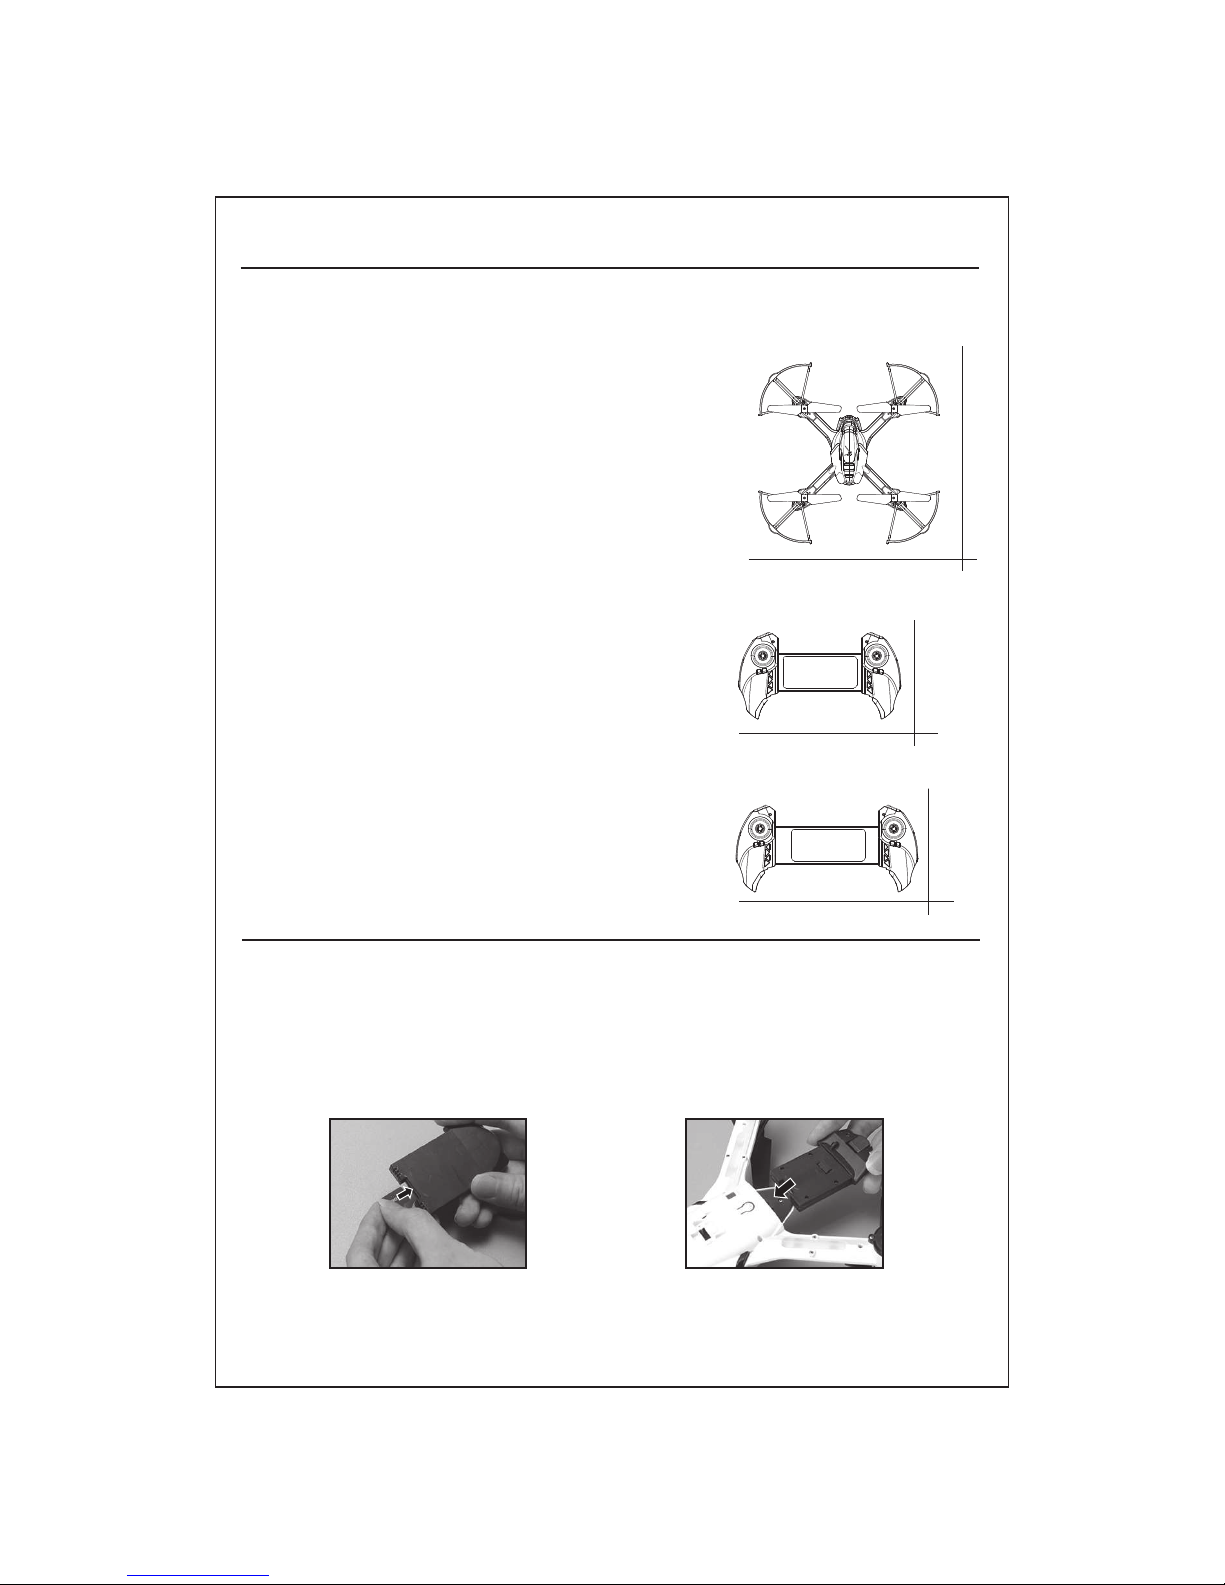
1. .Insert the SD card to the camera.
2. Plug the camera into the drone.
NOTE: Please make sure the drone is off while mount/dismount the camera.
Preparation Before Flight
Ɣ'URQHLQVWDOODWLRQ'LVDVVHPEO\
,QVHUWWKHFDPHUD'LVDVVHPEO\
330mm
188mm
225mm
120mm
120mm
330mm
-5-
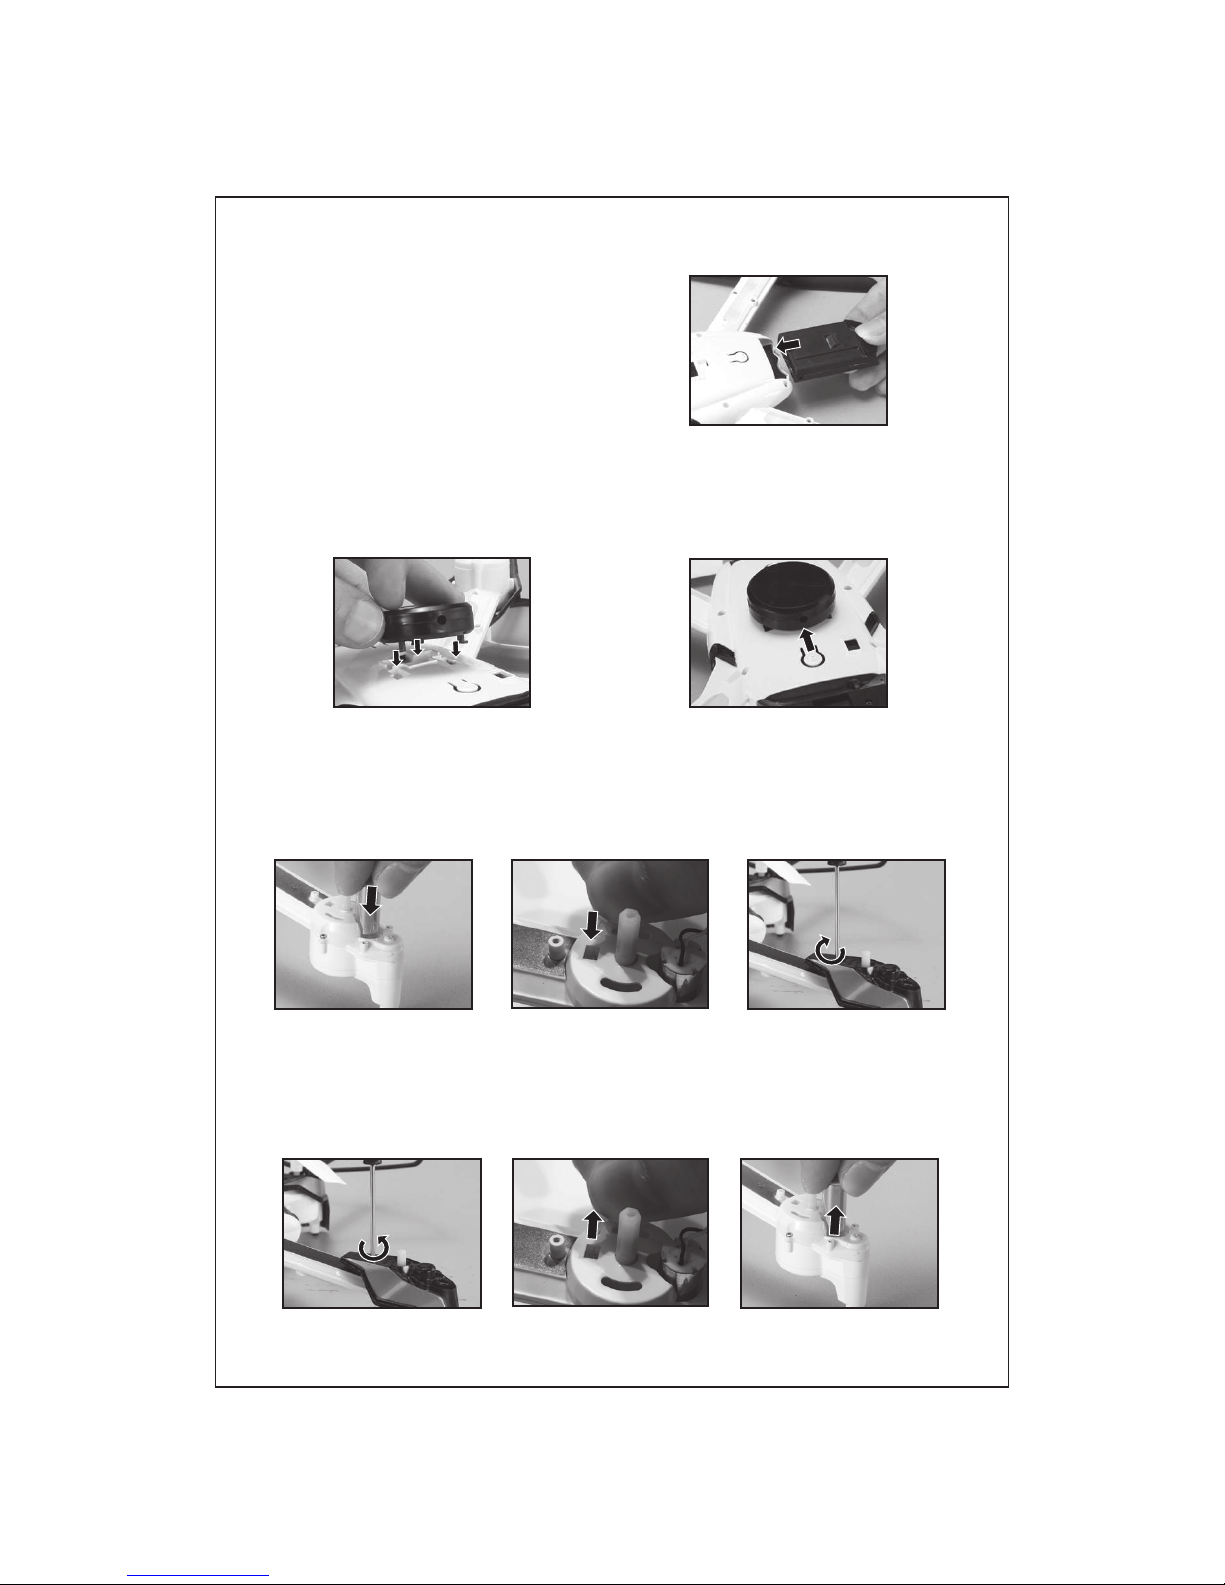
0RWRULQVWDOODWLRQ'LVDVVHPEO\
'LVDVVHPEO\
%DWWHU\LQVWDOODWLRQ'LVDVVHPEO\
6HQVRU,QVWDOODWLRQ'LVDVVHPEO\
1.Match the module with the socket at the bottom of the drone.
2.Push the module according to the direction on the module show to mount it.
1.Connect the battery to the socket
back of the drone.
1.Insert the motor to the motor base.
2.Connect the motor with the socket on the gear.
3.Instal the landing gear and tighten the screw in clockwise direction.
1.Loose the screw in anti clockwise direction then dismount the protect shield.
2.Pull out the motor wire from the socket on the gear.
3.Take out the motor from the motor base.
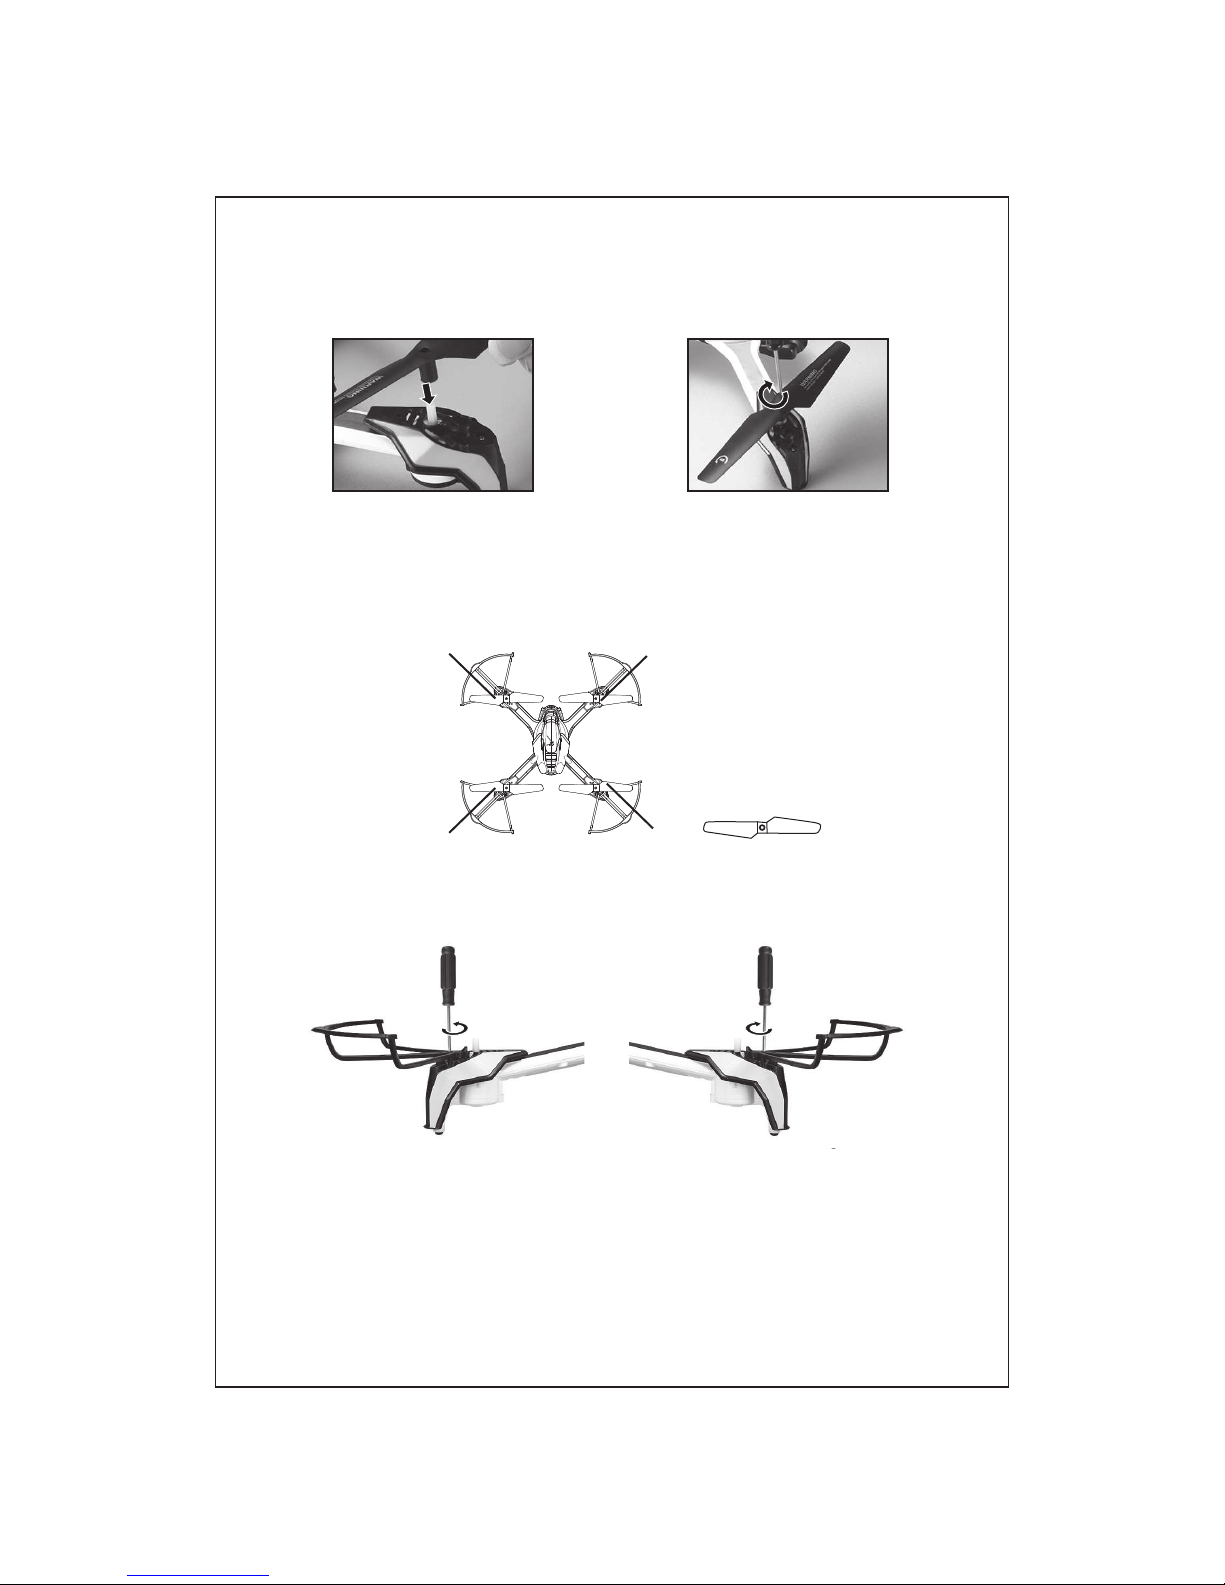
1. Insert the blades with the main axis bar of the six angle gear.
2.Use screwdriver to tighten the screw in clockwise direction.
Install the blade protection frame to every corner and tighten the screws.
See diagram below:
Disassemble the blade Install the blade
NOTE: If the quad-copter crashes, double check to make sure the blade
protection frame is not loose or broken.If the blade is broken, please
replace the protect shield right away
NOTE: If you prefer not to install blade guards, fillers are included to place in
the slots instead.
NOTE: It is important for the correct blade to be put on the correct motor or
the drone will not fly correctly. A letter is marked on each blade to
indicate which motor it should go on.
-6-
3URWHFWVKLHOGLQVWDOODWLRQ'LVDVVHPEO\
%ODGHLQVWDOODWLRQ'LVDVVHPEO\
In
st
al
l
th
e
bl
ad
e
Di
sassem
bl
e
th
e
bl
ad
e
$
$ %
%$
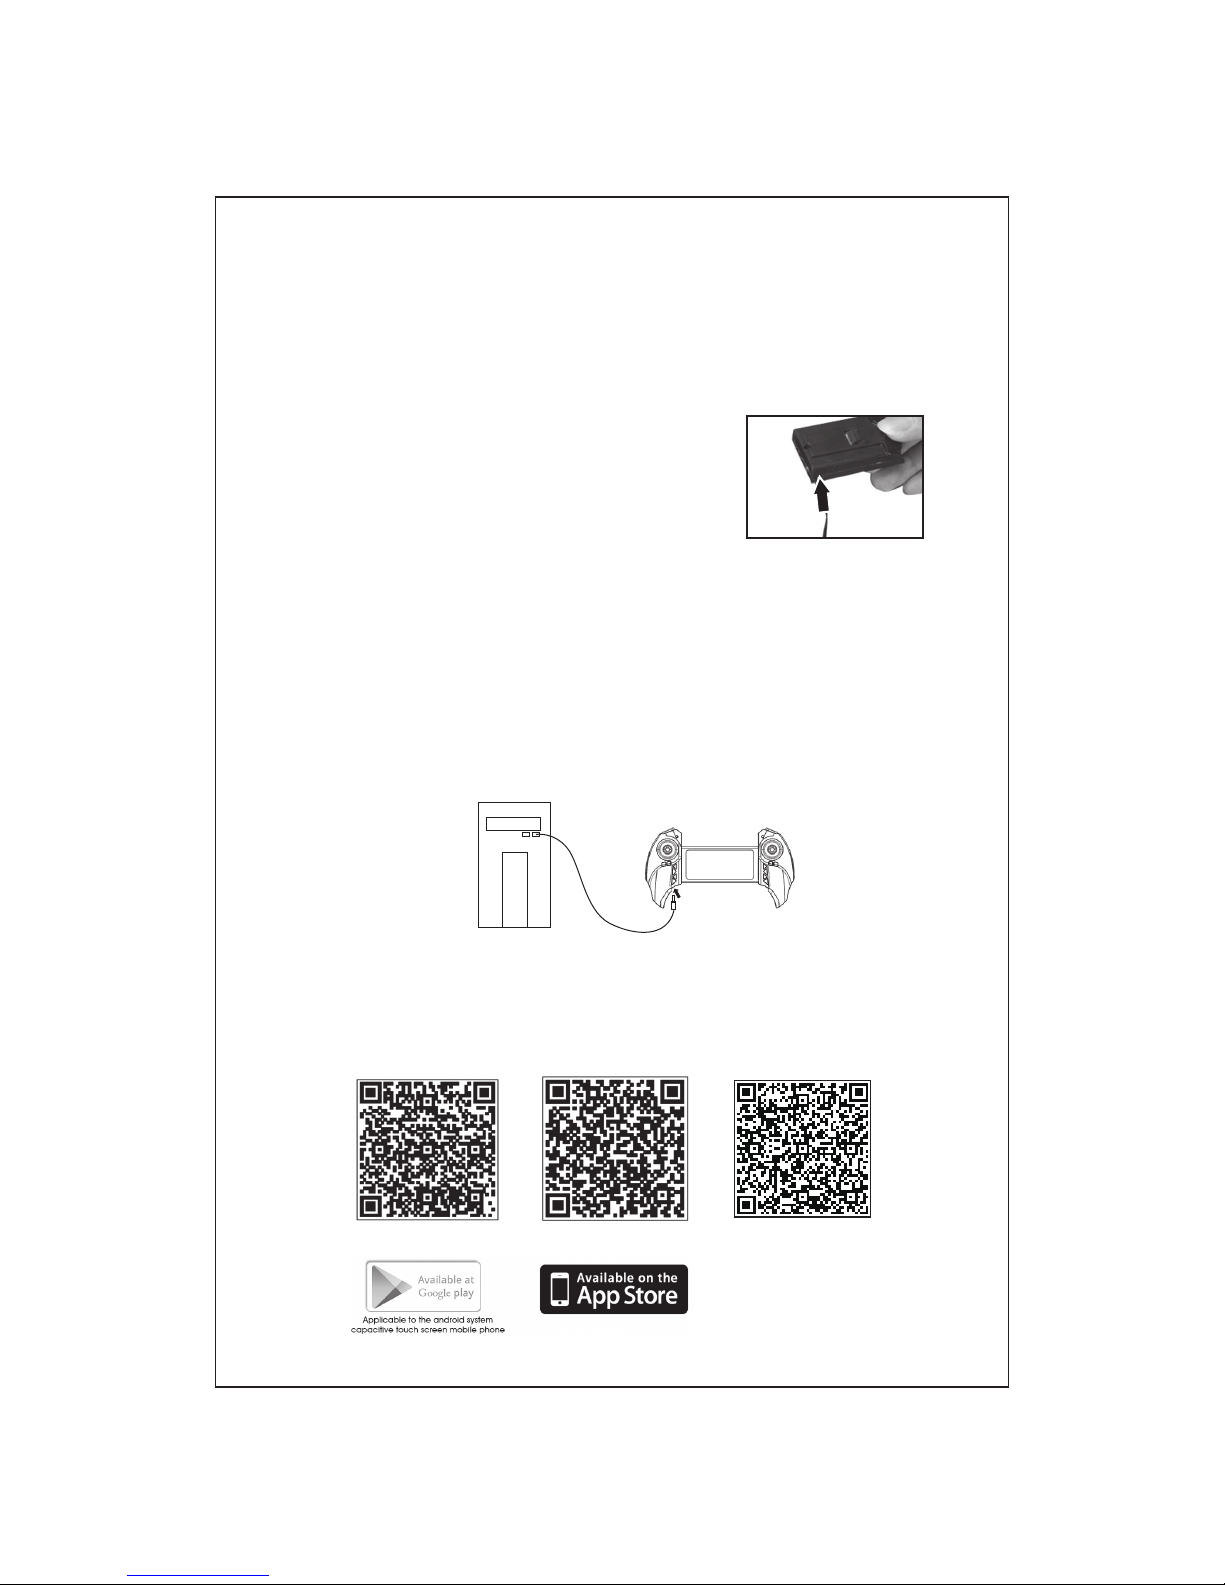
1.Connect the USB cable to the remote controller.turn off the remote controller
when charging
2.Connect the USB cable with computer or compatible USB power adapter,
the green light on the remote controller will on while charging. The red
charging light on the USB cable will turn off while charging and will turn
on once charged.
-7-
Ɣ5HPRWHFRQWUROOHUSUHSDUDWLRQ
Ɣ&KDUJLQJWKHEDWWHU\
Charging the controller
Software installation
6PDUWSKRQHSDGWDEOHWKDUGZDUHVRIWZDUHLQVWDOODWLRQ
1. Push the on/off switch of the quad-copter to OFF and press the button to
take out the battery.
2. Connect the USB cable to the battery pin.
3. Connect the USB cable with computer or compatible USB power adapter.
The red charging light will turn off while
charging and will turn on once charged.
4. Reconnect the battery to the battery socket.
Charging time: approximately 90 minutes.
Flying time: approximately 6.5 minutes.
Two-dimension code is provided on color box packing and back cover of
specification to scan.
QR code for google play QR code for IOS QR code for 360
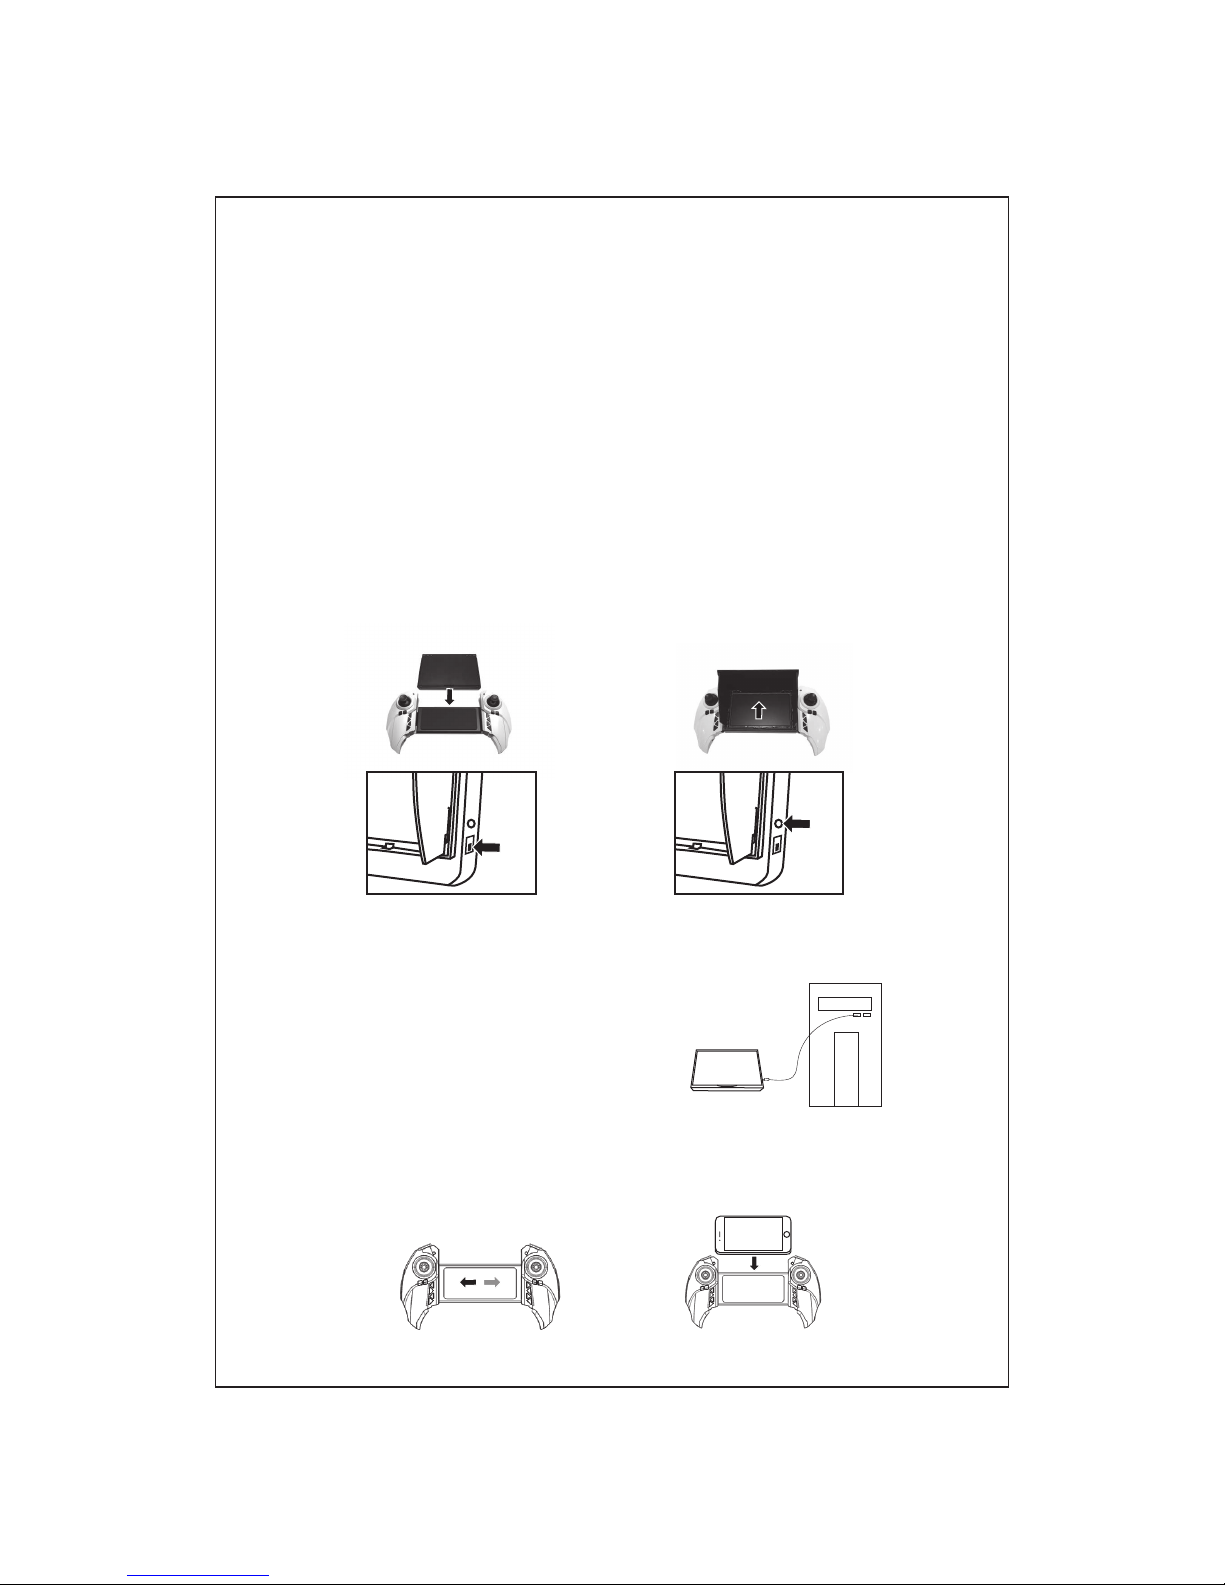
1. Stretch the controller to adjust different size of phone.
2. Slide the phone to the pad of remote controller as the photo show.
Connection instruction:
1.Turn on the drone, the FPV indicate light blink slowly, which shows the
drone is ready to connect with phone.
2.Open your phone and into “settings” , turn on the WIFI, search the KD-
**** from the signal list, connect the signal, exit “setting” option until the
signal shows connected.
3.Open the PANTONMA APP, click “MY DRONE” into control interface. The
indicate light on the drone will on, which means is connected.The phone
shows the real time image. The wifi signal in full grid showing the strongest
signal.
-8-
Phone installation
*)39FRQQHFWLRQLQVWUXFWLRQ
&KDUJHWKH*)39PRQLWRU
Power Switch Charging Slot
1.Connect the 5.8G camera module to the drone.
2.Turn on the drone and controller, as well as the 5.8G monitor, slide the
5.8G monitor to middle of the controller.
Insert the USB pin to the monitor and
connect the USB with adaptor or computer
to charge the monitor.

-9-
Ɣ(QWHULQJLQWRSUHIO\VWDWXV
Basic Operation Guide
Push the throttle lever to the highest position, the LED light on the drone
change from flickering to steady on. This shows that the quad-copter has
synced with the remote. Then press the Auto take off button and push the
throttle slightly to fly.
Here are the basic operation guide(Mode 1), the left stick controls altitude and
direction, while the right stick controls the rotation forward, backward, left or
right movement.
Ascend
Descend
Left Stick Right Stick
Turn
Left
Turn
Right
Backward
Forward
Left
side
-fly
Right
side-
fly
&DPHUD/HQV8S'RZQ
/('/LJKW&RQWURO
90°
NO OFF
Forward Trimmer
/HIW5LJKW6LGH)O\7ULPPHU
Backward Trimmer
Left/Right Turning Trimmer
Tabla de contenidos
Otros manuales de Cuadricóptero de KaiDeng


