JEA Technologies TPM-193R Manual de usuario

TPM-193 Series
Touch Screen LCD Monitors
USER’s GUIDE

Important Recycle Instruction:
Lamp(s) inside this product contains mercury. This product may contain other electron-
ic waste that can be hazardous if not disposed of properly. Recycle or
dispose in accordance with local, state, or federal Laws. For more information,
contact the Electronic Industries Alliance at WWW.EIAE.ORG. For lamp specific
disposal information check WWW.LAMPRECYCLE.ORG.
The information contained in this document is subject to change without notice.
This document contains proprietary information that is protected by copyright. All rights
are reserved. Nopart of this document may be reproduced,translated to another language
or stored in a retrieval system, or transmitted by any means, electronic, mechanical,
photocopying, recording, or otherwise, without prior written permission. Windows is a registered
trademark of Microsoft, Inc.
Other brand or product names are trademarks of their respective holders.

Table of Contents
Usage Notice
Precautions............................................................................................................................. 1
Introduction
About TPM-193 Series ...........................................................................................................2
Touch Screen for TPM-193 Series ............................................................................... 3
Package Overview ...................................................................................................... 4
Installation
Product Overview ........................................................................................................ 5
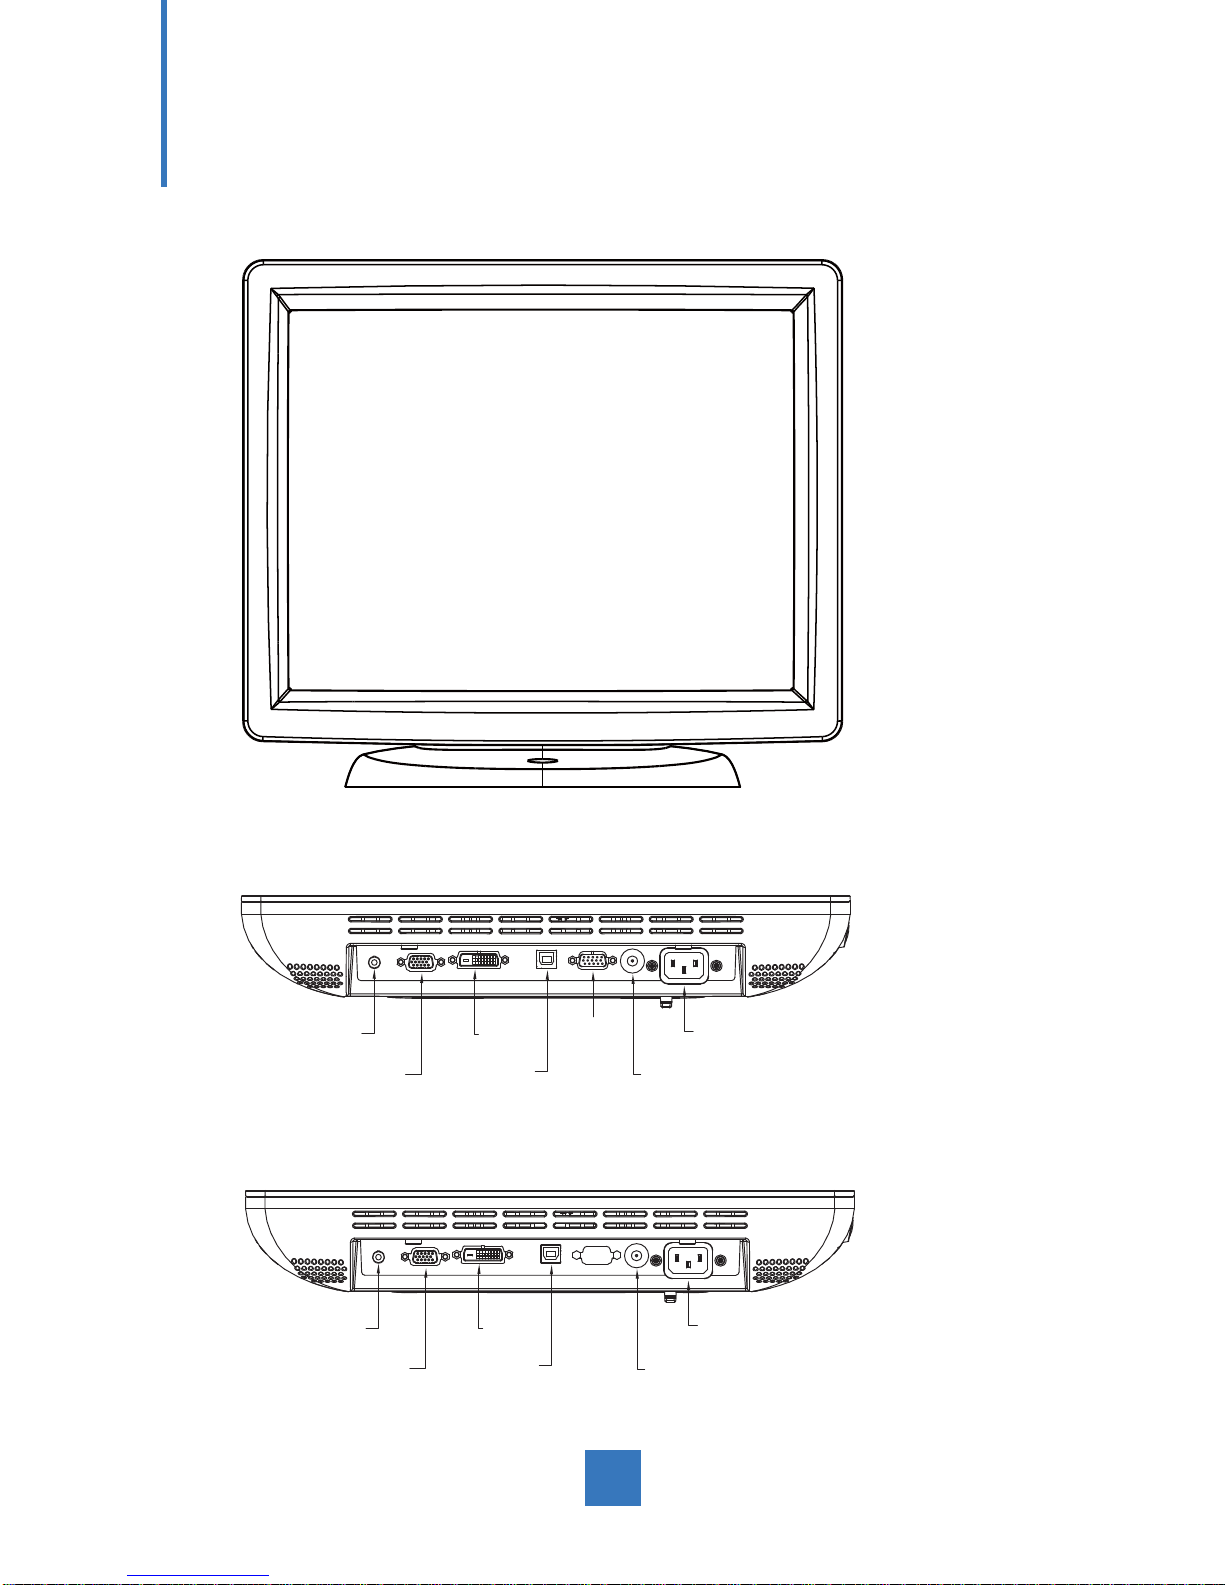
Front View ............................................................................................................... 5
TPM-193R / TPM-193C Bottom View (Without Stand) .............................................. 5
TPM-193W Bottom View (Without Stand) ................................................................. 6
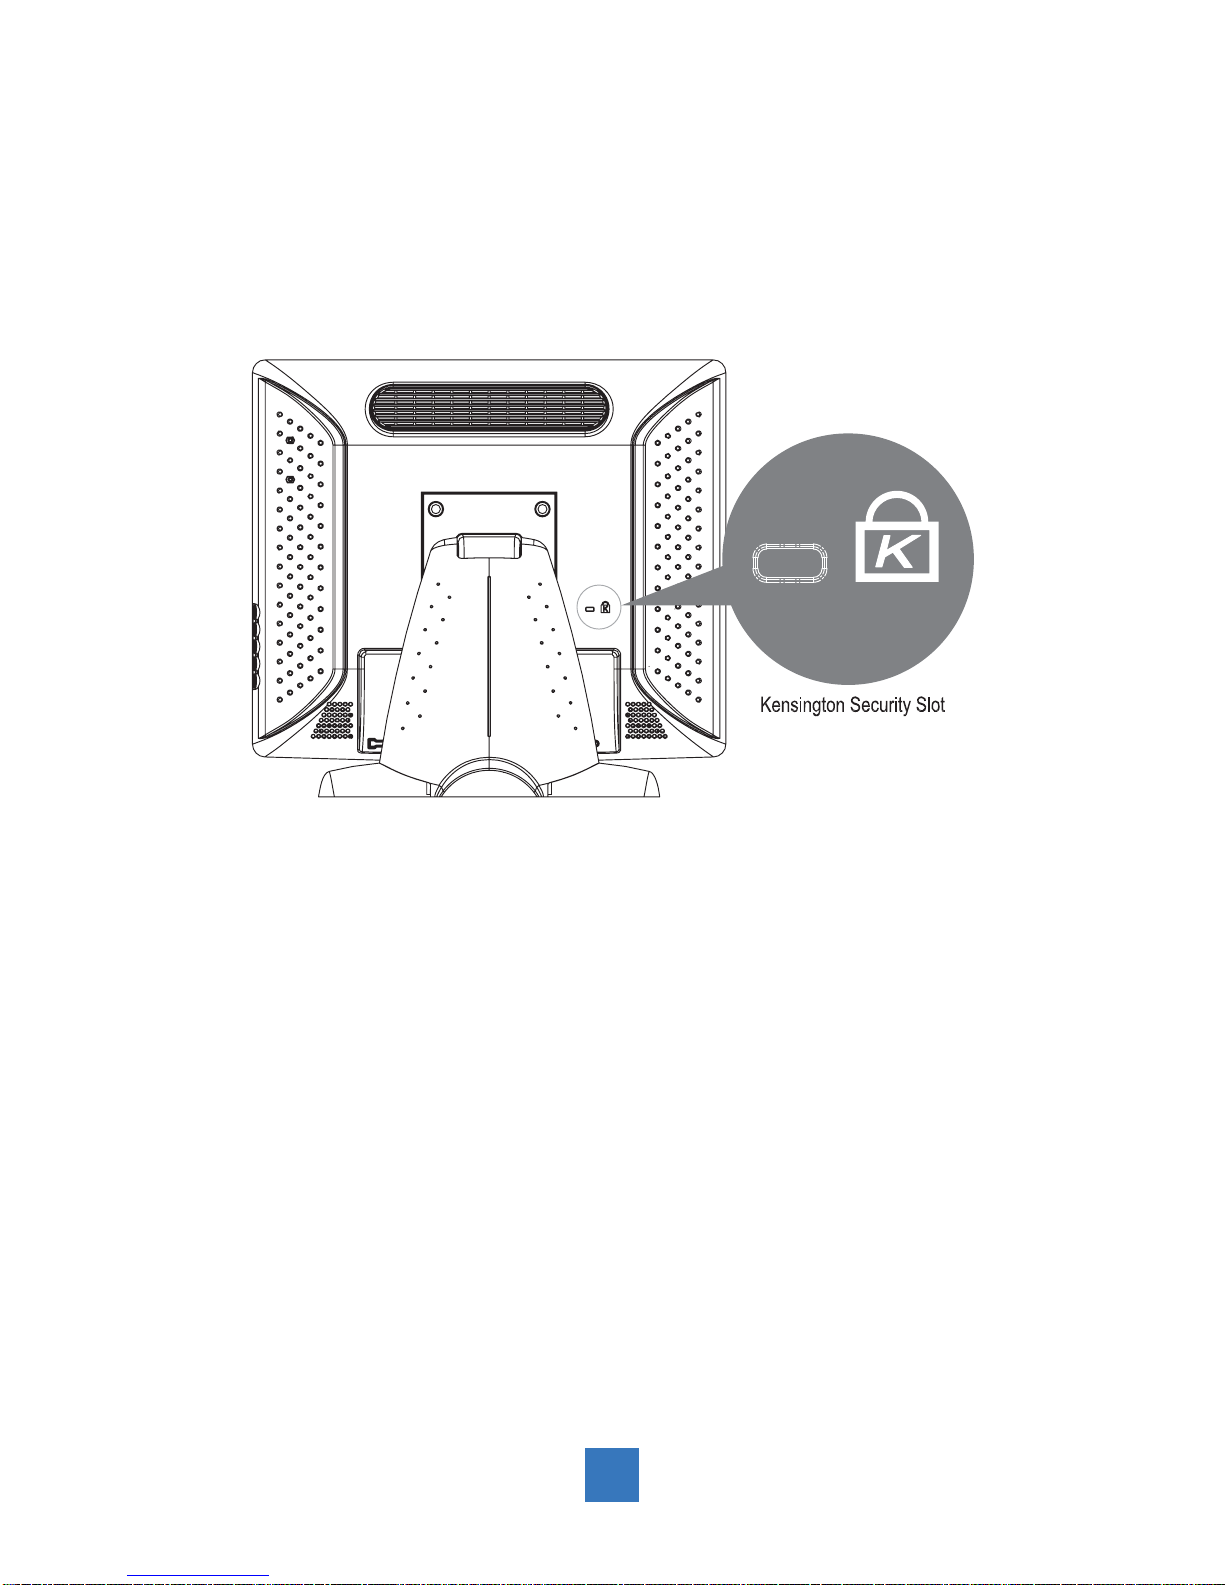
Kensington Security Slot.............................................................................................. 6
VESA Mount for your Monitor....................................................................................... 7
Start Your Installation .................................................................................................. 8
Remove the Back Cover .......................................................................................... 8
Connecting the Display (Figure 1.1)............................................................................. 9
User Controls
Front Panel Controls...................................................................................................11
How to Use the OSD Menus .......................................................................................12
On-Screen Display Menus ..........................................................................................13
Appendix
Troubleshooting..........................................................................................................14
Warning Signal ...........................................................................................................15
No signal .................................................................................................................15
Going to sleep ........................................................................................................15
Out of range ...........................................................................................................15
Product Dimensions ...................................................................................................16
Compatibility Modes ...................................................................................................17
Touch Screen Driver Installation .................................................................................18
Driver installation process ......................................................................................18
TPM-193R / TPM-193C Driver Install ......................................................................18
TPM-193W Driver Install.........................................................................................19
TPM-193C Optional Capacitive Calibration Tool Install............................................19

Usage Notice
! Warnin
g
- To prevent the risk o
f
fi
re or shock hazards, do not expose
this product to rain or moisture.
! Warnin
g
- Please do not open or disassemble the product as this ma
y
cause
e
l
ec
tri
c
s
h
oc
k
.
Precautions
Follow all warnings, precautions and maintenance as recommended in this user’s manual to
maximize the life of your unit.
Do:
• Turn off the product before cleaning.
• Touch screen surface may be cleaned using a soft clean cloth moistened with
mild window glass commercial cleaners or 50/50 mixture of water and isopropyl
alcohol.
• Use a soft cloth moistened with mild detergent to clean the display housing.
• Use only high quality and safety approved AC/DC adapter.
• Disconnect the power plug from AC outlet if the product is not going to be used for
an extended period of time.
Don’t:
• Do not touch the LCD Display screen surface with sharp or hard objects.
• Do not use abrasive cleaners, waxes or solvents for your cleaning.
• Do not operate the product under the following conditions:
- Extremely hot, cold or humid environment.
- Areas susceptible to excessive dust and dirt.
- Near any appliance generating a strong magnetic field.
- In direct sunlight.
1

Introduction
About TPM-193 Series
The TPM-193 Series is a 19" flat panel screen with an active matrix, thin-film
transistor (TFT) liquid crystal display (LCD).
Features include:
• Direct Analog signal input
• Active matrix TFT LCD technology
• 1280 x 1024 SXGA resolution
• 19" viewable display area
• 31.5 ~ 81 KHz horizontal scan
• 56.3 ~ 75 Hz high refresh rate
• 0.294mm x 0.294mm pixel pitch
• Auto adjustment function
• Multilingual OSD user control
• Kensington security slot
• 100 mm VESA mount
• Removable base for flexible mounting solutions.
• TPM-193R- 5-wire resistive touch screen with dual RS-232 Serial / USB controller
• TPM-193W - SAW touch screen with USB controller
• TPM-193C - Capactive touch screen with dual RS-232 Serial / USB controller
• Built-in speakers-1W x 2
Touch Screen for TPM-193R
• Analog 5-wire resistive touch screen for finger and stylus input
• Surface: Anti-glare treatment
• Interface: Dual RS-232 Serial/USB controller
• Transmittance: 80±5%
• Driver: Windows®VISTA, XP, 2000, ME, 98, CE, XP Embedded, Linux/Apple®Mac OS
Touch Screen for TPM-193W
• Surface Acoustic Wave (SAW) touch screen for finger and stylus input
• Surface: Anti-glare treatment
• Interface: USB controller
• Transmittance: 90±5%
• Driver: Windows®VISTA 64/32 bits, XP, 2000, 98
2

3
Touch Screen for TPM-193C
• Analog capacitive touch screen for finger input only
• Surface: Anti-glare treatment
• Interface: Dual RS-232 Serial/USB controller
• Transmittance: 85±5%
• Driver: Windows®VISTA, XP, 2000, ME, 98, CE, XP Embedded, Linux/Apple® Mac OS

Package Overview
LCD Display Power Cord VGA Signal Cable
RS-232 Cable
Quick Start Guide
USB Cable ( A to B) Audio-in Cable
DVI-D Cable
(TPM-193X Series Only)
USB Cable (A to A)
(Option for MSR)
4
TouchKit CD
DC Power Supply
(sold separately)

Product Overview
• Front View
• TPM-193R / TPM-193C Bottom View (Without Stand)
RS-232
(Option)
VGA IN
AC IN
Audio DVI IN
USB DC IN
• TPM-193W Bottom View (Without Stand)
VGA IN
AC IN
Audio DVI IN
USB DC IN
5

Kensington Security Slot
The monitor can be secured to your desk or any other fixed object with Kensington lock
security products. The Kensington lock is not included.
6

VESA Mount your monitor
This monitor conforms to the VESA Flat Panel Mounting Physical Mounting Interface
standard which defines a physical mounting interface for flat panel monitors, and
corresponding with the standards of flat panel monitor mounting devices, such as wall and
table arms. The VESA mounting interface is located on the back of your monitor.
To mount the monitor on a swing arm or other mounting fixture, follow the instructions
included with the mounting fixture to be used, please note to mount your monitor to the
devices (either mounting fixture or swing arm) what conforms to the UL listed.
! Warning!
Please select the proper screws!
The distance between the back cover surface and the bottom of the screw hole
is 8 mm. Please use four M4 screws diameter with the maximum length of 8
mm to mount your monitor.
Please note the mounting stand shall be able to sustain at least 5Kg weight.
7
Este manual sirve para los siguientes modelos
2
Tabla de contenidos


