HOTA D6 Pro Manual de usuario

D6 Pro AC/DC Dual Channel Smart Charger
Operating Instructions

D6 Pro AC/DC Dual
Channel Smart Charger
Ver 1.1.8

Product Overview
1. Specifications
2. Introduction
3. Warnings and Safety Notes
4. Recommended Connected Way
5. Standard Battery Parameters
Operation and Setup
1. How to Confirm Charging Current
2. Operative Skills
3. Charger Settings
4. Charger Settings>Task Parameters
5. Charger Settings>System Parameters
6. Task Settings
7. Task settings and Notes
8. Working Parameters Display
Product Qualification Declaration
Troubleshooting
Warranty and service
Safety Tips
Safety Notes
0 1
0 1
0 2
0 3
0 4
0 5
0 6
0 7
0 8
2 0
2 1
2 2
2 3
0 9
1 2
2 1
0 4
0 4
0 2
0 3
Contents

Product Overview
Specifications
Net Weight
Input
Voltage
Charge
Power
Discharge
Power
575g
USB Output 5V / 2.1A
External
Discharge Current 1~15A x 2
AC 100~240V / DC 6.5~30V
AC 200W
Wireless
Charging Color white,black,gray Max 5W output
Protection
Function
Temperature protection,time protection,capacity protection,input reverse
protection,Output protection,short circuit protection,output overcurrent
protection,Output overvoltage protection,overcharge protection
Balance
Current
Screen Size
Charge
Current
Discharge
Current 0.1~3A x 2
1600mA x 2
2.8” 320×240
260000 colors
Dimensions 108mm×105mmx76mm
Storage
Temperature -20~60°C
Operating
Temperature 0~40°C
Battery
Type
LiHV/LiPo/LiFe/Lilon/Lixx : 1~6S
NiZn/NiCd/NiMH : 1~16S
Smart Battery : 1~6S
Lead Acid(Pb) : 1~12S(2~24V)
Eneloop : 1~16S
0.1~15A x 2
Internal Discharge:15W × 2
(balance port 10W x 2)
External Discharge:
325W × 2(650W)
01 D6 Pro AC/DC Dual Channel Smart Charger

Product Overview
Introduction
Warnings and Safety Notes
Channel
Switch
DC Port
1. Do not use the charger in an unattended manner,in case of any functional abnormity,
please stop using it and refer to the manual.
2. Keep the charger away from dust,humidity,rain and high tempreture,as well as avoid
direct exposure to sun and intense vibration.
3. Input voltage of the charger is 6.5-30V DC. When connecting the power supply, make sure
that the input voltage match the operating voltage range of the charger.
4. Please place the charger on a heat-resisting,non-flammable and insulating surface. Do not
use it by placing it on the car’s seats,carpet or other similar place. Keep inflammable and
explosive objects away from operation areas of the charger.
5. Make sure the heat emission hole at the bottom of the charger is uncovered while in use,
and ensure the cooling fan smoothly extracts heat.
6. Please fully understand the charging and discharging characteristics as well as the battery’s
specifications. Additionally,set up proper charging parameters in the charger. Incorrect
setting of parameters can cause damage to the charger and battery and/or result to
disastrous consequences such as fire or explosion.
7. When charging or discharging is completed,please press the speed shuttle key to terminate
current task,and remove the battery when charger shows the standby screen.
Balance Port
for Channel 1
Balance Port for Channel 2
Speed Shuttle Key
USB Port 5V
AC Port
Wireless Charging
Update Port
Battery Port for Channel 2
Battery Port
for Channel 1
02 D6 Pro AC/DC Dual Channel Smart Charger

Be very careful to choose the correct voltage for different types of battery otherwise you
may cause damage to the batteries. Incorrect settings could cause the cells to vent, burn
or explode leading to injury or loss of property.
Recommended Connected Way
Standard Battery Parameters
Product Overview
Rated
Voltage
Full Charger
Voltage
Storage
Voltage
Discharge
Voltage
Balance
Charge
Unbalanced
Charge
Support
Cells
Max Charge
Current
NiCd
NiMH LiFe
1.20V
1.50V
0.90V
1-16S
15.0A
3.30V
3.20V
3.65V
2.90V
1-6S
15.0A
3.70V
3.6V
4.10V
3.20V
1-6S
15.0A
3.80V
3.70V
4.20V
3.30V
1-6S
15.0A
3.85V
3.80V
4.35V
3.40V
1-6S
15.0A
1.60V
1.50V
1.93V
1.20V
1-16S
15.0A
3.80V
3.7V
4.20V
3.30V
1-6S
15.0A
3.80V
3.70V
4.20V
3.30V
1-6S
15.0A
2.00V
2.46V
1.90V
1-12S
15.0A
1.20V
1.50V
0.90V
Max Charge
C Value ≦2C ≦4C ≦1C ≦1C ≦1C ≦0.5C ≦1C ≦1C ≦0.5C ≦0.5C
1-16S
15.0A
Lilon LiPo LiHV NiZn Lixx Pb
Smart
Ba�ery Eneloop
1. Connect the power supply, wait for self-checking to be completed;
2. Select the channel you wanna use then connect your battery to the chosen channel;
3. Set up task parameters applicable to your battery through the display and speed shuttle key;
4. Enjoy.
03 D6 Pro AC/DC Dual Channel Smart Charger
Ba�ery
Type
Task

How to Confirm Charging Current
Operative Skills
Operation and Setup
It is very important to know the maximum charging current of the battery as excessive
current could influence the life span of battery and/or cause damages. In addition, excessive
current can cause heating and/or explosion of the battery during the charging process.
The charging and discharging capacity of battery is usually marked with C value. Multiplying
the charging C value and battery capacity equals to the maximum charging current support-
ed by the battery. For example, for a 1000 mAh battery with a charging capacity of 5C, the
maximum charging current would be 1000*5=5000mA; therefore, the maximum charging
current is 5A.
For a lithium battery, if it is impossible to confirm the supported charging C value, please set
the charging current below 1C for the sake of its (lithium battery) safety.
The reference relation between C value and charging time: charging time ≥60 minutes/
charging C value (it therefore needs around 60~70 minutes to complete charging with 1C).
Due to differences in battery conversion efficiency, the period to complete the charging
might be extended.
CH Key Speed
Shuttle Key
04 D6 Pro AC/DC Dual Channel Smart Charger
Connect power supply to the charger's AC or DC
port, wait for the system to complete the
self-checking. Connect the battery to the char-
ger under standby interface, and short press
the speed shuttle key to select the switching
channel freely,after select the corresponding
channel,short press the speed shuttle key to
make the“Task Setting” menu to pop up.
When the task is being executed, you can short
press the speed shuttle key to pop up the“
Adjust Task” menu to adjust the task's current .
Long press CH key to quick stop current oper-
ation or to enter the “Task Settings” menu
for corresponding channel.

Task Parameters
System Parameters
CH2 Calibrations
CH1 Calibrations
System Self-checking
Factory Settings
Charger settings
System Info
Back
Charger Settings
Operation and Setup
Adjust Safety Timer, Max Capacity, End Current and other parameters
Adjust Language, input power, Volume and other parameters
Used for channel 1 data calibration
Used for channel 2 data calibration
Start self-checking of the charger
Restore all parameters to factory settings(User calibration data cleanup)
Display system information, serial number
Exit “Charger Settings”
Task Parameters
System Parameters
CH1 Calibrations
CH2 Calibrations
System Self-checking
Factory Settings
System Info
Back
05 D6 Pro AC/DC Dual Channel Smart Charger
In the standby interface, Long press the speed shuttle key to pop up the “Charger Settings”
menu. The menu items are as follows:

Safety Timer
Max. Capacity
Trickle Charge
End Current
Back
< Task parameters
2400Minute
999999mAh
10%
On
Charger Settings > Task Parameters
Operation and Setup
Safety Timer
Back
Trickle Charge
End Current
Max. Capacity
06 D6 Pro AC/DC Dual Channel Smart Charger
In the standby interface,Long press the speed shuttle key to pop up the “Charger Settings”
menu. and then choose “Task parameters” item, the menu items are as follows:
Cut off when less than the ratio between completed current and set up current
Allows maximum running time; running beyond this setting, automatic
protection will stop the task.
Allows maximum charging capacity; running beyond this setting, automatic
protection will stop the task.
Whether to turn on trickle charge : On or Off
Exit the “Task parmeters” menu
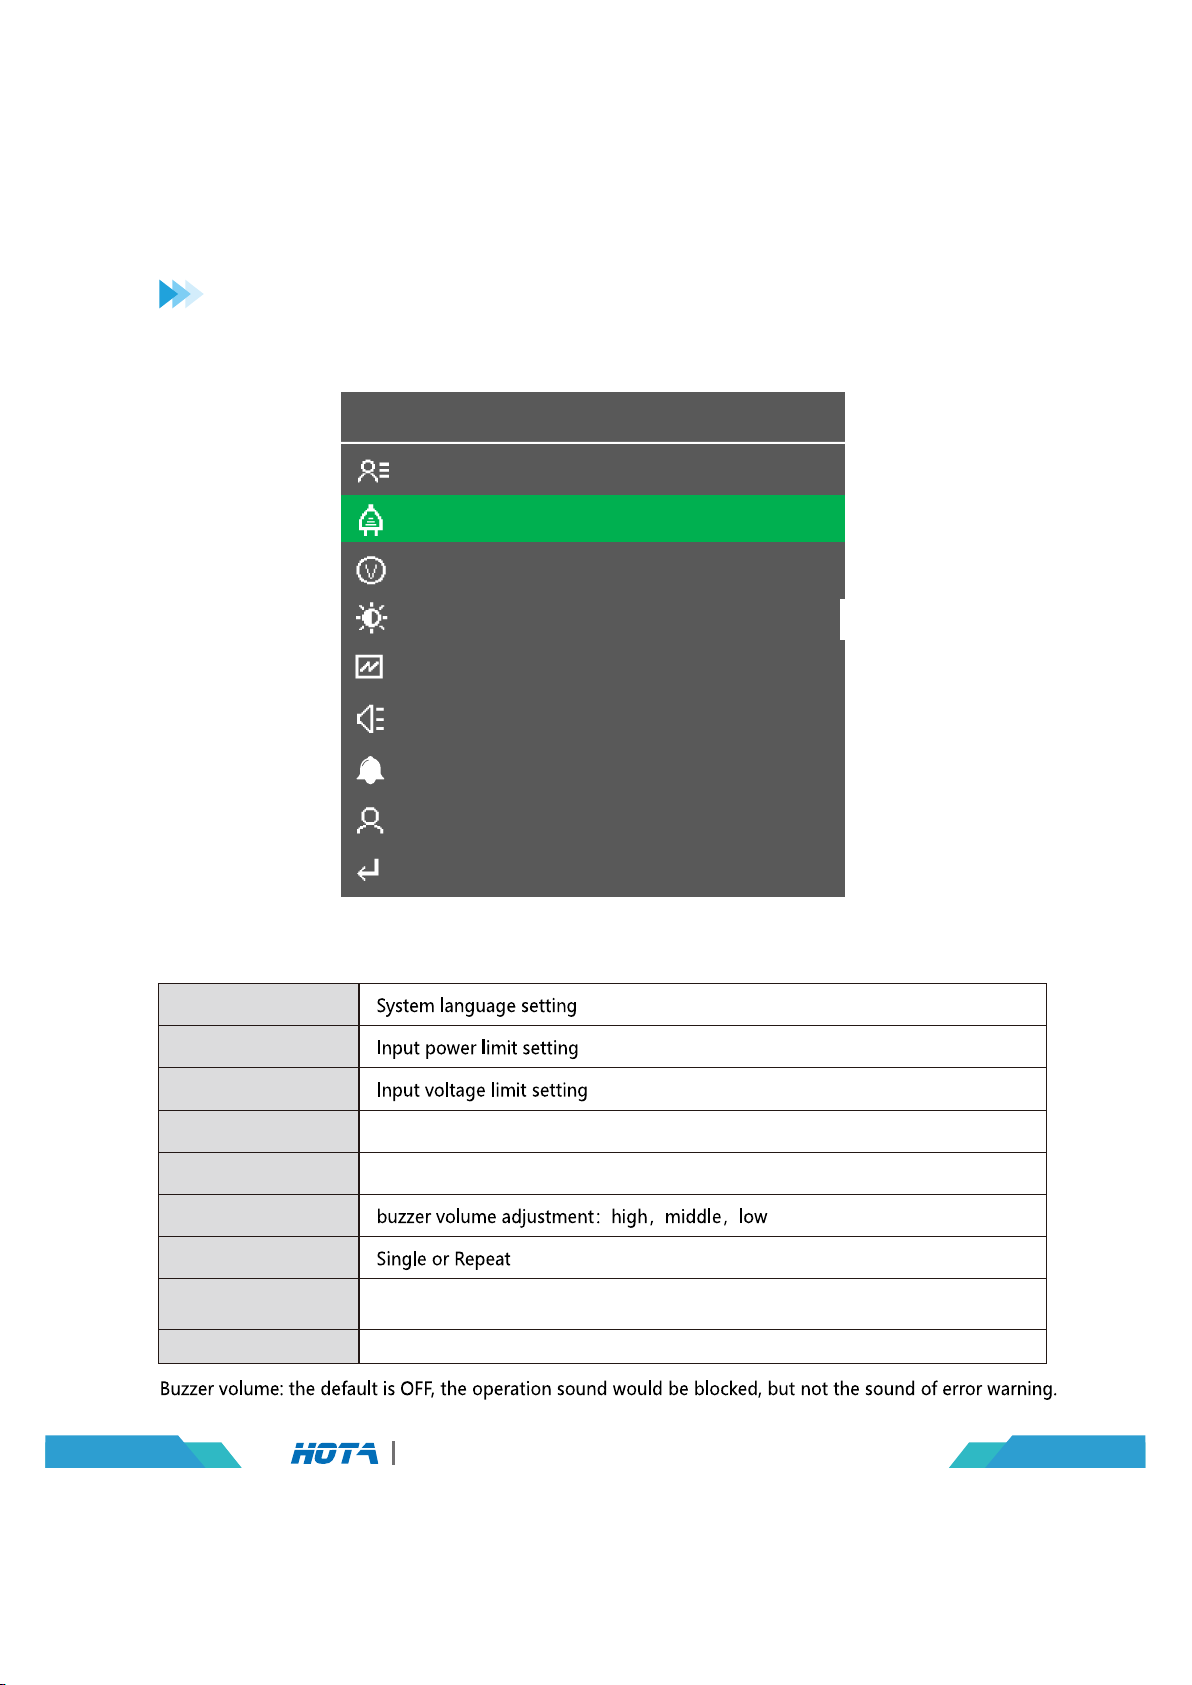
Language
Max. Input Power
LCD Backlight
Min. Input Voltage
Wireless Charge
Volume
< System Settings
English
700W
6.5V
High
High
Repeat
Name
On
Completion Signal
Device Name
Back
Charger Settings > System Parameters
Operation and Setup
Backlight adjustment:high,middle,low
Buzzer volume adjustment:high,middle,low
Exit the “System settings” menu
Language
Max. Input Power
Min. Input Voltage
LCD Backlight
Wireless Charge
Volume
Completion Signal
Device Name
Back
07 D6 Pro AC/DC Dual Channel Smart Charger
In the standby interface, Long press the speed shuttle key to pop up the“Charger Settings”
menu. and then choose“System parameters”item, the menu items are as follows:
Press the speed shuttle key to enter, need to manually enter the name of
the device, long press the speed shuttle key to exit
Tabla de contenidos
Otros manuales de Cargador de baterías de HOTA


