
GROTHE CALIMA 200 Series Manual de usuario
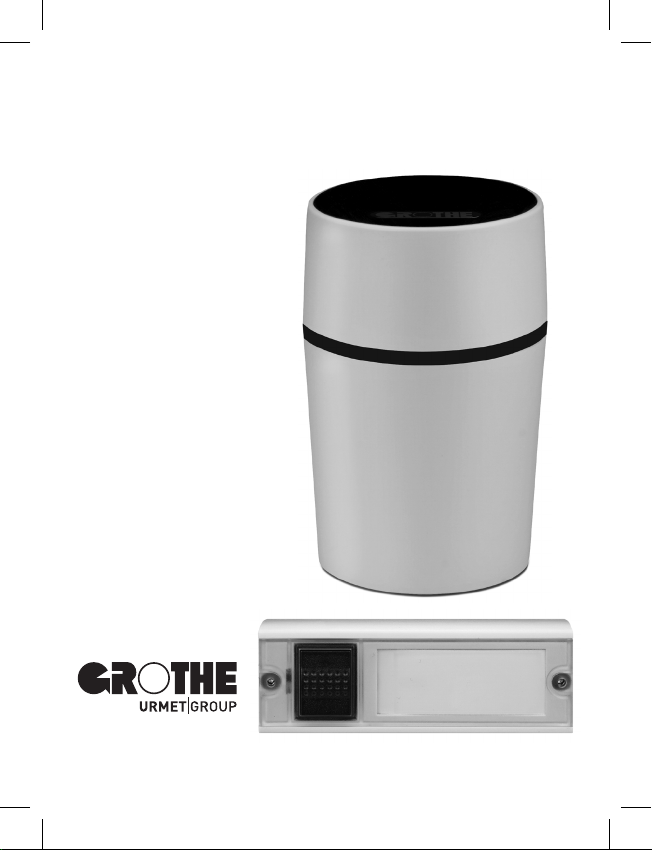
Installation and Operating Instructions
CALIMA 200 Series Wireless Chime Kit
Kit consisting of a
wireless chime
with LED ring and
wireless bell button

2
Dear Customer,
With this device you have acquired a quality product which we have developed
and produced for you with the greatest possible care and to the highest
standards. The statutory guarantee period applies. Defects caused by improper
handling, misuse or disregard of the installation and operating instructions are
excluded from this guarantee
.
Package contents (please check the package contents for
completeness)
o
1 CALIMA 200 wireless chime
o
1 wireless bell button
o
2 wall plugs and 2 Phillips screws for mounting the wireless bell
button
o
1 Allen key for opening the cover of the wireless bell button
You also need (not included in the package)
o
4 x 1.5 V (AA type) batteries for the wireless chime
o
2 x 1.5 V (AAA type) batteries for the wireless bell button
o
Tools / aids such as drill bits, screwdriver, coin
Alternative fixing option (not included)
o
Velcro tape or double-sided adhesive tape instead of mounting
with screws
Guarantee / Package contents / Materials required

3
Safety instructions / Cleaning
Do not expose the wireless chime to dripping or splashing liquid! Do not place
any vessels filled with liquid on it! Do not cover it with objects or blankets,
curtains, etc. and protect it from direct sunlight and naked flames!
Do not expose the batteries in the wireless bell button to excessive heat
(e.g. sunlight, fire or similar)!
Intended use
The devices described here are solely intended as a radio-controlled bell and
signalling system for private use. The function can be impaired by different
influences (flat batteries, radio interference, etc.). Never use this wireless
chime kit in safety-related areas!
If failure of the device could cause a hazard for people, or other consequential
damage is possible, you MUST prevent this through suitable additional safety
measures!
Cleaning
Please clean using only a slightly damp cloth, not a microfibre cloth, as this
could scratch the surface.

4
Initial information:
• Guarantee . . . . . . . . . . . . . . . . . . . . . . . . . . . . . . . . . . . . . . . . . . . . . . . . . . . . . . . . . . . . . . . . . . . . . . . . . . . . . . . . . . . . . . . . . . . . . . . . . . . . 2
• Package contents . . . . . . . . . . . . . . . . . . . . . . . . . . . . . . . . . . . . . . . . . . . . . . . . . . . . . . . . . . . . . . . . . . . . . . . . . . . . . . . . . . . . . . . . 2
• What else you need . . . . . . . . . . . . . . . . . . . . . . . . . . . . . . . . . . . . . . . . . . . . . . . . . . . . . . . . . . . . . . . . . . . . . . . . . . . . . . . . . . . . . . 2
• Alternative fixing option . . . . . . . . . . . . . . . . . . . . . . . . . . . . . . . . . . . . . . . . . . . . . . . . . . . . . . . . . . . . . . . . . . . . . . . . . . . . . . . 2
• Intended use . . . . . . . . . . . . . . . . . . . . . . . . . . . . . . . . . . . . . . . . . . . . . . . . . . . . . . . . . . . . . . . . . . . . . . . . . . . . . . . . . . . . . . . . . . . . . . . . 3
• Safety instructions . . . . . . . . . . . . . . . . . . . . . . . . . . . . . . . . . . . . . . . . . . . . . . . . . . . . . . . . . . . . . . . . . . . . . . . . . . . . . . . . . . . . . . . 3
• Cleaning . . . . . . . . . . . . . . . . . . . . . . . . . . . . . . . . . . . . . . . . . . . . . . . . . . . . . . . . . . . . . . . . . . . . . . . . . . . . . . . . . . . . . . . . . . . . . . . . . . . . . . . 3
CALIMA 200 – the highlights explained briefly . . . . . . . . . . . . . . . . . . . . . . . . . . . . . . . . . . . . . . . . . . . . . . . . 6
Product overview . . . . . . . . . . . . . . . . . . . . . . . . . . . . . . . . . . . . . . . . . . . . . . . . . . . . . . . . . . . . . . . . . . . . . . . . . . . . . . . . . . . . . . . . . . . . 7
First-time use of the wireless chime
• Inserting the batteries . . . . . . . . . . . . . . . . . . . . . . . . . . . . . . . . . . . . . . . . . . . . . . . . . . . . . . . . . . . . . . . . . . . . . . . . . . . . . . . . . 8
First-time use of the wireless bell button
• Mounting, inserting the batteries, writing on the nameplate . . . . . . . . . . . . . . . . . . . . . 10
Individual settings of the wireless chime
• Setting the melody . . . . . . . . . . . . . . . . . . . . . . . . . . . . . . . . . . . . . . . . . . . . . . . . . . . . . . . . . . . . . . . . . . . . . . . . . . . . . . . . . . . . . . 12
• Setting the colour of the LED ring . . . . . . . . . . . . . . . . . . . . . . . . . . . . . . . . . . . . . . . . . . . . . . . . . . . . . . . . . . . . . . . 14
• Setting the volume . . . . . . . . . . . . . . . . . . . . . . . . . . . . . . . . . . . . . . . . . . . . . . . . . . . . . . . . . . . . . . . . . . . . . . . . . . . . . . . . . . . . . . 16
Mute / slumber function . . . . . . . . . . . . . . . . . . . . . . . . . . . . . . . . . . . . . . . . . . . . . . . . . . . . . . . . . . . . . . . . . . . . . . . . . . . . . . . . 18
• Switching mute on/off (for an undefined period) . . . . . . . . . . . . . . . . . . . . . . . . . . . . . . . . . . . . . . . . 19
• Switching on / prematurely ending slumber function for 1, 3, 9 hours . . . . . . . . 20
Table of Contents

5
Coupling
• Coupling the wireless chime and wireless bell button . . . . . . . . . . . . . . . . . . . . . . . . . . . . . . . . 22
• Optional: Extending by adding further wireless bell buttons /
wireless chimes . . . . . . . . . . . . . . . . . . . . . . . . . . . . . . . . . . . . . . . . . . . . . . . . . . . . . . . . . . . . . . . . . . . . . . . . . . . . . . . . . . . . . . . . . 23
• Deleting the coupling between wireless chime and wireless bell button . . . 24
Optional: Using the alarm function
(only with MISTRAL SE03.1 wireless bell button)
• Alarm function . . . . . . . . . . . . . . . . . . . . . . . . . . . . . . . . . . . . . . . . . . . . . . . . . . . . . . . . . . . . . . . . . . . . . . . . . . . . . . . . . . . . . . . . . . . . 25
Acoustic warning if batteries are low . . . . . . . . . . . . . . . . . . . . . . . . . . . . . . . . . . . . . . . . . . . . . . . . . . . . . . . . . . . 26
Radio range . . . . . . . . . . . . . . . . . . . . . . . . . . . . . . . . . . . . . . . . . . . . . . . . . . . . . . . . . . . . . . . . . . . . . . . . . . . . . . . . . . . . . . . . . . . . . . . . . . . 27
Possible combinations / networking . . . . . . . . . . . . . . . . . . . . . . . . . . . . . . . . . . . . . . . . . . . . . . . . . . . . . . . . . . . . . . 28
Technical data . . . . . . . . . . . . . . . . . . . . . . . . . . . . . . . . . . . . . . . . . . . . . . . . . . . . . . . . . . . . . . . . . . . . . . . . . . . . . . . . . . . . . . . . . . . . . . . 29
Troubleshooting and help . . . . . . . . . . . . . . . . . . . . . . . . . . . . . . . . . . . . . . . . . . . . . . . . . . . . . . . . . . . . . . . . . . . . . . . . . . . . . . 30
Declarations of conformity . . . . . . . . . . . . . . . . . . . . . . . . . . . . . . . . . . . . . . . . . . . . . . . . . . . . . . . . . . . . . . . . . . . . . . . . . . . . 32
Disposal and recycling . . . . . . . . . . . . . . . . . . . . . . . . . . . . . . . . . . . . . . . . . . . . . . . . . . . . . . . . . . . . . . . . . . . . . . . . . . . . . . . . . . 32
Guarantee and liability . . . . . . . . . . . . . . . . . . . . . . . . . . . . . . . . . . . . . . . . . . . . . . . . . . . . . . . . . . . . . . . . . . . . . . . . . . . . . . . . . . 33
Quick-start guide . . . . . . . . . . . . . . . . . . . . . . . . . . . . . . . . . . . . . . . . . . . . . . . . . . . . . . . . . . . . . . . . . . . . . . . . . . . . . . . . . . . . . . . . . 34
• Melody selection
• LED ring colour selection
• Volume
• Coupling
• Mute / slumber function
Table of Contents

6
x
CALIMA 200 – the highlights explained briefly
The wireless chime kit is made up of a wireless chime and a wireless bell button.
The wireless chime can be installed in any place in the house or, for example,
on the patio – wherever it is needed. It fits harmoniously into your furnishings
and is nonetheless an eye-catcher. A large number of varied melodies are
clearly distinguished from ambient noises; in addition, the flashing coloured
LED ring assists perception in an ideal way. Thanks to the large range,
CALIMA always announces your visitors or suppliers reliably, even in the
garden.
Ready for use immediately: The wireless bell button is coupled with the
wireless chime in the factory, so that you can use the wireless chime kit
immediately. You can change settings such as the required melody, colour of
the LED ring and volume later.
Networking and individual settings: Several wireless bell buttons and wireless
chimes can be combined with each other and a different melody and colour of
the LED ring can be set for each wireless bell button. So that you know
immediately at which door your visitor is.
Optional alarm function: You can use the wireless chime in combination with
a wireless bell button of the type MISTRAL SE03.1 (not included in the kit) as
an alarm generator. With this wireless bell button, a quickly usable, flexible
and above all, mobile in-house help call system is created. In this way, for
example, a person in need of help can easily draw attention to themselves. To
do this, the wireless bell button must only be pressed for around 3 seconds.
Extendable system: The wireless chime kit can be extended to include an
additional wireless bell button and wireless chime. You can couple a wireless
bell button with any number of wireless chimes1and up to 11 wireless bell
buttons can be coupled with one wireless chime. Interference caused by
other transmitters is prevented, as each wireless bell button sends its own
individual code.
1(Wireless chimes of the ECHO, MISTRAL, CALIMA series only)

7
Battery
compartment
cover
Battery
compartment
Battery holder
Select button
Menu button
Button Nameplate
CALIMA 200 wireless chime kit product overview
Screws
Loudspeaker
Radio chimeWireless bell button
LED
LED ring

8
First-time use / starting up – wireless chime
Before using for the first time, you
only have to insert the batteries into
the wireless chime and wireless bell
button and mount the wireless bell
button. Simply install the wireless
chime in the required place.
The batteries
required are not
included.
Wireless chime:
4 x 1.5 V (AA type) batteries
Wireless bell button:
2 x 1.5 V (AAA type) batteries
1
Open the battery compartment by
using a coin to unscrew the cover
anti-clockwise.
Re-insert the battery holder into the
chime with the springs into front.
4

9
First-time use / starting up – wireless chime
Remove the battery holder from the
chime.
Close the battery compartment by
using a coin to screw the cover
clockwise.
2 3
Insert 4 x 1.5 V (AA type) batteries
into the battery holder. Note the
polarity.
Please note:
• The contact springs on the
battery holder must always be
positioned where “+” and “–” are
visible at the edge of the bottom
of the housing.
• The two small metal clips inside
the housing must touch the
contact springs of the battery
holder. Otherwise the batteries do
not have any contact.
5

10
First-time use / starting up – wireless bell button
Wireless bell button:
Mount, insert batteries, write on nameplate
1
3
Use the Allen key to undo the screws in the cover of the wireless bell button,
and then remove the top half.
Insert 2 x 1.5 V (AAA type) batteries into the bottom part of the wireless bell
button. Note the polarity (see markings).
Undo screws
Tabla de contenidos
Otros manuales de Sensor de seguridad de GROTHE


