EverFocus EN320 Manual de usuario

EN320
7" AHD / TVI / CVBS Portable Video Test Monitor
With Li-Ion Battery
User’s Manual
Copyright © EverFocus Electronics Corp.
Release Date: November, 2015

i
Safety Information
Please read before use
Please follow local power and safety guidelines and regulations, and avoid operation of this product in
any prohibited area (e.g. Hospitals, gas stations...).
Keep away from moisture, impact, drop, or other damages to avoid malfunctioning of the unit.
Please avoid any dust, dirt, or liquids contacting the interfaces exposed.
In use or during transport, please avoid excessive impact or vibration, so as not to damage the
components and cause failures.
Pay attention to the charging status and time. If the battery overheats or charging time goes over 8
hours, please unplug the power and stop charging.
Do not use this product in a highly humid environment. Please turn off power if any abnormality
occurs, and remove all connected cables immediately.
Do not use this product in an oil and gas environment.
Please do not disassemble the unit as it will avoid the product warranty.
This product is not suitable for use in a highly electromagnetic noise environment.
Do not operate this product with wet hands or objects.
Please avoid using chemical cleaners on this product. Dry cloth is recommended to remove dirt,
fingerprints, and other residues on the product.
Please use 12VDC power adapter to charge this product.
This product is able to supply 12VDC power by connect the 5φ DC jack on CCTV camera to this product
and turn on the power switch. Some cameras with no power cord or different type DC jack, please
prepare corresponding power cable and F-M connectors.
If the CCTV camera needs more than 12watts (>1A), please use a power adapter accordingly. This
product will automatically turn off and enter the protect mode once the DC power output over 1A .
Please remove the power cable from camera and switch the power off. The protect mode will be
released by charging this product with 12VDC input.

ii
CONTENTS
1. Introduction ................................................................................................1
2. Main Features..............................................................................................1
3. Packing List ..................................................................................................1
4. Function Interfaces and Appearance ...........................................................2
4.1 Connectors............................................................................................ 2
4.2 Panel and Front Keys............................................................................. 3
5. Operation ....................................................................................................4
5.1 Power ON / OFF .................................................................................... 4
5.2 Buttons for Configuration ..................................................................... 4
5.3 CVBS Signal Monitor / Main Menu........................................................ 4
5.4 PTZ Controller ....................................................................................... 5
5.5 CVBS Pattern Generator........................................................................ 5
5.6 RS-485 Receiver .................................................................................... 6
5.7 VGA Signal Monitor............................................................................... 6
5.8 AHD Signal Monitor............................................................................... 7
5.9 TVI Signal Monitor................................................................................. 7
6. 12VDC Power Input /Output........................................................................8
7. Specifications...............................................................................................9

EN320
1
1. Introduction
EN320 AHD / TVI test monitor is designed for reliable installation and maintenance of CCTV security
camera systems. It can display AHD / TVI / CVBS / VGA signals on the LCD screen, and supports built-in PTZ
Controller, Pattern Generator, RS-485 data communication monitor, all powerful functions available with
easy and friendly user interface operations. The portability helps technicians to improve working efficiency,
and significantly save the labor cost for the CCTV security system installation and maintenance.
2. Main Features
Removable sunshield cover to avoid light reflection
Support AHD / TVI / CVBS / VGA video input
PTZ protocol command receiver function for RS-485 transmission testing
PTZ control, pan / tilt, zooms in / out the lens, adjusts the focus
Support CVBS video looping output
12VDC Power output for camera
Built-in Li-ion battery
Multi-protocol, supports more than 20 kinds such as PELCO-D or PELCO-P
3. Packing List
Please check that there is no missing item in the package before using.
7" AHD / TVI tester
AC Adapter / 12VDC 1A output
Battery pack / 7.4V 5200mAh
Removable sun-shield
BNC cable
DC power output cable
Hard shell bag
Y-shape neck strap
User's Manual
Y-shape neck strap
Adjustable neck straps for easy adjustment with velcro.

EN320
2
4. Function Interfaces and Appearance
4.1 Connectors
NO.
Connector
1
Power switch
2
12VDC input / output
3
PTZ Control (RS-485) connector
•Left connector for RS-485 +
•Right connector for RS-485 -
4
CVBS signal loop output / Video test pattern output
5
CVBS signal input
6
VGA signal input
7
AHD signal input
8
TVI signal input

EN320
3
4.2 Panel and Front Keys
NO.
Item Name
1
Charge indicator
•Normal:
LED off
•Charging:
LED flash
•12VDC output:
LED on
2
Keyboard
3
7" LCD monitor
Operations of Keyboard
Button
Symbol
Function
NAVI / ENTER
OSD operation.
MODE
Switch main functions.
(PTZ Control / AHD / TVI / VGA / CVBS)
Button
Symbol
Hot-Keys
PTZ Controller mode
FAR
Enter CVBS video detect
mode.
Focus far.
NEAR
Enter AHD video detect
mode.
Focus near.
TELE
Enter TVI video detect mode.
Zoom in.
WIDE
Enter VGA video detect
mode.
Zoom out.
NOTE: Focus far / near and zoom in / out function only works in PTZ Controller mode. In other
detect mode, FAR,NEAR,TELE and WIDE are hot-keys to switch between modes.

EN320
4
5. Operation
5.1 Power ON / OFF
Switch to proper position to turn ON / OFF power. Toggle the power switch to panel side for power OFF;
the other side for power ON.
5.2 Buttons for Configuration
1. Press MODE to switch main functions among:
CVBS signal monitor
PTZ Controller
CVBS pattern generator
RS-485 receiver
VGA signal monitor
AHD signal monitor
TVI signal monitor
2. Press in each main function to bring up the OSD sub menu. Use navigation keys to select items
and configure parameters accordingly.
Note: All parameters will be memorized automatically.
5.3 CVBS Signal Monitor / Main Menu
Connect the camera signal via BNC connector; the video
image will be displayed on the LCD panel.
Press to bring up the sub menu. The current signal
format (NTSC / PAL) will be displayed on the mode bar.
Use navigation keys to setup image parameters for
Contrast, Brightness, Color, Language, Aspect Ratio,
Mode Bar Display and Reset setting.

EN320
5
5.4 PTZ Controller
Connect the data cable of RS-485 to EN320. When the
camera is successfully connected, the video image will
be displayed on the LCD panel. Use navigation keys to
remotely control the directions and angles of PTZ
camera, or use FAR /NEAR /TELE /WIDE function keys
to control the camera function.
Press to bring up the sub menu, and use navigation
keys to setup Address / Protocol / Baud / S-PS / C-PS /
Pan Speed / Tilt Speed, and select video source from PTZ
Input Signal.
Set Preset Position
Use navigation keys to move to the desired position, then press to bring up the sub menu and go
to S-PS to select a preset number. When finished, press to save the setting.
Call Preset Position
Press to bring up the sub menu and go to C-PS to select a preset number. Press to force the
PTZ camera to the preset position.
5.5 CVBS Pattern Generator
When switch to this function, the pattern generator will
turn on automatically and output a color-bar pattern via
BNC video output port. Connect this pattern to the cable
to check if the signal cable in camera end to DVR is
installed properly.
Press to bring up the submenu and switch NTSC /
PAL signal format by navigation keys.

EN320
6
5.6 RS-485 Receiver
Once the PTZ device is connected, the Data Monitor is
able to capture the protocol from the controlling system
and display command data. It is helpful to debug and
maintain RS-485 communication.
Press and keys to switch Baud rate.
5.7 VGA Signal Monitor
Connect the signal via VGA connector and the video
image will be displayed on the LCD panel.
Press to bring up the sub menu. Use navigation keys
to setup image parameters for Auto Adjust, Contrast,
Brightness and Color.
EN320
7
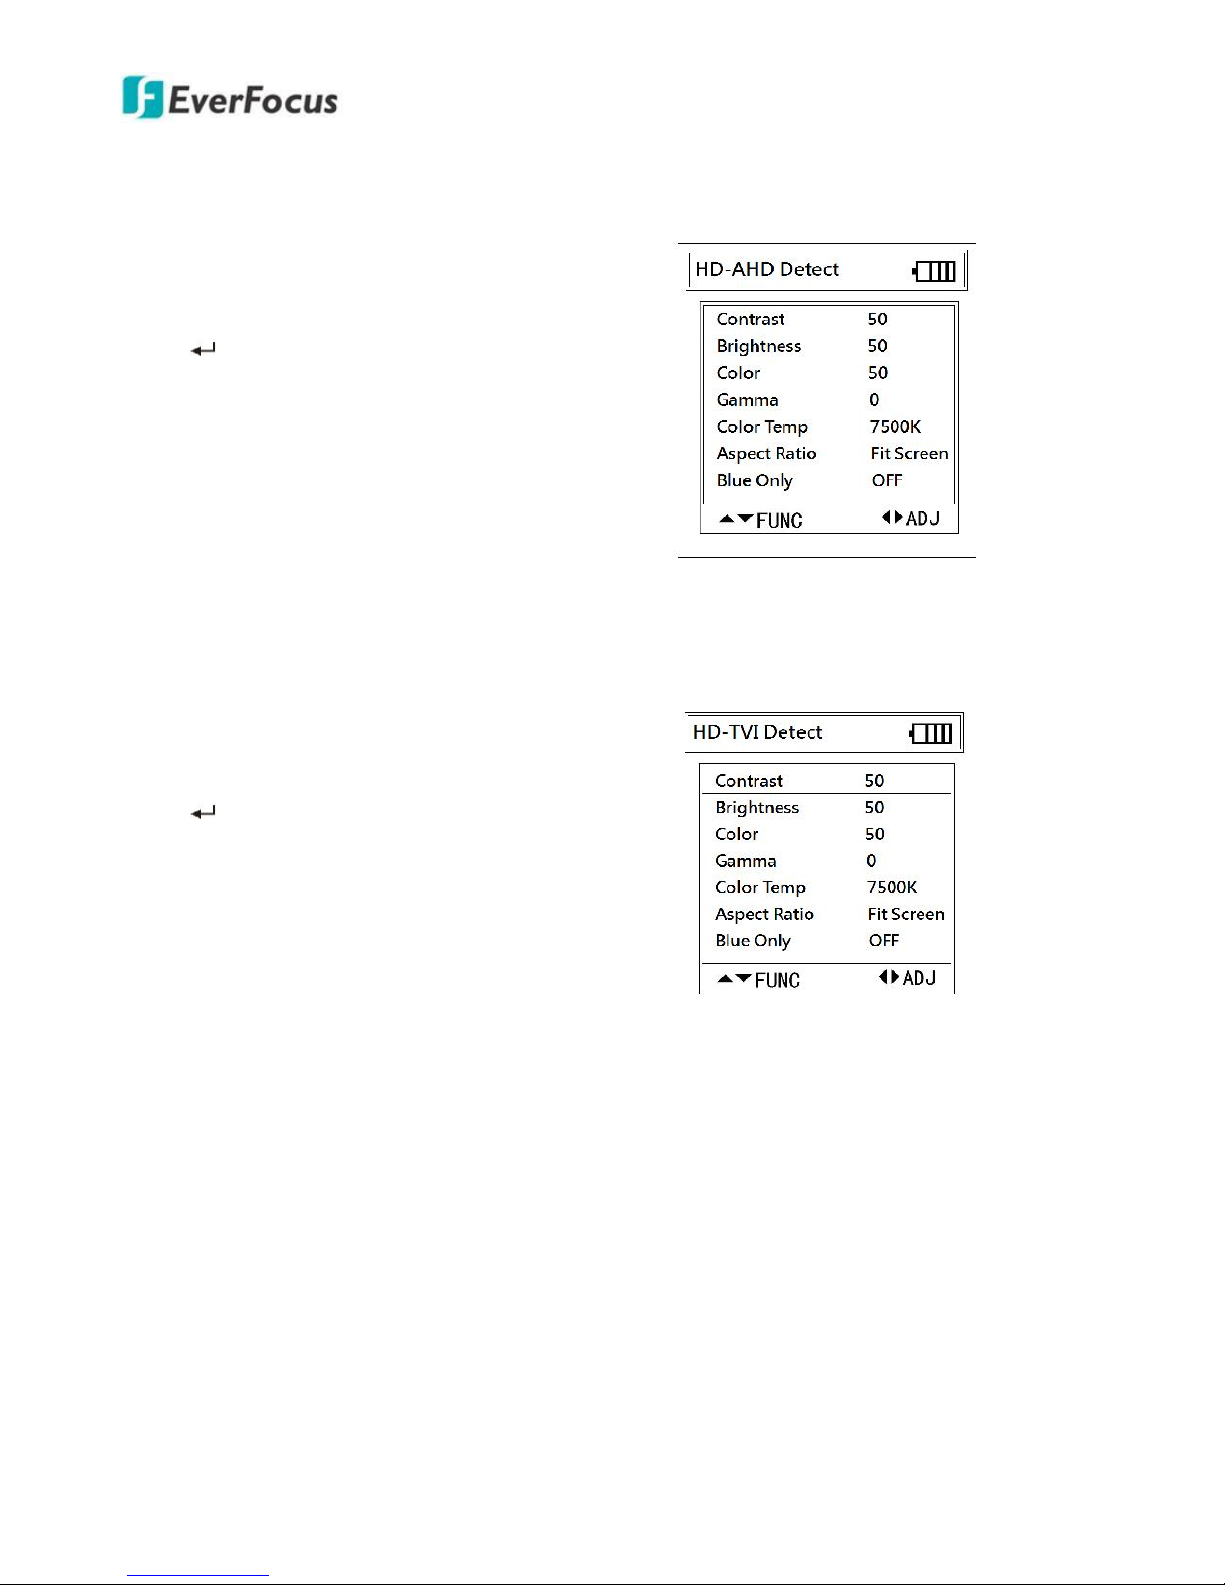
5.8 AHD Signal Monitor
Connect the camera signal via AHD connector and the
video image will be displayed on the LCD panel.
Press to bring up the sub menu. Use navigation keys
to setup image parameters for Contrast, Brightness,
Color, Gamma, Color Temperature, Aspect Ratio and
Blue Only.
5.9 TVI Signal Monitor
Connect the camera signal via TVI connector and the
video image will be displayed on the LCD panel.
Press to bring up the sub menu. Use navigation keys
to setup image parameters for Contrast, Brightness,
Color, Gamma, Color Temperature, Aspect Ratio and
Blue Only.
Tabla de contenidos
Otros manuales de Monitor de EverFocus

EverFocus
EverFocus EN-1080P22 Manual de usuario

EverFocus
EverFocus EN-7522C Manual de usuario

EverFocus
EverFocus LCD Monitor Manual de usuario

EverFocus
EverFocus EX784B Manual de usuario

EverFocus
EverFocus EN-7542H Manual de usuario

EverFocus
EverFocus EN-7517E Manual de usuario

EverFocus
EverFocus EN-1080P24 Manual de usuario

EverFocus
EverFocus EN-7515C Manual de usuario

EverFocus
EverFocus FH 7519 EBL Guía

EverFocus
EverFocus EN-7519C Manual de usuario


