Touch Panel
2/3
User’s manual: 2019-9 www.euchips.com
RF Connection Description
When you need to edit luminance and color temperature of lamps, you can use the
powerful real-time editing function of this panel. Note: only when the corresponding area
is selected can the lighting effect be edited, and only the brightness/color temperature
can be adjusted in the scene mode. Operation "guide for the selection of areas.
Lighting Effect Editing
The adjustment loop is used for different functions in different editing modes.
Under the color temperature mode, the light fixture color in the selected area can be
adjusted by finger sliding adjustment ring.
In luminance mode, the finger slide adjustment ring can adjust the luminance of the
selected area.
Touch Ring
Click the Night key, and the lights in the four areas will reach the brightness of 1% warm
light. Exit the mode by ALL and group.
Night Mode Regulation
After selecting the corresponding area (or all of them), the user clicks the "brightness"
button and enters the state of "brightness adjustment". Under the state, the luminance of
the selected area can be adjusted, or the luminance of the current scene can be adjusted
as a whole. Use your finger to slide the "color ring" to adjust the brightness. A maximum
brightness of 5%.
Brightness Regulation
After the user selects the corresponding area, click the color board button to enter the
"color adjustment" mode, and slide the color ring with the finger to adjust the color of
lamps and lanterns in the selected area.
Color Temperature Regulation
ALL button is pressed, indicating that ALL four areas are selected, and brightness and
color temperature can be adjusted, as well as scene call.
All Selection
Setting by dialing switch 1. When the dial switch is on, there is a key tone; conversely,
there is no key tone.
Press Key Sound
Setting by dial switch 2. When the dial switch is on, the indicator lights on; otherwise, it
does not.
1. Check the code: select the receiver that needs to check the code, cut off the power for
10 seconds and turn on the power again. Click the "group on 1" button for 3 times within 5
seconds after the power on.
2. Clear the code: select the receiver that needs to clear the code, cut off the power for 10
seconds and then switch on the power again. Click the "group on 1" button for 6 times
during the 5 seconds when the power is on. The Zone1 button on the panel can be seen to
switch continuously.
Press key Indicator light
For Non-corresponding Panels:
Proportional Brightness Adjustment Key
CW/WW Key:
Select a single area or all areas and press the 25% brightness key to turn the lights in that
area to 25% brightness. Press the 50% luminance key to turn the lights in the area to 50%
luminance. Press the 75% brightness button to change the area light to 75% brightness.
Press the 100 luminance key to change the area light to 100 luminance.
Short press the WW key to increase the warm color in the selected area and the CW key
to increase the cool color in the selected area.
Brightness Adjustment Key:
Short press + to increase the brightness of the selected area, short press - to decrease
the brightness of the selected area.
Touch Ring:
After selecting the corresponding area, the user can adjust the lighting color of the
selected area by sliding the color ring with his finger (not available in scene mode).
Scene key calls the four scenes saved in the panel, and groups Zone1, 2, 3 and 4
corresponding to the four areas on the panel. (no long press function).
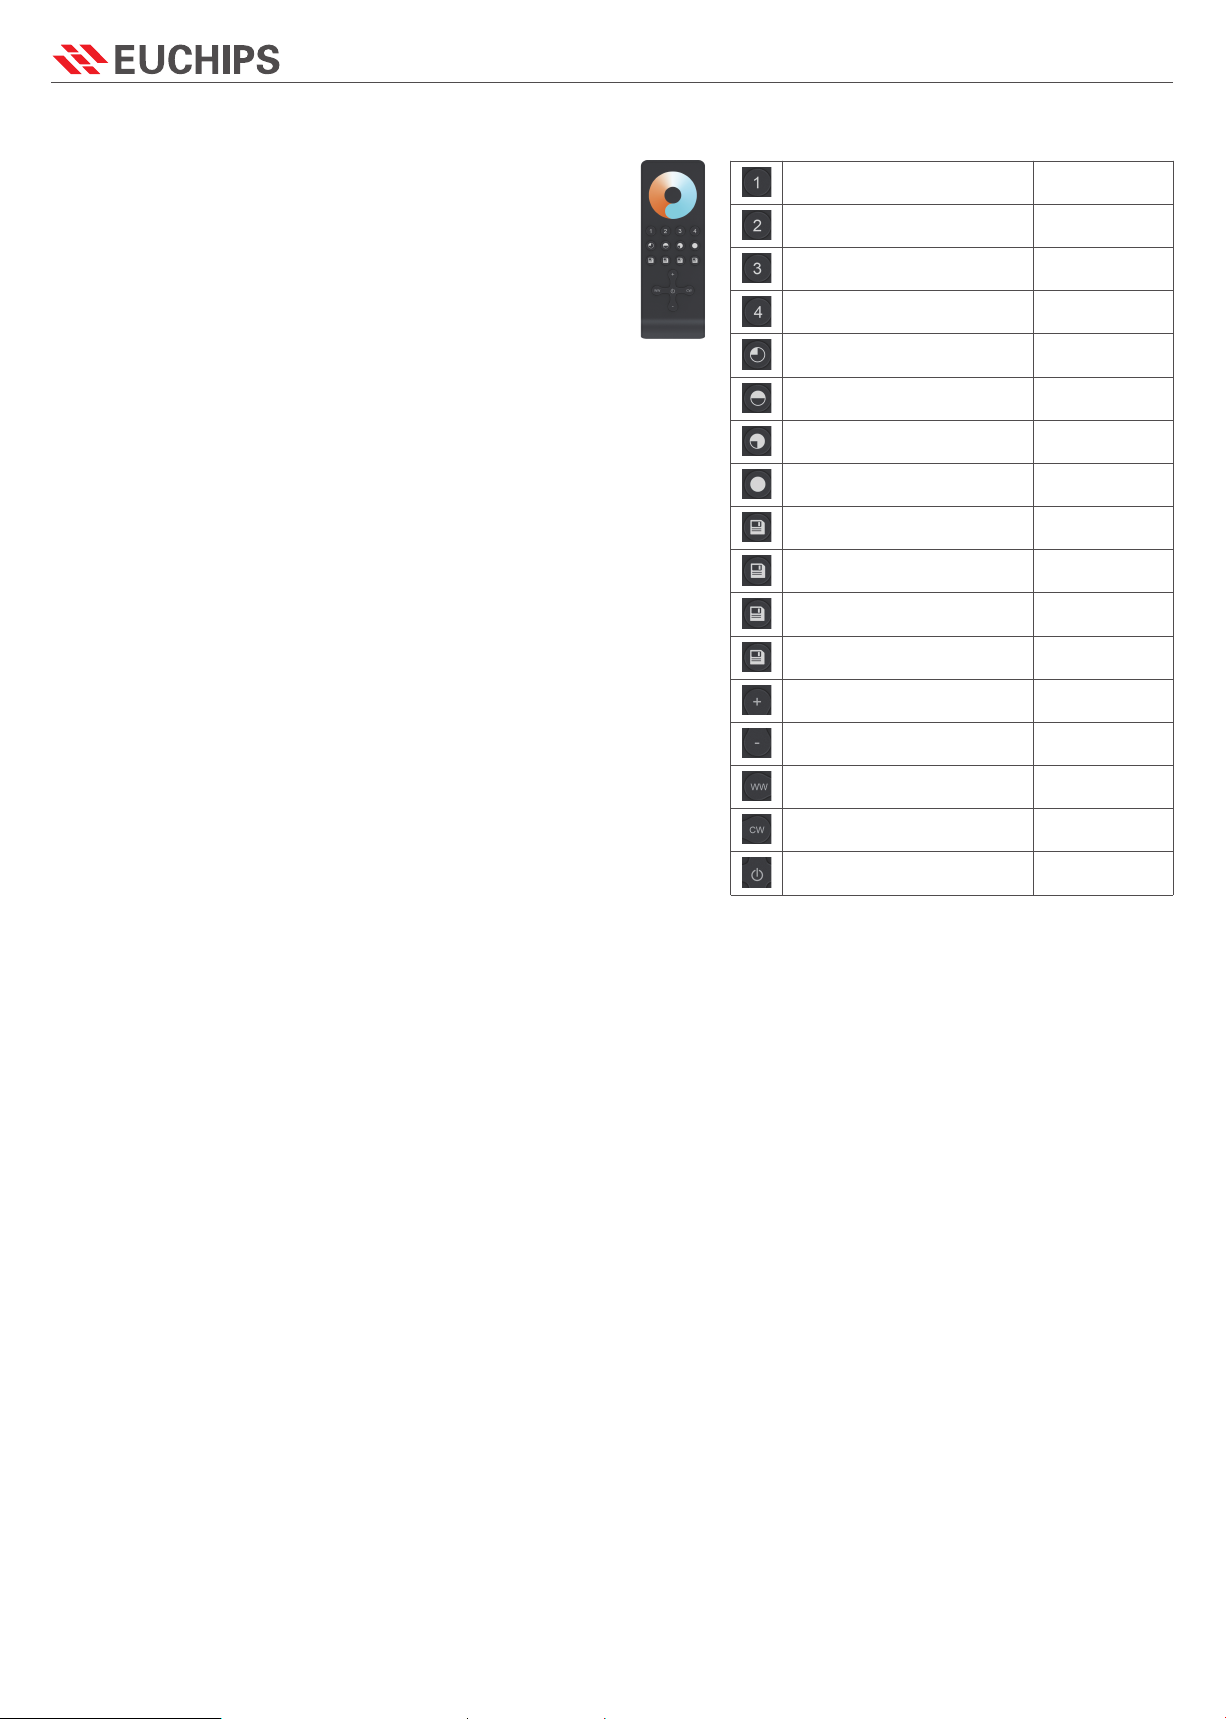
Whether The Panel Corresponds To The Remote Control Is Shown In The Right Picture:
Group 1
Group 2
Group 3
Group 4
25% brightness
50% brightness
75% brightness
100% brightness
ALL key, realize four groups at the
same time control
B key, brightness adjustment plus
Color key, Color temperature
adjustment minus
The Night key performs a low-light
scene
Brightness plus, divided into ten levels
Brightness reduction, divided into
ten levels
Color Temperature Plus
Color Temperature Reduction
Turn ON/OFF
Non-corresponding
Panel
Non-corresponding
Panel
Non-corresponding
Panel
Non-corresponding
Panel
Non-corresponding
Panel
Non-corresponding
Panel
Non-corresponding
Panel
Non-corresponding
Panel
Corresponding Panel
Corresponding Panel
Corresponding Panel
Corresponding Panel
Corresponding Panel
Corresponding Panel
Corresponding Panel
Corresponding Panel
Corresponding Panel


