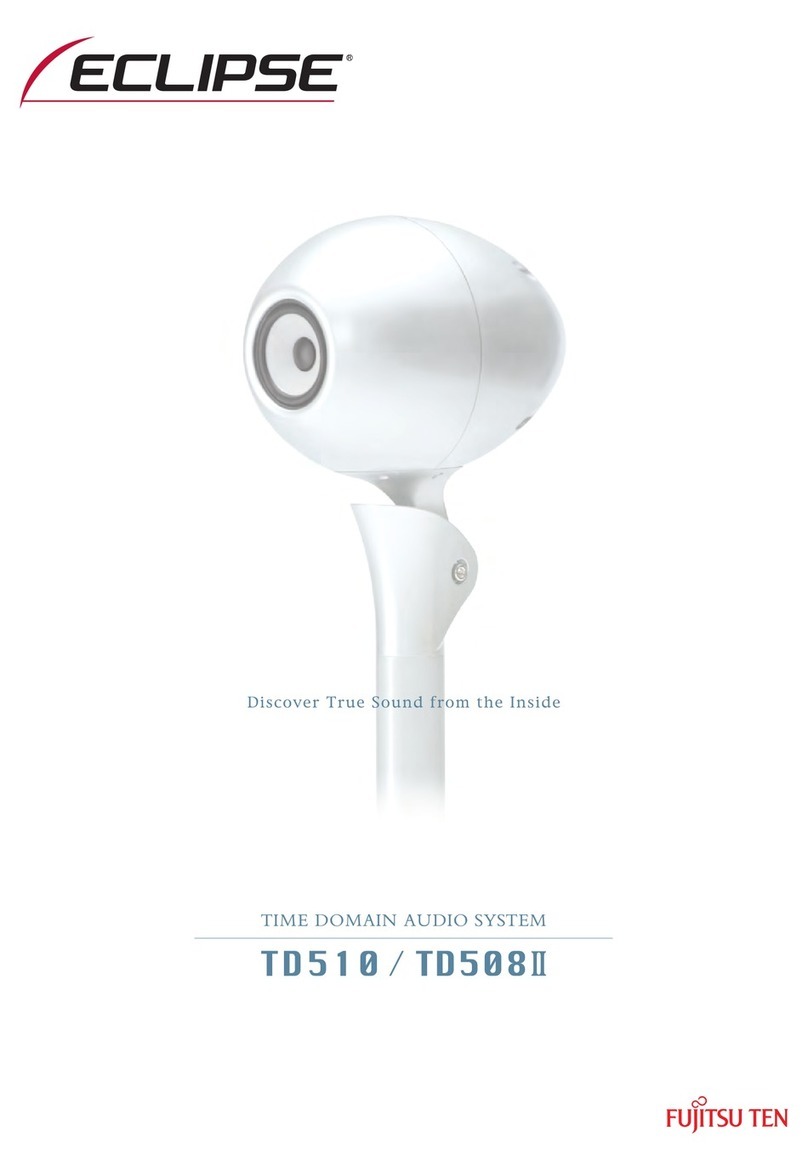
Eclipse TD307MK3 Manual de usuario

JAPANESE
ENGLISH GERMAN FRENCH ITALIAN SPANISH
・Thank you for purchasing this product.
・Please read this owner's manual thoroughly prior to making any connections.
・If installation methods or non-standard parts not specified in this installation manual are used,
accidents or injury may result.
・Specialized knowledge and experience is required in order to install the speaker to a ceiling or wall. In such
a case, please consult a qualified technician.
・Installation by two people is always advised.
Keep this Owner’s Manual together with the Warranty Certificate in a safe place for future reference.
OWNER'S MANUAL
MANUAL No. 090001-15030700

-
18
-
JAPANESE
ENGLISH GERMAN FRENCH ITALIAN SPANISH
Parts listParts list Check that all of the following items are present
ContentsContents
Parts list 18
Safety guidelines 19
Checklist before use 19
Speaker installation example 20
Parts and connections 21
Adjusting the speaker angle 22
Installing the speaker grille 23
Reversing the position of the speaker arm to the base 24
On a ceiling or wall 25
Care / Specifications 31
Warranty and customer service 32
Installation
Before
installation
①Speaker X1 ③Safety cable
(hole thread diameter 4.5 mm) X1
④
Allen key (large)
(For securing speaker) X1
⑤Allen key (small)
(For securing drop-prevention
wire to speaker) X1
⑥Owner's Manual X1 ⑦Warranty
ツメ ×9
②Grille X1

-
19
-
JAPANESE
ENGLISH GERMAN FRENCH ITALIAN SPANISH
・Be sure to set the volume to the minimum level before turning on the power supply for connected equipment
and before switching the input source. Sudden high levels of output can cause damage to the connected
speaker system.
・Even pleasant music can be a disturbance at times. To avoid disturbance in your neighborhood, enjoy your
unit at an appropriate volume. Remember that at night, even low volume carries into surrounding areas. Help
to maintain a pleasant living environment.
・Always be sure to turn off the power supply for the connected equipment before connecting the speaker.
・Be careful not to tip over the stand.
・Clean the unit by wiping it gently with a soft cloth moistened with neutral detergent. Do not use liquid solvents
such as gasoline or thinner to clean this product.
Caution
・The unit should be placed on a hard, flat surface. Placing the unit on an unstable surface may cause it to fall
over and cause injury.
・Do not climb on or swing from the unit. In particular, care should be exercised when children are present. The
unit may fall or break and cause injury.
Warning
・Do not open the unit as this may cause electric shock or injury. For repair or maintenance, please contact
a Customer Service Center. Do not attempt to modify the unit. This may cause fire or electric shock, and
invalidate the warranty.
・Do not place the unit in the bathroom or anywhere exposed to rain. Do not use the unit in places with high
humidity. This may cause fire or electric shock. Be particularly careful when using the unit in rainy weather
or near water. Do not place above or near the unit, any flower vases, plant pots, cups, makeup, any vessel
containing medicine or liquid or any small metal objects. In case any liquid or small metal objects enter the
unit, fire or electric shock may result.
Checklist before useChecklist before use
Warning
The information following this sign indicate situations where failure to follow the
instructions may result in death or severe injury.
Caution
The instructions which follow this sign indicate situations where failure to follow
the instructions could cause injury when using the product or physical damage to
equipment and surroundings.
Tip This section contains information that can help to prevent problems and damage to the
unit, and other useful information.
The following WARNING and CAUTION signs are used throughout this owner’s manual as well as on the product.
These signs alert the installer and users of important safety information to avoid risk of injury and damages to the
product. Make sure that you familiarise yourself with these symbols and their meaning.
Safety guidelinesSafety guidelines

-
20
-
JAPANESE
ENGLISH GERMAN FRENCH ITALIAN SPANISH
Installation on a floor or shelf ・Adjust the speaker angle. ➡Refer to P.22.
・Example of installation on a ceiling or wall. ➡Refer to P.25.
・Install the speaker to the ceiling or wall. ➡Refer to P.26 - 30.
・Adjust the speaker angle. ➡Refer to P.22.
Speaker installation exampleSpeaker installation example
Ceiling installation
・Example of installation on a ceiling or wall. ➡Refer to P.25.
・Install the speaker to the ceiling or wall. ➡Refer to P.26 - 30.
・Adjust the speaker angle. ➡Refer to P.22.
Wall mounting

-
21
-
JAPANESE
ENGLISH GERMAN FRENCH ITALIAN SPANISH
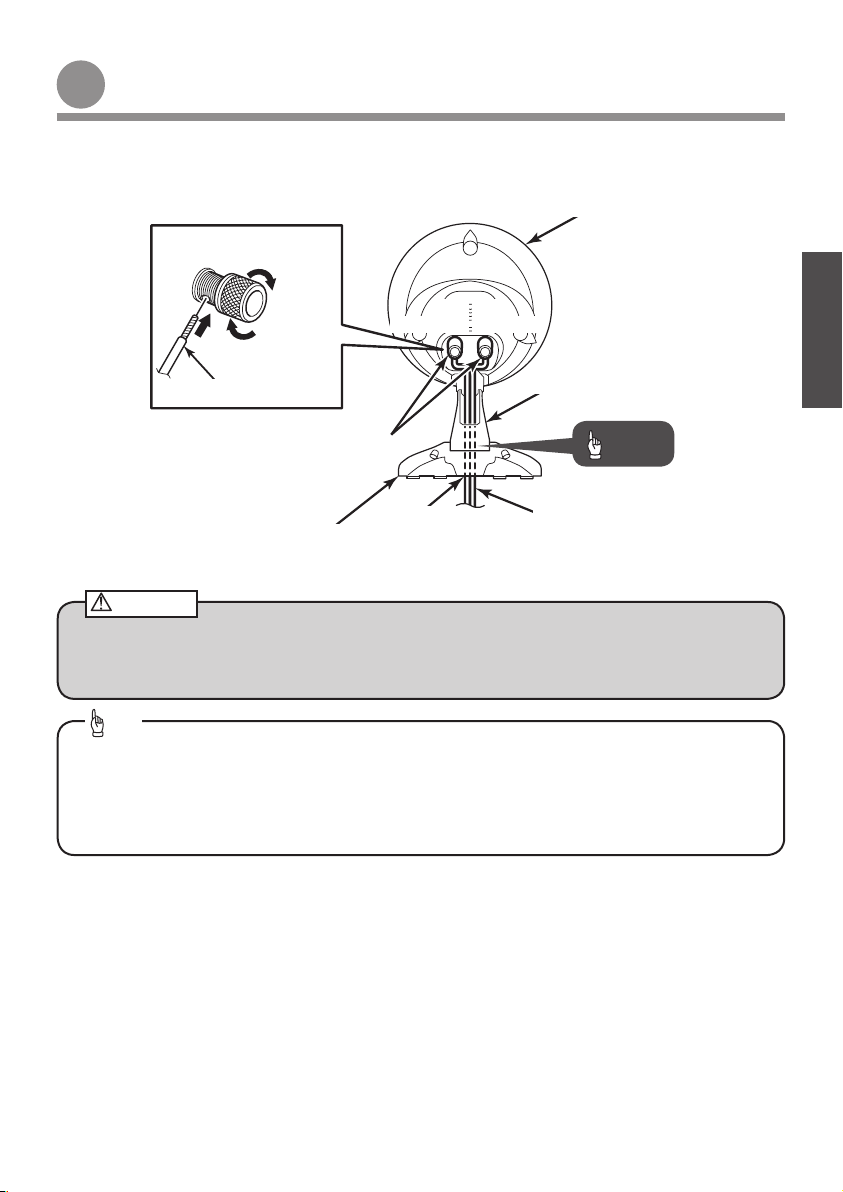
Speaker wire
Cable entry
point
Speaker wire
(diameter less than φ7 mm)
(Red)
Speaker base
Speaker arm
Speaker input terminals
⊕⊖
Tip
■ For speaker wire diameter less than φ7 mm
• If the speaker wire is passed through the cable entry point in the speaker base and the speaker arm, it will
improve the outer appearance of the speaker.
■ For speaker wire diameter φ7 mm or more
•The speaker wire cannot be passed through the speaker arm, so route it along the outside.
Tip
Parts and connectionsParts and connections
①Speaker
(Black)
• When connecting the speaker wires, insert the bare ends of the speaker wires correctly so that they do not
touch neighboring terminals, otherwise it may cause short-circuits.
• The speaker wires are not provided with the speaker, so purchase them separately.
Caution

-
22
-
JAPANESE
ENGLISH GERMAN FRENCH ITALIAN SPANISH
Use the Allen key (large) which is supplied with the
speaker to loosen the hex socket nut underneath
the speaker.
1
Set the speaker to the desired angle.
2
Securely tighten the hex socket nut.
3
Hex socket nut
360˚ rotation
The speaker is heavy, so hold it with your hand
when adjusting the angle.
Tip
The vertical angle of the speaker can be adjusted
within a range of +30° upward and -25° downward
from the horizontal. If the speaker is installed to a
ceiling or wall, refer to the installation examples on
P.25 for the vertical angle adjustment range. The left
and right angle adjustment range is 360°.
Tip
Adjusting the speaker angleAdjusting the speaker angle
+30°
-25°

-
23
-
JAPANESE
ENGLISH GERMAN FRENCH ITALIAN SPANISH
Install the grille as shown in the illustration.
1
TD307MK3-011
②Grille
①Speaker
Installing the speaker grille
• The grille may be attached when the speaker is
not in use or at the users discretion.
• Clip the edge of the grille to secure it.
Tip

-
24
-
JAPANESE
ENGLISH GERMAN FRENCH ITALIAN SPANISH
When disassembling the speaker, refer to steps
to of "Preparation for installation" on page 26.
1
2
Tip
Remove the screws which are securing the speaker
arm to the speaker base.
1
Remove the speaker arm from the speaker base.
2
Change the direction of the speaker arm and fit it
back to the speaker base.
3
Speaker base
Speaker base
Screws x2
Screws x2
Speaker arm
Speaker arm
The speaker is heavy, so use care when removing
it.
Caution
The TD307MK3 speaker can be installed in a variety of configurations by changing the way the speaker base
and speaker arm are installed.
Tip
Reversing the position of the speaker arm to the baseReversing the position of the speaker arm to the base
①Speaker
①Speaker
Screwdriver

-
25
-
JAPANESE
ENGLISH GERMAN FRENCH ITALIAN SPANISH
Ceiling
Wall
Leave enough
space.
Speaker wire (for diameter
of less than 7 mm)
Example 1.
Example 3.
0˚ - 30˚
60˚ - 90˚
Speaker wire (7 mm
diameter or more)
Speaker wire
(for diameter of less
than 7 mm)
Ceiling
Wall Leave
enough
space.
Speaker wire
(7 mm diameter or more)
Speaker wire
(for diameter of less
than 7 mm)
Leave enough
space.
35˚ - 90˚
Ceiling
Wall
0˚ - 55˚
Speaker wire
(for diameter of
less than 7 mm)
Leave
enough
space.
Ceiling
Wall
Example of installation to a ceiling or wall
Example 2.
Speaker wire
(7 mm diameter
or more)
Example 4.
Tip
Tip
Caution
Caution
• Please read this owner's manual thoroughly prior to carrying out installation and connections.
• If installation methods or non-standard parts not specified in this installation manual are used, accidents or
injury may result.
• Depending on the specific installation specialised skills may be required. In such cases, please consult a
qualified technician.
• Installation by two people is always advised.
• Please note the screws for fixing the product and safety cable to the ceiling are NOT supplied.
Caution
• Be sure to leave some space in between the speaker and the wall so that the speaker and wall do not touch.
• Leave enough space to insert a tool such as a screwdriver.
Caution
• In the case of example 2 and example 4, the direction that the base is facing will be reversed.
• In the case of example 2 and example 4, it will be necessary to adjust the assembly positions of the speaker
base and speaker arm. Refer to “Reversing the position of the speaker arm to the base” on P.24 for details on
changing the assembly positions.
Tip
This product can be installed on ceilings and walls. If installing on a ceiling or a wall, you will need to use extra screws
(sold separately). When installing the speaker, be sure to fit the safety cable.
On a ceiling or wallOn a ceiling or wall
①Speaker
Speaker wire
(7 mm diameter or
more)

-
26
-
JAPANESE
ENGLISH GERMAN FRENCH ITALIAN SPANISH
Remove the speaker base cover.
2
Remove the screws from the speaker base rear
cover, and then remove the speaker base rear
cover.
1
Speaker base
cover
Speaker base rear cover
Screws x2
Speaker base
-
Preparation for installation
-
①Speaker
Screwdriver
①Speaker
Speaker base
Este manual sirve para los siguientes modelos
2
Tabla de contenidos
Otros manuales de Sistema de altavoces de Eclipse
Manuales populares de Sistema de altavoces de otras marcas

Sondpex
Sondpex Active Speaker System and Digital Music... Manual de usuario

JVC
JVC NX-PN7 Manual de usuario

Marshall Amplification
Marshall Amplification AR-DM61-BT Manual de usuario

Yamaha
Yamaha NX-A01 - Speaker Sys Manual de usuario

SE Audiotechnik
SE Audiotechnik I-LINE Manual de usuario

Gemini
Gemini WRX-843 Series Manual de usuario