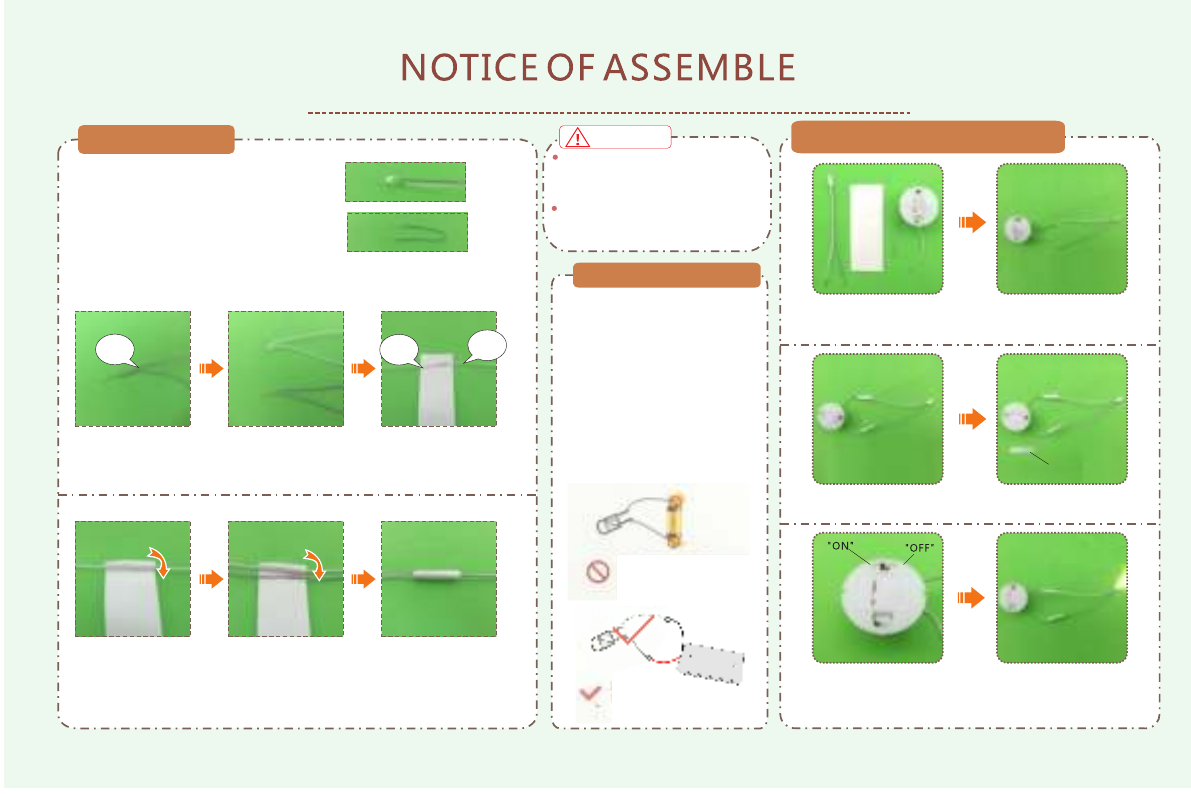
Making tips1. LED wiring indication: White=Positive;Grey=Negative.2.Use a craft blade to carefully skim over the plastic to bare the copper wire.3. For LED wiring extension, please refer to the below steps:Twist the copper of both LED wire and extension wire together.Do the same on the white wire. Remarks: Tie a knot at the end of the grey wire to differentiate the polarity.Place the duly twist wire on the tapes provided.Roll and wrap the wire.Place another wire next to it.Remarks: DO NOT contact both copper wire to avoid short circuit.Roll and wrap it together.WarningsThe product is not suitable for children under 14 years old. The should be undercustody of adults when playing with the product.There are small parts, please do not swallow them for avoiding dangerous accidents.Tips for assembling
1.Picures shown on the package may be slightly different from the actual product.2.Please use the provided tracing paper for cutting purpose to achieve the best outcome.3.Product designs and specification may be subject to change without advance notice for purpose of making improvement.4.Testing on LED function:
DO NOT contact the LED wire end direct to the battery cell.Use the provide battery holder. Make sue the correct polarity.
1.Material and tools needed:- Battery holder, LED bulb, tape. 2.Twist the following wire together: (I) WHITE wire from the battery box with the GREY wire from LED bulb. (II) GREY wire from the battery box with the WHITE wire from LED bulb.3.Wrap the exposed wire with the tapes.4.Tear off the rubber paperRubber paper5.Set the black key on the battery box to one side of “ON” as shown.6.Ture on the power and complete the installation.
LEDwire
LEDwireLEDwire
Extension wire
How to assemble the battery holder