Digitus DN-16150 Manual de usuario

1
NETWORK VIDEO RECORDER
DIGITUS®PLUG&VIEW NVR
Manual
DN-16150

2
Contents
SAFETY INSTRUCTION ......................................................................................... 4
CHAPTER 1 OVERVIEW OF NVR......................................................................... 1
1.1FRONT PANEL ................................................................................................................1
NVR Front Panel......................................................................................................1
1.2 REAR PANEL .................................................................................................................1
NVR Rear Panel ......................................................................................................1
1.3 REMOTE CONTROLLER ....................................................................................................2
CHAPTER 2 NVR CONNECTION.......................................................................... 2
2.1HDD INSTALLATION ........................................................................................................2
2.2 SETUP .........................................................................................................................3
CHAPTER 3 NVR BOOT UP .................................................................................. 4
3.1 SYSTEM INITIALIZATION ...................................................................................................4
3.2 START UP WIZARD ..........................................................................................................4
CHAPTER 4 NVR MENU ........................................................................................ 6
POPUP MENU ....................................................................................................................6
4.1 MAIN MENU GUIDE ......................................................................................................7
4.2MAIN MENU.................................................................................................................8
4.2.1 Parameter .......................................................................................................8
4.2.1.2 Record........................................................................................................10
4.2.1.3 Network......................................................................................................12
4.2.3 Device............................................................................................................19
4.2.4.4 Log..............................................................................................................22
4.2.5 Advanced ......................................................................................................22
4.2.6 SHUTDOWN.............................................................................................................23
4.3MENU LOCK ................................................................................................................24
4.4SPLIT MODE................................................................................................................24
THERE ARE MANY DISPLAY MODES IN VIDEO CHANNEL,INCLUDING SINGLE CHANNEL DISPLAY,SEQ
DISPLAY AND SPLIT MODE. ...................................................................................................24
4.5 RECORD SEARCH..........................................................................................................24
4.6 MUTE .......................................................................................................................24
4.7 START SEQUENCE.........................................................................................................24
CHAPTER 5 WEB APPLICATION MANAGER................................................... 25
5.1 ACTIVEXCONTROL DOWNLOAD AND INSTALLATION.............................................................25
5.2 WEB APPLICATION MANAGER LOGIN...............................................................................26
5.3 LIVE INTERFACE ...........................................................................................................26
5.3.1Menu Bar........................................................................................................27
5.3.2 Playback........................................................................................................28
5.3.3Parameter Setting.........................................................................................30

3
5.3.4 Local Setting.................................................................................................38
5.3.5 Logout............................................................................................................38
CHAPTER 6 APPENDIX ....................................................................................... 39
6.1TROUBLESHOOTING ......................................................................................................39
6.2 USAGE MAINTENANCE .................................................................................................40

4
SAFETY INSTRUCTION
Please carefully read the following safety instruction so as to avoid personal
injuries and prevent the equipment and other connection devices from being
damaged.
1. Power sources (note: please use the power supply attached or specified by
the manufacturer)
Never operate the equipment by unspecified power supply.
2. Never push objects of any kind through openings of NVR
Never push objects of any kind through openings of NVR so as to avoid electric
shock or other accidents.
3. Do not put the equipment in the dusty field
Do not put the equipment in the dusty field.
4. Do not place the equipment under rain or humid environment
Do not place the equipment under humid environment like basement. If the
equipment is in contact with water, please unplug the power cable and immediately
contact your local dealer.
5. Keep the surface of the equipment clean and dry
Use soft damp cloth to clean the outer case of NVR (do not use liquid aerosol
cleaners)
6. Do not operate if any problems are found
If there are any strange smell or sound, unplug the power cable and contact the
authorized dealer or service center.
7. Do not try to remove the upper cover
Warning: Do not remove the cap of NVR so as to avoid electric shock.
8. Handle with care
If NVR does not work normally because of hitting on the hard object, please contact
the authorized dealer for repair or replacement.
9. Use standard lithium battery (Note: Use the batteries attached or specified by
the manufacturer)
After cutting off the power supply, if the system clock cannot continue to work,
please replace the standard 3V lithium battery on the main board.
Warning: Turn off NVR before replacing the batteries, or you may be suffered from
serious electric shock. Please properly dispose of the used batteries.
10. Put the equipment in a place with good ventilation.
The NVR system includes HDD, which produces large amount of heat during
operation. As a result, do not block the ventilation openings (on the top, bottom,
both sides and the reverse side) for cooling the system during operation. Install or
put the equipment in the place with good ventilation.
11. The attached power adapter can only be used for 1 set of NVR. Do not connect
more equipment, or NVR may be restarted repeatedly because of insufficient
power.
12. Prevent the equipment from water dropping or splashing. Do not place
objects containing water, such as flower vase, on the equipment.

1
Chapter 1 Overview of NVR
1.1Front Panel
NVR Front Panel
Item Keytitle
or Indicator Remark Function & Description
1 Power
Indicator PWR If the “Green” indicator is on, NVR is getting power normally.
2 HDD Indicator HDD
If the “Red” indicator flashes, the hard drive is being read or written to. If
the indicator is always on, it means the hard disk is abnormal, unformatted
or has no recording files.
3 USB USB port
Table 1-1
1.2 Rear Panel
NVR Rear Panel
Item Physical Port Connection Method
1 Power Port Startup and shutdown with DC12V power
2 USB Port Connect USB devices, such as USB mouse and USB flash disk.
3 HDMI Port HDMI high definition port
4 VGA Port Connect to VGA monitor, such as PC monitor
5 AUDIO OUTPUT Audio signal output, RCA interface
6 WAN Port Network input interface of the router.
Table 1-2

2
1.3 Remote Controller
Table 2-3 Key functions of the remote controller
Chapter 2 NVR Connection
2.1 HDD Installation
Caution: Please do not take out hard drive when NVR is running!
HDD Installation:
(1) Cut power firstly, and then remove screws on both sides and rear panel and open
NVR upper cover.
(2) 1. Insert 4 hard drive screws into the bottom of the hard drive and tighten them 1/2 of
the way.
2. Place the hard drive in the screw slots with the power and data connectors facing
left (if looking at the NVR from the front), and slide the hard drive into place.
3. Tighten the hard drive screws to secure the hard drive in place.
Item Key title Key function
1 1-8 Channel select 1-8; Numeric key
2 9、0 Numeric key
3 ALL Multiple display mode
4 Menu Enter into Main menu/Exit
5 Mute Mute On/off
6 Submenu Go to submenu
7 ▲Up arrow key, volume increase
8 SEL Select key/Edit key
9 ◄/ Left/Right key; Decrease/increase parameter value of control bar.
10 ▼Down arrow key, Volume decrease
11 Rewind key
12 Forward key
13 Enter into record search menu / Play key
14 ●Record key
15 ■Stop manual record; stop playing
16 Pause/Sequence key
Table 1-3
1
2
3 4
5 6
7
8
9
10
9
11 12
13
14 15
16

3
(3) Connect HDD data cable and power cable to the main board. Install the HDD and fix it
on the bracket and then connect the HDD power cable and data cable.
2.2 Setup
After Hard-disk installation, please connect the NVR to the router or Ethernet switch using
an Ethernet cable to the LAN port on the NVR. Then please connect either a VGA or
HDMI monitor to the NVR as local display. Please also insert the USB mouse to the USB
port on the NVR to setup configuration. Then power on the NVR with the DC12V power
adapter.
In parallel, please install up to 4pcs of DIGITUS Plug&View cameras under the same
network as the NVR via a router or Ethernet switch in between.
Local Display with
HDMI or VGA
monitor
DC12V input
power supply
USB mouse for local
control and configuration
4
Chapter 3 NVR Boot up
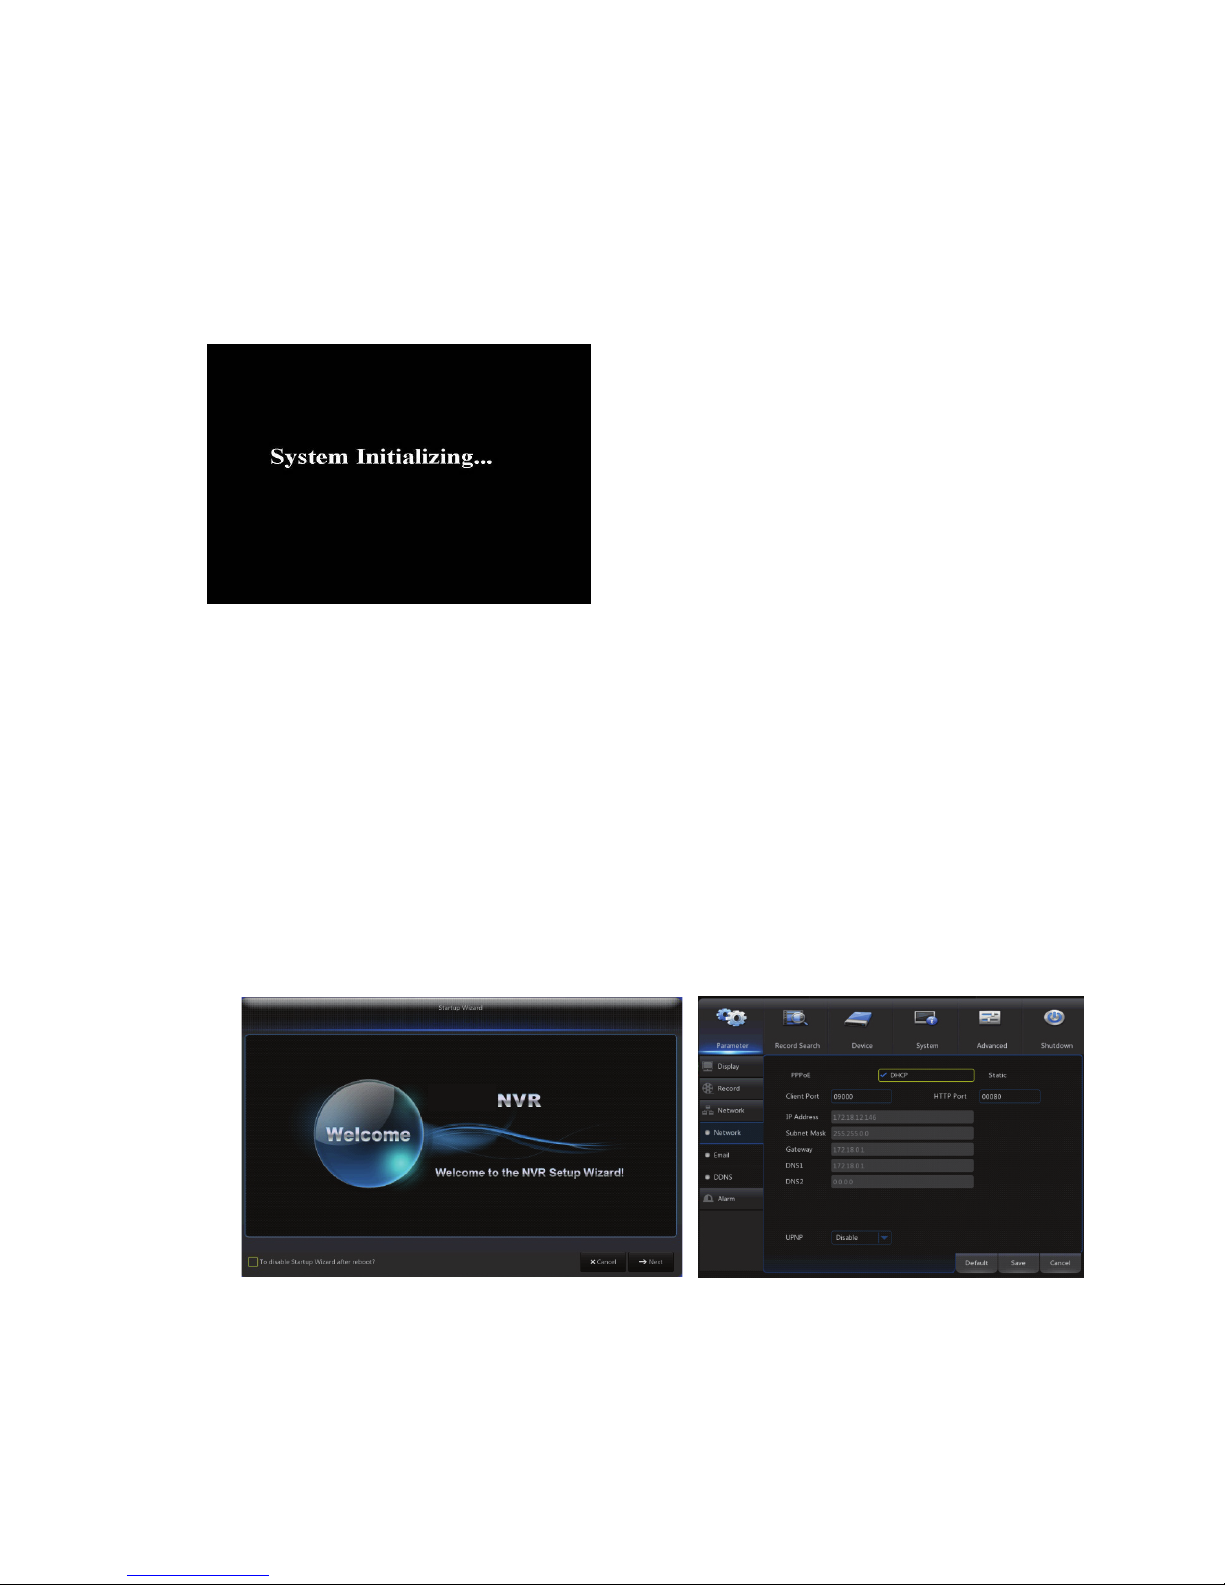
3.1 System Initialization
On the local display with the VGA or HDMI monitor, after connecting the power cable of
NVR to wall outlet and pressing the power button, you will see on the screen that the NVR
system initializing shown below.
3.2 Startup Wizard
After NVR startup is completed, please enter “admin” for both the login and password to
login. Then the “startup wizard” will be displayed. Please follow the “startup wizard” to
guide you through the first time installation.
Wizard setting menu includes:Homepage, Network setup, IPC setup, Record Schedule
and hard disk maintenance.
1.Homepage and network setup. In network setup page, please keep the default “DHCP”
setting as the NVR will be assigned with an IP address automatically when it is connected
to the router or access point t.
Note:The illustration in the user
manual may not be the same as the
menu interface in your monitor. All
the illustrations are for users’
reference.

5
2.IPC Setup: In this page, user may add and delete IP camera. It would automatically
search all the DIGITUS Plug&View IP cameras installed under the same network as the
NVR. Then you select the desired cameras for recording into NVR by enabling the
channels.
Record Schedule: In this page, user may set recording time and scheduled recording of
NVR.
3. HDD: It supports HDD formatting and overwriting setting.

6
Chapter 4 NVR Menu
Popup Menu
Picture4-1
After finishing system initialization, click right key of mouse on preview interface or
slide the mouse to the bottom of screen to enter into Pop-up Menu. Now you could
perform parameter setting and operate on Main Menu, Multi-Pics, Auto Cruise, Record
Search, Sequence, Volume setting and Stream switching, shown as Picture 4-1.
The options in the pop-up menu may be varied slightly according to different parameter
settings. The options in the menu will be explained in detail in the following chapters.
Otros manuales para DN-16150
1
Tabla de contenidos
Otros manuales de DVR de Digitus


