CPAP C-150 Manual de usuario
SUPER CPAP POWER PACK
USER’S GUIDE
MODELS: C-150, C-222, C-444

SUPER CPAP POWER PACK
START YOUR NEW ADVENTURE TODAY!
YOUR CPAP MACHINE DOESN’T HAVE TO KEEP YOU
FROM ENJOYING THE GREAT OUTDOORS...
Super CPAP Power Packs, the most powerful external
power solutions in the world, give CPAP users the
freedom to experience new adventures on the road!

TABLE OF CONTENTS
CPAP POWER PACK FEATURES 1
PRODUCT SPECIFICATIONS 2
SAFETY WARNINGS 3
PACKING LIST 3
CONTROL BOARD PART IDENTIFICATION 4
CHARGING THE POWER PACK VIA A WALL OUTLET 4-5
THE POWER METER 5
POWER PACK OPERATION 6
LOCATING THE CORRECT UNIVERSAL CONNECTOR 7
OPERATION - POWER PACK WITH INVERTER 8
SINE WAVE INVERTER OPERATION 8-9
CHARGING THE POWER PACK VIA THE CIGARETTE
LIGHTER SOCKET OF A VEHICLE 9-10
CPAP POWER PACK IMPORTANT NOTES 10-11

CPAP POWER PACK FEATURES
- 1 -
SUPER CPAP POWER PACKS...
THE MOST POWERFUL CPAP POWER SUPPLIES IN THE WORLD!
Available in three different sizes and capacities.
Includes soft side carrying case, AC Charger and DC Power Cord.
Power gauge on Power Pack indicates remaining usage time.
Power Pack does not have to be completely discharged before
recharging.
Power Pack can also be used to power other devices that operate
from a 12V DC Current such as portable DVD players, iPods,
MP3 Players, and cell phones.
Power Packs are designed and manufactured with a PCB
(Protective Circuit Board) which provides the following internal
protective safety features:
(1) Internal protection against thermal run away (overheating)
(2) Internal protection against over charging
(3) Internal protection against over discharge
(4) Internal protection against over voltage and over current
(5) Internal protection against short circuit
Perfect for camping! With the addition of the 150 or 225 Watt
Sine Wave Inverter (sold separately) you can safely recharge
your CPAP Power Pack via the cigarette lighter socket of a vehicle
giving you even more time to enjoy your outdoor adventures.
START YOUR NEW ADVENTURE TODAY!

PRODUCT SPECIFICATIONS
* Power Pack run times vary depending upon several factors including device type, pressure setting & altitude.
150Wh
12V
8A
2500mAh
*15-20 hours
4-5 hours
9.8” x 5.9” x 1.3”
3 lbs.
6 months
C-222 C-444C-150
Capacity
Output Voltage
Output Current (Max)
Power Gauge
Charge Current
*Average Run Time
Recharge Time
**Compatibility
Dimensions
Weight
Warranty
222Wh
12V
8A
2500mAh
*25-30 hours
5-6 hours
9.8” x 5.9” x 1.3”
4 lbs.
6 months
444Wh
12V
8A
2500mAh
*50-55 hours
6-7 hours
10 1/8” x 6 7/8” x 2 5/8”
9 lbs.
6 months
Five stage charge level indicator
CPAP/Bi-Level machines & other devices which require a 12V power source
- 2 -
** Some CPAP machines may require the 150 or 225 Watt Sine Wave Inverter to complete the connection
between the machine and the Power Pack. Usage times will decrease when using the inverter.

The following safety warnings must be observed at all times:
To prevent fire or shock hazard, do not expose the Power Pack
to rain or moisture of any type.
CAUTION: To reduce the risk of electric shock, do not remove
cover (or back) as there are no user-serviceable parts inside.
DECLARATION OF CONFORMITY: This class B digital device
complies with part 15 of the FCC rule, EMC standard regulations
En55022 Class B and Canadian ICES-003. Operation is subject to
the following two conditions: (1) This device may not cause
harmful interference, and (2) This device must accept any
interference received, including interference that may cause
undesired operation.
WARNING - SAFETY FIRST
- 3 -
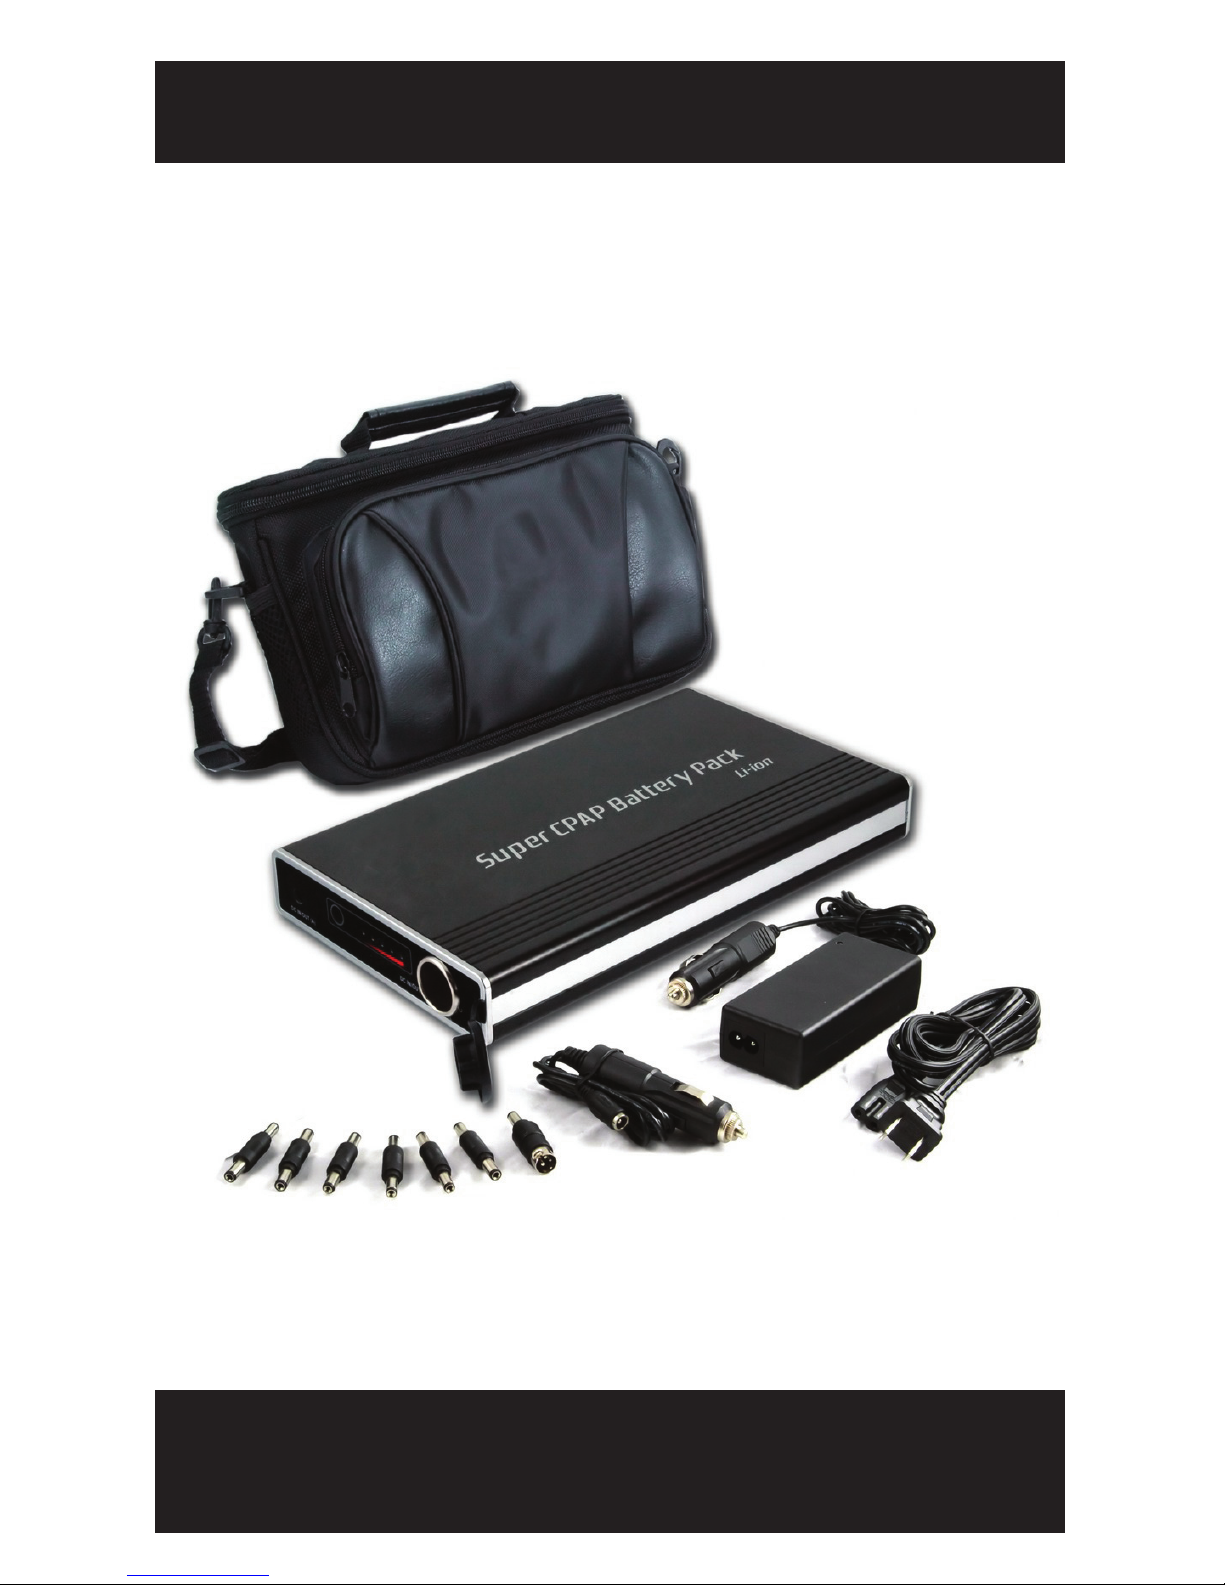
PACKING LIST
CPAP POWER PACK
C-150 or C-222
AC CHARGER DC POWER CORD CONNECTORS
C-444
CARRYING CASE

- 4 -
CONTROL BOARD PART IDENTIFICATION
A. DC IN/OUT JACK (A) B. DC IN/OUT JACK (B)
C. TEST BUTTON D. LOW POWER ALARM
E. POWER METER
B
D
C
A
E
CHARGING THE POWER PACK
CHARGING THE POWER PACK A VIA WALL OUTLET
Connect the DC-out plug of the AC charger to the DC IN/OUT
jack (A) of the Power Pack.
Connect the power cord of the AC charger to a wall outlet.
The red light of the charger lights up when charging begins.
When the charger light turns green, normal charge is completed.
No memory effect. The Power Pack can be recharged at any
time regardless of the amount of discharge.

- 5 -
POWER METER
THE POWER METER MAY BE ACTIVATED AFTER THE
FIRST CPAP POWER PACK CHARGING.
CHARGING THE POWER PACK
After giving your Power Pack a complete charge please hold the
test button down for up to 30 seconds to initialize the indicator
lights. You should see up to four green LED lights come on.
If a blinking red light comes on, this means your Power Pack is
turned on. To shut off your Power Pack, hold down the test
button until the lights go black.
Press the TEST button, the number of the LED lights will show you
the power level of the Power Pack.
When the low battery alarm LED is flashing, the Power Pack needs
to be charged.
4 green LED lights 75%-100% power level
3 green LED lights 50%-75% power level
2 green LED lights 25%-50% power level
1 green LED light < 25% power level

- 6 -
SUPER CPAP POWER PACK OPERATION
If the DC Power Cord will not directly fit in the CPAP machine
you will need to use one of the Universal Connectors provided
to complete the connection between the Power Pack and the
CPAP machine.
Determine which Universal Connector fits in the DC in/out jack
on the CPAP machine and attach that connector to the end of
the DC Power Cord. Then connect the DC Power Cord to the
Power Pack. If you have trouble locating the correct connector,
please refer to additional instructions on the next page.
Once the connection between the Power Pack and the CPAP
machine is complete, press the ON/OFF button on the CPAP
machine. Your CPAP machine should start functioning.
CONNECTING THE POWER PACK TO A CPAP MACHINE
NOTE: PRODUCTS MANUFACTURED BY RESMED
SHOULD NEVER BE POWERED VIA DC CONNECTIONS
AS IT WILL RUIN THE DEVICE. ResMed products should
only be connected via a Sine Wave Inverter. (see page 8)
Connect DC Power Cord to the DC IN/OUT jack (B) on CPAP
Power Pack.
Connect the DC Power Cord to the DC in/out jack located on
the CPAP machine.

- 7 -
Locate the DC input port on the CPAP machine.
Try to insert a connector tip to the DC input port on the CPAP
machine and then gently try to plug the connector tip to the DC
Power Cord.
Test all of the connector tips. Create 2 different piles of tips. The
first pile will include all the connecter tips that do not fit into the
DC input port of your CPAP machine, and the second pile will
include a small handful of tips that are potential matches because
they physically fit into the DC input port.
Connect the DC output cable to the Power Pack. Carefully and
methodically test each tip from the handful of potential matches
that were set aside in the second pile. Plug into your CPAP
machine and then try turning it on and see if the CPAP machine
begins running.
Try all of the connector tips because even if you find that one
works, there may be another connector tip that makes a better
connection. You want to avoid using a loose tip if there is a
better match.
Once you have found the correct connector tip, you may want to
store it in a separate place away from your other tips for easy
retrieval.
LOCATING THE CORRECT UNIVERSAL CONNECTOR
Este manual sirve para los siguientes modelos
2
Tabla de contenidos


