
CoVac tempblue Hi Wall E Series Manual de usuario

INSTALLATION INSTRUCTIONS
This manual applies to models:
TBH41E-012-H1N1C
TBH41E-012-H3N1C
TBH41E-018-H3N1C
TBH41E-024-H3N1C
TBG41E-012PH1N1C
TBG41E-012PH3N1C
TBG41E-018PH3N1C
TBG41E-024PH3N1C
TM
Thank you for selecting Tempblue Air Conditioning.
Please read this manual carefully and store for future reference.
Hi Wall E series 60HZ
TBH41EX(xxx)-HXN1C
TBG41EX(xxx)PHXN1C
Hi Wall E series
TBG41EX(xxx)PHXN1C
TBH41EX(xxx)-HXN1C

Table of Contents
Installation Manual
Indoor Unit Installation........ 11
1. Select installation location..........................11
2. Attach mounting plate to wall....................
12
3. Drill wall hole for connective piping............
12
4. Prepare refrigerant piping...........................
14
5. Connect drain hose....................................
15
6. Connect signal cable..................................
17
7. Wrap piping and cables..............................
18
8. Mount indoor unit.....................................
18
Outdoor Unit Installation...
20
8
1. Select installation location..................20
2. Install drain joint................................
21
3. Anchor outdoor unit..........................
22
4. Connect signal and power cables.......23
Safety Precautions........................... 4
0
1
5
Accessories........................................6
2
4
Unit Parts..........................................10
3
Installation Summary - Indoor Unit........
Refrigerant Piping Connection........ 25
A. Note on Pipe Length................................................25
B. Connection Instructions –Refrigerant Piping............. 25
1. Cut pipe..............................................................
25
2. Remove burrs......................................................
26
3. Flare pipe ends....................................................
26
4. Connect pipes.....................................................
27
Air Evacuation................... 29
1. Evacuation Instructions...................... 29
2. Note on Adding Refrigerant...............30
Electrical and Gas Leak Checks........ 31
Test Run............................................32
European Disposal Guidelines........34
6
7
8
9
10
MC MC
Impedance Information.................. 35
11

Page 4
This symbol indicates that ignoring instructions may cause death or serious
injury.
This symbol indicates that ignoring instructions may cause moderate injury
to your person, or damage to your unit or other property.
Read Safety Precautions Before Installation
Incorrect installation due to ignoring instructions can cause serious damage or injury.
The seriousness of potential damage or injuries is classified as either a WARNING or CAUTION.
WARNING
CAUTION
WARNING
Do not modify the length of the power supply cord or use an extension cord to power the unit.
Do not
Do not
share the electrical outlet with other appliances. Improper or insufficient power supply
can cause fire or electrical shock.
When connecting refrigerant piping, do not let substances or gases other than the specified
refrigerant enter the unit. The presence of other gases or substances will lower the unit’s capacity,
and can cause abnormally high pressure in the refrigeration cycle. This can cause explosion and
injury.
allow children to play with the air conditioner. Children must be supervised around the
unit at all times.
1.
Installation must be performed by an authorized dealer or specialist. Defective installation can
cause water leakage, electrical shock, or fire.
2.
Installation must be performed according to the installation instructions. Improper installation can
cause water leakage, electrical shock, or fire.
(In North America,installation must be performed in accordance with the requirement of NEC and
CEC by authorized personnel only.)
3.
Contact an authorized service technician for repair or maintenance of this unit.
4.
Only use the included accessories, parts, and specified parts for installation. Using non-standard
parts can cause water leakage, electrical shock, fire, and can cause the unit to fail.
5.
Install the unit in a firm location that can support the unit’s weight. If the chosen location cannot
support the unit’s weight, or the installation is not done properly, the unit may drop and cause
serious injury and damage.
This symbol indicates that you must never perform the action indicated.
Safety Precautions

Page 5
WARNING
6.
For all electrical work, follow all local and national wiring standards, regulations, and the
Installation Manual. You must use an independent circuit and single outlet to supply power. Do
not connect other appliances to the same outlet. Insufficient electrical capacity or defects in
electrical work can cause electrical shock or fire.
7.
For all electrical work, use the specified cables. Connect cables tightly, and clamp them securely to
prevent external forces from damaging the terminal. Improper electrical connections can overheat
and cause fire, and may also cause shock.
8.
9.
10.
11.
All wiring must be properly arranged to ensure that the control board cover can close properly. If
the control board cover is not closed properly, it can lead to corrosion and cause the connection
points on the terminal to heat up, catch fire, or cause electrical shock.
This appliance can be used by children aged from 8 years and above and persons with reduced
Physical, sensory or mental capabilities or lack of experience and knowledge if they have been given
supervision or instruction concerning use of the appliance in a safe way and understand the hazards
involved. Children shall not play with the appliance. Cleaning and user maintenance shall not be
made by children without supervision.
CAUTION
For units that have an auxiliary electric heater, do not install the unit within 1 meter (3 feet) of
any combustible materials.
Do not
install the unit in a location that may be exposed to combustible gas leaks. If combustible
gas accumulates around the unit, it may cause fire.
Do not operate your air conditioner in a wet room such as a bathroom or laundry room. Too
much exposure to water can cause electrical components to short circuit.
1.
The product must be properly grounded at the time of installation, or electrical shock may occur.
2.
Install drainage piping according to the instructions in this manual. Improper drainage may cause
water damage to your home and property.
Note about Fluorinated Gasses
1.
This air-conditioning unit contains fluorinated gasses. For specific information on the type of gas
and the amount, please refer to the relevant label on the unit itself.
2.
Installation, service, maintenance and repair of this unit must be performed by a certified
technician.
3.
Product uninstallation and recycling must be performed by a certified technician.
4.
If the system has a leak-detection system installed, it must be checked for leaks at least every 12
months.
5.
When the unit is checked for leaks, proper record-keeping of all checks is strongly
recommended.
In certain functional environments, such as kitchens, server rooms, etc., the use of specially designed
air-conditioning units is highly recommended.
If the supply cord is damaged, it must be replaced by the manufacturer, its service agent or similarly
qualified persons in order to avoid a hazard.

Name
Shape Quantity
1
1
1
(for cooling & heating
models only)
Clip anchor
Mounting plate fixing
screw ST3.9 X 25
Remote controller
Fixing screw for remote
controller holder ST2.9 x 10
Remote controller holder
Dry battery AAA.LR03
Seal
Drain joint
Mounting plate
1
Accessories
The air conditioning system comes with the following accessories. Use all of the installation
parts and accessories to install the air conditioner. Improper installation may result in water
leakage, electrical shock and fire, or cause the equipment to fail.
5
5
2
1
Optional
Parts
2
Page 6
1
1
1
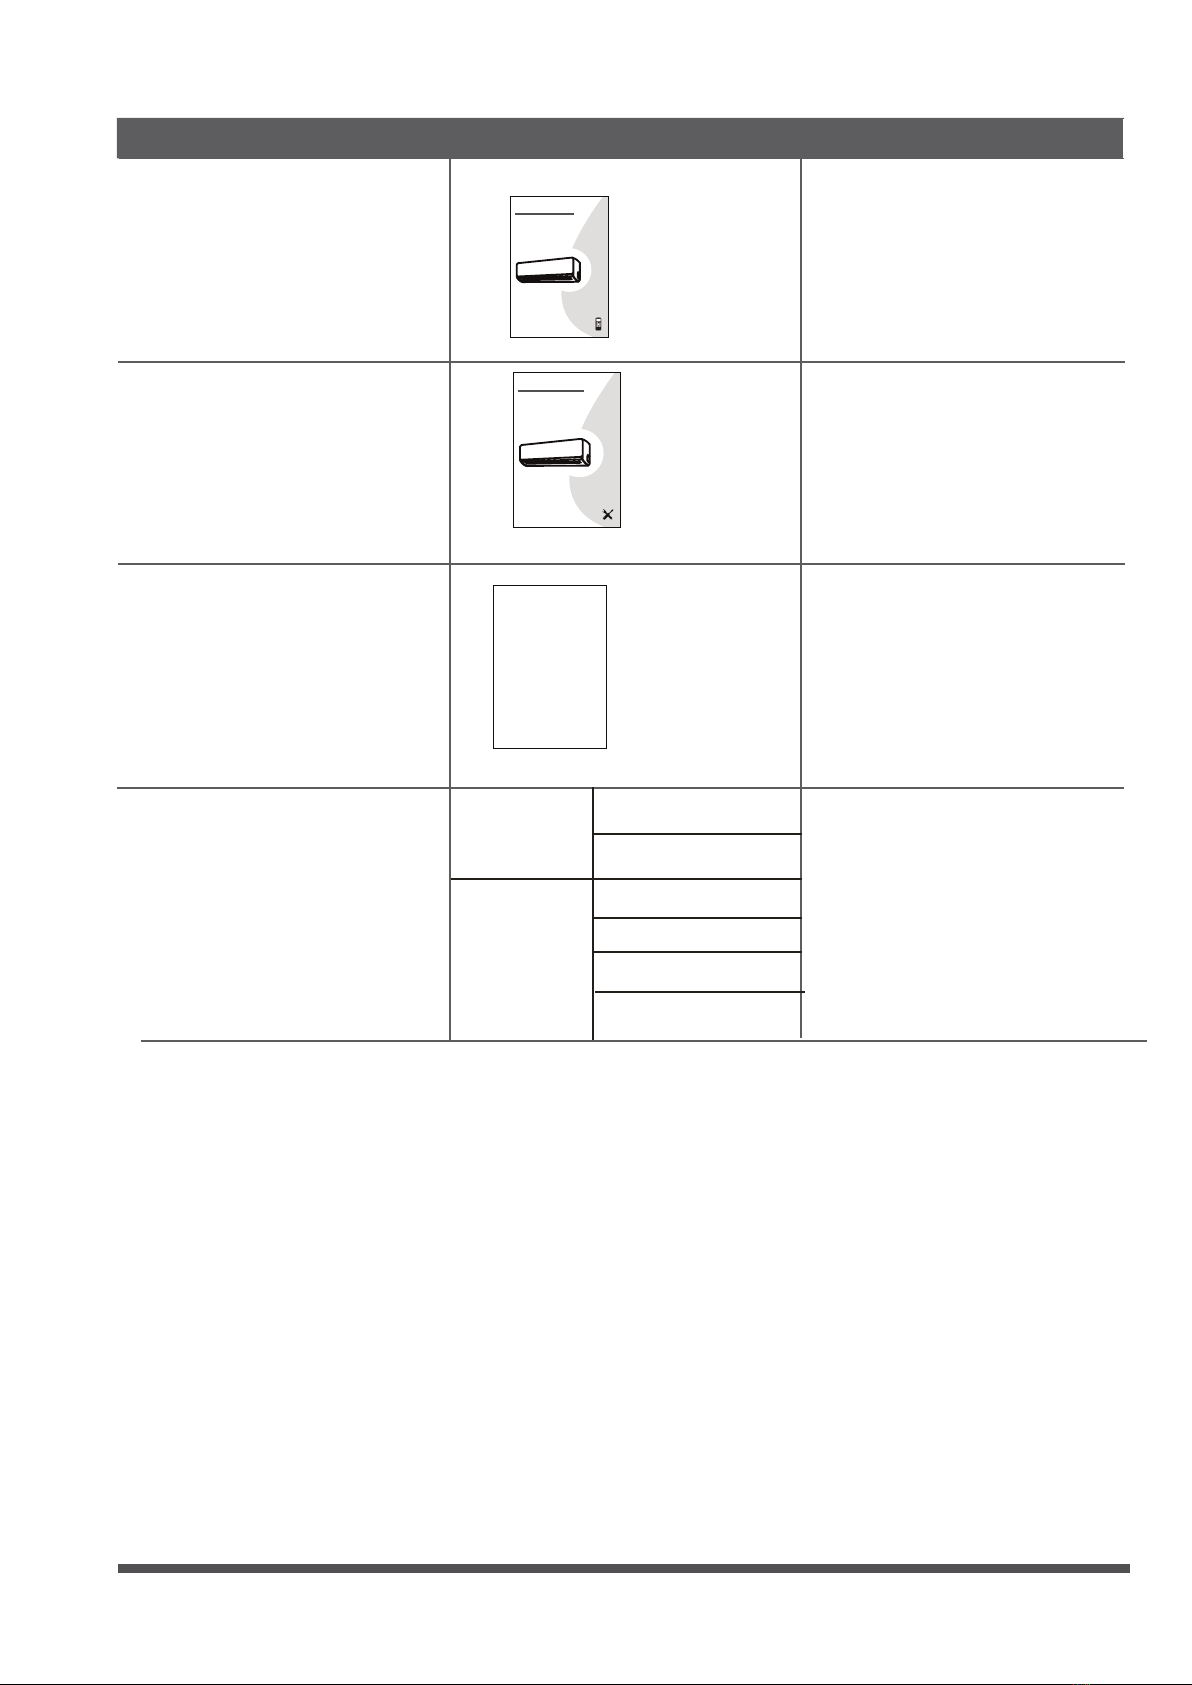
Owner’s manual
Installation manual
Remote controller
illustration
Page 7
Name
Shape Quantity
Parts you must purc hase.
Consult the dealer about
the pipe size.
Connecting pipe
assembly
Liquid side
Gas side
Φ6.35(1/4in)
Φ9.52(3/8in)
Φ9.52(3/8in)
Φ12.7(1/2in)
Φ16(5/8in)
IMPORTANTNOTE:
Read this manual carefully before installing
or operating your new air conditioning
unit. Make sure to save this manual for
future reference.
AIR CO ND I T IO N E R
RE MO TE CON TR OL LER I L LU S T RATI O N
SPLIT-TYPE ROOMAIR CONDITIONER
CS78421-548-754
IMPORTANTNOTE:
Read this manual carefullybefore installing
or operating your new air conditioning
unit. Make sure to savethis manual for
futurereference.
Owner’s Manual
Forest Series
All Model Numbers
SPLIT-TYPE ROOMAIR CONDITIONER
CS78421-548-754
IMPORTANTNOTE:
Read this manual carefully before installing
or operating your new air conditioning
unit. Make sure to save this manual for
Installation Manual
Forest Series
All Model Numbers
Φ19(3/4in)

Page 8
Installation Summary - Indoor Unit 2
Installation
Overview
Select Installation Location
(Page 11)
Attach Mounting Plate
(Page 12)
Drill Wall Hole
(Page 12)
Determine Wall Hole Position
(Page 12)
12
3 4
12cm
(4.75in)
2.3m (90.55in)
12cm
(4.75in)
15cm (5.9in)
Page 9
Installation
Overview
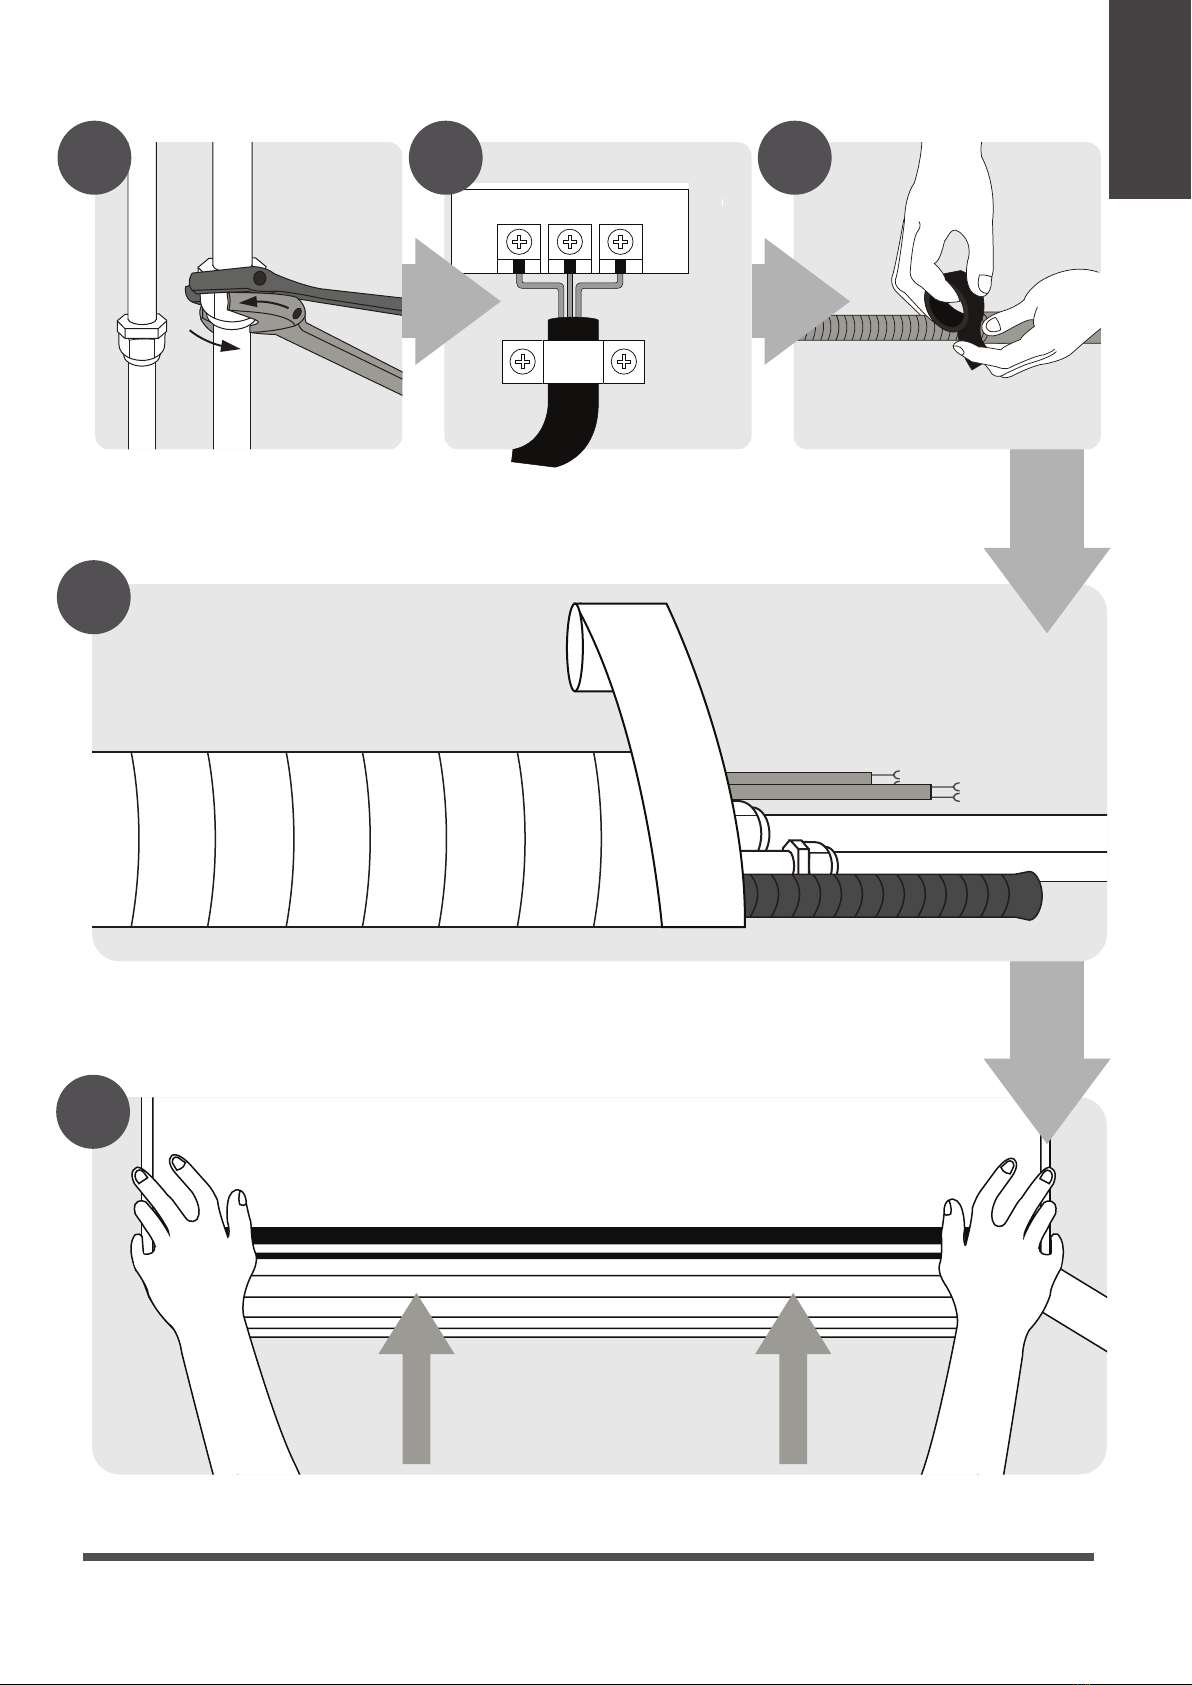
Mount Indoor Unit
(Page 18)
STEP 8
Wrap Piping and Cable
(not applicable for some locations in the US )
(Page 18)
Connect Piping
(Page 25) Connect Wiring
(Page 17)
Prepare Drain Hose
(Page 14)
5 6 7
8
9

Page 10
Unit Parts 3
Installation
Overview
Fig. 3.1
NOTE ON ILLUSTRATIONS
Illustrations in this manual are for explanatory purposes. The actual shape of your indoor
unit may be slightly different. The actual shape shall prevail.
NOTE: The installation must be performed in accordance with the requirement of local and
national standards. The installation may be slightly different in different areas.
Wall Mounting Plate
Power Cable (Some Units)
Refrigerant Piping
Signal Cable
Remote Controller
Drainage Pipe
Louver
Remote controller Holder
(Some Units)
Functional Filter (On Front of
Main Filter - Some Units)
Front Panel
Outdoor Unit Power Cable
(Some Units)
1
2
3
4
5
6
7
8
9
10
11
(1) (2)
1
2
3
4
6
7
8
9
10
11
Air-break switch
3
1
2
4
5
6
7
8
11
5
Este manual sirve para los siguientes modelos
8
Tabla de contenidos
Otros manuales de Acondicionador de aire de CoVac


