Coleman CX5HD Manual de usuario

CX5HD
USER’S MANUAL
Before operating this unit,
please read this manual thorougly
and retain it for future reference.

Contents
Precautions..................................................................................................................................1
System Requirements ................................................................................................................3
Introduction to Appearance and Keypad .................................................................................4
Accessories .................................................................................................................................6
Get Started...................................................................................................................................7
1. Charge the Built-in Lithium Battery ........................................................................................7
2. Using Memory Card ...............................................................................................................8
3. Startup/Shutdown...................................................................................................................8
4. Conversion between Function Modes....................................................................................9
5. Indicator light ........................................................................................................................10
6. Video Recording Mode.........................................................................................................10
7. Picture Taking Mode.............................................................................................................11
8. Vehicle-Mounted Mode.........................................................................................................13
9. Playback Mode.....................................................................................................................14
10. Connect to Personal Computer..........................................................................................16
Technical Parameters...............................................................................................................17

1
This user's manual has referred to the latest information we had when this user’s manual was
made. The screen display and illustrations are used in this user's manual for the purpose of
introducing details of this video camera in a more specific and direct way. Difference may arise
between these displays and illustrations and the video camera actually available for you due to
difference in technological development and production batch, under which case, the actual
functions of this video camera shall prevail.
Precautions
Please read the Announcements carefully before using this video camera for proper and safe
operation, so as to bring its optimum performance into play and extend its service life.
Do not expose the video camera to sunshine directly, nor point its lens to sunlight.
Otherwise, the image sensor of the video camera may be damaged.
Take good care of the video camera and prevent water or sand particles from entering the
video camera when it is used on the beach or near to water, because water, sand particles,
dust or component containing salt may damage the video camera.
Keep the video camera contaminated free of dust and chemical materials. Place it in a cool,
dry and well ventilated place. Do not place the video camera in a high temperature, moist or
dusty place.
Please check if the video camera can operate normally before use.

2
If dirt or stain is accumulated on the video camera or on its lens, use soft, clean and dry rag
to wipe it away gently. If the video camera or its lens is stained with sand particles, blow on
the lens to get the sand articles away gently. Do not use cloth to wipe arbitrarily. Otherwise,
it may scratch the surface of video camera or its lens.
If it is required to clean video camera surface, firstly blow away the sand dust accumulated
on this surface, and then wipe the video camera gently with rag or tissue applicable to
optical equipment. Please use the cleaning agent of video camera for wiping if necessary.
Do not use organic solvent to clean the video camera.
Do not touch the lens surface with fingers.
Please back up the data if the memory card inside this video camera is used for the first
time.
The externally installed memory cards are manufactured from precise electronic
components. Data may be lost or damaged under the following circumstances:
1) Improper use of the memory card.
2) The memory card is bent, dropped or collided.
3) Place it under high temperature or moist environment or expose to sunshine directly.
4) Electrostatic or electromagnetic field exists around the memory card.
5) This memory card is taken out or power supply is interrupted when this video camera or
computer is connected to the memory card (i.e. during reading, writing and formatting).
6) Touch the metal contact surface of the memory card with fingers or metal materials.

3
System Requirements
Operating System
Microsoft®Windows®7, Vista, XP, 2000
CPU
Intel®Pentium III 800 MHz or other CPU with equivalent performance
Internal Memory
512 MB RAM
Sound Card and
Display Card
Sound card and display card support DirectX8 or later
CD-ROM Drive
Speed of 4 X or faster
Memory card
No photos if no memory card is inserted.
Hard Disk
Free space of 500 MB or above
Others
One standard USB1.1 or USB2.0 port

4
Introduction to Appearance and Keypad

5
Memory card slot
Mode switch
Reset
Lens
USB port
TFT LCD
Power button
Working indicator
MIC
Charging indicator
Shutter button
6
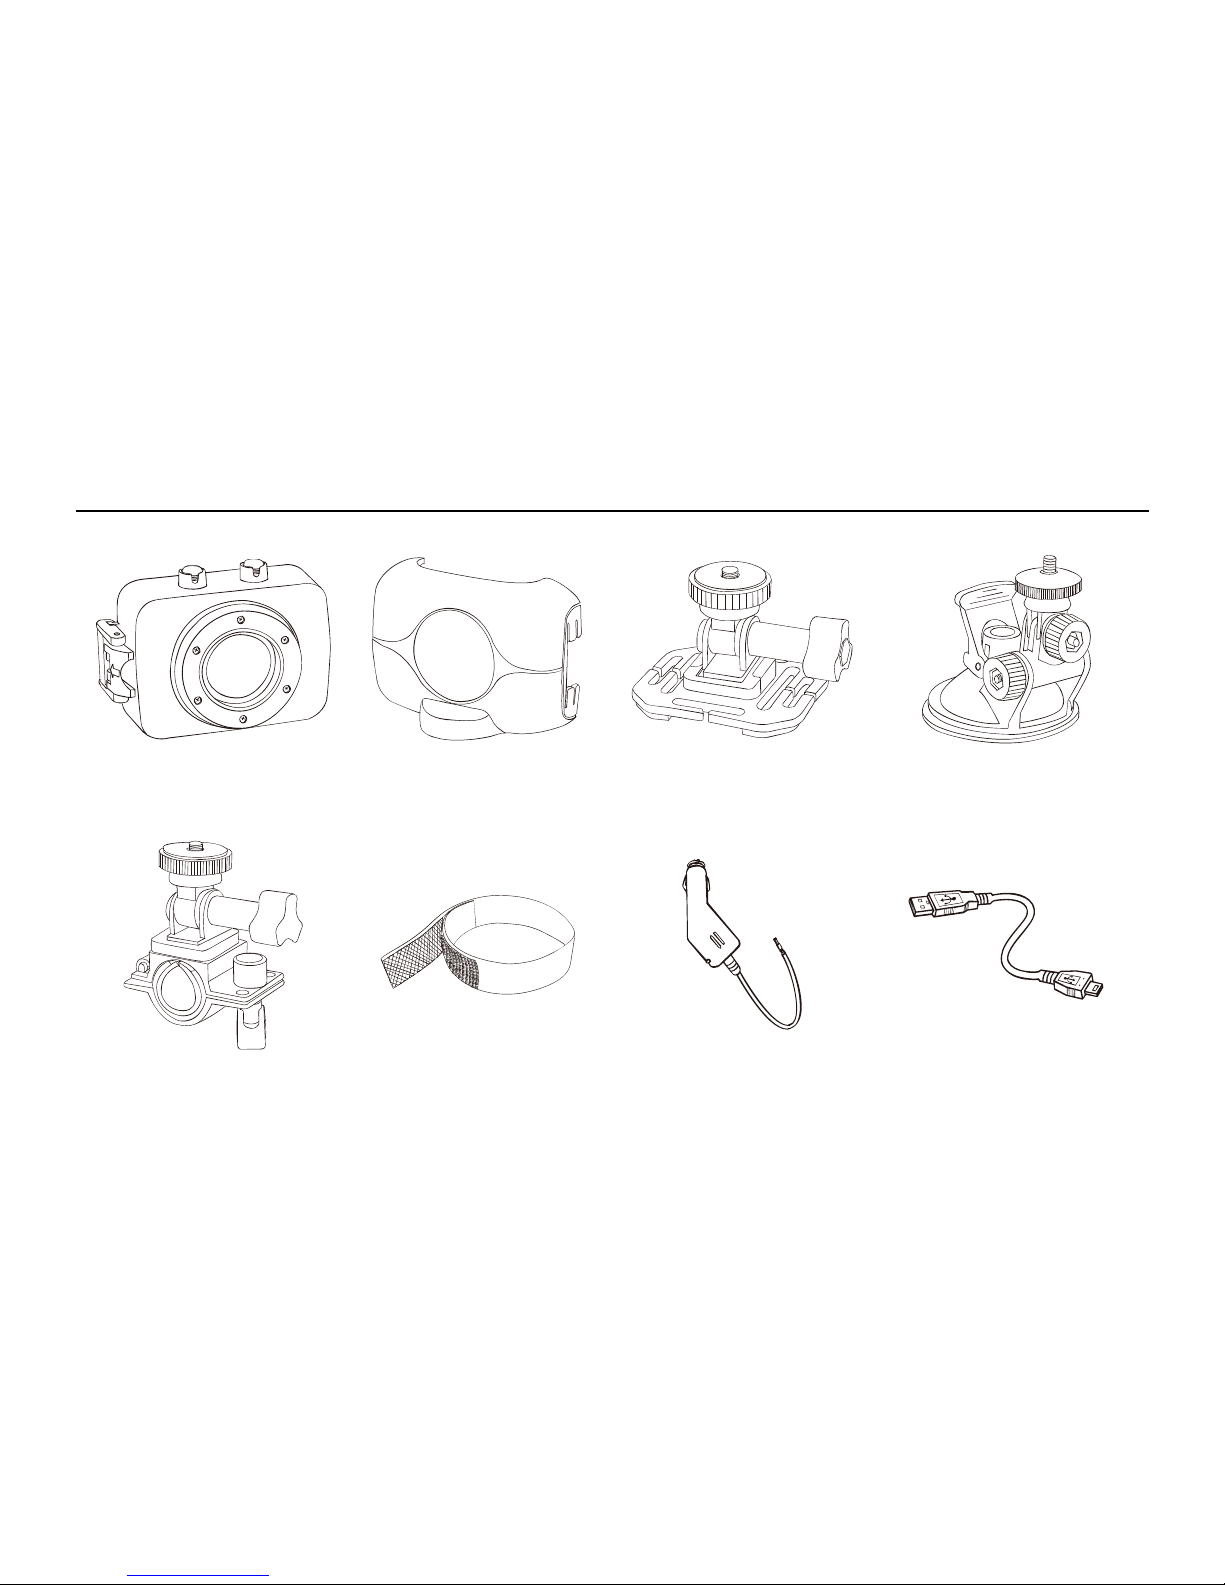
Accessories
Waterproof Casing
Camera Holder
Helmet Holder
Suction Cup Mount
Handlebar Mount
Helmet Band
Car Charger
USB Cabel

7
Get Started
1. Charge the Built-in Lithium Battery
Connect the video camera with computer for charging in the shutdown state. The indicator light
for charging is on at this time and will be off after charging. In general, it can be fully charged
after 2-4 hours.
USB Cable
Indicator Light for
charging is on.

8
2. Using Memory Card
Push the memory card into the card slot according
to the concave lettering beside the slot of memory
card till it is completely inserted.
To take out the memory card, gently press the end
of the memory card inward and it will pop up.
Note: No built-in memory is available in this video
camera. Make sure to insert memory card before using.
3. Startup/Shutdown
3.1 Startup: Press the POWER button for 3 seconds, the screen will be on and the camera
enters the startup state.
Tabla de contenidos
Otros manuales de Cámara de acción de Coleman


