Clas Ohlson SD18B Manual de usuario

EnglishSvenskaNorskSuomi EnglishSvenskaNorskSuomiDeutsch
Ver. 20140228
Action camera FullHD
Actionkamera FullHD
Actionkamera FullHD
Actionkamera FullHD
Action-Kamera FullHD
Art.no. Model
38-6119 SD18B

2
3
English
Action camera FullHD
Art.no 38-6119 ModelSD18B
Please read theentire instruction manual before use and save it for future reference.
Wereserve theright for any errors in text or images and for making any necessary
technical changes to this document. Ifyou should have any questions concerning
technical problems please contact our Customer Services.
Safety
• The camera must be fitted inside thewaterproof protective case if it will be
exposed to moisture andrain.
• Do not expose thecamera to impacts, knocks or strong heat.
• Do not leave thecamera in bright sunlight for prolonged periods.
• Keep thecamera and memory card away from strong magnetic fields or
radiowaves from speakers or antennas, etc.
• Do not allow children to play with thecamera.
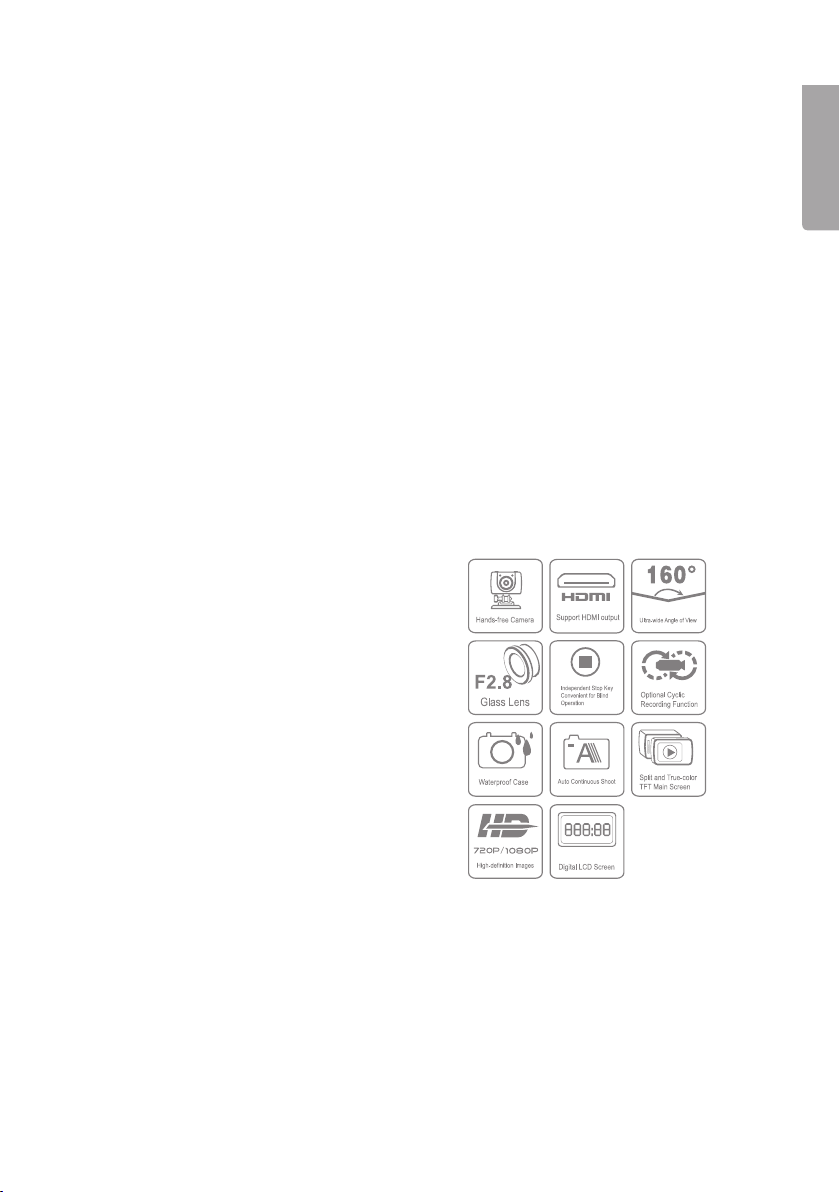
Product description
• Video recording in FullHD.
• Still camera 5 megapixels, autoexposure
and auto white balance.
• Audio recording
• Still photography
• Detachable TFT colour display screen
• Date and time display
• 4× digital zoom
• USB 2.0
• Mini HDMI output
• Indicator for battery capacity, memory
capacity and charging.
• Waterproof protective case. IP68, 60 m.
• A remote control is available as
anaccessory (sold separately).

4
English
1 2 3 4 5 6 7 8
9
10
11
12
13
18
19
20
21
14 15 16 17
Buttons and functions
1. [ ] Recording button
2. Green LED to indicate recording
inprogress.
3. [POWER] On/off
4. Microphone
5. Red LED to indicate charging status.
Flashing light: charging in progress.
Constant light: fully-charged battery.
6. LCD display
7. Shutter button for still photography
8. [■] Stop
9. TFT display
10. [M] Button to open settings menu
11. [+] Navigate up, zoomin
12. [<] Navigate toleft
13. [-] Navigate down, zoomout
14. [
] Open playback/display mode
15. [OK] Confirm choice
16. [PUSH] Detach theTFT display
screen from thecamera
17. Attachment point for strap
18. Speaker
19. Slot for Micro SDcard
20. [>] Navigate toright
21. AV out

5
English
2322
24
25
26
22. Green indicator of video
recording/shooting
23. Camera lens
24. Mini HDMI output
25. Mini USB connection
26. Attachment point for
accessory or tripod
Getting started
Inserting thebattery
1. Push up thebattery cover.
2. Insert thebattery as shown on
thesticker in thebattery holder.
3. Gently push thebattery down so that
it is right down in thebattery holder.
Toremove thebattery, grasp theplastic
tab by theOPEN arrow and pull
straight up.

6
English
Memory card
Only use memory card type MicroSDHC, max. 32GB.
Format thecard in thecamera before use.
NB: Ifthecard has previously been used in another device, remember that all
recorded material on thecard will be deleted when it is formatted. Makesure that you
transfer any material you want to keep to another location.
Formatting
1. Insert thememory card into its slot (19).
2. Switch on thecamera by sliding [POWER] to theON position.
3. Press [M] to open themenu.
4. Press [>] twice to get to theSetupmenu.
5. Press [+] or [-] several times to get to theFormat menu.
6. Press [OK] to open themenu.
7. Press [>] to select theright symbol.
8. Press [OK] to format.
Charging
• Connect theaccompanying USB cable to thecamera’s USB connection (25) and
to acomputer or other USB charger.
• The LED light (5) will indicate charging status. Flashing light: charging in progress.
Constant light: fully-charged battery.
• Time required to fully charge battery: approx. 4hours.
• The camera will automatically switch to maintenance charging once thebattery is
fully charged.
4. Mount the TFT screen onto the camera, being very careful to line it up straight with
the camera before pressing it securely into place. The screen’s connectors may
be damaged if the screen is fitted at an angle. Thescreen is easily detached from
theside with thePUSHbutton, but requires slightly more force on theside with
thescreen’s connection to thecamera.

7
English
Use
Switch on thecamera by sliding [POWER] to theON position.
LCD display
The LCD display on thetop of thecamera shows thefollowing icons:
Video-recording mode.
Audio-recording mode.
Flashes once for each still photograph.
Indicates that thecamera is switched on.
Shows battery status.
Indicates that thecamera is connected to acomputer or USB charger.
Indicates remaining memory capacity.
When video recording is in progress, time elapsed is shown in thedisplay, e.g. 005:20.
Thesame time is also shown in theTFT display.
TFT display
The following icons are shown:
Indicates that thecamera is in standby mode for video recording.
Shows battery status.
Indicates that amemory card has been installed.
Shows remaining memory capacity as a%.
Current video resolution is shown: 1080p, 960p, 720/60, 720/30, WVGA.
Date and time setting
1. Press [M] to open themenu.
2. Press [>] twice to get to theSetupmenu.
3. Press [+] or [-] several times to get to theDate/Timemenu.
4. Press [OK] to open themenu.
5. Select value using [<] [>] (the value is highlighted yellow).
6. Press [OK] to activate (the value is highlighted red).
7. Press [+] or [-] to change thevalue.
8. Press [OK] to confirm.
9. Press [M] twice to exit menumode.

8
English
Menus
Press [M] once to get to thecamera’s 3 menus. Press[<] [>] to switch between
Camcorder (video camera), Camera (camera) and Setup (settings).
Navigate themenus in thesame way as described in theButtons and functions
section above. Confirm your choice with [OK] and exit themenu by pressing [M].
Camcorder
Videocamera, contains thefollowing sub-menus:
• Resolution: Setting of video resolution 1080p (Full HD), 960p, 720/60, 720/30 and
WVGA (848×480). WVGA yield longer recording time, but poorer image quality.
NB: Use720p for thebest results in scenes with alot of movement.
• Capture Mode: Selectaudio or video recording.
Camera
Stillcamera, contains thefollowing sub-menus:
• Single Shot: Stillphotography, one picture at atime.
• Treble Shot: Takes3 pictures in rapid succession.
• Continuous: Setthetimer to take photos at any of thefollowing intervals: every
2seconds, every 3 seconds, etc. Thefollowing time intervals are possible: 2,
3, 5, 10, 20, 30. Picture-taking continues until[■] Stop (8) is depressed again,
thememory becomes full (“Out of Memory” will be shown in thedisplay) or
thebattery runsout.
• Self timer: Delayed shutter release; set delay as 0, 5or 10 seconds.
• Resolution: Setimage resolution. 3M (2048×1536), 5M (2592×1944) or
8M(3200×2400, interpolated). Remember that higher-resolution images take up
morespace on thememory card.
Setup
Settings, contains thefollowing sub-menus:
• Beep: Buttonsound on/off. Thebutton sounds for photographing and video
recording are not affected. Thesecannot be switched off.
• Self Lamp: Turn the video rec/photo indicator off and on.
• Time Display: Switchdisplay of time and date on/off for recording of videofiles.
• Loop Record: Whenthis function is switched on, thevideo recording is
automatically saved every 15 minutes. Ifthefunction is switched off, therecording
is saved every 30 minutes.

9
English
• Auto Standby: Settime for automatic return to standby mode after inactivity.
0, 2, 5or 10 minutes. To activate thecamera from standby mode, press
any of thebuttons for start of video recording (1) or theshutter button for
still photography(7). Thecamera can also be activated by sliding theon/off
button(3) to OFF and then back to ON. Ifany activity takes place during theset
time period, theAuto Standby time will start again from thebeginning once
theactivityconcludes.
• TV Standard: Setting of video system for viewing recorded material on TV.
NTSC or PAL. NTSC is recommended.
NB: Iftheformat is changed while thecamera is connected to aTV with
anAVcable, unplug thecable from thecamera for thesettings to be updated.
• Format: Formatting thememory card. SeetheGetting started – Memory card
section above.
• Default: Resettheaction camera to thefactory settings.
• Language: English.
• Frequency: Select50 or 60 Hz. 60 Hz is recommended.
• Date/Time: Setting of date and time. SeetheUse – Date and time setting
sectionabove.
Video recording
1. Switch on thecamera and select video-recording mode. SeetheMenus –
Camcorder – Capture mode section above.
2. Start recording by pressing thebutton for recording (1).
3. Zoom in/out using [+]/[-]. NB: The zoom in/out function is only applicable for
720p/30 and WVGA mode, not for 1080p, 960p, 720p/60.
4. Press [■] Stop (8) to conclude and save therecording.
- If thecamera is switched off by mistake during anongoing recording,
therecording is saved before thecamera switches off.
- If thebattery runs out during anongoing recording , therecording is saved and
a“Low Battery” message appears in theTFT display.
- If thecamera is not switched off manually when this message appears, it will
automatically switch to standby mode.
- If thememory becomes full during anongoing recording, thefiles are saved
and therecording is switched off automatically.
Still photography
1. Zoom in/out using [+]/[-]. NB: The zoom in/out function is only applicable for
720p/30 and WVGA mode, not for 1080p, 960p, 720p/60.
2. Take still photos by pressing theshutter button (7).
3. See theUse – Menus – Camera section above for description.

10
English
Audio recording
1. Switch on thecamera and select audio-recording mode. SeetheMenus –
Camcorder – Capture mode section above.
2. Start recording by pressing thebutton for recording (1).
3. Press [■] Stop (8) to conclude and save therecording.
NB: Whenthecamera is activated from standby mode, it is set to video-recording mode.
Playback/viewing mode
Press [
] (14) to open theplayback menu. Themenu has 2 sub-menus:
Recordand Capture.
Record
Videoand audiofiles.
1. Press [OK] to open themenu; thelast recorded file is shown. Press[<] [>] to
change file.
2. Press [-] to view recorded files as miniatures. Selectfile using [<] [>] or [+] [-] and
press [OK] toopen.
Control playback of video as follows:
• [OK] Start and stop playback.
• [+] [-] Volume
• [<] [>] Fast-forward or rewind. Press these buttons to switch between playback speeds
of 1/4x, 1/2x, 2x, and 4x normal speed. Press[OK] to return to normal playback.
• [
]: Pause/play
Control playback of audio files as follows:
• [OK]: Startand stop playback.
• [+] [-]: Volume
• Audio files cannot be fast-forwarded or rewound.
Press [
] to exit playback/viewing mode.
Capture
Stillphotos.
1. Press [OK] to open themenu; thelast picture taken is shown. Press[<] [>] to
change picture.
2. Press [-] to view thepictures as miniatures. Selectfile using [<] [>] or [+] [-] and
press [OK] to open thepicture.
3. Press [+]/[-] if you want to zoom in in thepicture.
4. Press [OK] in azoomed image to determine [<] [>] function of thekeys.
Theycan be used to move round in thepicture up/down or right/left.
Tabla de contenidos
Idiomas:
Otros manuales de Cámara de acción de Clas Ohlson


