Blue Robotics BlueROV2 Instrucciones de montaje

5/20/2019 BlueROV2 Software Setup - Blue Robotics
https://bluerobotics.com/learn/bluerov2-software-setup/ 1/16
Home (https://bluerobotics.com)/Guide (https://bluerobotics.com/learn/)/BlueROV2 Software Setup
BlueROV2 Software Setup
Guides in this Series
BlueROV2 Assembly
(https://bluerobotics.com/learn/bluerov2-assembly/)
Get your BlueROV2 built quickly with this assembly guide!
BlueROV2 Software Setup
(https://bluerobotics.com/learn/bluerov2-software-setup/)
Privacy - Terms

5/20/2019 BlueROV2 Software Setup - Blue Robotics
https://bluerobotics.com/learn/bluerov2-software-setup/ 2/16
Software Introduction
These are instructions for the rst time that you set up your computer to work with the BlueROV2. If you
have not assembled your BlueROV2, please see our Assembly Guide (/learn/bluerov2-assembly/) and
assemble your BlueROV2 prior to setting up the software.
Select your operating system below to begin the installation and network conguration:
Windows Mac Linux
QGroundControl Installation, Network Setup and Joystick Setup
Install QGroundControl for Windows
To connect your computer to the BlueROV2, you need to download and install QGroundControl:
This is the current software version (updated 28 April 2019):
QGroundControl: v3.5.2 (release notes (https://docs.qgroundcontrol.com/en/releases/release_notes.html))
Windows (https://s3.amazonaws.com/downloads.bluerobotics.com/QGC/latest/QGroundControl-
installer.exe)
Windows Network Setup
Network Settings
1. Go to
Control Panel
>
Network and Sharing Center
and then choose "Change adapter settings".
Get your BlueROV2 connected to a topside computer, the vehicle updated, and joystick properly
calibrated!
BlueROV2 Operation
(https://bluerobotics.com/learn/bluerov2-operation/)
Learn how to operate your newly built BlueROV2!
Privacy - Terms

5/20/2019 BlueROV2 Software Setup - Blue Robotics
https://bluerobotics.com/learn/bluerov2-software-setup/ 3/16
(https://bluerobotics.com/wp-content/uploads/2019/03/network-and-sharing-center-annotated.png?x62571)
2. Right click on the Ethernet adapter, then choose
Properties
.
(https://bluerobotics.com/wp-content/uploads/2019/03/network-connections-annotated.png?x62571)
3. In the properties dialog, choose
Internet Protocol Version 4 (TCP/IPv4)
, then click
Properties
.
Privacy - Terms

5/20/2019 BlueROV2 Software Setup - Blue Robotics
https://bluerobotics.com/learn/bluerov2-software-setup/ 4/16
(https://bluerobotics.com/wp-content/uploads/2019/03/internet-protocol-version-4-annotated.png?x62571)
4. Select "Use the following IP address" And enter 192.168.2.1 for the IP address and 255.255.255.0 for the
Subnet mask. Then select OK.
Privacy - Terms

5/20/2019 BlueROV2 Software Setup - Blue Robotics
https://bluerobotics.com/learn/bluerov2-software-setup/ 5/16
(https://bluerobotics.com/wp-content/uploads/2019/03/static-ip-annotated.png?x62571)
Firewall
1. Go to
Control Panel
>
Windows Firewall
and then select "Allow an app or feature through Windows
Firewall".
2. Select "Change Settings" and then select "Open source ground control app provided by QGroundControl
dev team" or "QGroundControl".
Privacy - Terms

5/20/2019 BlueROV2 Software Setup - Blue Robotics
https://bluerobotics.com/learn/bluerov2-software-setup/ 6/16
(https://bluerobotics.com/wp-content/uploads/2019/03/windows-rewall-annotated.png?x62571)
Joystick Setup
Initial Setup for XBox Controllers on Windows
For using the shift button functionality of XBox Controllers on Windows:
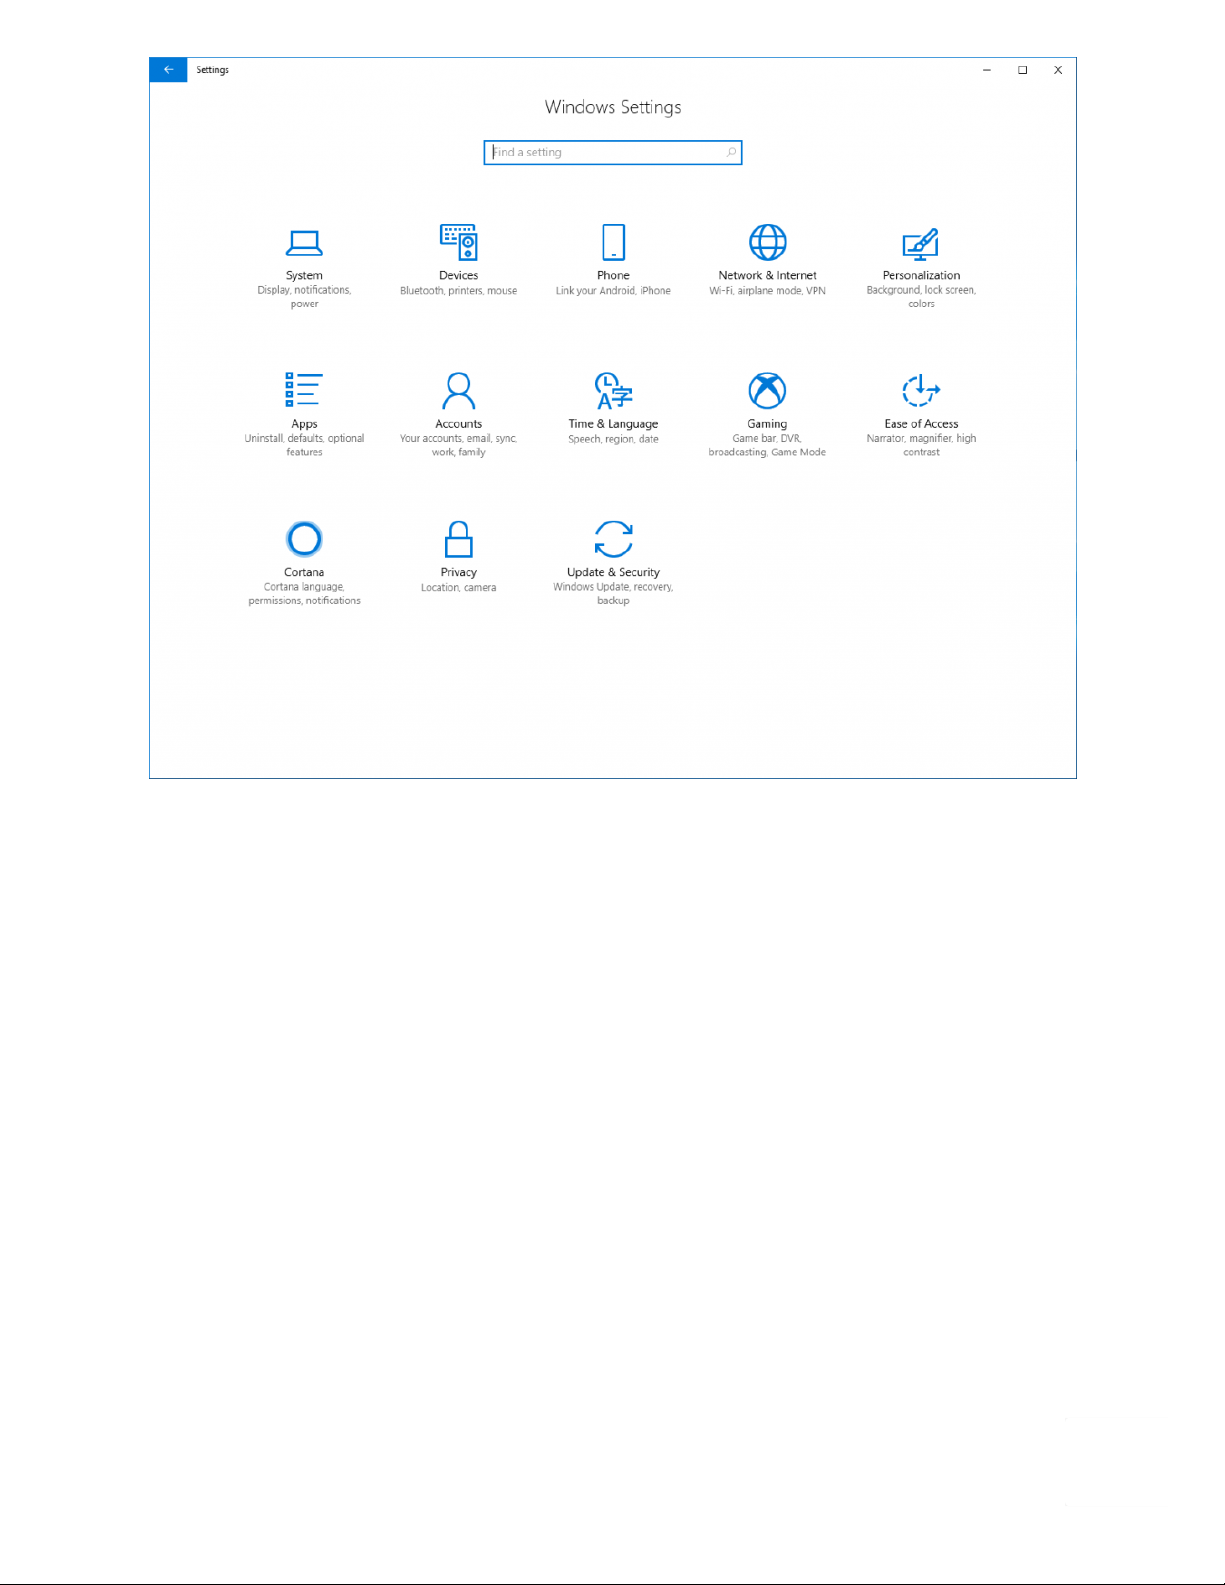
1. Go to Start -> Settings
2. Open the Gaming settings
Privacy - Terms
5/20/2019 BlueROV2 Software Setup - Blue Robotics
https://bluerobotics.com/learn/bluerov2-software-setup/ 7/16
(https://bluerobotics.com/wp-content/uploads/2019/03/settings.png?x62571)
3. Go to Game Bar tab from the left navigation panel
4. Uncheck the 'Open Game bar using this button on a controller' option
Privacy - Terms

5/20/2019 BlueROV2 Software Setup - Blue Robotics
https://bluerobotics.com/learn/bluerov2-software-setup/ 8/16
(https://bluerobotics.com/wp-content/uploads/2019/03/gamebar.png?x62571)
This will enable the XBox home button on the controller to be used as the Shift button for ROV controls.
XBox 360 Controller
Plug and Play
XBox One Controller
Wired: Plug and Play
Wireless:
1. Plug in Microsoft XBox Wireless Adapter for Windows (https://www.microsoft.com/en-us/p/xbox-
wireless-adapter-for-windows-10/91dqrb97l130/jq56?
cid=msft_web_collection&activetab=pivot%3aoverviewtab).
2. Turn on the controller, then press the Wireless Enrollment button on the top of the controller and on
the wireless adapter.
Logitech GamePad (F710 and F310)
Logitech controllers should have the switch on the back set to "X".
Testing the Connection to the BlueROV2
1. With the BlueROV2 still connected and powered on, start the QGroundControl application.
Privacy - Terms

5/20/2019 BlueROV2 Software Setup - Blue Robotics
https://bluerobotics.com/learn/bluerov2-software-setup/ 9/16
2. Wait a few seconds for the ROV to auto-connect and the green parameters bar to nish loading from left
to right.
3. The video stream and telemetry information should now be shown in the QGroundControl application.
Update Software
There are two computers installed on the BlueROV2: a Pixhawk autopilot, and a Raspberry Pi 'companion'
computer. Before proceeding, we will check that the software on both computers is up to date, and update
the software if necessary.
These are the current software versions (updated 15 April 2019):
Companion: v0.0.17 (release notes (https://github.com/bluerobotics/companion/blob/master/release-notes.txt))
ArduSub: v3.5.4 (release notes (https://github.com/ArduPilot/ardupilot/blob/master/ArduSub/ReleaseNotes.txt))
Companion
Companion is the software that runs on the Raspberry Pi. To perform a companion software update:
1. Plug a _fully charged_ battery into the ROV and connect the tether to your computer.
2. Navigate to 192.168.2.2:2770/network (http://192.168.2.2:2770/network) in your browser and ensure that
the ROV has access to a WiFi network. If you do not see a webpage at this address, you need to perform the
update according to the instructions here (http://discuss.bluerobotics.com/t/software-updates/1128).
3. Navigate to 192.168.2.2:2770/system (http://192.168.2.2:2770/system). Click the button that says 'Update
companion'. If you do not see this button, then the companion software is up to date.
4. The update process will take between 5 and 20 minutes depending on the Internet connection speed.
Wait for the update process to complete.
5. When it completes, refresh your browser. The companion version should be updated, and the update
available message should no longer appear.
6. If the update fails (usually due to a loss of internet connectivity), you will be warned that the ROV will
reboot and to leave the battery plugged in. At this point, once you are able to refresh the webpage, it is safe
to either power down the ROV or attempt the update again.
ArduSub
ArduSub is the software that runs on the Pixhawk autopilot. To perform an ArduSub software update:
1. Navigate to 192.168.2.2:2770/network (http://192.168.2.2:2770/network) and ensure that the ROV has an
internet connection.
If the video stream is not shown or the vehicle does not connect, please follow the ArduSub Troubleshooting
Guide (https://www.ardusub.com/troubleshooting/troubleshooting.html) before contacting Blue Robotics
Support.
Privacy - Terms

5/20/2019 BlueROV2 Software Setup - Blue Robotics
https://bluerobotics.com/learn/bluerov2-software-setup/ 10/16
2. Navigate to 192.168.2.2:2770/system (http://192.168.2.2:2770/system). Click the button under the
'Pixhawk Firmware Update' section that says 'Stable'.
3. Wait for the update process to complete, and you are nished!
Joystick/Gamepad Calibration
Some joysticks require calibration before you can enable them for use with QGroundControl. If your joystick
requires calibration, the Joystick tab on the Vehicle Settings page will be red, and you should follow these
steps to calibrate your joystick. If your joystick does not require calibration, the Joystick tab will not be red,
and you can skip this step!
1. Go to the Vehicle Settings page in QGroundControl, then click on the red Joystick tab in the sidebar on
the left.
2. Ensure the 'TX Mode' selection is set to 3.
3. Click "Calibrate", then click "Next".
4. Follow the step-by-step instructions, move the sticks as indicated in the diagram in QGroundControl.
When completed, the Joystick tab will no longer be red, and the Enabled checkbox on the Joystick page
should be checked.
Button Setup
The default button setup for the BlueROV2 is as shown in the image below:
Privacy - Terms
Otros manuales para BlueROV2
2
Tabla de contenidos


