First, choose whether the wind sensor will be mounted vertically or
horizontally (on a mast). Make sure that you position the wind sensor
in a free, open area that is not protected by objects, which may distort
or interfere with the wind (e.g. large buildings, trees, chimney, etc.).
: Make sure the following contents have been included with
your HWS for mounting the wind sensor:
• 8 x 0.25" screws (to fix mast to main unit and base bracket)
• 4 x 2.75" screws (to fix base bracket to a flat surface)
Cable Preparation for Vertical Mounting
1. Run the cable that is already fastened to the wind sensor through
the vertical joining section (see right).
2. Run the cable through the extension pole but do not secure the
pole to any sections yet.
3. Now run the cable through the top of the base-bracket and then
through the small rectangular section found on one side of the
Make sure that you completely pull the cable through
the wind sensor's extension pole and base-br
1. Make sure that the wind vane can rotate freely before fastening
the unit permanently into position.
2. Insert one end of the extension pole provided into the base-
3. Secure the connection point of the extension pole and base-
bracket using the 0.25" metal screws provided to prevent rotation
at the joining point. (Use 4 x 0.25" screws to ensure stability).
4. Insert the vertical joining section on the bottom of the wind
sensor into the top of the extension pole. (Ensure that you pull
all cable slack through the side of the base-bracket to prevent
creasing or cutting the cable).
5. Secure the wind sensor to the extension pole using the 0.25"
screws provided to make sure that the pole connection does not
rotate. (Use 4 x 2.75" screws to ensure stability).
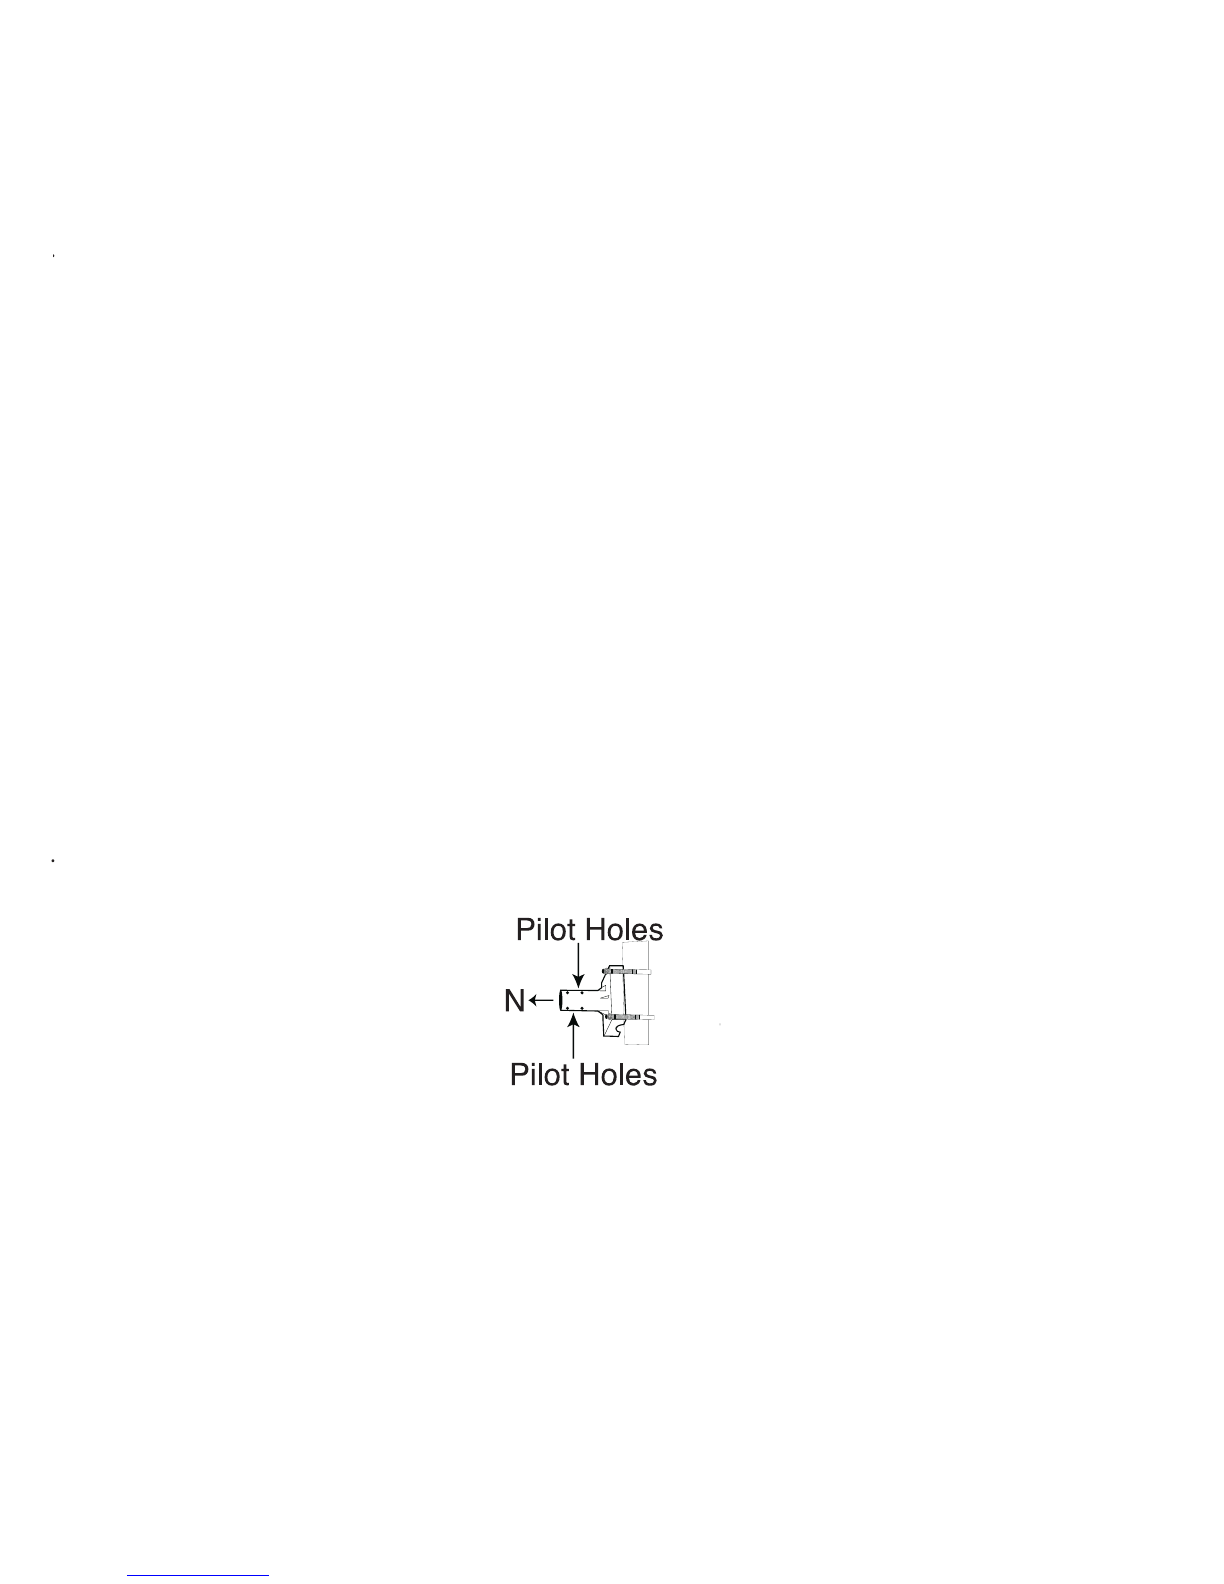
For accurate readings, it is important to mount the
at the "N" (north) on the casing is facing the
correct direction (north). If
necessary, use a standard compass to
6. Using 4 x 2.75" screws provided, secure the wind sensor's
base-bracket to a flat surface.