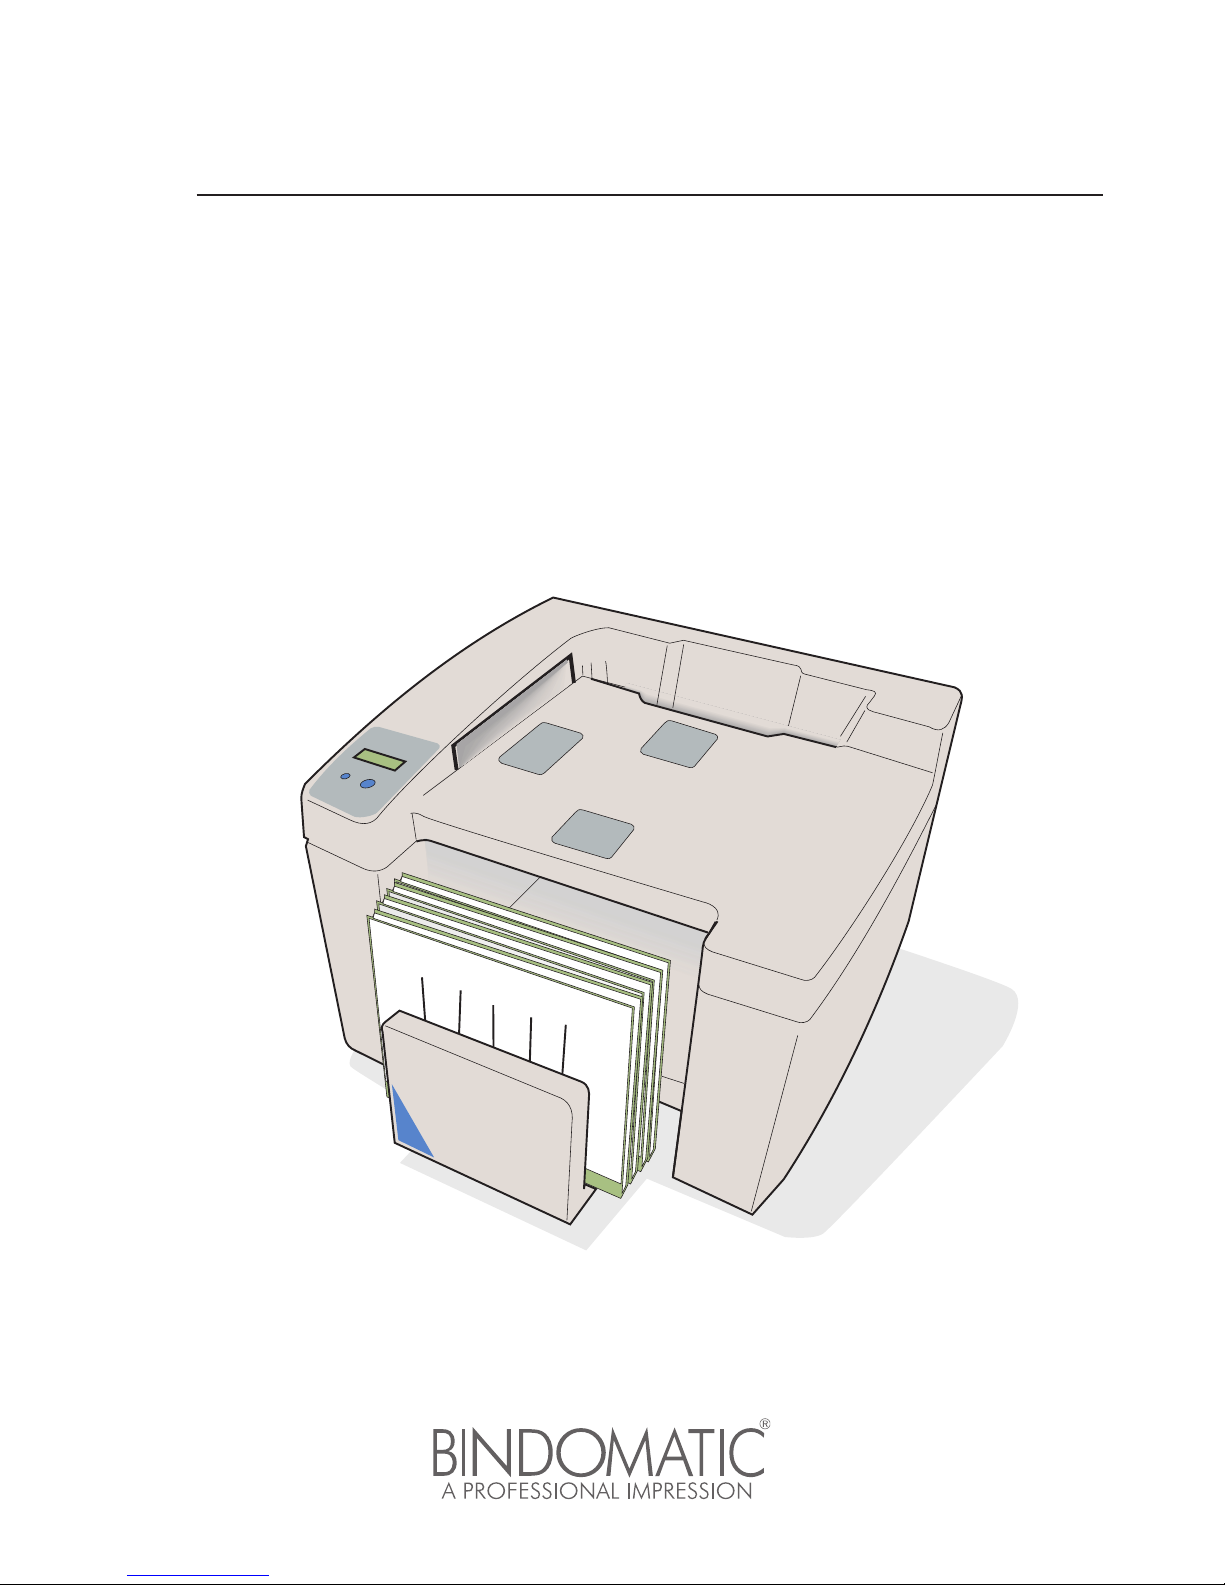
BINDOMATIC 101 DFS Manual de usuario

BINDOMATIC 101 DFS
Document Finishing System
Operator’s Manual
Version 2
(2003-02-17)

2
1. Safety instructions .................................................................. 3
2. Installation ................................................................................ 4
3. Description ............................................................................... 5
4. How to use the Bindomatic 101 DFS ..................................... 6
5. User settings ............................................................................ 8
6. Troubleshooting..................................................................... 10
7. Clearing and emptying .......................................................... 11
8. How to make the most of your binding machine ................ 12
9. Specifications ........................................................................ 13
10. Index and addresses ............................................................. 14
Contents

3
1. Safety instructions
Introduction:
To be able to use the Bindomatic 101 DFS in the best possible way, you the user should read through this Operator’s
Manual carefully and follow the instructions. Store the manual in the holder at the rear of the binding machine.
In order to guarantee perfect binding of your documents, only Bindomatic original covers can be used with this
machine.
Other types of covers or wrong use of the machine can cause poor binding results or the machine may stop working,
in which case an authorised service technician should be contacted to remedy the situation.
Warnings:
The machine must be connected to a power supply that
complies with the specifications in section 9 of this
manual.
The mains cable must not be damaged,
destroyed, or modified in any way. Do not
put heavy objects on the mains cable.
Do not remove any covers or screws on the
machine, other than those described in this
manual. There is high voltage in some
parts inside the machine. Contact with
these parts can cause a severe electric
shock. If the machine needs adjusting or
repairing, ask your service representative
for help.
If the machine appears to be damaged,
stops functioning, starts smoking, or smells
peculiar, immediately disconnect the mains
cable from the wall socket. Do not continue
to use the machine in this condition.
Contact your service representative.
Do not put any metal objects or objects
containing liquids (e.g. vases, flower pots,
coffee mugs, etc.) on the machine. If the
liquid contents are spilt into the machine,
there will be a risk of fire and electric
shock.
Safety Instructions
Always follow the safety instructions below when using
the machine.
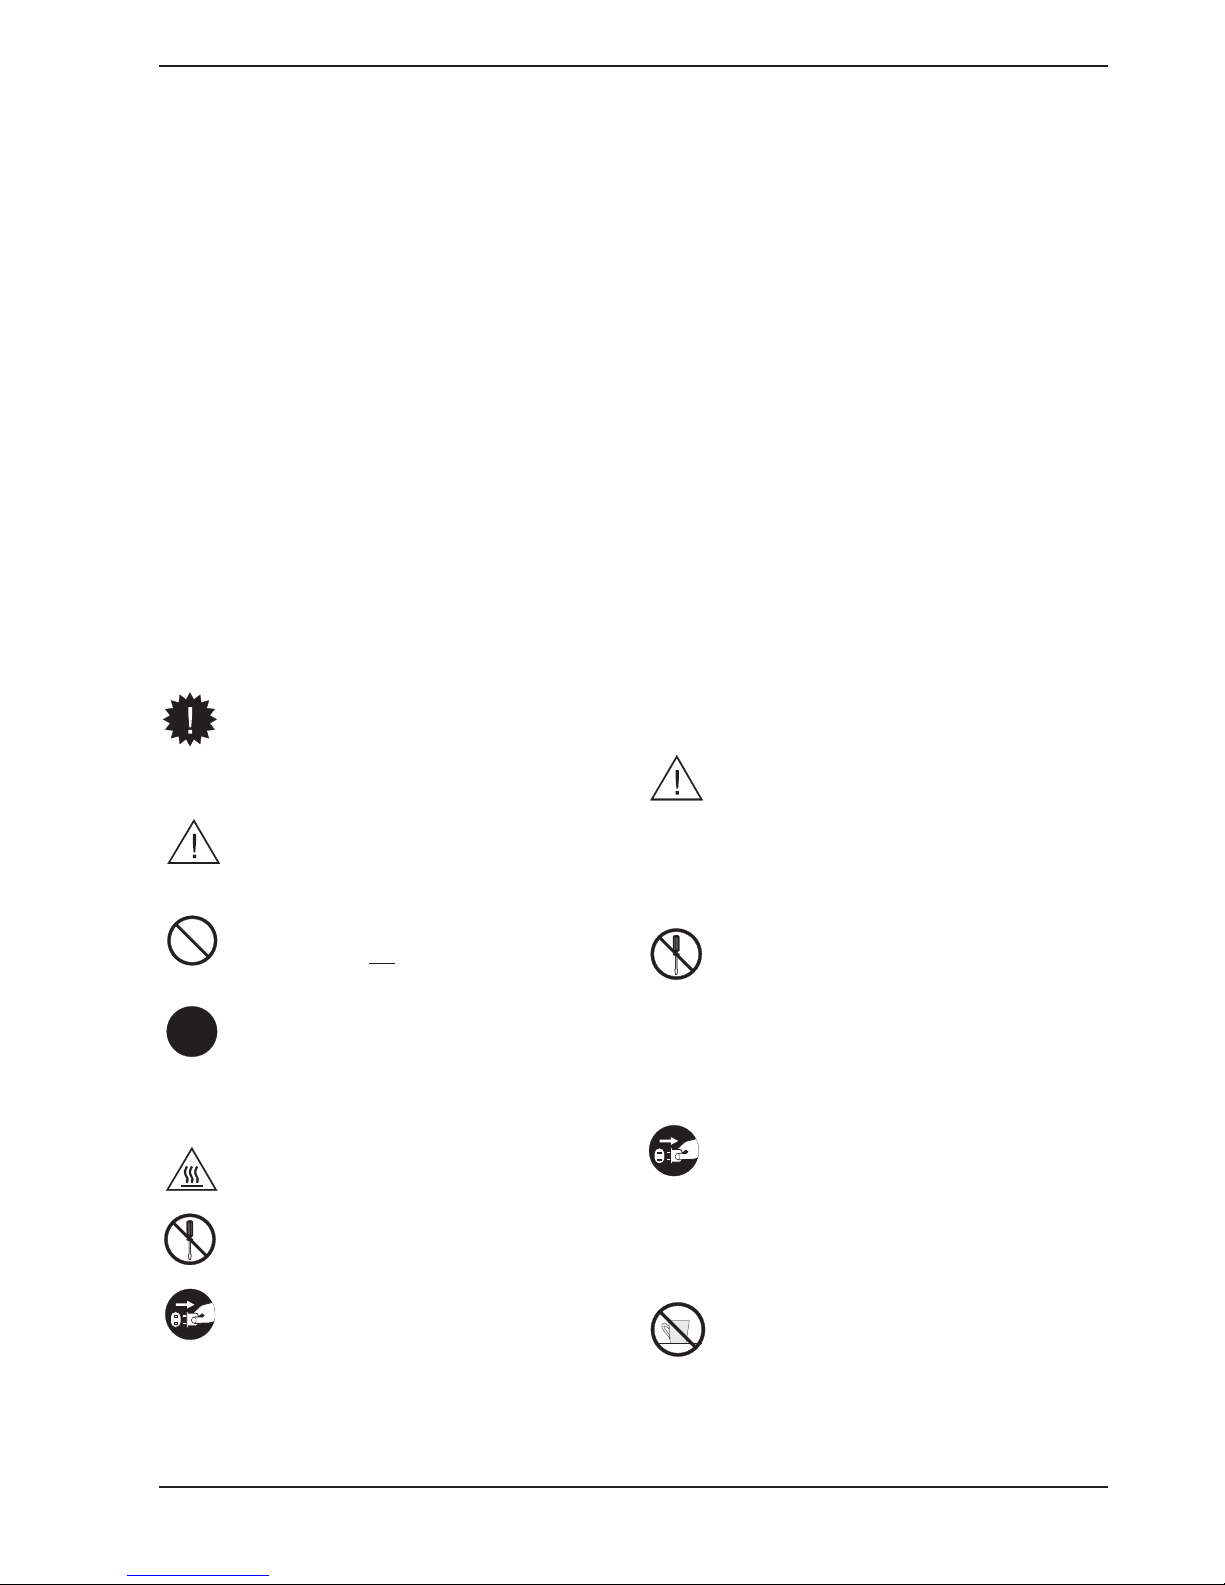
Symbols:
The “Important Symbol” means that if you
do not follow these instructions, the paper
feed can go wrong, the covers can be
damaged, or the result can be
unsatisfactory in some other way.
The “Triangle symbol” denotes a situation
that requires carefulness.
The “Prohibited symbol” denotes actions
that you are not allowed to do.
The “Mandatory symbol” denotes actions
that you must do.
Example
:
Be careful. Hot surface.
Prohibited. Do not dismantle.
Mandatory. Disconnect the mains cable.

4
•Quick Guide
•Operator’s Manual
•Mains cable
Preparations
1.Check that the items listed above are all included.
2. Remove the Bindomatic 101 DFS from the
packaging materials as described in the instructions
printed on the outside of the box.
3. Put the machine in its place (e.g. on a table).
Remove transport protection.
4. Plug the mains cable first into the machine and then
into the wall socket.
5. Press the button on the machine marked with the
symbol .
6. Check that the Bindomatic 101 DFS starts and that
the following message is shown on the display:
To change language, see chapter 5.1.
7. After you have read the Operator’s Manual and under-
stand how to use the product, put the Manual and Quick
Guide in the holder at the rear of the machine.
Your Bindomatic 101 DFS is now ready for use.
2. Installation
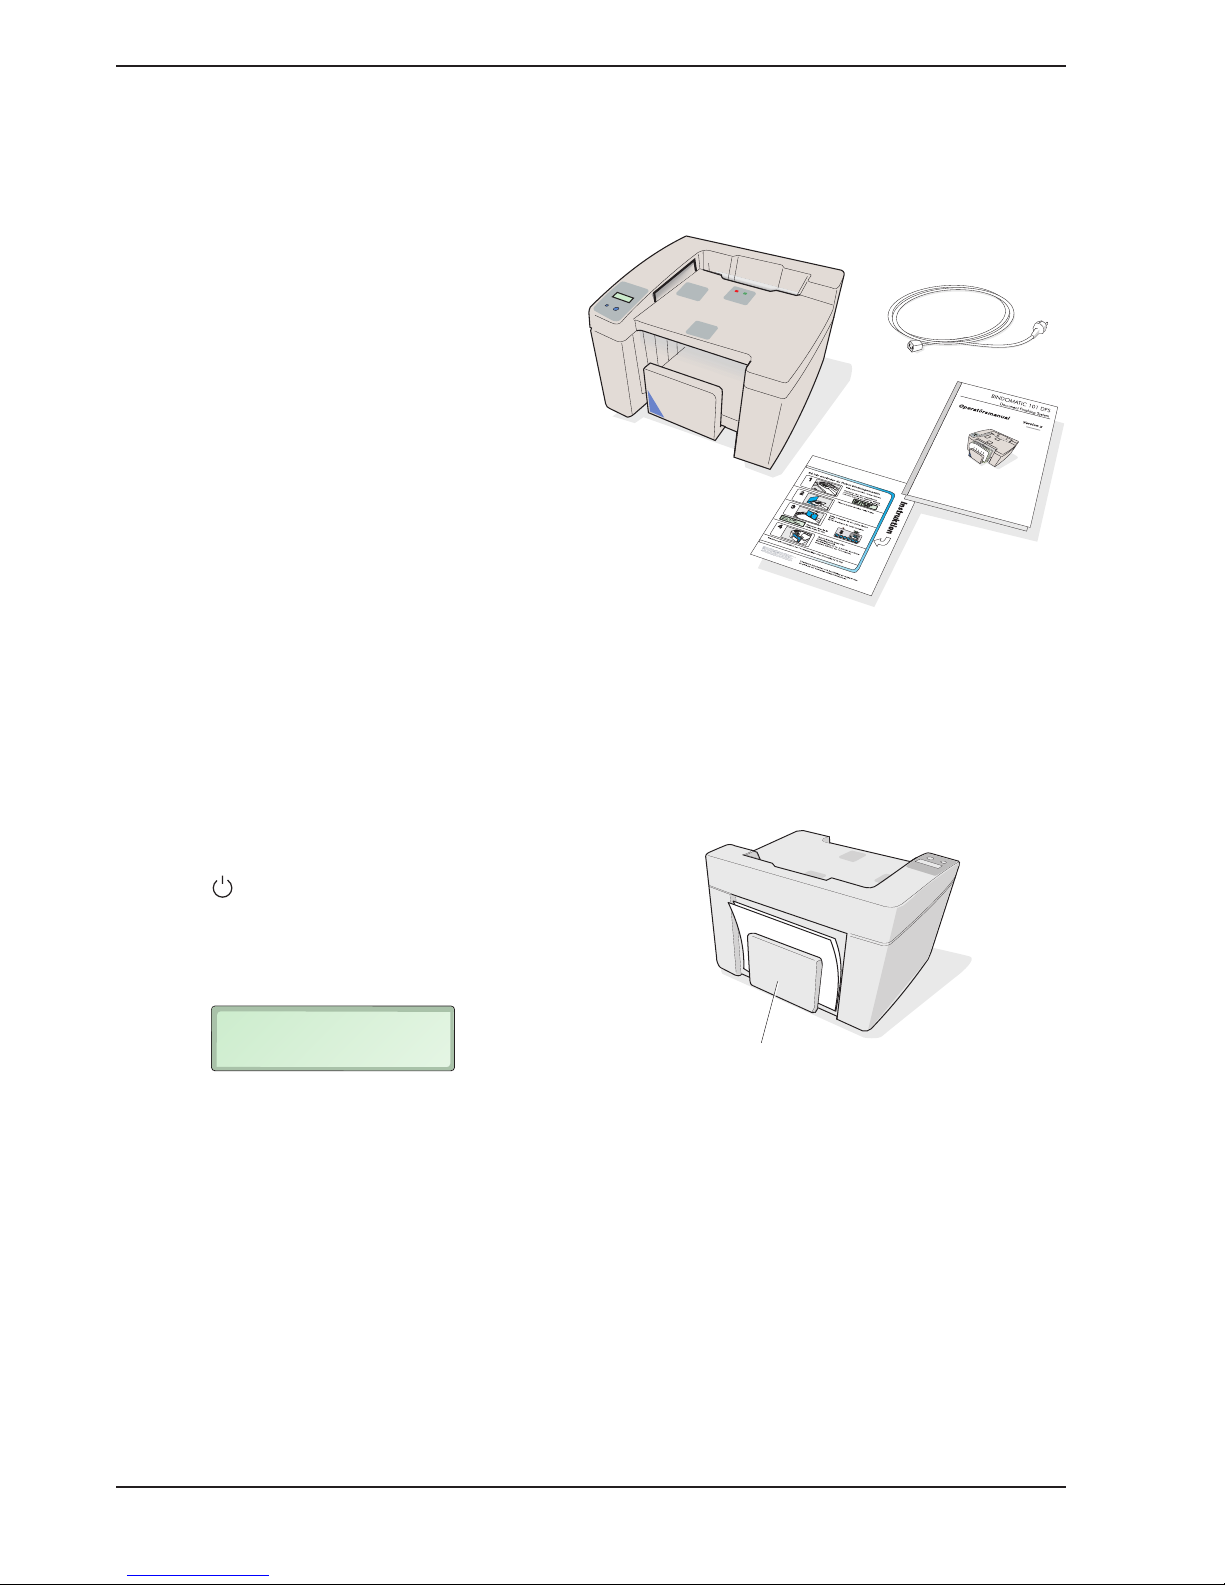
Besides the binding machine, the packaging should contain the following:
MEASURE DOCUMENT
SEE PICTURE 1
Holder for Operator’s Manual
and Quick Guide

5
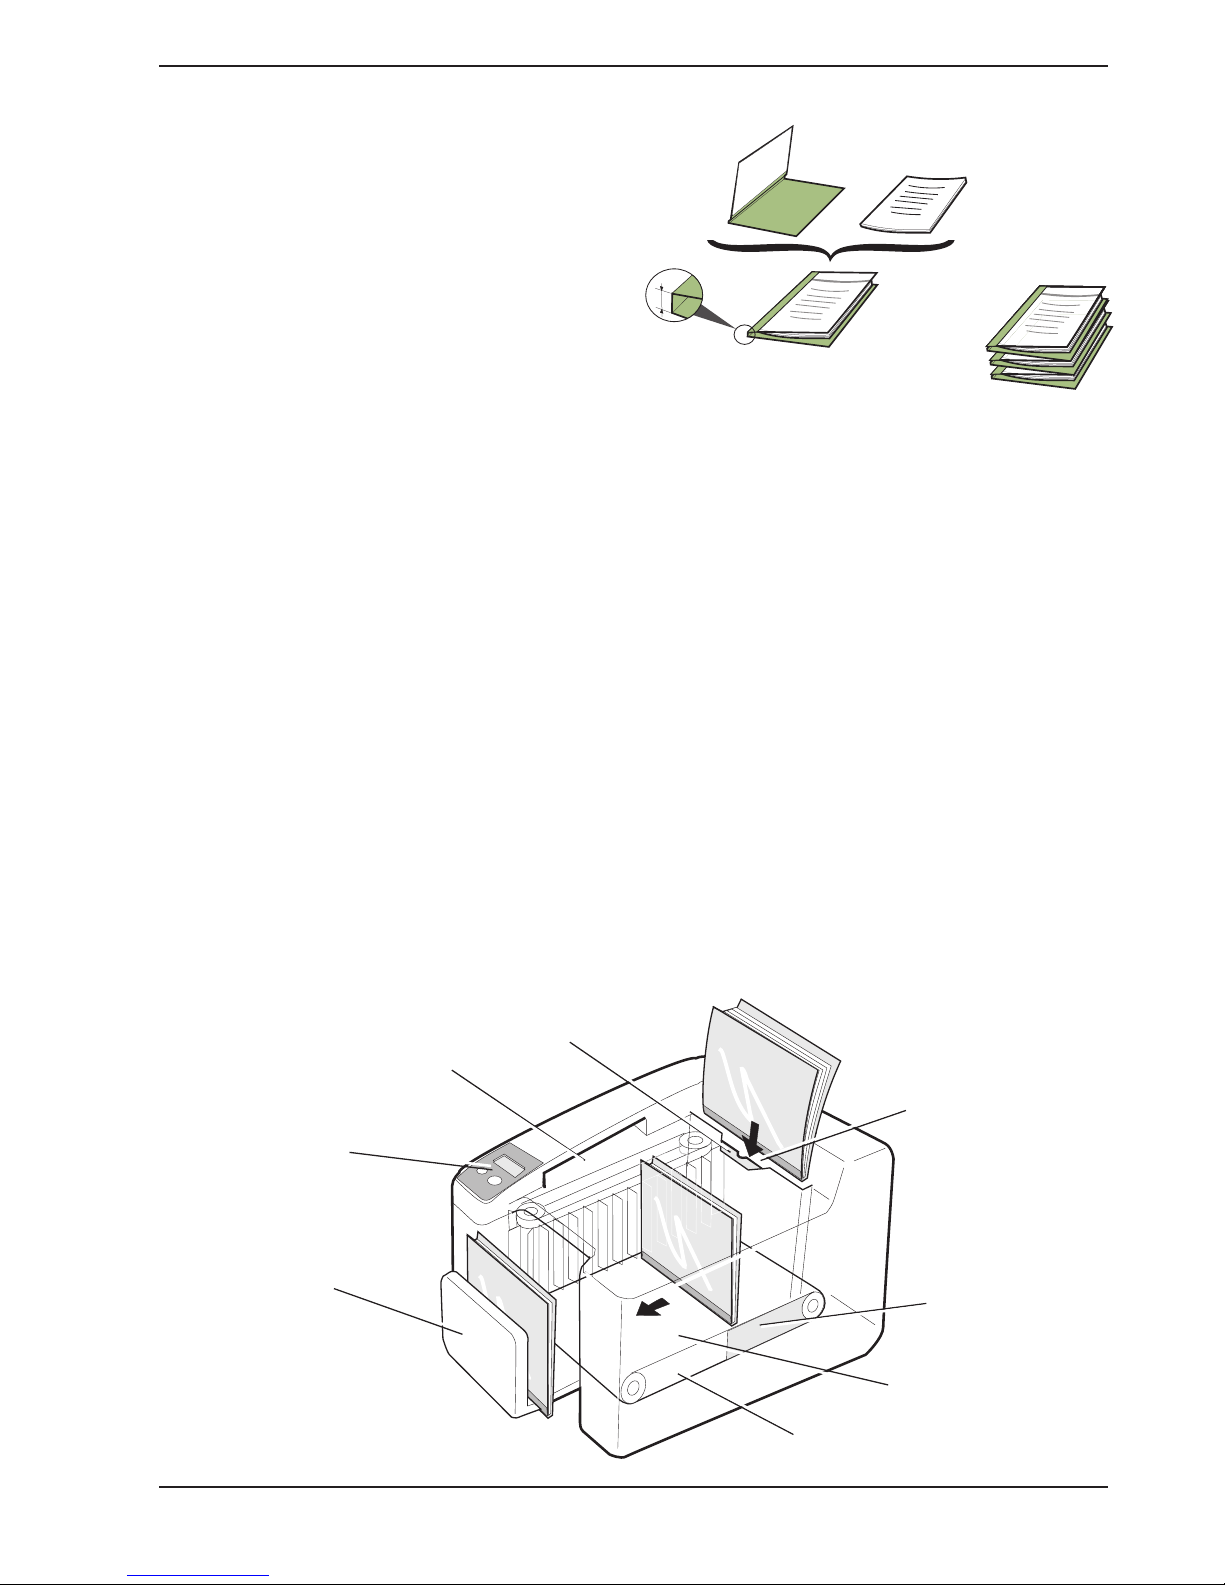
The machine consists of five main parts: Cover selector, Display, Input bay,
Binding unit, and Output tray.
Cover selector
The cover selector comprises a slot into which you
insert the set of papers to be bound, short side first.
A sensor measures the thickness of the set and the
recommended type of cover is then shown on the
display.
Display
The display shows what is happening in the machine. A
number of user functions can be selected using the two
push-buttons on the panel. (See also chapter 5 “User
settings”.)
Input bay
Insert the set of papers into the selected cover. This is
now called a document (cover with a set of papers).
Now put the document into the input bay with the spine
downwards.
If the binding machine stops for some reason, the jam
clearance door in the input bay can be pushed aside
and the document removed. (See also chapter 7
“Clearing and emptying”.)
Binding unit
The document is first jogged and then transported into a
heating zone where the glue in the cover melts. Then
the document passes through a cooling zone, and the
glue binds the pages together in the cover.
Output tray
The output tray moves outwards as the finished
documents are fed into it. An audible signal sounds
when the output bay is nearly full and a message is
shown on the display.
Terminology
In this manual and in the Quick Guide, the Bindomatic
cover is referred to as
cover
and the set of papers is
referred to as the
set
. When the set is put into the
cover, this is referred to as a
document
.
When a number of documents are piled on each other,
this is referred to as a
batch
.
Cover
Set
Batch
Document
Output tray
Input bay
Jam clearance door
Heating zone
Binding unit
Cooling
zone
Display
Cover selector
Spine
width
3. Description

6
4. How to use the Bindomatic 101 DFS
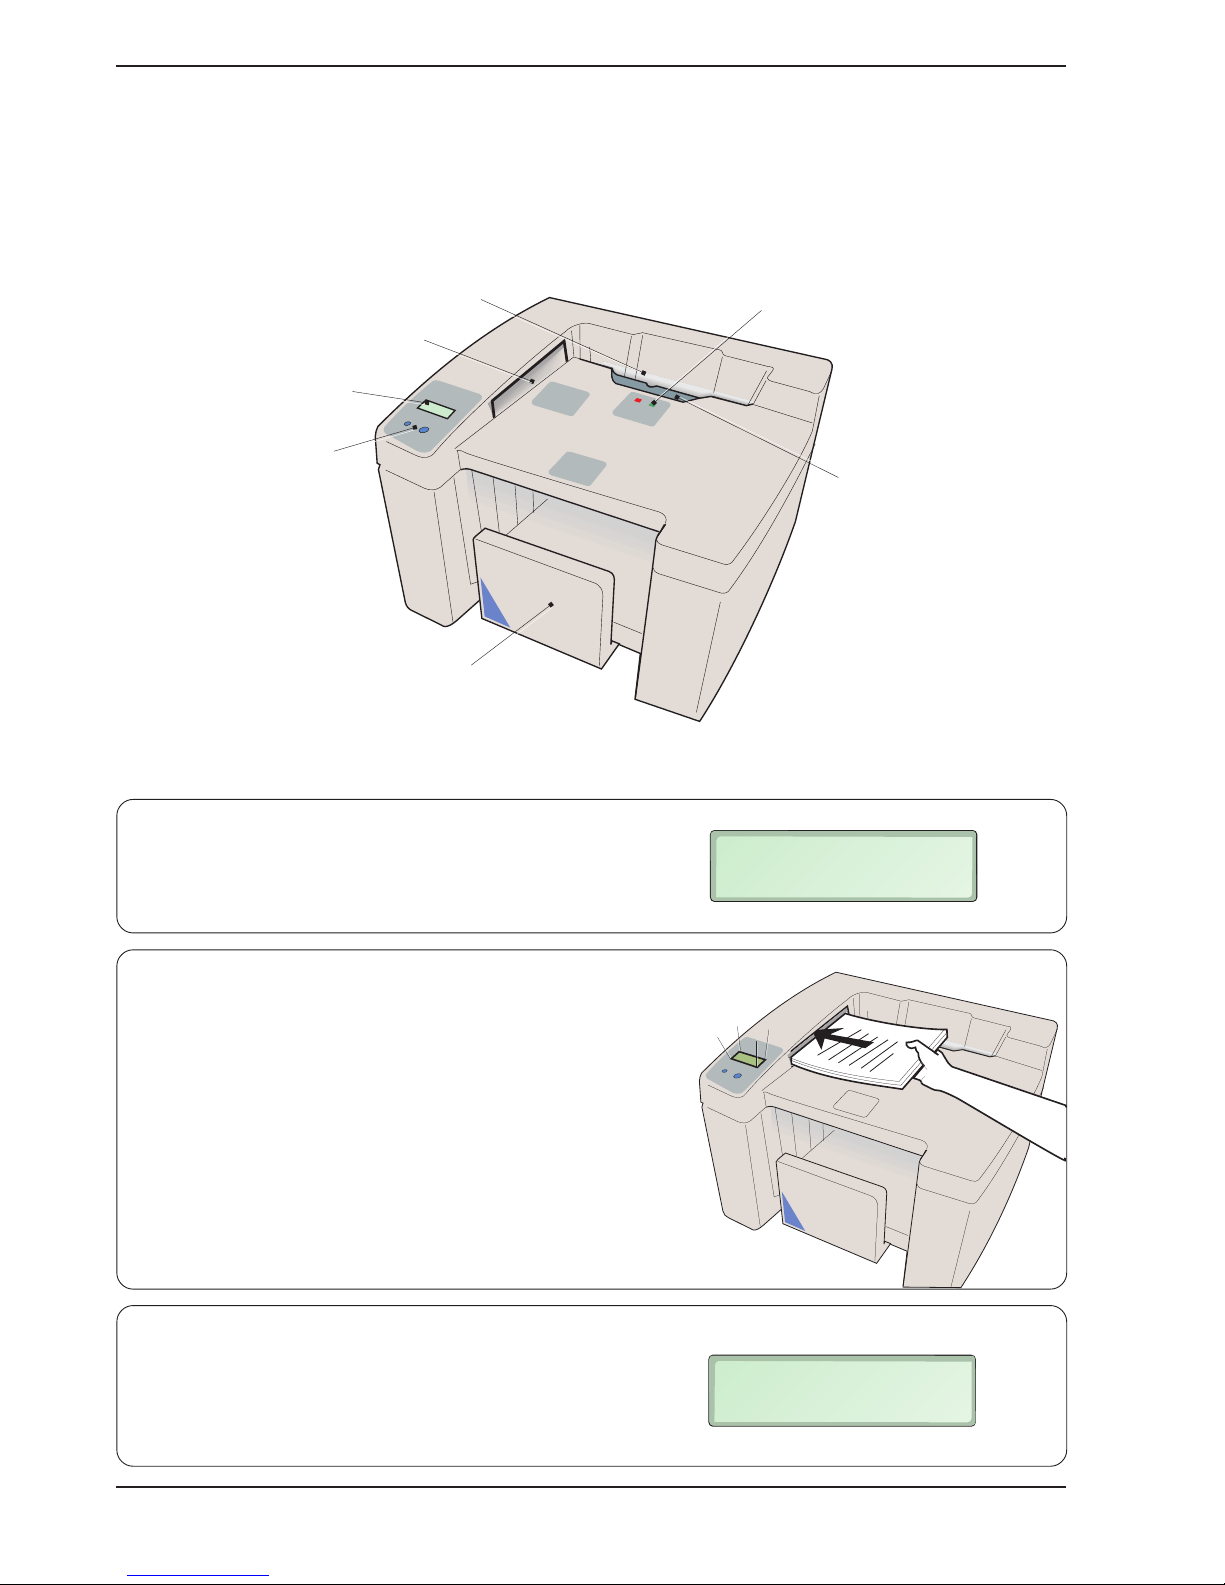
These are the most important parts of the machine that you should be acquainted with.
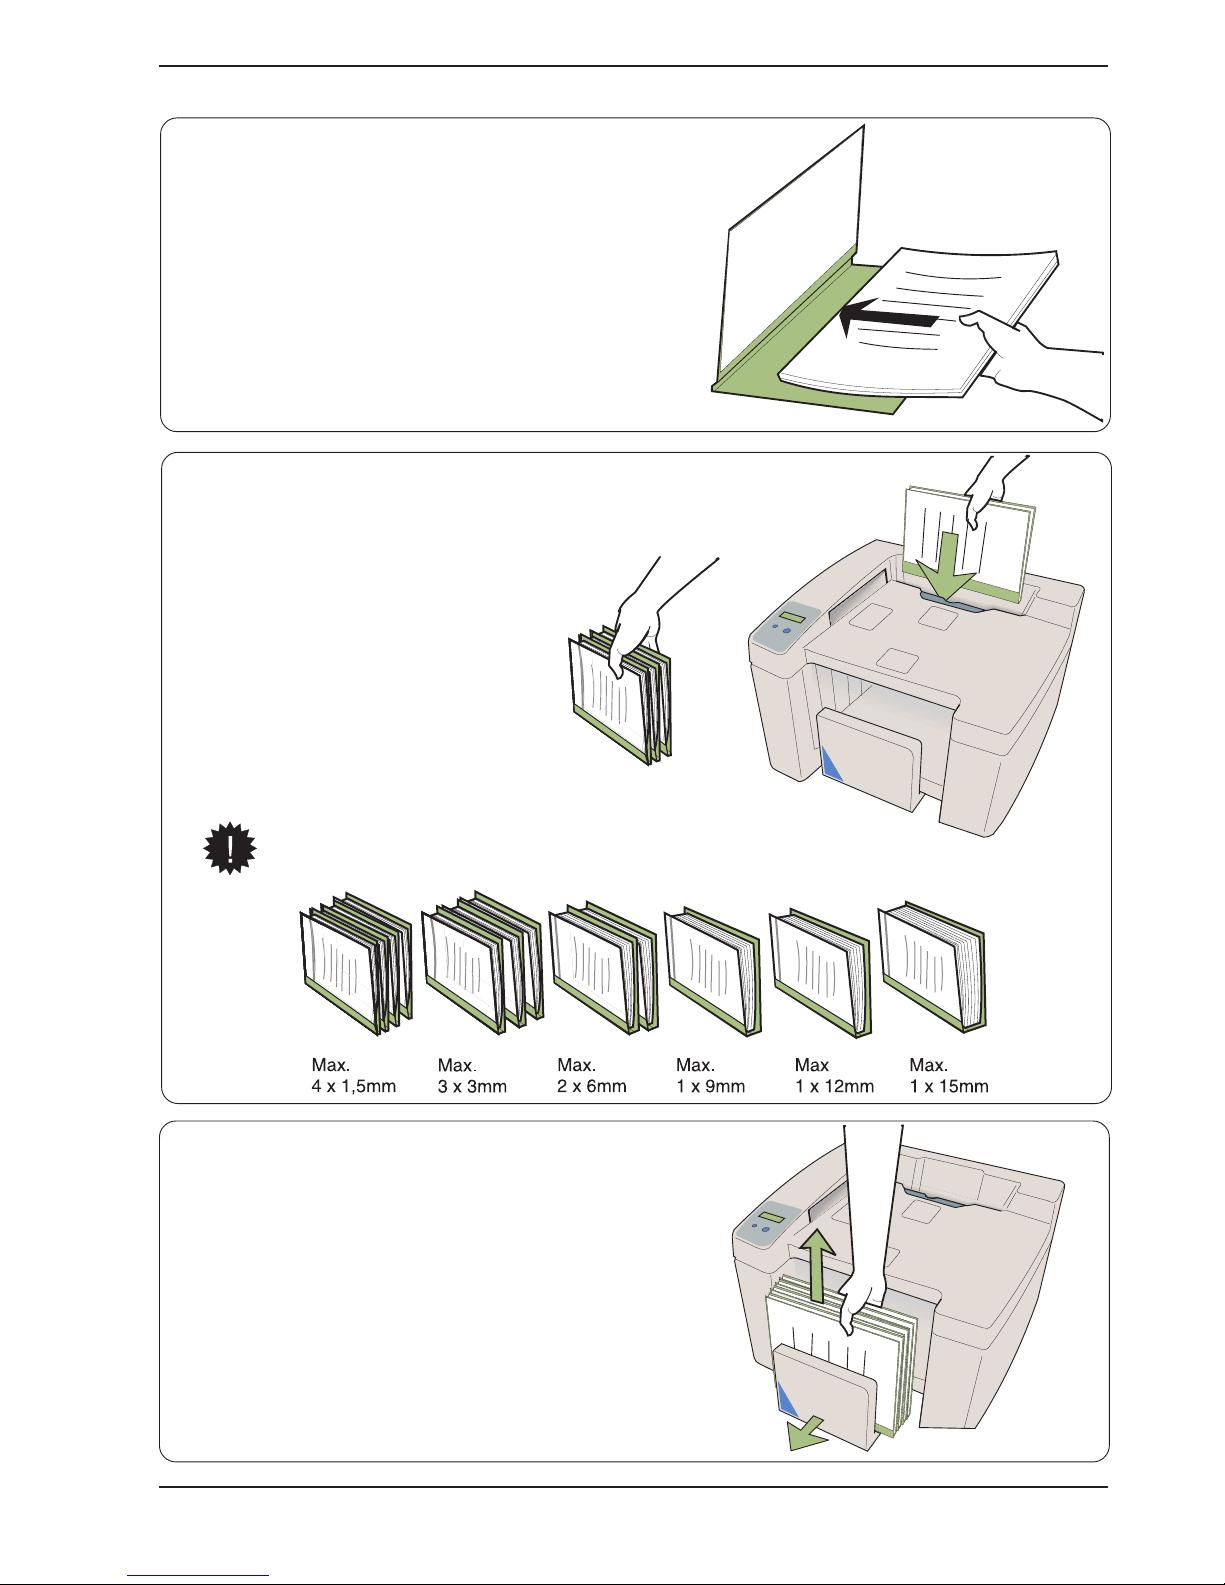
1. The display asks you to measure the thickness of the
set.
2. Measure the thickness of the set of papers to be
bound by inserting the short side of the set into the
cover selector.
3. The recommended cover size (spine width) is
shown on the display.
Input bay
Cover selector
Display
Control buttons
Indicator lamps
Output tray
Jam clearance door
MEASURE DOCUMENT
SEE PICTURE 1
USE COVER 1,5mm
SEE PICTURE 2

7
5. Documents (cover and set) can
always
be put into
the machine for binding when the green
lamp is on. Documents can be put in
one by one or in batches.
The machine confirms that a document
has been put in with an audible signal.
As soon as the green lamp lights again,
the next document or batch can be put
in. The machine starts heating up the
binder unit at the same time. Heating
remains on until the machine switches
to the energy-saving mode. See also
chapter 5 “User settings”.
When a batch of documents is put into the
machine, the number of documents in the
batch should be limited as shown below.
6. Remove the finished documents from the output tray.
The processing time is approx. 2 minutes for the first
document. The time for the second and subsequent
documents is only about 10 seconds. Allow the
documents to cool for a while before using them.
The machine automatically switches to the energy-
saving mode after a preset time (4 h). Alternatively, a
time of 15 minutes can be selected as described in
chapter 5 “User settings”.
4. Put the set into the selected cover.

8
5.1 Choosing the language
The default language setting for your Bindomatic 101 DFS upon delivery is English. You can,
however, choose between a number of languages.
Note that the English language is always used in the “User Settings” mode. Choose the language
as follows:
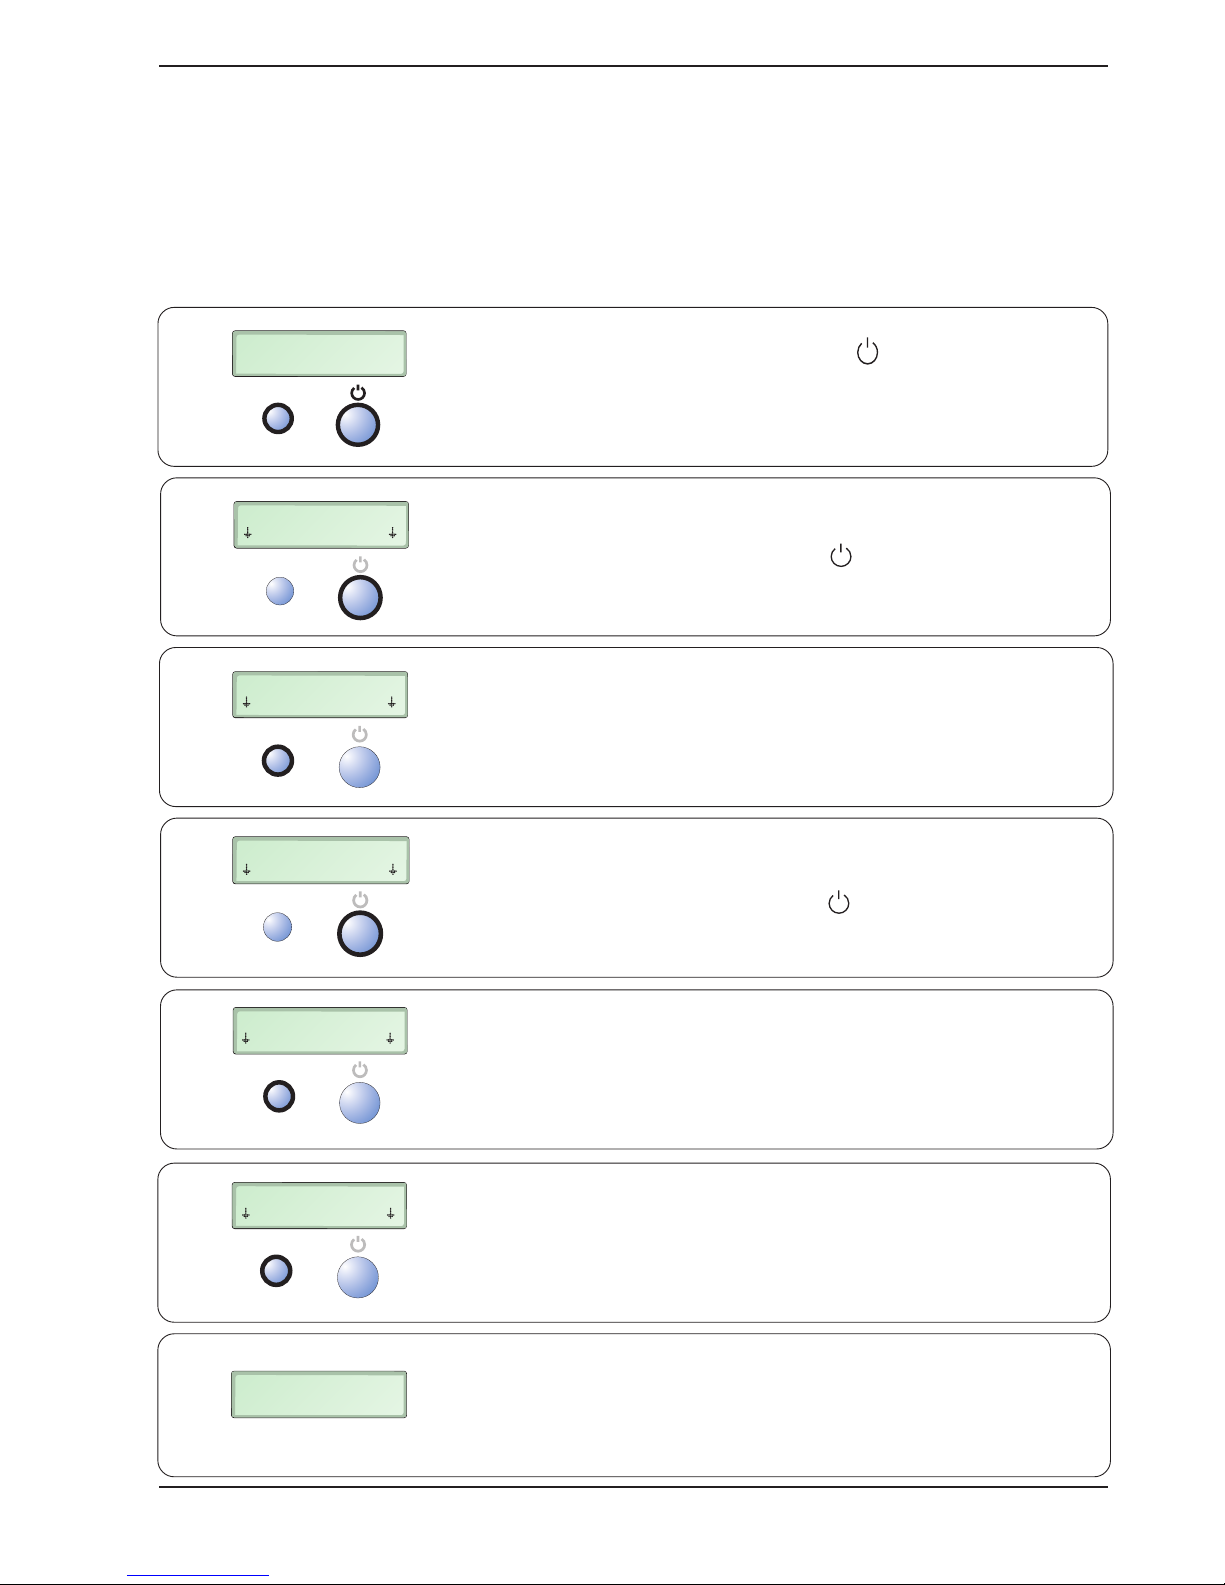
Press and hold down the RESTART and buttons for at least
2 seconds. The temporary function of these two buttons is now
shown on the lower line of the display.
Press the button under More (i.e. the button)
repeatedly
until the desired language is shown on the display.
5. User settings
The user can select the display language and one of two alternative times before the machine
switches to the energy-saving mode.
MEASURE DOCUMENT
SEE PICTURE 1
RESTART
RESTART
CUSTOM SETTINGS
BACK Enter
RESTART
ENGLISH
SELECT MORE
RESTART
SWEDISH
SELECT MORE
RESTART
ENERGY SAVER 4h
SELECT MORE
RESTART
CUSTOM SETTINGS
BACK Enter
> 2 s
1 x
>1 x
2 x
1 x
MEASURE DOCUMENT
SEE PICTURE 1
Press the button under Select (i.e. the
RESTART button)
twice
.
When satisfied with the settings, press the button
under Back (i.e. the RESTART button)
once
.
The desired language has now been selected.
Press the button under Enter (i.e. the button)
once
.
6.
5.
4.
3.
2.
1.

9
5.2 How to select the time before the machine switches to the energy-
saving mode.
The time can be set to 4 hours or 15 minutes after the latest document has been transferred to
the output tray. The default time upon delivery is 4 h.
Note that the English language is always used in the “User Settings” position. The time before the machine
switches to the energy-saving mode is set as follows:
MEASURE DOCUMENT
SEE PICTURE 1
RESTART
>2 s
RESTART
CUSTOM SETTINGS
BACK Enter
RESTART
ENERGY SAVER 4h
SELECT MORE
RESTART
SWEDISH
SELECT MORE
RESTART
ENERGY SAVER 15m
SELECT MORE
RESTART
CUSTOM SETTINGS
BACK Enter
1 x
1 x
1 x
1 x
1 x
MEASURE DOCUMENT
SEE PICTURE 1
1.
2.
3.
4.
5.
6.
7.
Press and hold down the RESTART and buttons for at least
2 seconds. The temporary function of these two buttons is now
shown on the lower line of the display.
Press the button under Enter (i.e. the button)
once
.
Press the button under Select (i.e. the RESTART button)
once
.
Press the button under More (i.e. the button)
once
.
Press the button under Select (i.e. the RESTART button)
once
.
When satisfied with the settings, press the button under Back
(i.e. the RESTART button)
once
.
The desired time until the machine switches to the energy-saving
mode has now been selected, and the binding machine has
returned to the normal mode.

10
6. Troubleshooting
Use these instructions to solve the most common operating problem with your Bindomatic
101 DFS binding machine:
NOTE! In order to guarantee perfect binding of your documents, only Bindomatic original covers can be
used with this machine. Other types of covers or incorrect use of the machine can cause poor binding
results or the machine may stop working, in which case an authorised service technician should be
contacted to remedy the situation.
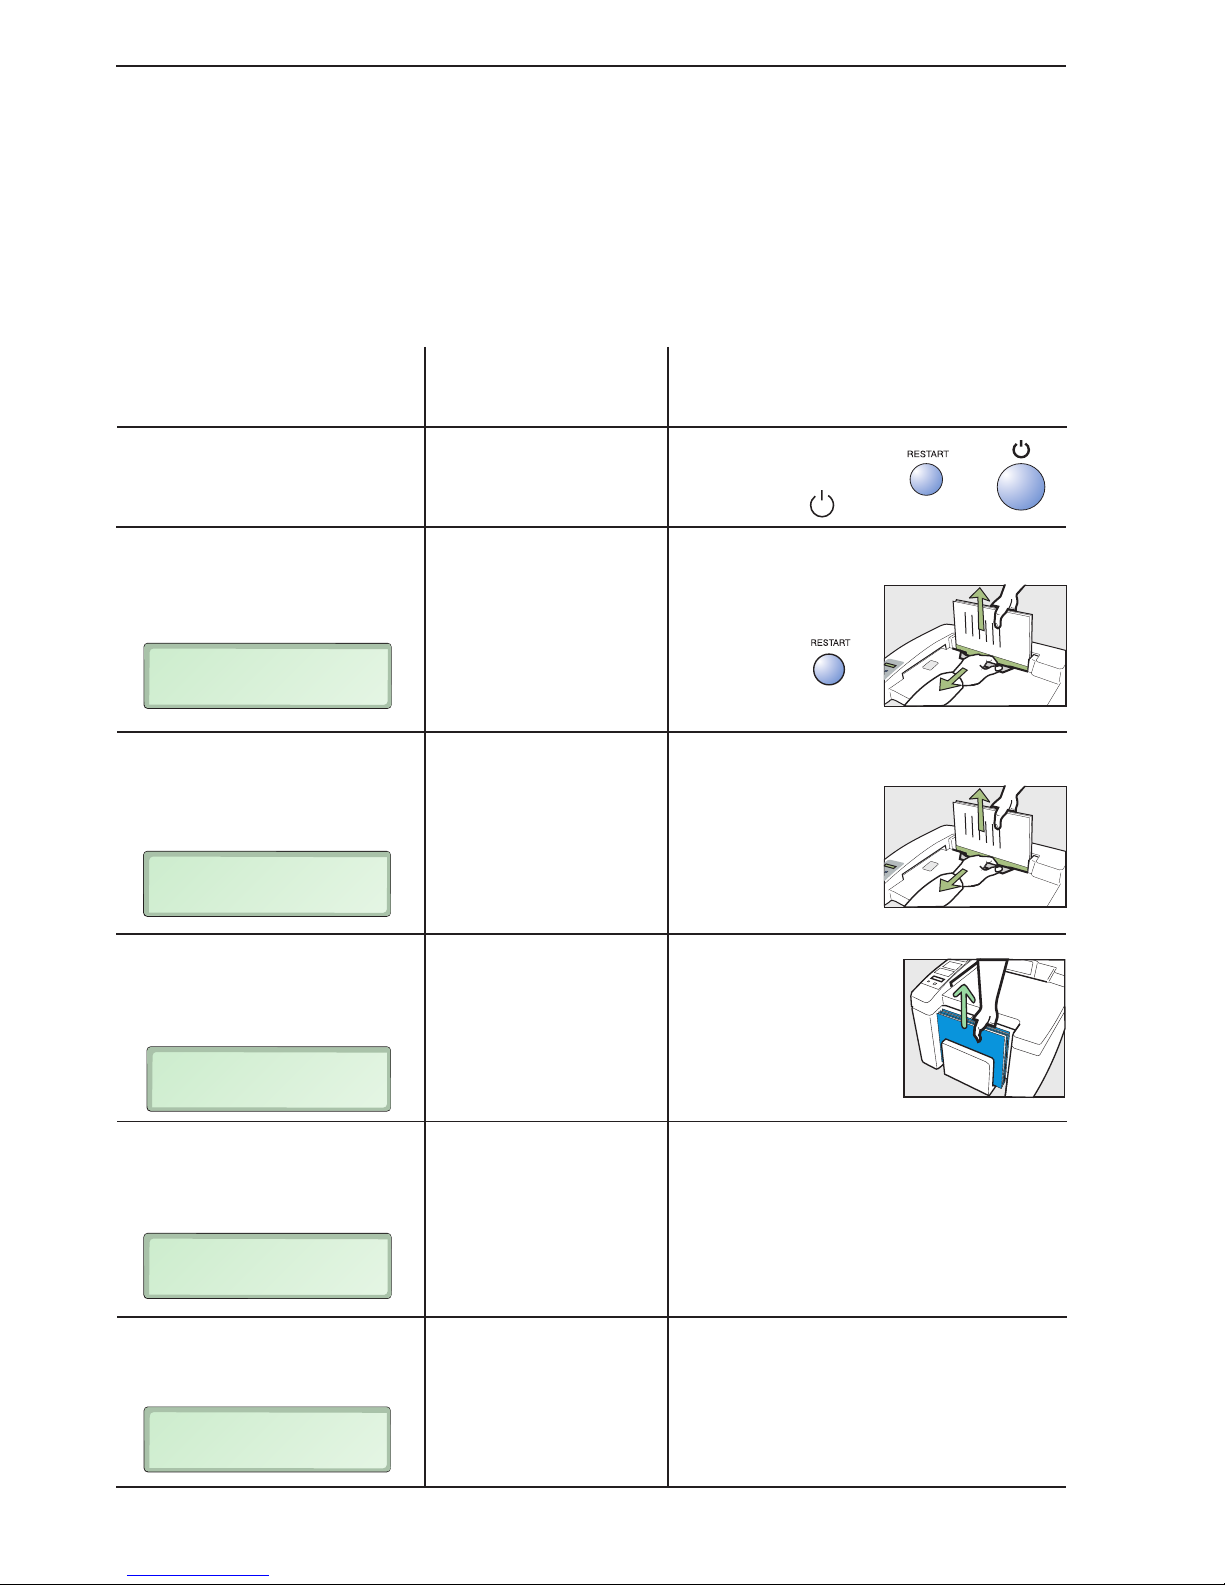
Red LED blinks.
Buzzer sounds.
Red LED illuminates more
than 3 s.
Buzzer sounds.
Red LED illuminates more
than 3 s.
Buzzer sounds (twice).
Red LED illuminates.
Buzzer sounds.
Machine stops.
Machine stops.
Other error codes, e.g.:
The machine will not start.
No text on display.
Cause:
No power supply.
Machine switched off.
Too many documents
in the same bay.
Output tray full.
Output tray nearly full.
Document not touching
bottom of input bay.
Too many documents in
the batch or document too
thick.
Check the mains
connection. Press
RESTART or .
Remove document by pulling the jam
clearance door away.
Check the thickness
and quantity.
Press
RESTART.
Input
document again.
Remove the documents by pulling the jam
clearance door away.
Input documents.
(Less documents
in each batch.)
Action:
Remove documents
from the output tray
before inserting more
documents.
Remove documents from output tray. The
machine continues with the documents
already inserted.
Contact an authorised Bindomatic service
station.
See also chapter 7 “Clearing and emptying”
about how to remove unbound documents
from the machine.
Symptom:
INPUT JAM
REMOVE DOC
DO NOT INSERT
REMOVE DOC
ALMOST FULL
EMPTY TRAY
OUTPUT TRAY FULL
EMPTY TRAY
BINDER FAULT
CALL SERVICE
Tabla de contenidos