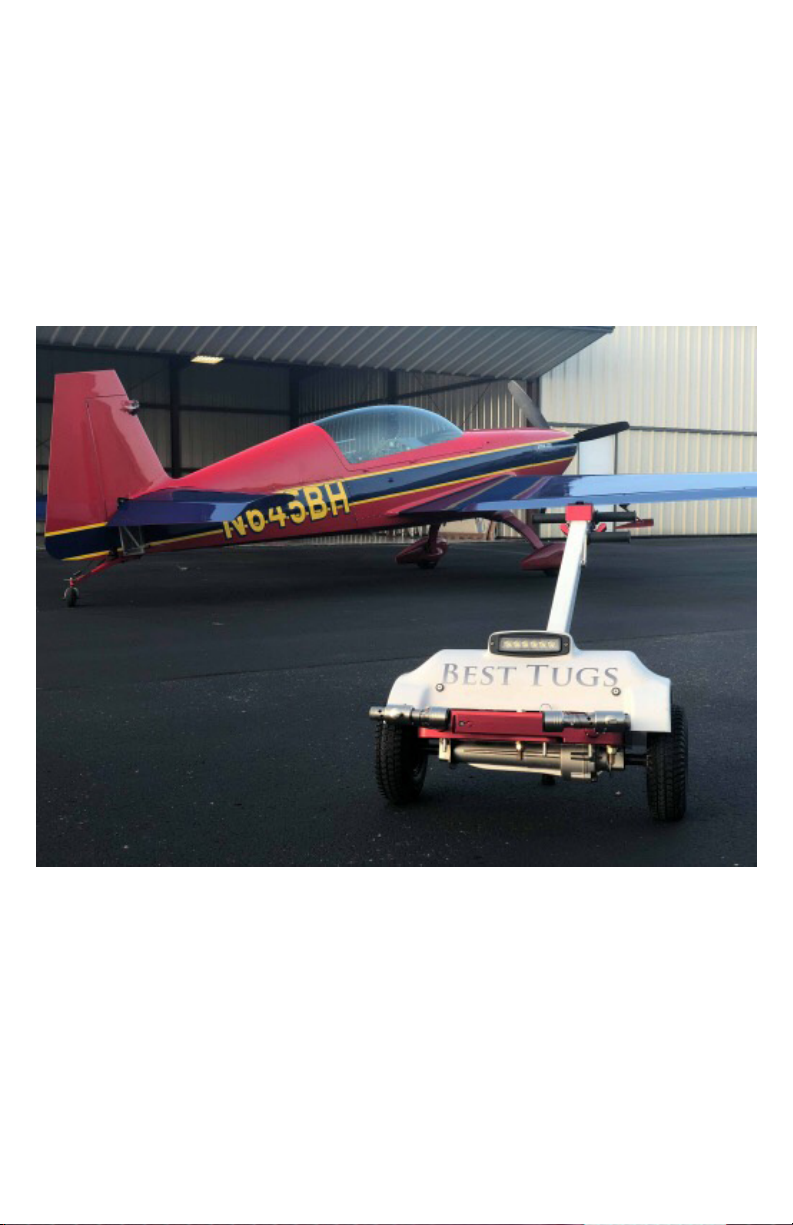
Best Tugs ALPHA A2 Manual de usuario

ALPHA
USER MANUAL
A2 and A3
Best Tugs
Because Your Pla ne Deserves It

252 West 3560 North
Spanish Fork, UT 84660
800.914.2003
INTRODUCTION
Best Aviation
Products
At Best Tugs™, we pride ourselves on building the most innovative
and advanced tugs in the world. We work diligently to ensure that
the quality and workmanship of your tug exceeds your expectations
and are confident that you will see the difference in every part of
your Best Tugs™experience.
We designed this guide to provide you the information needed to
make your experience even better… and while we are confident that
this guide will answer your questions, we are always here to chat
with you on the phone. You can reach us at 800-914-2003.
Thank you again for choosing Best Tugs™.

1
Please read these instructions
before beginning.
For any questions
call us at 800.914.2003
Tools Needed:
• Phillips Head
Screwdriver
(Drill/Impact is easiest)
• 7/16 Socket
1. Start by removing the screws marked
with red paint from the lid marked
with red “1”. Remove the top lid from
the crate.
2. On side 4 (FIG 1) of the crate, cut the
two black retaining straps.
3. On the opposite end of the crate, the
required wall is marked with a red
“4” and stripes, remove the screws
securing the end wall to the crate.
Remove the end wall. (FIG 2)
4. In the crate, cut the band securing
the control arm.
5. Grab the tug’s handle and pivot the
tug up with the tug’s weight resting
on the tires.
6. Push the master switch to the “on”
position.
7. Left thumb pressure moves the tug
backward. Slowly increase pressure
on the throttle with your left thumb
and back your tug out of the crate.
FIG 2
33
11
22
44
FIG 1
UNCRATING INSTRUCTIONS

2
8. Once out of the crate, carefully
rotate your tug forward and rest the
aluminum base on the ground.
Be sure to place foam from the crate
or some other padding between the
aluminum base and the ground to
avoid scuffs. (FIG 3)
9. Remove the kickstand from inside of
the crate. With the provided 5/32
Allen wrench, screw the kickstand to
the back of the Alpha’s control arm.
10. Observing all safety precautions,
attach your Best Tugs™tug to your
aircraft.
11. Most importantly, enjoy your new
Best Tugs™ Tug!
Please Email cool pictures of
your tug and plane to sales@
besttugs.com. You may see
it on our website or social
media. (By sending images, you
expressly permit us to use these
images for marketing purposes.)
FIG 3
UNCRATING INSTRUCTIONS
Continued
Note: Foam filed tires have
a screw in the tire from the
factory. It is safe to remove the
screw.

3
WHAT’S IN THE CRATE?
Adapters may not be included depend-
ing on your plane type. If you have more
planes you’d like to move with your
tug, give us a call, and we can ship the
appropriate adapters out to you.
Quick Connect Pins - 3
Charger
AdaptersConnecting Arms
Items Depending on Aircraft
3
1
2
Storage slot when pivoting

4
1. POWER SWITCH
Turns tug on and
off. Do not leave tug
turned on for long
periods of time or while
charging to avoid
draining the batteries
2. LED LIGHT
Make sure this switch
is off while the tug is
charging.
3. HIGH / LOW (A3 only)
High will move your
plane at a higher
speed. Low is great
for safe movements
around your hangar.
4. OVER CENTER LOCK
The locking arm travels
in an arching motion.
When locking, make
sure the arm is fully
rotated down and
secured in place.
5. VARIABLE SPEED
THROTTLE
Right thumb pressure
moves tug forward,
left thumb pressure
moves tug backward.
6. DIGITAL READ OUT
Displays your tug’s
state of charge.
3
2
5
1
4
INITIAL USE
We strongly recommend using your tug without an aircraft attached to get used
to the controls and movements; this is a very user-friendly system, but it can take
a bit of practice to get familiar with it initially. Make sure you are comfortable
with the throttle, maneuverability, and functionality of the tug before moving
your plane.
CONTROL PANEL FUNCTIONS
6

5
First Time Set Up
Right Connecting Arm - Pull out Drop
Pin and spin the Slide out, so the open
end is as close as possible to the center
of the connecting arm. (FIG 1)
Left Connecting Arm - Repeat step
one process on left arm.
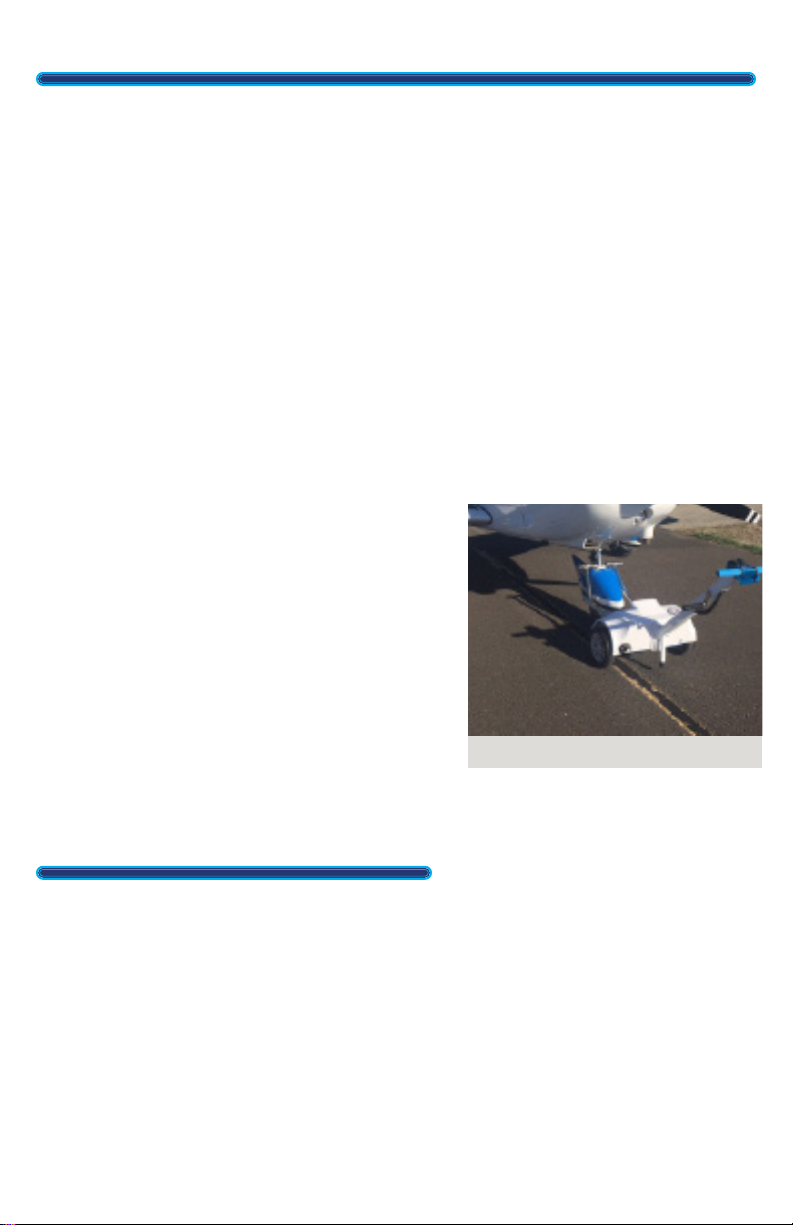
1. Rotate locking arm upwards to open
right connecting arm and move the
tug, position the Slides, so they are
close to the tow pin.
2. Close the arms. (FIG 2 & 3) Slides are
not expected to close on the tow pin
in this step.
3. Twist Slides until firmly attached to
the tow points. Correct set up should
leave very little to no slop on the
connection.
4. Wiggle tug slightly to confirm the
pins are firmly cupped and secured.
FIG 2
Drop PinDrop Pin
Please familiarize yourself with how long it takes for your plane to ramp up/down
and stop; that “coast” when slowing is due to the software that protects your
nose gear from unnecessary damage and stress. Take the time to get used to this
feature and be aware of it as you move your aircraft.
Check your plane’s POH to verify the maximum turn radius for your particular
nose gear. The tug can turn your plane at an angle that may exceed the nose
gear’s maximum turn radius. Best Tugs™ assumes no responsibility for any
damage caused by the tug operator misusing the equipment. As the operator,
you have the responsibility to be familiar with your tug, your plane, and their
specific limitations.
FIG 1
Check the plane’s surroundings, remove any
obstructions, verify that your path is clear, and
your propulsion systems (prop), wings, and tail
clear. Please verify that your wheel is secure on
the tug, including strapping it down. Finally,
remove the wheel chocks. You are ready to
move your plane.
Slide

6
Most users prefer their tug to pivot while
pulling their aircraft because it eliminates
the need to pick up and move the tug
when turning. The same feature that
makes pulling so incredibly easy can make
pushing your tug feel awkward at first; it
drives like backing up a trailer, meaning it
drives the opposite of where you turn.
Once you are used to the throttle, start/
stop speeds, and movements of the tug,
we strongly recommend you push/pull
your plane in an open area to familiarize
yourself with how your plane moves.
Pushing may take a few tries before you’re
comfortable, but once you find your
system, it is easy.
If you prefer to use your Best Tugs™ tug
with the pivoting base locked, place pin
3 back in the lock slot. Make sure the pin
seats as shown. (FIG 4)
Go to besttugs.com/pages/videos for
instructional videos and tips for moving
your plane.
1
Storage slot when pivoting
FIG 4
First Time Set Up
Continued
7
If anything everIf anything ever
looks wrong or likelooks wrong or like
it may damage yourit may damage your
aircraft,aircraft,
please call us.please call us.
800.914.2003800.914.2003
Loading Your Plane
Double check your plane to
make sure the tug is correctly
attached and the First Time Setup
instructions were followed.
1. Drive up to within one to two
feet of the airplane. Use locking
arm to open left connecting arm.
Turn power OFF and manually
push tug into position. We
strongly recommend following
this step in case you accidentally
bump the throttle while close to
your aircraft.
2. Position the tug with arms on
either side of the plane.
3. Insert the right arm into/onto tow
connection.
4. Use locking arm to close the left
connecting arm.
Moving Your Plane
Check the surroundings of the plane,
remove any obstructions, and verify you
have removed the wheel chocks. We
recommend slow and steady movements
when moving your plane. The right thumb
control moves the tug forward, and the left
thumb moves the tug backward. As you are
moving your plane, be sure your nose gear
can make the turns you are taking.
As the operator,
you are responsible
for knowing the
limitations of your
specific aircraft.
Este manual sirve para los siguientes modelos
1
Tabla de contenidos
Otros manuales de Jacobo de Best Tugs


