Berger + Schröter MG983G-12M Manual de usuario
27
(GB) Infrared Mobile Digital
Scouting Camera
User’s Manual
MG983G-12M
Art.-Nr. 31544

28
Content
1 Instruction 29
1.1 General Description 29
1.2 Application 29
1.3 Camera Overview 30
1.4 Shooting Information Display 32
1.5 Two Way Communication 32
2 Cautions 33
3 Quick Start Guide 34
3.1 Power Supply 34
3.2 Insert SD card and SIM card 34
3.3 Do the Camera Settings 34
3.4 Manually Send a MMS or GPRS Photo 35
3.5 SMS Control 36
4 Advanced Operations 37
4.1 Work Mode 37
4.2 Settings Menu 37
4.2.1 Setting Items 38
4.2.2 Default Set 42
4.3 Change the Settings via Android APP or SMS 43
4.3.1 User Level 43
4.3.2 Use Android APP 43
4.3.3 SMS Command List 44
5 Trouble Shooting 46
Appendix I: PIR Detection Zone 47
Appendix II: Error Code 49
Appendix III: Technical Specifications 51
Appendix IV: Parts List 52

29
1 Instruction
1.1 Instruction
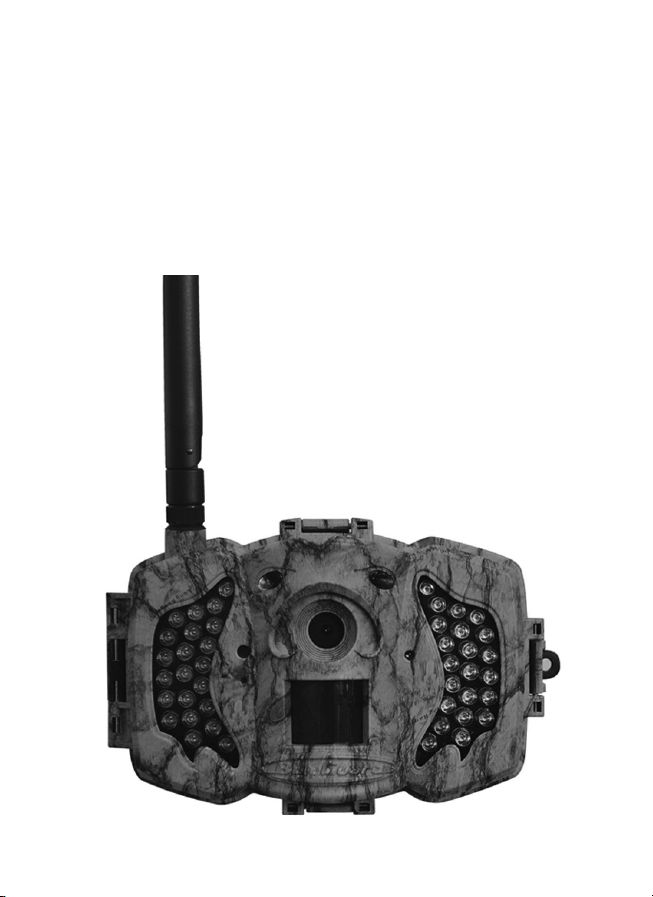
This camera, a digital scouting camera with 3G function, is a digital in-
frared surveillance camera, triggered by any movement of human or ani-
mal monitored by a high sensitive Passive Infrared (PIR) motion sensor,
and then automatically captures high quality pictures (up to 12M pixels)
or records video clips (720P HD). It sends pictures or videos (length 5-
10 sec.) instantly to your mobile device or e-mail via WCDMA/GPRS
network. You’ll be alerted just when the camera is triggered or per cus-
tom settings.
It takes color pictures or videos under sufficient daylight. While at night,
the built-in infrared LEDs can help to take clear pictures or videos (mo-
nochrome).
There is a 3” color LCD display screen on the camera and a sound re-
corder embedded in the camera. A laser pointer is used to help target
the photo area of the camera in setup mode press left key (on/off).
It is resistant against water and snow. The camera can also be used as
a portable digital camera.
1.2 Application
This camera can be used as an automatic surveillance device for guar-
ding and recording unexpected intrusion to homes, shops, schools, de-
pots, offices, taxis, work sites, etc. It can also be used as a trail camera
for hunting or monitoring animals by recording the traces of wild ani-
mals. It can be left alone for weeks and months and it will save event
records automatically in digital format.
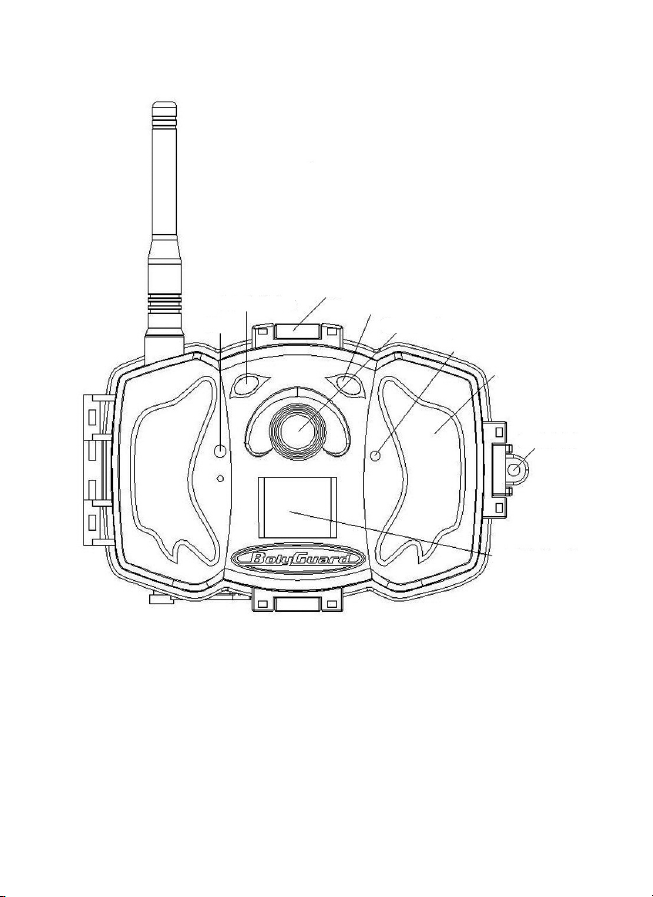
1.3 Camera Overview
Take a few moments to familiarize with the camera controls and dis-
plays. It is helpful to bookmark this section and refer to it when reading
through the rest of the manual.
30
Light Meter
Mic
Latch
Indication LED
Camera Lens
Laser Pointer
LED
Lock
Hole
PIR- Motion
Detector
Figure 1 Diagram of camera functional indicators
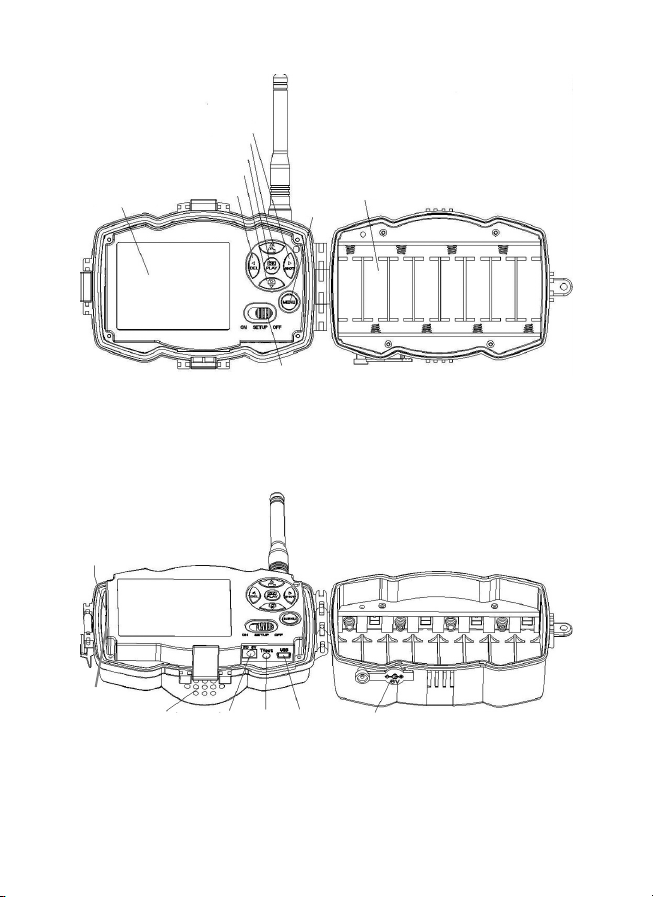
31
Display Screen
Figure 2 Inner panel view
Speaker
Figure 3 Diagram of camera interfaces
Right/Shot
Up/Video
OK/Playback
Down/Camera
Left/Delete/
turn on laser pointer
Power Switch
Menu
attery ays
SIM Cart Slot
DC In TV Out US -
Port DC Hole and Stopper
SD Cart Slot
32
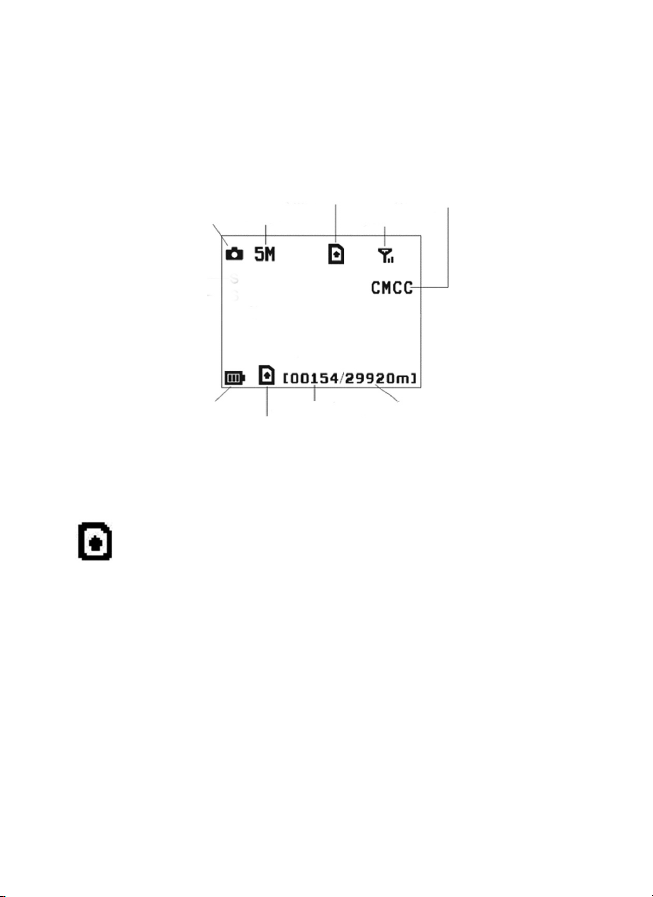
1.4 Shooting Information Display
When the camera is turned on (the power switch is slid to TEST posi-
tion), the current settings will be displayed on screen.
1.5 Two Way Communication
When in Hunting mode, you can set SMS control submenu as ON to
open the two way communication function. Under this setting, the ca-
mera can receive and respond to your SMS command or the Android
APP command. And you can retrieve live voice and pictures in this
mode.
Figure 4 Shooting information display
is the correct SIM card status and the available space of SD card
should be a none zero value.
Camera mode Image size
SIM card icon
Signal strength
Telecom provider
attery level
SD card icon
Number of images Available space

33
2 Cautions
➣The working voltage of the camera is 6V. The camera is supplied
by the power adapter or 8 AA batteries.
➣Please install batteries according to shown polarity.
➣Please insert the SD card before power on camera. The camera
has no internal memory for saving images or videos. The camera
will not work if there is no SD card.
➣Please make sure that your SIM card supports the GPRS data
business.
➣When going into the SETUP mode, allow approximately 10-20
seconds for the camera to acquire a signal.
➣Please unlock the write-protect switch before inserting the SD card.
➣Please do not insert or take out the SD card when the power switch
is at ON position.
➣It is recommended to format the SD card by the camera when used
for the first time. Many other SD cards formatted by other cameras
have poor compatibility with different brands of cameras. So it is
best to format the SD card with this camera or on a computer.
➣In the SETUP mode, the camera will shut down automatically
after 3 minutes if no operation is done. Please turn on the power
again if you want to continue to work with the control.

34
3 Quick Start Guide
3.1 Power Supply
Hunting mode or outdoor use: use 8 or 4 AA batteries. High-density
and high-performance alkaline or lithium batteries are recommended.
Security mode or indoor use: use 6V/2A high quality power adapter.
The battery can be just a backup for emergency use. Otherwise, the
battery will be quickly consumed.
3.2 Insert SD card and SIM card
Setzen Sie eine nicht gesperrte SD-Karte und eine SIM-Karte mit GPRS
ein.
3.3 Do the Camera Settings
Down load the camera set up software from our website. The specified
website is written in the last page of the manual.
Dear Customer! Please note! Depending
on battery regulations you are required to
used or defective batteries and accumu-
lators, at no cost to you, return it to us
Every consumer is legally obliged to dis-
pose of WEEE separately from the hou-
sehold waste and to dispose of at a
collection site of his community / City Di-
strict for example. Electric appliances are
marked with the crossed out dustbin, ac-
cepted there for free.
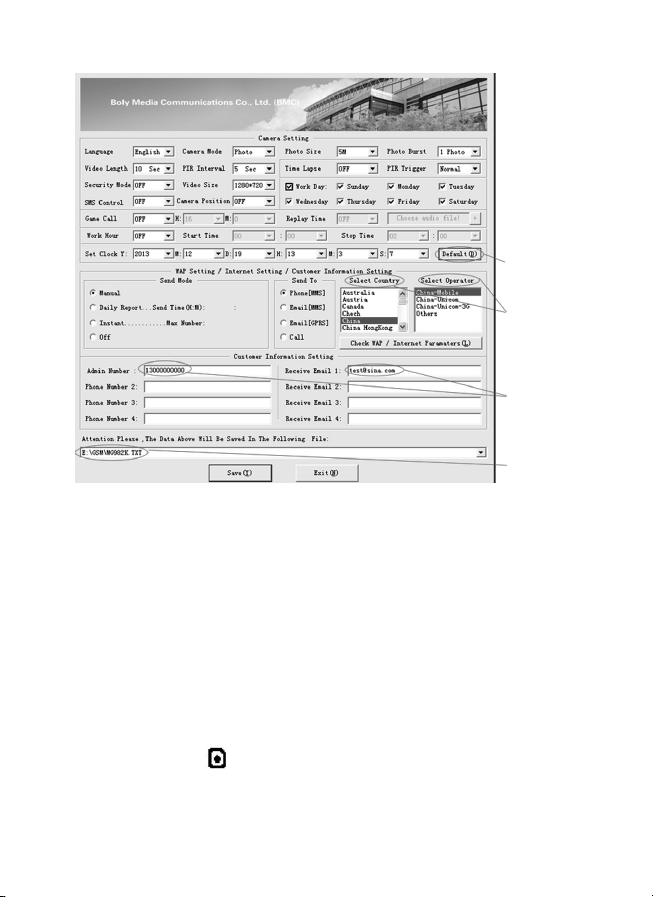
1) Open the
software and
select camera
model:
2) Set the
camera
parameters
35
First, select your country and carriers (step1) according to your SIM
card and input your receiving phone number in ”administrator num-
ber” and receiving e-mail address in ”Receive Email 1” (step3). For
first time use, we suggest you to use default settings (step2), anyset-
tings you want to change, please click ”Change setting”.
After finish settings, please save the GSM folder to the root directory
of your SD card (step4).
3.4 Manually Send a MMS or GPRS Photo
After you generate a setting file in your SD card, please slip the power
switch to SETUP position. After the camera acquires the signal and
the SIM card icon appears, target an object and press “SHOT” to
take a photo manually.
Step 1
Step 2
Step 3
Step 4
36
Then press “OK” to playback the photos, press “▲” and “▼”, to
switch to previous or next photo. Press “MENU” and you can see a
send Phone MMS] interface, press “OK” to send out the MMS.
After a few seconds, you will receive a MMS in your phone.
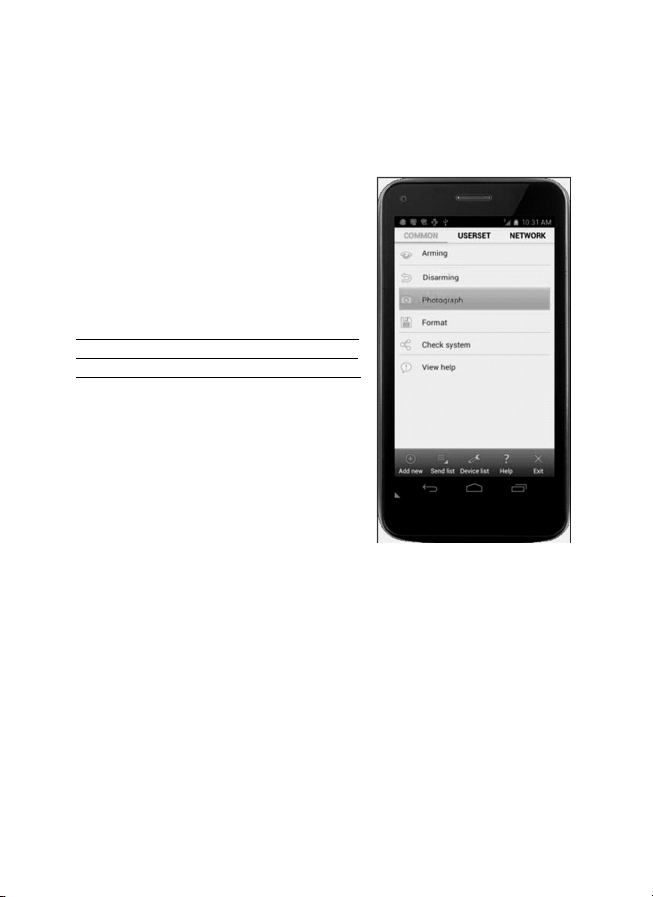
3.5 SMS Control
When the camera is armed, you can
send text message “#T#” to your came-
ra’s SIM card number to get an on spot
image or use our Android application
tools. Note you need to set SMS control
ON when using SMS command.
Down load the Android control software
from our website. The specified website
is written in the last page of the manual.
For iPhone, just download it from the
App Store by searching GTools.
Este manual sirve para los siguientes modelos
1
Tabla de contenidos
Otros manuales de Cámara termográfica de Berger + Schröter


