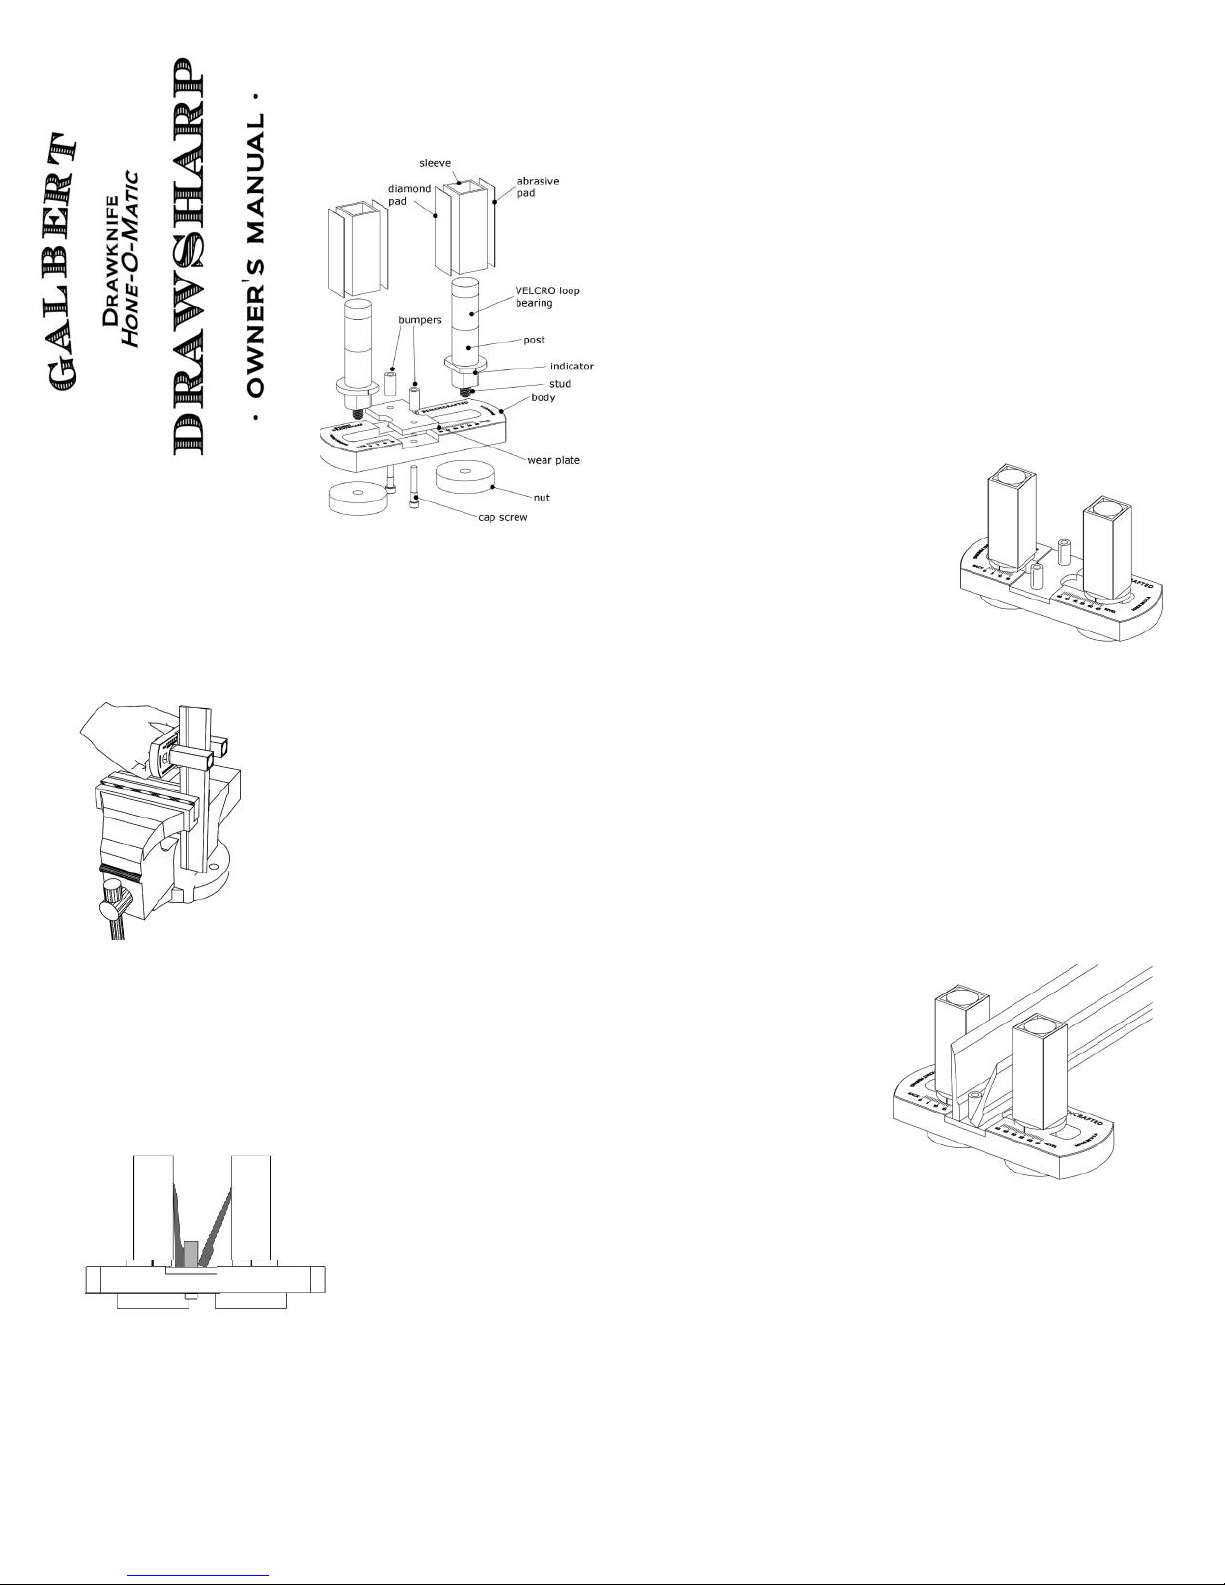
micro bevel angle. To measure the micro bevel angle of the drawknife’s bevel, place the blade
of the bevel square flat on the drawknife’s bevel. The difference between that angle and 90
degrees is the micro bevel angle. For most drawknives, a 3 degree micro bevel on the bevel
side and a 2 degree on the back works well. Now that the tool is set, note where each post
registers on the scale for later reference.
Using the Drawsharp
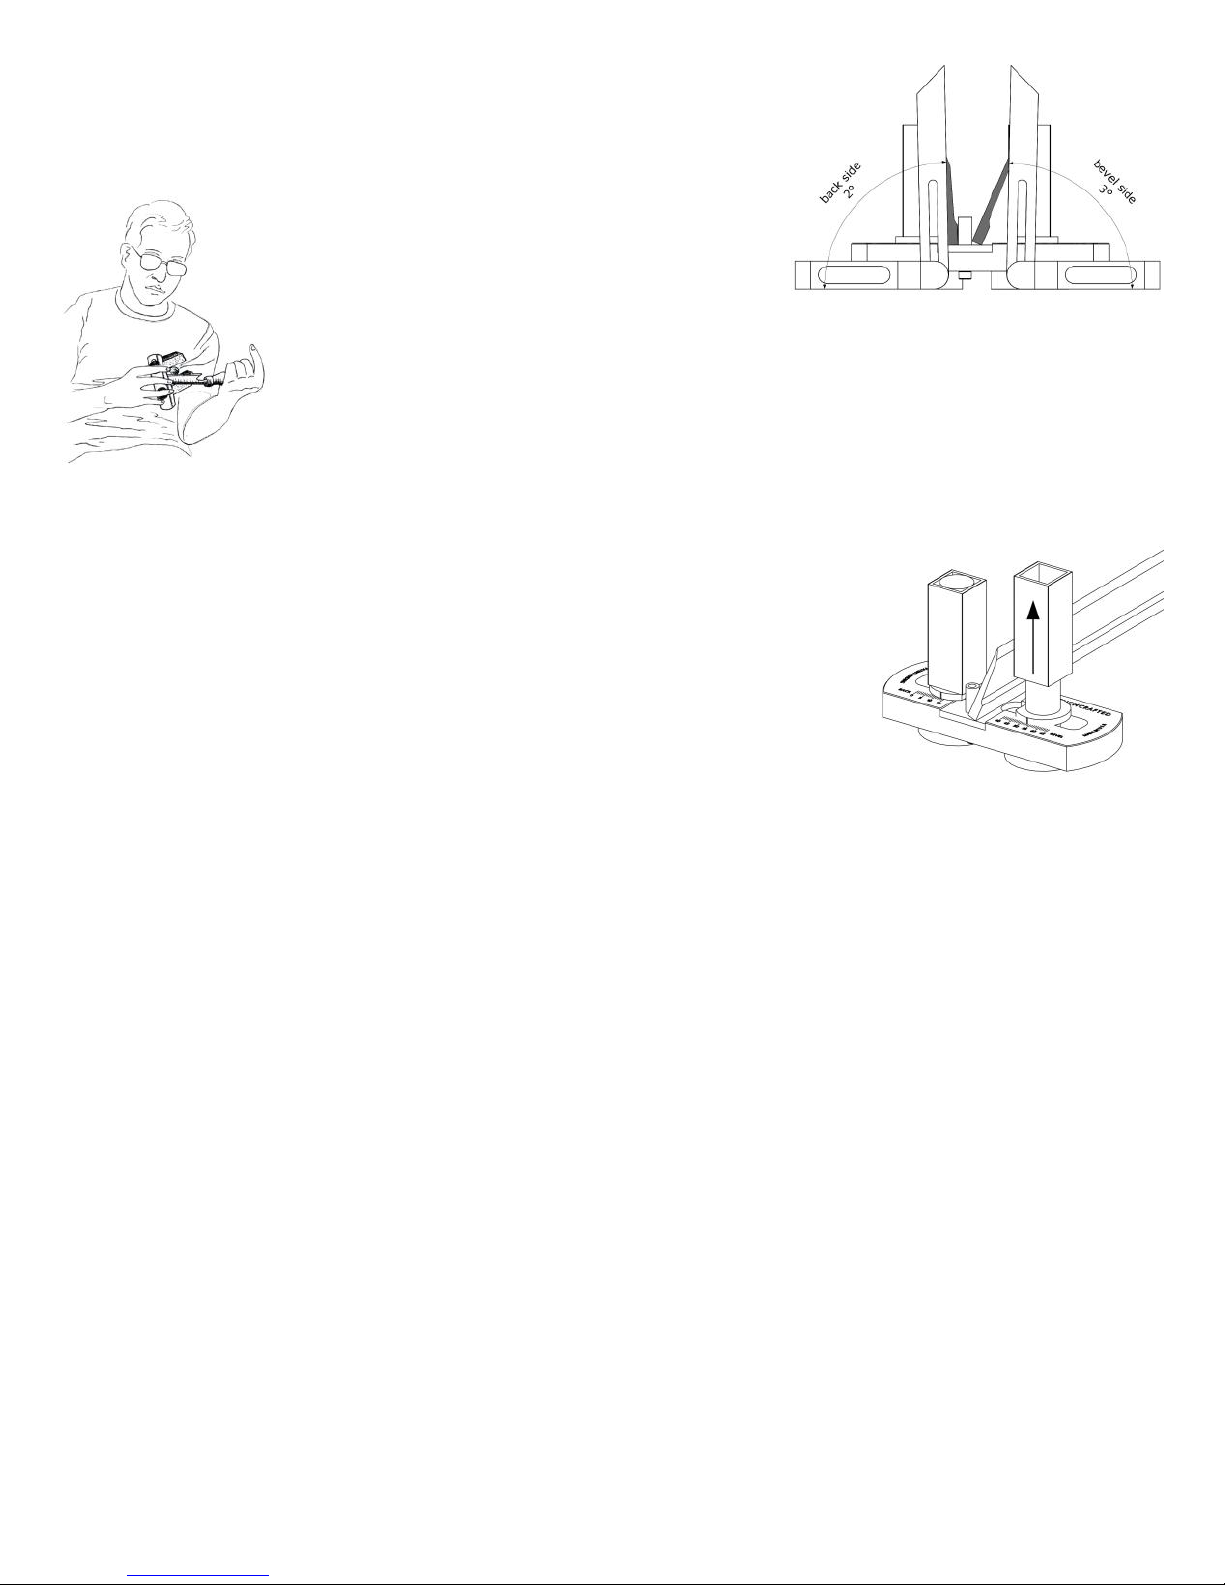
To hone the edge, hold the drawknife like a violin (i.e. in your
left hand if you’re right-handed, etc.), with the blade facing
away from you and the Drawsharp in your other hand as shown being sure that the Drawsharp is oriented properly,
i.e., if the drawknife’s bevel is up, then the post on the bevel side should be on top, above the drawknife.
Apply some light honing oil (Camellia or equivalent) to the blade. Keeping the blade and abrasive lubricated during the
honing process is vital to good honing. Place the Drawsharp onto the spine of the drawknife, pressing the knife’s edge
into the corner formed by the wear plate and bumpers, then rotate the Drawsharp until the abrasive (the diamond
pad) makes light contact with the cutting edge of the drawknife. Now slide the Drawsharp along the length of the knife
and back again, keeping the drawknife riding on the bumpers for the entire stroke. Take light strokes on the bevel side
until you feel a burr along the entire edge of the opposite face. Move the Drawsharp so the spine of the drawknife is
now on the opposite side of the bumpers and repeat on the back, rotating
the Drawsharp the opposite way to contact the other post’s abrasive sleeve.
Once the burr is turned back to the bevel side, repeat the process. Now that the diamond abrasive has
formed the edge, it should only take a stroke or two to turn the burr back to the other face. Repeat this using
one or two light strokes per side to reduce the size of the burr and scratch pattern. Rotate the sleeves 180
degrees so the finer, paper abrasive pads face the bumpers and repeat the process. Continue working both
sides of the knife on the same portion of the sandpaper, which will cause the grit to break down to finer
particles and polish the blade well beyond the 600 grit rating of the paper. Because the paper pads are
slightly thinner than the diamond, a “mini-micro” bevel is formed, ensuring you’re polishing all the way to
the very cutting edge. If your blade is not even in width, as many older blades are, that the stroke on the
sandpaper should be started in the wider sections and pushed towards the narrower until the mini
microbevel is established. Otherwise, the blade may cut into the paper. Light strokes are the key. Let the
abrasive do the work. Once the burr has been turned back and forth once, start a series of single strokes on
each side of the knife, turning the burr back and forth. Repeat this with increasingly light pressure and honing oil until you feel the burr greatly
diminished or gone. If you need to expose fresh abrasive to the cutting edge for the next session, simply pull up on the sleeve to present a fresh area.
The cutting angle will not change. Once you’ve used up the abrasive all the way to the bottom, remove and flip the sleeve over to utilize the rest of the
pad. To finish the process, strop both sides of the edge with a piece of softwood or leather charged with honing compound as you normally w ould. If the
edge is not satisfactory, i.e., you didn’t remove all the scratches from the diamond pad with the abrasive paper, repeat the process starting with the
diamond pad, focusing on using light strokes. The key to using the diamond pad is a very light touch. Resist the urge to bear down as you would with
waterstones. Diamond performs best with ample lubrication and motion versus intense pressure. In subsequent honings, focus most of the work on the
bevel side (which is easy to grind) and only hone the back with the fine diamond pad to turn the burr back to the bevel.
Drawknife Rehab
Some drawknives, especially a “new” one from a flea market or tool dealer may need more attention than the included abrasives can handle. For this
we offer a rehab kit which includes two additional sleeves outfitted with medium and coarse grit diamond pads. For knives in worse shape that require
more aggressive honing, start with the coarser pad to establish a consistent edge and establish a burr all along the edge. Now rotate the sleeve to the
medium pad and work the edge. As with the fine diamond pad included with the Drawsharp, light pressure with ample lubrication is the key to success.
Obviously, if you’re drawknife edge is in really bad shape, with large nicks in the edge or severely blunted, you’ll need to establish a new, uniform edge
at the grinder. Please visit our website for information and techniques on grinding drawknives.
Replacing The Abrasives
When you’ve used up the sandpaper pads on each post, you’ll need to replace them with a fresh pair. 10 pads are included with the Drawsharp, and
replacements are available directly through our website. To get the paper off, heat the paper slightly with a lighter or other heat source to soften the
adhesive. You just want a little heat here, don’t go overboard. The paper will peel off. Clean the surface with solvent, let dry and apply a new sheet. The
diamond pad should last for many years with normal use.
-Benchcrafted