General information
Please follow the instructions in this manual to cor-
rectly insert the letterbox lock Fingerprint HS 1400.
WARNING! Small parts and packaging materials can
be swallowed by children and lead to choking! Make
sure that small parts and packaging mate-
rials do not get into the hands of children.
Dispose of the packaging material immedi-
ately.
No hazards are to be expected if the device is used
in accordance with the instructions and in a profes-
sional manner.
The manufacturer expressly reserves the right to
make technical changes.
Disclaimer
The manufacturer accepts no liability for damage
and/or injury resulting from improper handling.
Scope of delivery
Check that the delivery is complete:
1. Lock with sensor and USB charging connection
2. Spacer rings (3 pieces)
3. Nut/counter nut
4. 2 Levers (3 variants)
5. Lever nut
6. USB-C charging cable
Additionally required:
For installation: either 22mm ring/ open-ended
spanner or water pump pliers - for charging when
installed: Mobile power bank
Installation instructions
Please read before installation!
Please check the installation depth (X) and the instal-
lation diameter of the lock (Fig. 1).
Before installation and programming, the lock must
be fully charged for approx. 60 minutes. To do this,
use the supplied USB charging cable and a commer-
cially available adapter. During the charging process,
3 LEDs of the lock light up blue. The 3 blue LEDs
flash until the charging process is completed (LEDs
light up constantly blue). Do not operate the lock dur-
ing the charging process!
When the lock is installed, we recommend charging it
using a mobile power bank (not included in the scope
of delivery).
The lock is delivered in the factory setting. In the fac-
tory setting, the lock can be opened with any finger-
print This is not a defect!
Up to 20 fingerprints can be stored. The first two fin-
gerprints to be stored are “Admin fingers”. These are
needed to store all “user fingers” or to reset the lock
to the factory setting.
At least 2 fingerprints should be stored, even if the
lock is only used by one person. For trouble-free op-
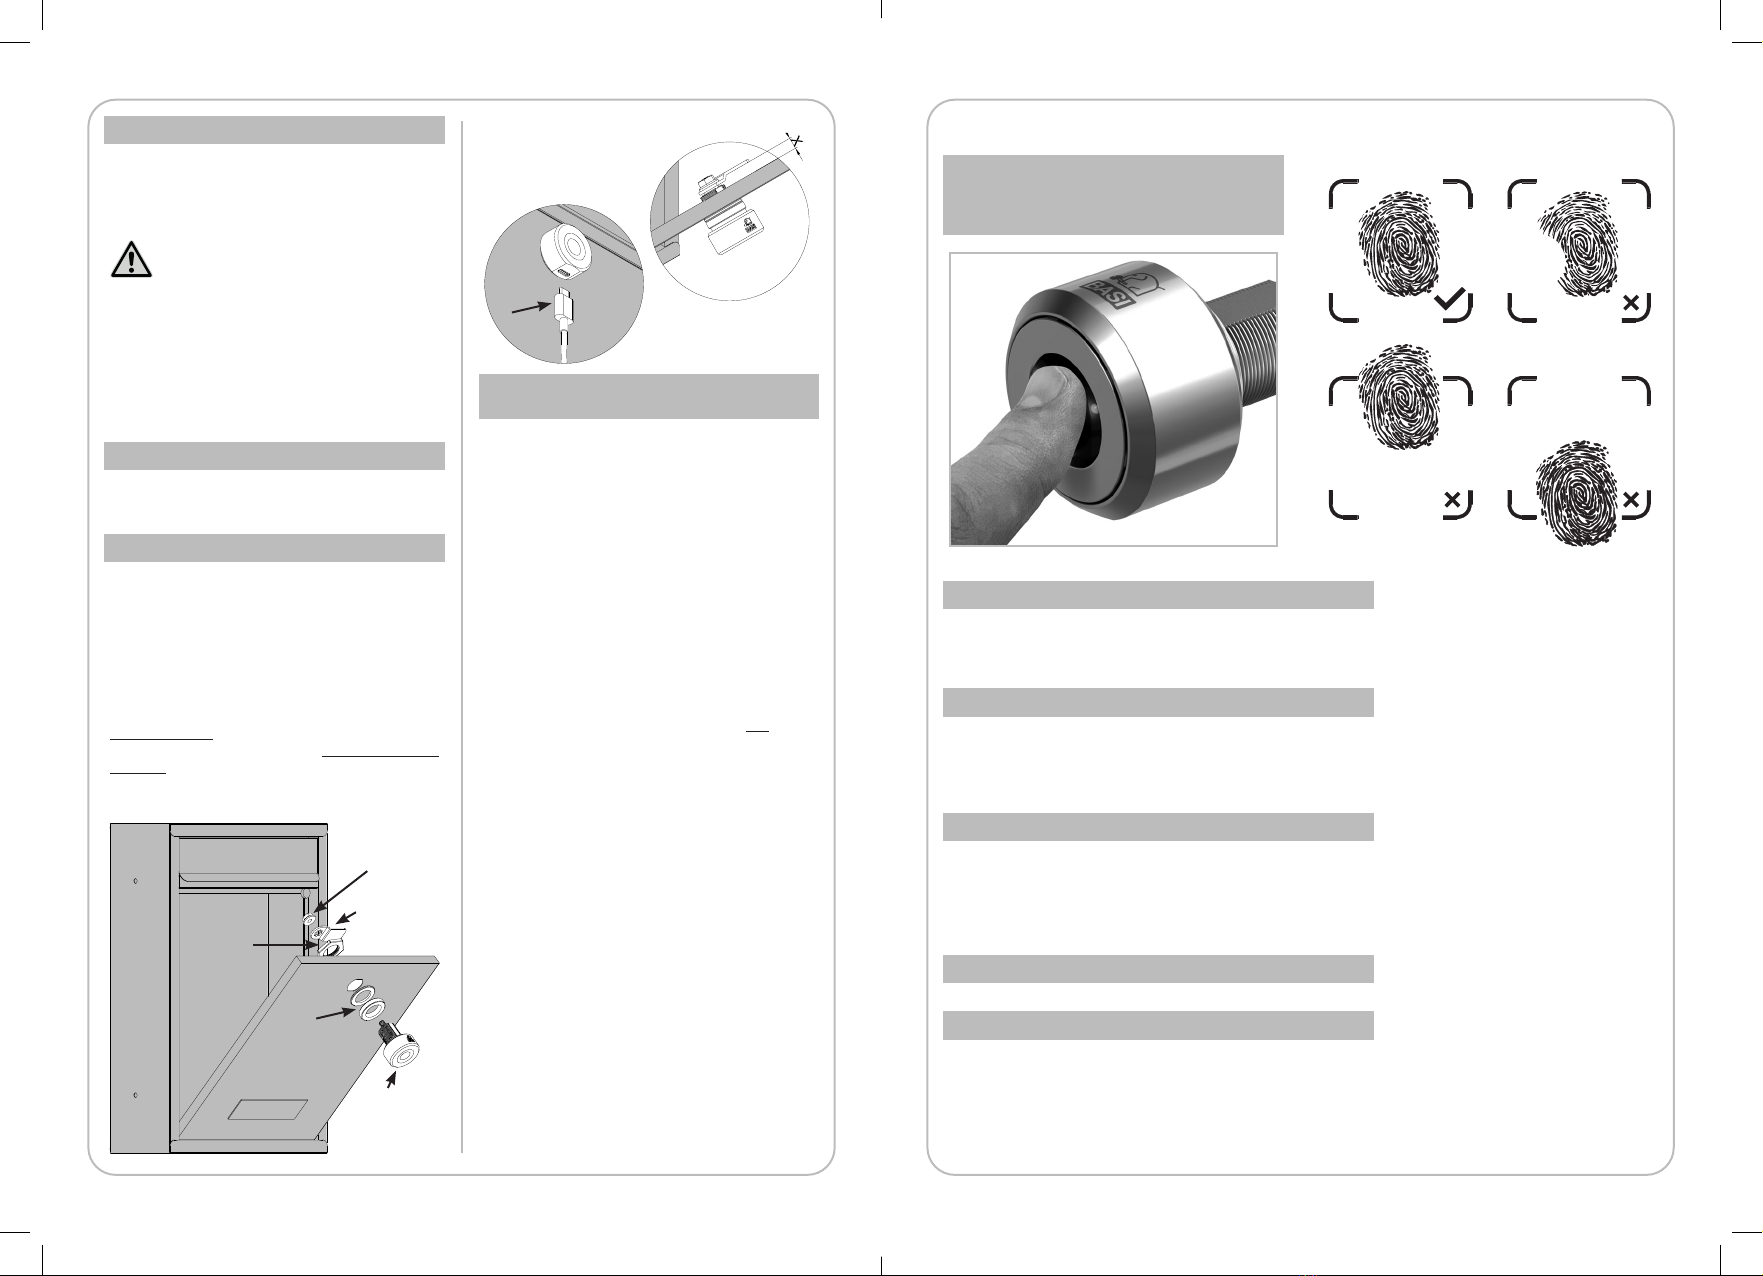
eration, the sensor and finger should always be dry,
clean and free of grease. If the battery is discharged,
the lock remains locked and the fingerprints remain
stored.
In the event of a complaint, it is essential to ensure
that the lock is returned to the vendor in factory con-
dition (reset). Otherwise, the acceptance of the com-
plaint will be refused.
When installing, make sure that the USB charging
port of the lock is facing downwards (fig. 2)!
To save the fingerprints, please follow the steps below:
Step 1 - Create and save Admin finger “1”:
Place Admin-Finger “1” on the sensor for 9 seconds this is followed by a blue flash (3x)
Remove the finger from the sensor this is followed by a blue-red flash
Place Admin-Finger “1” on the sensor 6 times in succession this is followed by a blue flash each time
The registration was successful this is followed by a blue flash (2x)
Step 2 - Create and save Admin finger “2”:
Place Admin finger “2” on the sensor for 9 seconds this is followed by a blue flash (3x)
Remove the finger from the sensor this is followed by a blue-red flash
Place Admin finger “1” on the sensor this is followed by a blue flash (3x)
Place Admin finger “2” on the sensor 6 times in succession this is followed by a blue flash each time
The registration was successful this is followed by a blue flash (2x)
Step 3 - Create and save User finger “1”:
Place User finger “1” on the sensor for 9 seconds this is followed by a blue flash (3x)
Remove the finger from the sensor this is followed by a blue-red flash
Optionally place Admin finger “1” or Admin finger “2”
on the sensor this is followed by a blue flash (3x)
Place User finger “1” on the sensor 6 times in succession this is followed by a blue flash each time
The registration was successful this is followed by a blue flash (2x)
Create and save further User fingers:
Repeat step 3 to add further User fingers (up to 20 User fingers are possible)
Restore factory settings:
Pace either Admin finger “1” or Admin finger “2” for 20 seconds
on the sensor this is followed by a red flash (3x)
Place the same Admin finger on the sensor 2x in succession this is followed by a blue-red flash each time
All data is deleted. The lock is now back in the factory setting and can be opened with any fingerprint! In order
to avoid unauthorised access, you should immediately create and save the two Admin and User fingers again.
Scanning fingers
correctly
3.
5.
Fig. 1
Fig. 2
4.
2.
1.
6.


