Apollo RoadRunner Manual de usuario

1331-118th Ave SE, Ste 300 - Bellevue, WA 98005
Tel: 800.641.1401 Fax: 425.453.0959
Installation Guide - Law Enforcement
Introduction
Cables and Hardware Description
System Overview with Monitor and Controller
System Overview with Laptop Computer
Main Power Connections
Recording Trigger Connections
Configuring Laptop with IP Address
RoadRunner
Mobile Digital Video Recording System

RoadRunner Installation Guide
Introduction
Apollo Video Technology
1331-118th Ave SE, Ste 300 - Bellevue, WA 98005
Tel: 425.453.0430 / Fax: 425.453.0959
www.avt-usa.com
Page 1
The Roadrunner is a Milspec-rated, trunk mounted Digital Video Recorder for mobile applications. It employs MPEG4
compression to record up to 4 cameras and 4 audio sources on a removable hard drive, and can be accessed directly
in the vehicle with a laptop computer, with the optional controller and monitor; or the removable hard drive can be read
directly on a desktop PC with the optional Hard Disk Player.
Installation follows these basic steps:
Remove the DVR from its base and remove the cable guard from the rear of the DVR.
Note: be sure to pass the wiring through the cable guard if you wish to reinstall it when the wiring is complete.
Mount the DVR base in its intended location (you may wish to complete the wiring before securing the DVR to its
base). In most cars it will be mounted in the trunk, either on the floor or under the shelf, though other vehicles
may require mounting the unit in different areas.
Install the Front Zoom Camera on the windshield with either the removable suction cup mount, or the permanent
glue-on mount.
Install the Interior Infrared Camera with audio (if included) using the included bracket or mount.
Run the wiring through the vehicle, including the wiring for connecting the light bar, siren, etc. and Main Power
connections using the supplied harness.
Connect the wiring to the rear panel of the DVR.
Connect power and turn on the DVR.
If the vehicle uses a laptop computer to communicate with and program the Roadrunner:
Connect the included crossover network cable
Assign the laptop an IP address which is compatible with the DVR’s IP address (192.168.1.129).
Install the IRAS software on the laptop
Connect the Laptop to the DVR
If the vehicle uses the optional monitor and controller to communicate with the Roadrunner:
Connect the monitor and controller as part of the installation
Enter the menu by pressing the MENU button
Enter the default password: 4321
Refer to the operations manual for further instructions
-
-
-
-
-
-
-
-
-
-
-
-
-
-
-

Cable and Hardware Descriptions
Note: Individual Specifications and color codes are subject to change without notice
Apollo Video Technology
1331-118th Ave SE, Ste 300 - Bellevue, WA 98005
Tel: 425.453.0430 / Fax: 425.453.0959
www.avt-usa.com
Page 2
Main Power Harness: Reduces 6 wires to 3; connects to ground, battery and ignition
Primary DB9 and power connections for Premium Driver Control Panel
DB9 extension cable for Premium Driver Control Panel
Crossover network cable for laptop installations (color will vary)
Coax with BNC connectors at both ends - used for both video and audio sources
Relay and pigtail; used to connect 12VDC sources such as light bar to the alarm inputs on the RoadRunner
Windshield or magnetic mount antenna and cable (other types of antennas also available)
Microphone for wireless audio kit
Camera Mounts: Both removable suction cup and permanent glue-mounts are available
TFT Monitor Mount: Flexible and hard-mount types available

System Overview - Monitor and Controller Configuration
Includes: DVR, Zoom Camera, Premium Control Panel and TFT Monitor
Optional: Interior IR Camera with Audio, Wireless Audio Kit
Apollo Video Technology
1331-118th Ave SE, Ste 300 - Bellevue, WA 98005
Tel: 425.453.0430 / Fax: 425.453.0959
www.avt-usa.com
Page 3

System Overview - Laptop Configuration
Includes: DVR, Zoom Camera
Optional: Interior IR Camera with Audio, Wireless Audio Kit
Apollo Video Technology
1331-118th Ave SE, Ste 300 - Bellevue, WA 98005
Tel: 425.453.0430 / Fax: 425.453.0959
www.avt-usa.com
Page 4

RoadRunner installation Guide
Main Power Connections for Battery and Ignition
Apollo Video Technology
1331-118th Ave SE, Ste 300 - Bellevue, WA 98005
Tel: 425.453.0430 / Fax: 425.453.0959
www.avt-usa.com
Page 5

RoadRunner installation Guide
Connections: Light Bar, Sirens, Brakes, etc.
Apollo Video Technology
1331-118th Ave SE, Ste 300 - Bellevue, WA 98005
Tel: 425.453.0430 / Fax: 425.453.0959
www.avt-usa.com
Page 6
Any 12 VDC output MUST use the supplied relay or damage to the DVR may result.
Devices which go to Ground when activated do not require the relay and may be
wired directly to the DVR alarm inputs.
Many devices besides those shown here may be used as Recording and Event log
triggers.
Up to three external devices can be used as alarm triggers.
Alarm input 4 is reserved for the panic button.
STOP

RoadRunner installation Guide
Standard DCP (Panic Button) Connections
Apollo Video Technology
1331-118th Ave SE, Ste 300 - Bellevue, WA 98005
Tel: 425.453.0430 / Fax: 425.453.0959
www.avt-usa.com
Page 7
Note: Panic button included only when manual activation and deactivation is required.
Laptop Configuration: Step 1
Setting an IP Address with MS Windows 98, 2000 or XP
Apollo Video Technology
1331-118th Ave SE, Ste 300 - Bellevue, WA 98005
Tel: 425.453.0430 / Fax: 425.453.0959
www.avt-usa.com
Page 8
Note: RoadRunner RAS (Remote Access Software) is compatible with Windows 98, 2000 or XP. It is NOT compatible with Mac OS, Windows 95 or NT.
Configuring a laptop to communicate with the RoadRunner DVR is not difficult and simply refers to assigning the laptop
an IP address that is compatible with the default IP address of the DVR. It is similar to having two telephones... If they
had the same phone number they would not be able to call each other. In the same way, the laptop and the DVR must
have different IP addresses.
The RoadRunner DVR has a factory default IP address of 192.168.1.129,
which makes it simple to connect to any RoadRunner DVR you encounter
in the field.
IP Address: (Internet Protocal) There are three parts to an IP address.
Just like a phone number has a country code, area code and exchange,
ie.: 01-555-555-5555, an IP address has the address, the subnet mask
and the gateway.
Generally it will only be necessary to set the laptop’s IP address and
possibly the subnet mask:
192.168.1.130: IP Address
255.255.255.0: Subnet mask
192.168.1.254: Gateway, if needed
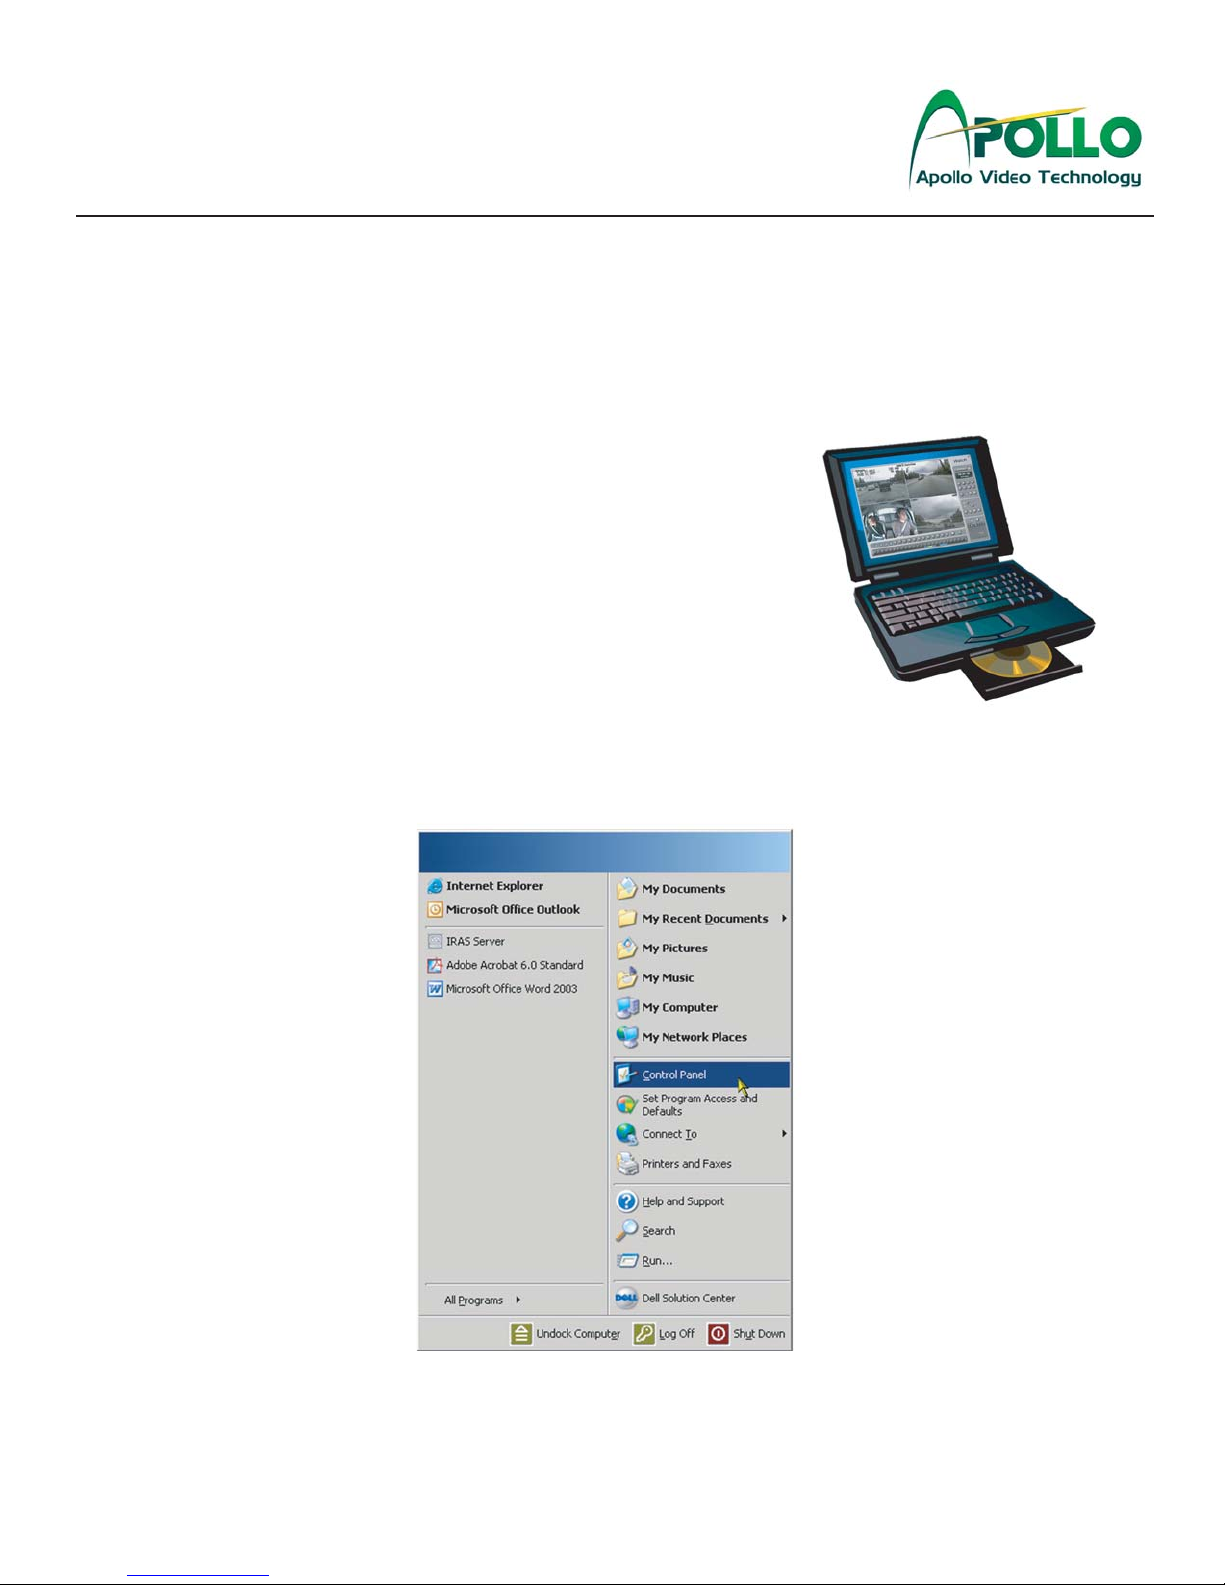
1. First, go to the Start Menu,
then click on Control Panel.

Laptop Configuration: Step 2 & 3
Setting an IP Address with MS Windows 98, 2000 or XP
Apollo Video Technology
1331-118th Ave SE, Ste 300 - Bellevue, WA 98005
Tel: 425.453.0430 / Fax: 425.453.0959
www.avt-usa.com
Page 9
2. On the Control Panel, select Network Connections, by double-clicking, or pressing enter.
3. On the Network Connections screen, select Local Area Connection, then click the right button on the
mouse and select Properties.
Otros manuales para RoadRunner
4
Tabla de contenidos
Otros manuales de DVR de Apollo


