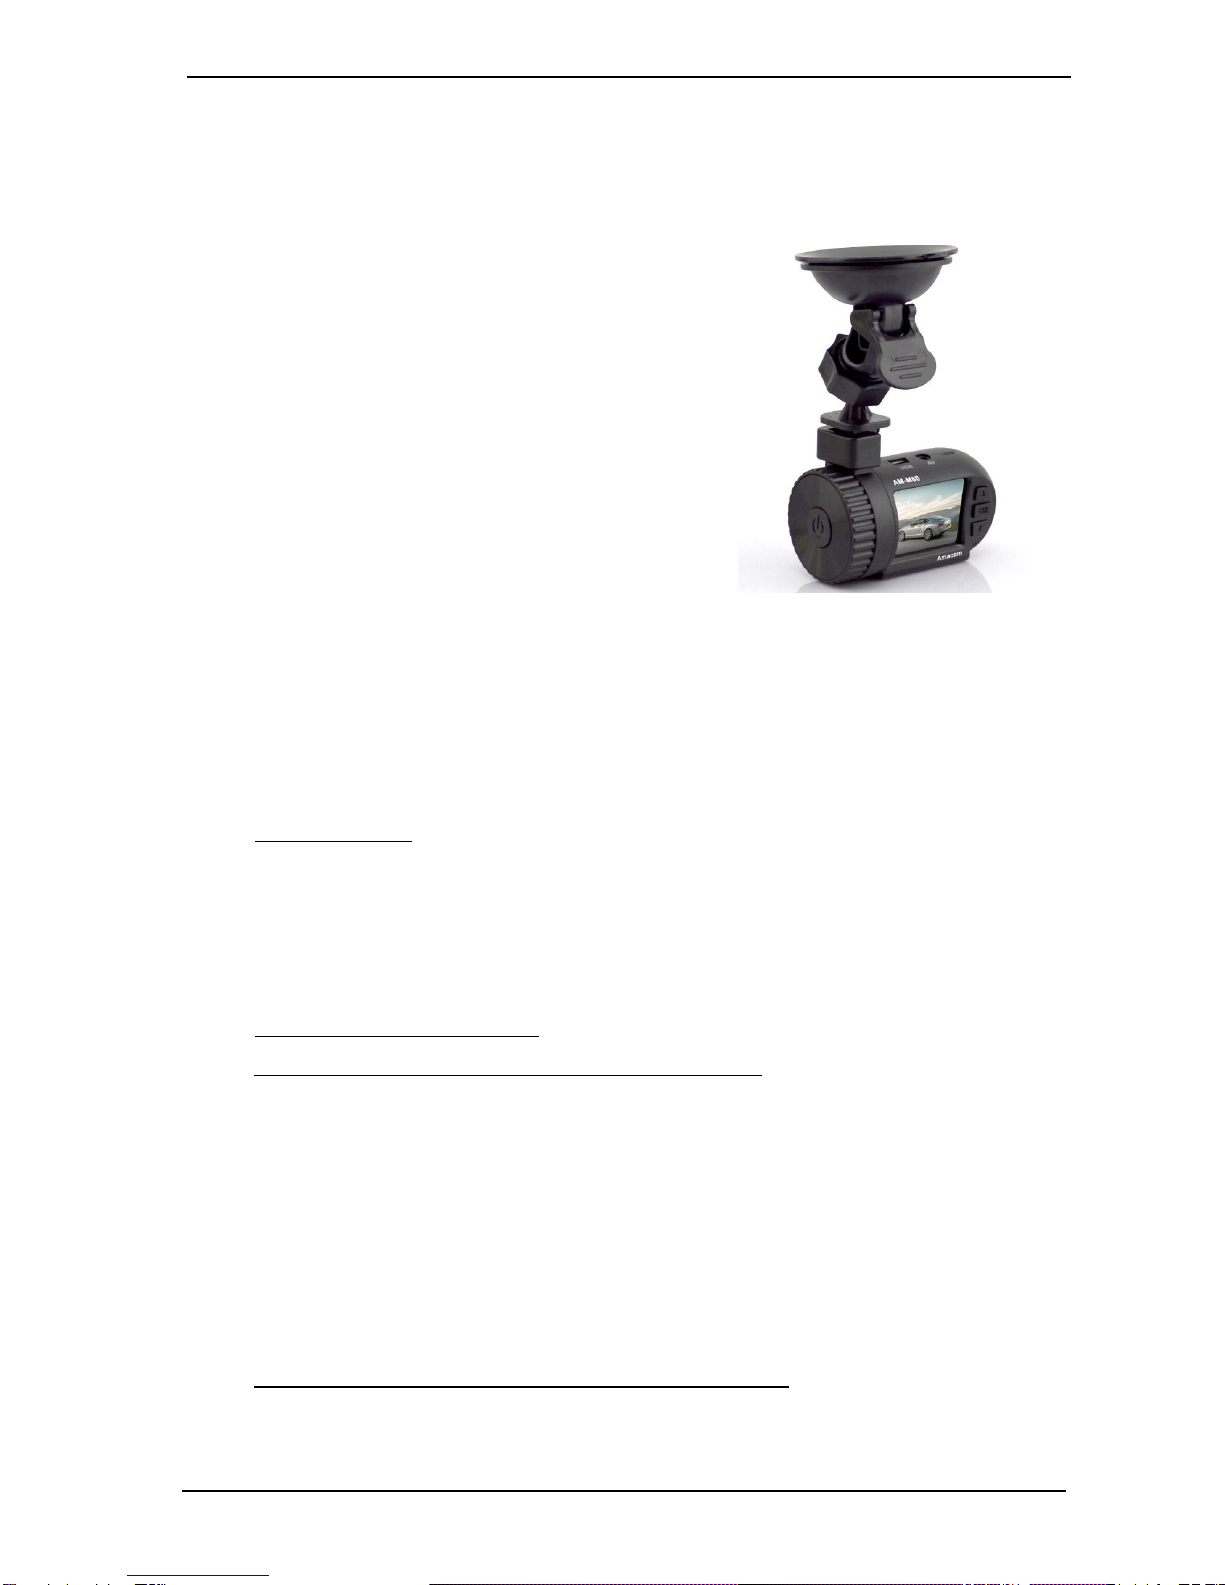
Amacam AM-M80 Manual de usuario

AM-M80
USER MANUAL
Please Register Your AM-M80
www.amacam.net/product-registration

AMACAM AM-M80 USER MANUAL
Page 1
CONTENTS
1. PACKAGE CONTENTS.................................................................................2
2. OVERVIEW....................................................................................................2
3. DIAGRAM OF CAMERA................................................................................3
4. BASIC OPERATION......................................................................................4
4.1. First set up.............................................................................................4
4.2. Mounting in the car...............................................................................5
4.3. Recording ..............................................................................................5
4.4. Play back................................................................................................6
5. MENU OPTIONS............................................................................................7
5.1. In Video mode........................................................................................7
5.2. In Photo mode .......................................................................................7
5.3. In Playback mode..................................................................................8
5.4. USB Mode ..............................................................................................8
6. VIDEO MENU (VIDEO MODE) ......................................................................8
7. STILL MENU (PHOTO MODE)......................................................................9
8. SET UP MENU (ALL MODES) ....................................................................11
9. PLAYBACK MENU (PLAYBACK OR REVIEW MODE) .............................12
10. FURTHER OPERATIONS............................................................................13
10.1. Indicator light.....................................................................................13
10.2. External power supply/Charging the battery ..................................13
10.3. Protecting Files..................................................................................13
10.4. Connecting to the computer.............................................................14
10.5. Connecting to the TV.........................................................................15
10.6. System reset......................................................................................15
11. SPECIFICATION..........................................................................................16
12. TECHNICAL SUPPORT ..............................................................................16
13. QUICK REFERENCE GUIDE ......................................................................17

AMACAM AM-M80 USER MANUAL
Page 2
1. PACKAGE CONTENTS
Camera –Note that the camera requires a micro SD memory card, which is not
supplied with the camera.
(See Section 4.1 Below)
Mounting Bracket for car windscreen
Charging lead for use in car (Car
Cigarette lighter to Mini-USB cable)
Connection lead for computer (Mini USB
to USB Cable)
User Manual
2. OVERVIEW
The Amacam AM-M80 camera is designed primarily as a small video camera for
mounting on the front or rear windscreen of a car. This is for the purpose of
recording the car movements and externals activities, and would be of use in
providing evidence for Insurance purposes. It is designed in this mode to start
recording as soon as the car ignition is switched on.
In addition it can be used for short periods hand held outside the car, but the
battery life in this instance is limited to approximately 30 minutes of recording
before being reconnected to the car or a charger for recharging..
The camera may also be used to take still photos as a manual operation.
The video or still pictures recorded can be reviewed on the inbuilt small screen, or
the camera can be connected to a PC computer for review of all photos and
videos taken.

AMACAM AM-M80 USER MANUAL
Page 3
3. DIAGRAM OF CAMERA
Key
1. HDMI Slot
2. Micro SD Card Slot
3. Reset
4. Microphone
5. AV Out
6. USB Socket
7. UP Button
8. OK Button
10. Screen Display
11. Power Button
12. Mounting Bracket
13. Camera lens
14. Speaker
15. Indicator Light
Blue- power on
Red –battery charging

AMACAM AM-M80 USER MANUAL
Page 4
4. BASIC OPERATION
4.1. First Set Up
Before the camera is used the following actions must be taken. This should be
read in conjunction with the Menu Options description in this User Manual.
The number references below refer to the Diagram and Key in Section 3 of this
user manual.
Switch camera on by pressing Power button (11) once.
Set up date and time in settings (See Section 8 below).
Set up Loop recording time. The default is set to 3 minutes. (See Section 6 below)
Insert a Micro SD card into slot (2). Good quality. Speed rating minimum Class 4.
4GB, 8GB, 16GB or 32GB.
Camera will now operate in default settings mode.
Note.
If problems are experienced setting up the camera from the SET UP menu, it is
suggested that the SD card is removed temporarily during the set up and then
replaced after Set up is completed.
Power Button (11)
The Power button (11) is used to
switch the camera on (in manual operation)
switch between menu pages
switch the camera off
Care should be taken to press the button for the correct amount of time.
Switch on (from Off) –one press
Switch between Menus –one press
Switch off –Press and hold for approx. 3 seconds until camera switches off.

AMACAM AM-M80 USER MANUAL
Page 5
4.2. Mounting in the Car
Fix the suction operated mounting bracket to
the car windscreen, usually this is done
behind the rear view mirror.
The mounting bracket on the camera (12) can
be rotated to any position between 0 and 90°,
to accommodate the slope angle of the car
windscreen.
Connect the car charging lead from the mini
USB socket (6) on the camera to the Cigarette
lighter in the car.
Alternatively the power cable can be hard wired in, but this requires an auto-
electrician to carry out the wiring work. Cables for this are not provided.
4.3. Recording
4.3.1. In car operation
The camera will start recording automatically when the ignition is switched on and
the car starts to travel. Recording will stop when the car ignition is switched off.
(See also ‘AC Power Off’ in SET UP menu)
4.3.2. Hand held Manual operation
Video recording (Video camera depicted in top left)
Switch power on by pressing Power button (11) once.
Camera will turn on in Video mode
Press OK (8) to start recording. Red indicator light on screen will start to
flash
Press OK (8) to stop recording.
Whilst recording, To Zoom in –press Up button (7)
To Zoom out –press Down button (9)
Photo Mode. (Still camera depicted on top left corner)
To take still pictures change to Photo mode.
From Video mode, Press the OK button (8) and hold for 2 seconds.

AMACAM AM-M80 USER MANUAL
Page 6
To Zoom in –press Up button (7)
To Zoom out –press Down button (9).
To take picture, Press the OK button (8) for 1 second omly (Warning,
pressing for a longer period will bring up the menu options)
4.4. Play Back
Play back or review of the video files and photos may be carried out either on the
camera or by connecting the camera to a computer.
4.4.1. To review on the computer
see Section 10.4 (Connecting to the computer) below.
Note
Protected Files (See section 10.3) can only be deleted using a connection to the
computer.
4.4.2. To review files on the camera
Turn the camera on by pressing the Power button (11)
Change to Photo Mode (Press the OK button (8) and hold for 2 seconds .)
Press the OK button (8) and hold for 2 seconds
Use Up button (7) or Down button (9) to scroll between the various video
files/pictures.
When desired video file is selected use OK button (8) to start video playing
To fast scroll between files, press and hold the Up (7) or Down (9) button
until the desired file is reached.
The Name or number of the file is shown in top right hand corner of screen.
Resolution, date and time are also indicated on screen.

AMACAM AM-M80 USER MANUAL
Page 7
Video Menu
Setup Menu
Photo Mode
Still Menu
5. Menu Options
Various menu pages are obtained by pressing the Power button (11). Different
menus are obtained depending on the operating mode of the camera at the time.
5.1. In Video Mode
One press (click) of the Power button (11) will result in the
VIDEO menu
Two clicks of the Power button (11) will result in the SET UP
menu
To exit the menu, press the Power button
(11) twice (from VIDEO Menu) or one more
time (from SET UP menu) to return to the
Video mode
5.2. In Photo Mode
One press (click) of the Power button (11) will result in the
STILL menu
Two clicks of the Power button (11) will result in the SET UP
menu
(Note that this is the same SET UP menu as in Video mode.
To exit the menu, press the Power button (11) twice (from
STILL Menu) or one more time (from SET UP menu) to return to
the Photo mode
Video Mode

AMACAM AM-M80 USER MANUAL
Page 8
Playback Mode
Playback Menu
5.3. In Playback Mode
One press (click) of the Power button (11) will result in
PLAYBACK menu
Two clicks of the Power button (11) will result in the SET UP
menu
(Note that this is the same SET UP menu as in Video mode.)
To exit the menu, press the Power button (11) twice (from
PLAYBACK Menu) or one more time (from SET UP menu)
to return to the Playback mode
5.4. USB Mode
When connected to the computer the USB mode is displayed
Automatically. No other menus can be accessed whilst the
USB cable is connected between camera and computer
6. VIDEO MENU (Video Mode)
Item
Sub Menu
Choice
Default
Setting
Function/Comment
Resolution
1080FHD
1920x1080
1080P
1920x1080
720P 1280x720
WVGA 720x480
VGA 640X480
QVGA 320x240
1080FHD
1920x1080
Higher resolution will increase file sizes
and recording time on SD card but will
enable number plates to be more easily
read.
Loop
Recording
Off
3 mins
5 mins
10 mins
3 mins
Determines the size of files into which the
recording is divided. When the memory
card is full and when loop recording is on,
the files are progressively recorded over,
one file at a time.
When loop recording is off, the camera will
stop recording when the memory card is full.

AMACAM AM-M80 USER MANUAL
Page 9
7. STILL MENU (Photo Mode)
Item
Sub Menu
Choice
Default
Setting
Function/Comment
Motion
Detection
Off
On
Off
This applies only when the camera battery
is being charged (by being connected to
the in car charger).
When ‘On’ is selected the camera will start
recording when motion of the camera or
the image is detected.
Date
Stamp
Off
On
On
Puts the date/time stamp on the Video
recording
Record
Audio
Off
On
On
Records Audio as well as video material.
G Sensor
High
Normal
Low
Off
Normal
This senses an impact, and then protects
that file to prevent it being overwritten by
loop recording.
Item
Sub Menu
Choice
Default
Setting
Function/Comment
Capture
mode
Single
2 seconds
5 seconds
10 seconds
Single
This is a delay timer for taking photo
after pressing OK.
Resolution
12M 4032 x 3024
10M 3648 x 2736
8M 3264 x 2448
5M 2592 x 1944
3M 2048 x 1636
2M 1920 x 1080
VGA 640 x 480
1.3M 1280 x 960
12M
4032 x 3024
This gives the resolution as the number
of pixels in the picture
Quality
Fine
Normal
Economy
Normal
This refer to the quality of the STILL
photos
Otros manuales para AM-M80
1
Tabla de contenidos
Manuales populares de Videocámara de otras marcas

Panasonic
Panasonic AG-HMC152EN Manual de usuario

Insignia
Insignia NS-DCC5HB09 - Camcorder - 720p Manual de usuario

MYDLINK
MYDLINK DCS-6100LH Manual de usuario

Sony
Sony video Hi8 Handycam CCD-TR555 Manual de usuario

SECURECOM
SECURECOM V-5014B Manual de usuario

Panasonic
Panasonic HDC-SD100 Manual de usuario