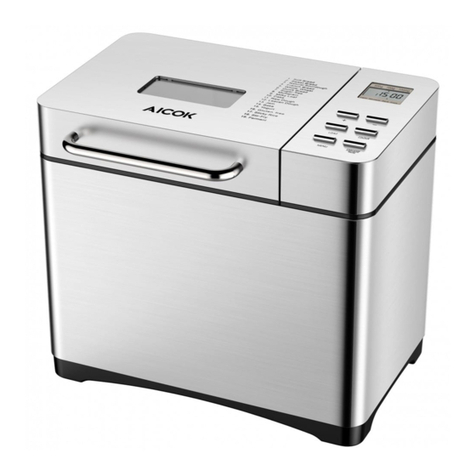
Aicok MBF-004 Manual de usuario

1
Bread Maker 15 Function
MBF-004
Please read the manual fully before using the appliance and keep
the manual safe for future reference.

2
CONTENTS PAGES :
1.IMPORTANT SAFEGUARDS------------------------03
2.Product Features ----------------------------------04-05
3.QUICK-IDEALS-TO-MAKE-BREADS --------------05-06
4.INTRODUCTION OF CONTROL PANEL--- -06-08
5.OPERATING GUIDE --------------------------------- 08-12
6.SPECIFIC FUNCTIONS DESCRIPTION -----------12-13
7.RECIPES RECOMMENDED -------------------------13-18
8.CLEANING AND MAINTENANCE -------------18-19
9.TECHNICAL SPECIFICATION ----------------------19
10.CIRCUIT DIAGRAM ----------------------------------20
11.PROBLEM SOLUTION --------------------------20-21

3
1.IMPORTANT SAFEGUARDS
Before using the electrical appliance, the following basic precautions
should always be followed:
1. This appliance can be used by children aged from 8 years and above and persons
with reduced physical, sensory or mental capabilities or lack of experience and
knowledge if they have been given supervision or instruction concerning use of the
appliance in a safe way and understand the hazards involved. Children shall not
play with the appliance. Cleaning and user maintenance shall not be made by
children unless they are older than 8 and supervised.
2. Keep the appliance and its cord out of reach of children less than 8 year.
3. If the supply cord is damaged, it must be replaced by the manufacturer, its service
agent or similarly qualified persons in order to avoid a hazard.
4. CAUTION: Hot surfaces. Do not touch hot surfaces. Use handles or knobs, Do not
let cord hang over edge of table or hot surface.
5. The appliances are not intended to be operated by means of an external timer or
separate remote-control system.
6. Clean surfaces in contact with food.
7. Before use, check that the voltage of wall outlet corresponds to the one shown on
the rating plate.
8. To protect against electric shock do not immerse cord, plugs, or housing in water or
other liquid.
9. Unplug from outlet when not in use, before putting on or taking off parts, and before
cleaning.
10. Do not place on or near a hot gas or electric burner, or in a heated oven.
11. Extreme caution must be used when moving an appliance containing hot oil or other
hot liquids.
12. Do not touch any moving or spinning parts of the machine when baking.
13. Never switch on the appliance without properly placed bread pan filled ingredients.
14. Never beat the bread pan on the top or edge to remove the pan, this may damage
the bread pan.
15. Always attach plug to appliance first, then plug cord into the wall outlet. to
disconnect, turn any control to OFF, then remove plug from wall outlet.
16. The appliance is not intended to be operated by means of an external timer or
separate remote-control system.
17. Do not operate the unit without bread pan placed in the chamber to avoid damaging
the appliance.

4
2.Product Features
1. LCD Indicator controlled with Microcomputer
2. Automatically making bread, Cake, Kneading, Jam, Yogurt, Baking.
3. Multiple taste selection, include Sweet bread, French bread, etc.
Product Parts
Display screen
Viewing Window
Bread Barrel
Measuring
Cup
Measuring
Spoon
Stirring Rod
Stainless Steel
Housing
Handle
control Panel
hook
Lid

5
Explanation on Measuring Cup
Cup of liquid. (Please see the right graphic)
1. When you take some liquid with transparent
cup and try to measure desirable amount,
place measuring cup on the flat table at your
eyes level. If need to add egg or milk,
you would have to mix them into water before
reading scale.
2. Measure solid powder ingredient: hold
desirable solid powder with this transparent
measuring cup, shaking cup lightly in order
to flatten the surface of powder, and then read correct scale. Please don’t shake cup for
long or sharply, otherwise the powder might descend to the scale lower than requested
amount.
Tips: one cup of flour’s weight approximated 160g
Measuring Spoon
Small spoon and big spoon, used for measuring material
Hook
Used for taking the Stirring Rod out from bread.
3.QUICK-IDEALS-TO-MAKE-BREADS
Made Soft Bread at 750g and Medium Color:
1. Clean Bread Barrel, Stirring Rod, Measuring Cup and Measuring Spoon.
2. Align the oblate hole at stirring rod to the corresponding position of revolving axle in
bread barrel and fix in appropriate position.
3. As recommended Recipe Book’s “Soft Bread” -750g,please add material by order.
Be sure to add yeast powder above flour and not allow yeast powder to touch water.
4. Put bread barrel into the container and fix it into position, covering the lid.

6
5. After plugging bread baker to outlet screen displays Defaulted Menu immediately:
750g /Medium Color/ Soft Bread
6.Press “Start/Stop/Pause” with a buzzer sound, indicator light flashed, and bread
maker begins to knead.
7. The bread is done as soon as the countdown is over. At this time, program
auto-starts “Keep Warm”.
8. Pressing “Start/Stop/Pause” for 3 seconds followed by giving a buzzer sound, “Keep
Warm” is stopped.
9. After bread is done, please wear glove to lift bread barrel and take it out, turning
barrel upside down to take out bread.
Tips
It may happen the stirring rod remains
stuck in the bread when it is turned out .
In this case, use the hook accessory
as follows.
1) insert the hook in the axis of the
stirring rod(A).
2) pull gently to release the stirring rod(B).
4.INTRODUCTION OF CONTROL PANEL
1. “MENU”:
When select one from the menus 1-15 displayed in Control Panel, LCD indicator will
show the corresponding setting:
1—“Soft Bread” 2—“Sweet Bread” 3—“Natural sourdough”
4—“French” 5—“Whole-Wheat” 6—“Quick”
7—“Sugar-free” 8—“Multigrain ” 9—“ Milky Loaf ”
10—“Cake”; 11—“Raw Dough” 12—“Leaven Dough”
13—“Gluten free”; 14—“Bake”; 15—“Yogurt”
2. “LOAF”:

7
In setting status, pick one of 500g/750g/1000g as bread weight. Except for 1 to 9 and
13, “loaf” can’t be adjusted. And three weight 500g/750g/1000g choice.
3. “COLOR”
Select bread color by pressing Light/Medium/Dark one by one in circle for Whole
Wheat Bread, French Bread … When select one color, the upper will display the
corresponding mark.
4. START/STOP/PAUSE”
Press this button to start or stop the working of bread maker, giving a buzzer sound.
When bread baker begins to work, for avoiding exceptional contact or collision, this
performance will start “Exceptional Stop” as protection performance. When press this
button for 1second until hear a prompt sound “Buzz”, the unit stops working
immediately.
NOTE: Within one second short press is “Pause” , the program stops the countdown,
the machine all the action at status of “Pause”, you can add some ingredients, etc.,
press again to quit “pause”, all programs continue the original action. “Stop” Press 3
seconds or more is required.
5.“+”: In setting status, each pressing this button will add 1,5 or 10minutes delay. If
press this button without releasing, the program would rapidly add the time of delay up
to the maximum time of delay. At this moment program would return to the original
minimum time of delay and continue to move like this in circle.
6. “-” :
In setting status, each pressing this button will reduce 1,5 or 10minutes delay. If press
this button without releasing, the program would rapidly reduce the time of delay up to
the minimum time of delay. At this moment program would return to the original
maximum time of delay and continue to move like this in circle.
7. Working status includes:
Reservation(if you need)—Preheat—Stir 1--Rest—Stir 2—Ferment 1,2,3
--Bake—Keep Warm—End/Complete
8. working for Start/Pause/Stop
★This bread maker(program 1-13, except for program 10) have function of

8
“Reservation”, after set your reservation time, click button “Start / Stop/Pause”, ":"
starts flashing, reservation function is activated, the countdown begins. If you do not
want an appointment, click on “Start / Stop/Pause” button, ":" starts flashing, bread
maker start working.
★program 14,15 without the function of “Reservation”, but can be adjusted
according to your time, set the time click “Start / Stop/Pause”, the time display stops
flashing, which means that OK, and then click “Start / Stop/ Pause”, ":" Start flashing,
bread maker start working.
★When on the halfway of bread maker working or reservation, if you want to pause
bread maker, please click on the “Start / Stop/Pause” button to hear a beep, the time
display flashes, toaster work suspended; if you want to cancel pause, please Click
again to “Start / Stop/Pause” button. If you want to terminate the machine, please
press “Start / Stop/Pause” button, you hear a beep, LCD display to its default state,
bread maker work stopped.
5.OPERATING GUIDE
Please be careful before use:
★Check wire cord, socket and fuse box in order; Rating Load is higher than 3A.
★Bread Maker must be grounded in safe. Earth Wire and Zero Line must be separated,
preventing them from twisting in each other over three-plug connector.
Operation Instruction on “Toast”
1. Take out bread barrel from the inside of container and put stirring rod into barrel.
2.Add the appropriate amount of water, egg and flour into barrel, and finally add yeast
powder.
Then place the half-round hole of
stirring rod into the right position at
the revolving axle.
Insure yeast powder to be added
above flour and don’t mix yeast
powder with water, sugar and salt,
otherwise the activation of yeast will
be weaken or can’t workable.

9
3. Put the barrel holding the mixture of material into container and close the lid.
a. If you found a obstruct with barrel during pressing down, you could lift barrel again
and turn the axle at the bottom of barrel to the another angle.
b. After placing barrel into container, then rotate the barrel clockwise, barrel is fixed.
4. Plug bread maker to outlet followed by a buzzer sound and indicator displays the
following: The default value after starting unit is 750g/ Medium Color/ soft bread.
5. Select your Bread Recipe
press “Menu” ,The number will be moving in circle from 1-15. And 1-9 and 13 are bread
recipes.
6. Select your Bread Color and Loaf
7. Set “Reserve” Time
If you want to make bread right now, please skip current step.
Yeast Powder
Flour or other Stuff
Mixture of Water, Oil, Sugar and
Salt
Press “COLOR”
Press “LOAF”

10
8. Start The Unit and Begin to Make Bread
Press “START/STOP/PAUSE”, begin to Count Down .
★After starting Bread Maker the unit begins to stir flour. For avoiding the splashing of
flour, the program can auto-set interval stirring at the first 7 minutes. After 7 minutes,
auto-switches to continuous stirring.
★After setting “Reserve”, “:” at LCD indicator begins to flash and the unit is started.
When Countdown begins, flour stirring begins too.
★When “Whole Wheat ” is in working, the unit will not stir flour at once even not
setting “Reserve”. The first 30minutes are for dip in whole wheat flour and the
second 30minutes begins stirring flour. The flashing of “:” at LCD indicates the unit
is working.
9. The Finishing of Bread-making
When countdown is up to 0:00, the buzzer sound will be given to notify that bread is
done.
1. Keep Warm
Adjust to your desirable time
Please refer to “Reserve Function ”for counting
Reserve Time
Press “ +“
Press “-“
Tabla de contenidos
Otros manuales de Máquina para hacer pan de Aicok