AEC MM1021 Manual de usuario

MM1021
10.2” LCD OVERHEAD MONITOR
OPERATIONMANUAL
POWER
MENU
ON OFF AUTO
DOWN
UP

Important Notice
AnLCD paneland/or videomonitor maybe installedin amotor vehicleand visibleto the
driver if the LCD panel or video monitor is used for vehicle information, system control,
rear or side observation or navigation. If the LCD panel or video monitor is used for
televisionreception, videoorDVD play,theLCD panelorvideomonitormust beinstalled
sothat thesefeatureswill onlyfunctionwhenthevehicleisin“park” orwhenthe vehicle’s
parking brake is applied.
An LCD panel or video monitor used for television reception, video or DVD play that
operates when the vehicle is in gear or when the parking brake is not applied must be
installedto therearof thedriver’sseat whereit willnot bevisible, directlyorindirectly,to
the operator of the motor vehicle. It is unlawful in most jurisdictions for a person to drive
a motor vehicle which is equipped with a screen that is located in the motor vehicle at
any point forward of the back of the driver’s seat, or that is visible, directly or indirectly,
to the driver while operating the vehicle. In the interest of safety, the MM801 should
never be installed where it will be visible, directly or indirectly, by the operator of the
motor vehicle. Warnings
Do not use any solvents or cleaning materials when cleaning the video monitor.
Do not use any abrasive cleaners.
Safety Precaution
For safety reasons, when changing video media it is recommended that the vehicle is
not in motion, and that you do not allow children to unfasten seatbelts to change tapes
or make any adjustments to the system. System adjustments can be accomplished
usingtheremote controlunit, whileseatbelts remainfastened. Enjoyyour Movies2 Go
entertainment system but remember-safety of all passengers remains the number
one priority.
Licensedunderoneormoreofthefollowingpatents,
PatentNOS. 5,775,762 and 5,927,784

Congratulations on your purchase of the Movies 2 Go MM1021 drop-down
Video Monitor. The MM1021 has been designed to give you and your family
many years of video entertainment in the mobile environment. Please read
the directions that follow to familiarize yourself with the product and to ensure
that you obtain the best results from your equipment.
NOTE: Installation options vary, see the individual owner’s manuals for
each component in your system to obtain a full understanding of each
component’s operation.
FEATURES
!10.2”TFT(ThinFilmTransistor)ActiveMatrixLCD(Liquid
CrystalDisplay)Monitor
!OSD(OnScreenDisplay)forControlofPictureQualityand
Functions
!InfraredTransmitterforOptionalIRWirelessHeadphones
!TwoAudio/VideoSourceInputs
!PowerON/OFF
!DomeLightswithBuilt-inThreeWaySwitch
!VideoDisplayON/OFFControl(whenLCDPanelisOpened
andClosed)
!FullFunctionRemoteControl

4MM1021
FRONT PANEL FEATURES
POWER
MENU
ON OFF AUTO
21
33
4
5
67
8
10
9
11
AUX
DOWN
UP

5MM1021
1. Infrared Transmitter – Used to transmit audio to wireless headphones.
2. Remote Sensor – For Remote Control operation of the MM1021.
3. Dome Lights – Provide additional interior illumination.
4. Three Position Dome Light Switch
• Auto – Automatically switches on the dome lights in conjunction with the
vehicle’sinteriorillumination.
• Off – The Dome lights will not turn on in this position.
• On – Turns on the Dome lights.
5. Power ON/OFF – Turn the MM1021 on and off.
6. Menu/Enter Button – Pressing this button will display the OSD menu
(Select Video, Set Picture, Mode Select).After accessing the menu, it is used
as the Enter function.
7. Select Up Button – Select menu item, source selection and picture quality
adjustments.
8. Select Down Button – Select menu item, source selection and picture
quality adjustments.
9. Screen Release – Slides in the direction of the arrow to release the drop
down screen.
10. LCD Panel – Display the video source and the On Screen Displays (OSD).
11. AUX –AUX Input jack.
FRONT PANEL
6MM1021
TURNING THE MM1021 ON OR OFF
1. Sliding the screen release lock forward will unlock the LCD screen and drop
downslightly. Move thescreendownwardandpivotituntilacomfortableviewing
angle is reached. The internal friction detent will hold the screen in position
while the system is in use.
2. Press the power button to turn on the MM1021.
3. After the unit is turned ON and begins to display a picture, adjust the viewing
angle by pivoting the screen to optimize the picture quality. (NOTE: The video
source (DVD/VCP/Game will need to be turned on also).
4. Remember to turn the unit OFF and pivot the LCD to the locked position when
not in use.
Power
ON/OFF
Switch
POWER
MENU
ON OFF AUTO
DOWN
UP

7MM1021
OPERATION
OVERHEAD DOME LIGHTS
TheDome Lightsintegrated intothe MM1021are controlledby athree positionslide
switch. Sliding the switch to the ON position will turn the lights ON. The OFF
position will prevent the lights from turning ON with the vehicle’s interior lighting,
and the auto position will allow the lights to turn ON and OFF with the vehicle’s
interior lighting. Do not leave the vehicle unattended with the dome light switch in
the ON position as this could result in a discharged battery.
Consult the Installation Manual for dome light wiring information.
POWER
MENU
ON OFF AUTO
Dome
Light
Switch
DOWN
UP

8MM1021
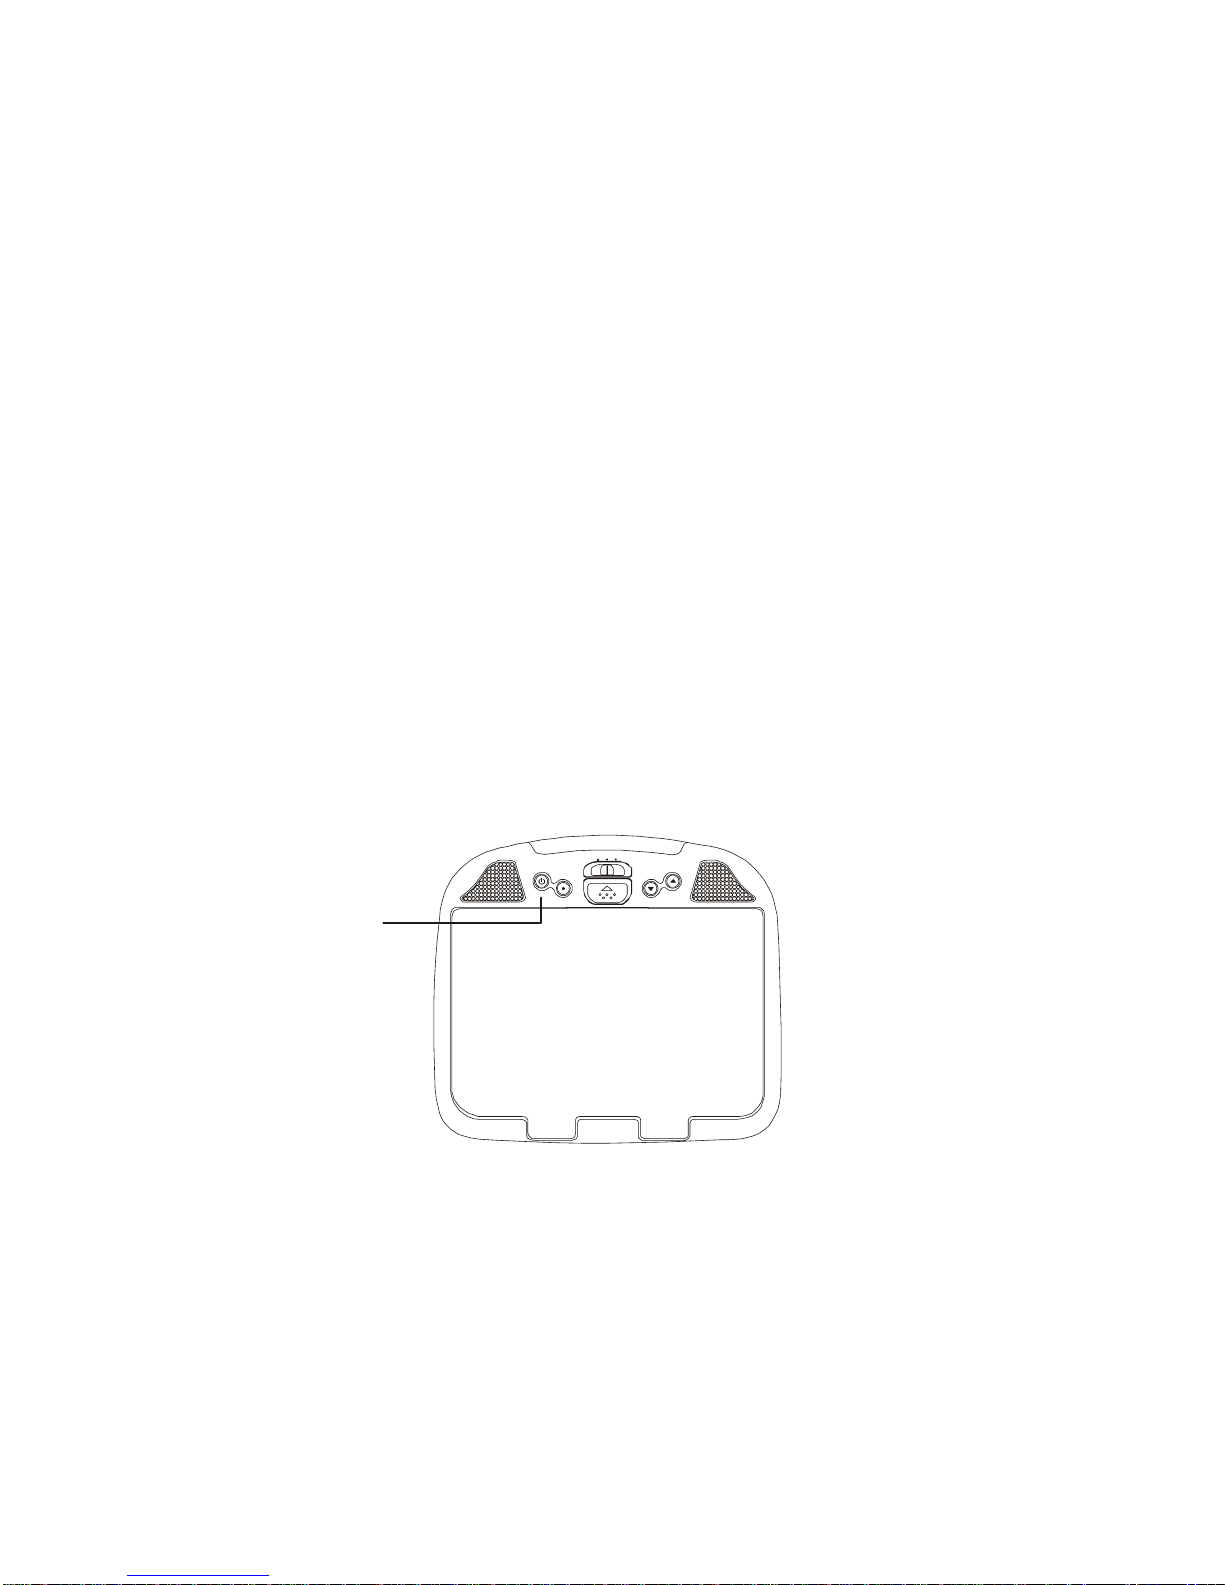
REMOTE CONTROL SENSOR
The MM1021 infrared sensor will relay signals from the remote control to allow an
auxiliary source to be controlled simply by pointing its remote control at the remote
sensor eye. This provides control of auxiliary equipment such as a Video Cassette
Player or DVD Player. The infrared sensor can relay signals from most
manufacturer’s remote controls to its respective component connected to the AV1
input1, suchas aDVDplayer. In thiscaseyoumustuse theremote controlsupplied
with the DVD player.
Remote Control Sensor Infrared Transmitter
POWER
MENU
ON OFF AUTO
DOWN
UP

9MM1021
LCD SOURCE
MENU/
ENTER
V
CP
STOP
PLAY
REW FWD
1
4
5
7
10
2
3
6
8
9
1 LCD : Power On / Off Button for the MM1021 monitor
2 VCP : Power On / Off Button for an OptionalAudiovox VCP
3 SOURCE : Button for selection ofAV1 andAUX
4 MENU/ENTERButton
5 – : Volume / Select Down Button
6 + : Volume / Select Up Button
7 REW : ........Rewinds Tape
8 FWD : ........ Fast Forwards Tape
9 STOP : ........Stops Tape
10 PLAY : ........ Plays Tape
REMOTE CONTROL UNIT BUTTONS CONTROLS

10 MM1021
SELECT VIDEO
There are 2 inputs to select from. Pressing the source button on the remote control will
changethe source selected in the following order:AV1andAUX.
The source can also be changed by pressing the menu button. Use the - or + button to
highlight SELECT VIDEO and press the MENU button to enter the submenu. Then, press
the - or + button to select fromAV1orAUX. Press MENU to confirm the setting.
EXIT THE MENU
To exit the main menu, press the MENU button of Remote Control again to Exit, the menu
willdisappear.
NOTE: The menu also disappears from the screen automatically if you do not press
any button within a five seconds.
SELECT VIDEO
AV1
AUX
MENU
SET PICTURE
MODE SELECT
EXIT
SELECT VIDEO
EXIT
MENU
-
+
MENU
Tabla de contenidos
Otros manuales de Sistema de vídeo para coche de AEC


