Adcom 707-D Manual de usuario

Table
Table
Table
Table of
of
of
of Contents
Contents
Contents
Contents
Basic Introduction .................................................................................................................... 1
Quick Start ................................................................................................................................ 2
Boot and Shutdown ...................................................................................................... 2
Connect with PC ........................................................................................................... 2
Interface Introduction .............................................................................................................. 4
Bottom bar of the Interface .......................................................................................... 4
The HOME Screen menu ............................................................................................. 4
Desktop ......................................................................................................................... 5
Basic Operation ........................................................................................................................ 5
Date and time settings: ................................................................................................. 6
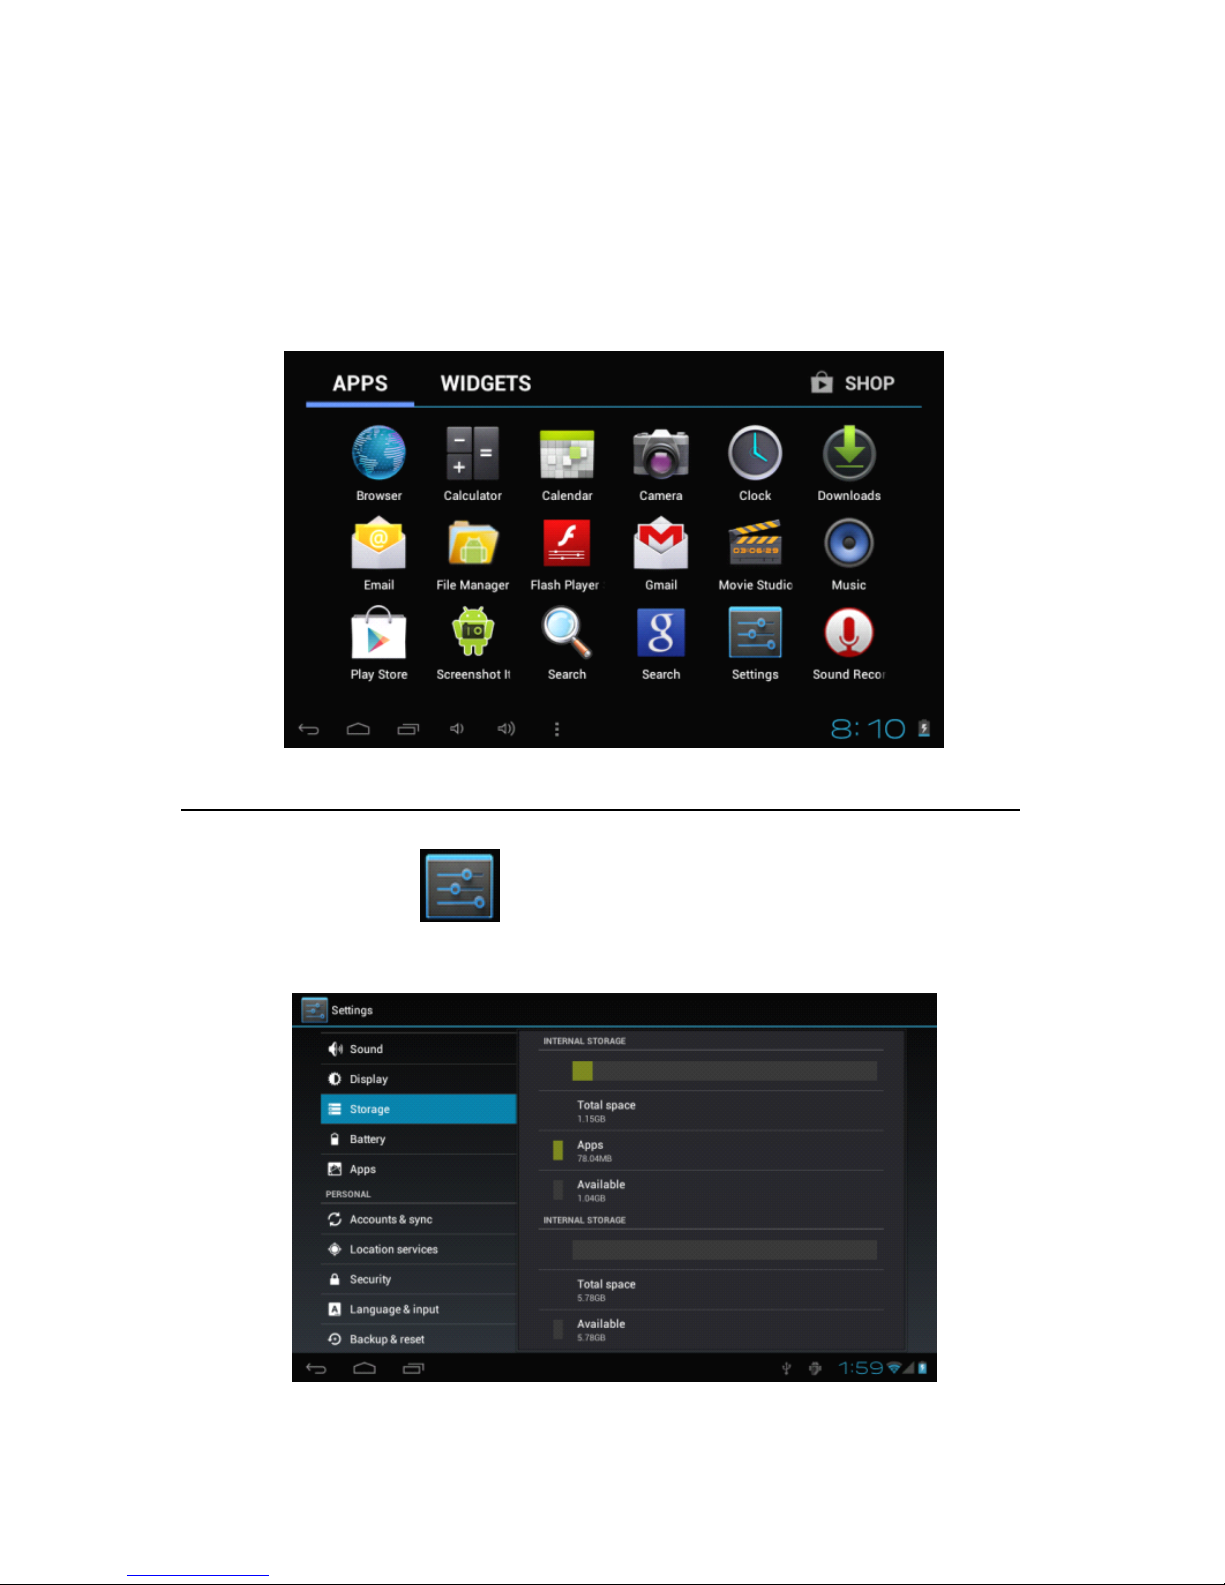
Display settings ............................................................................................................ 6
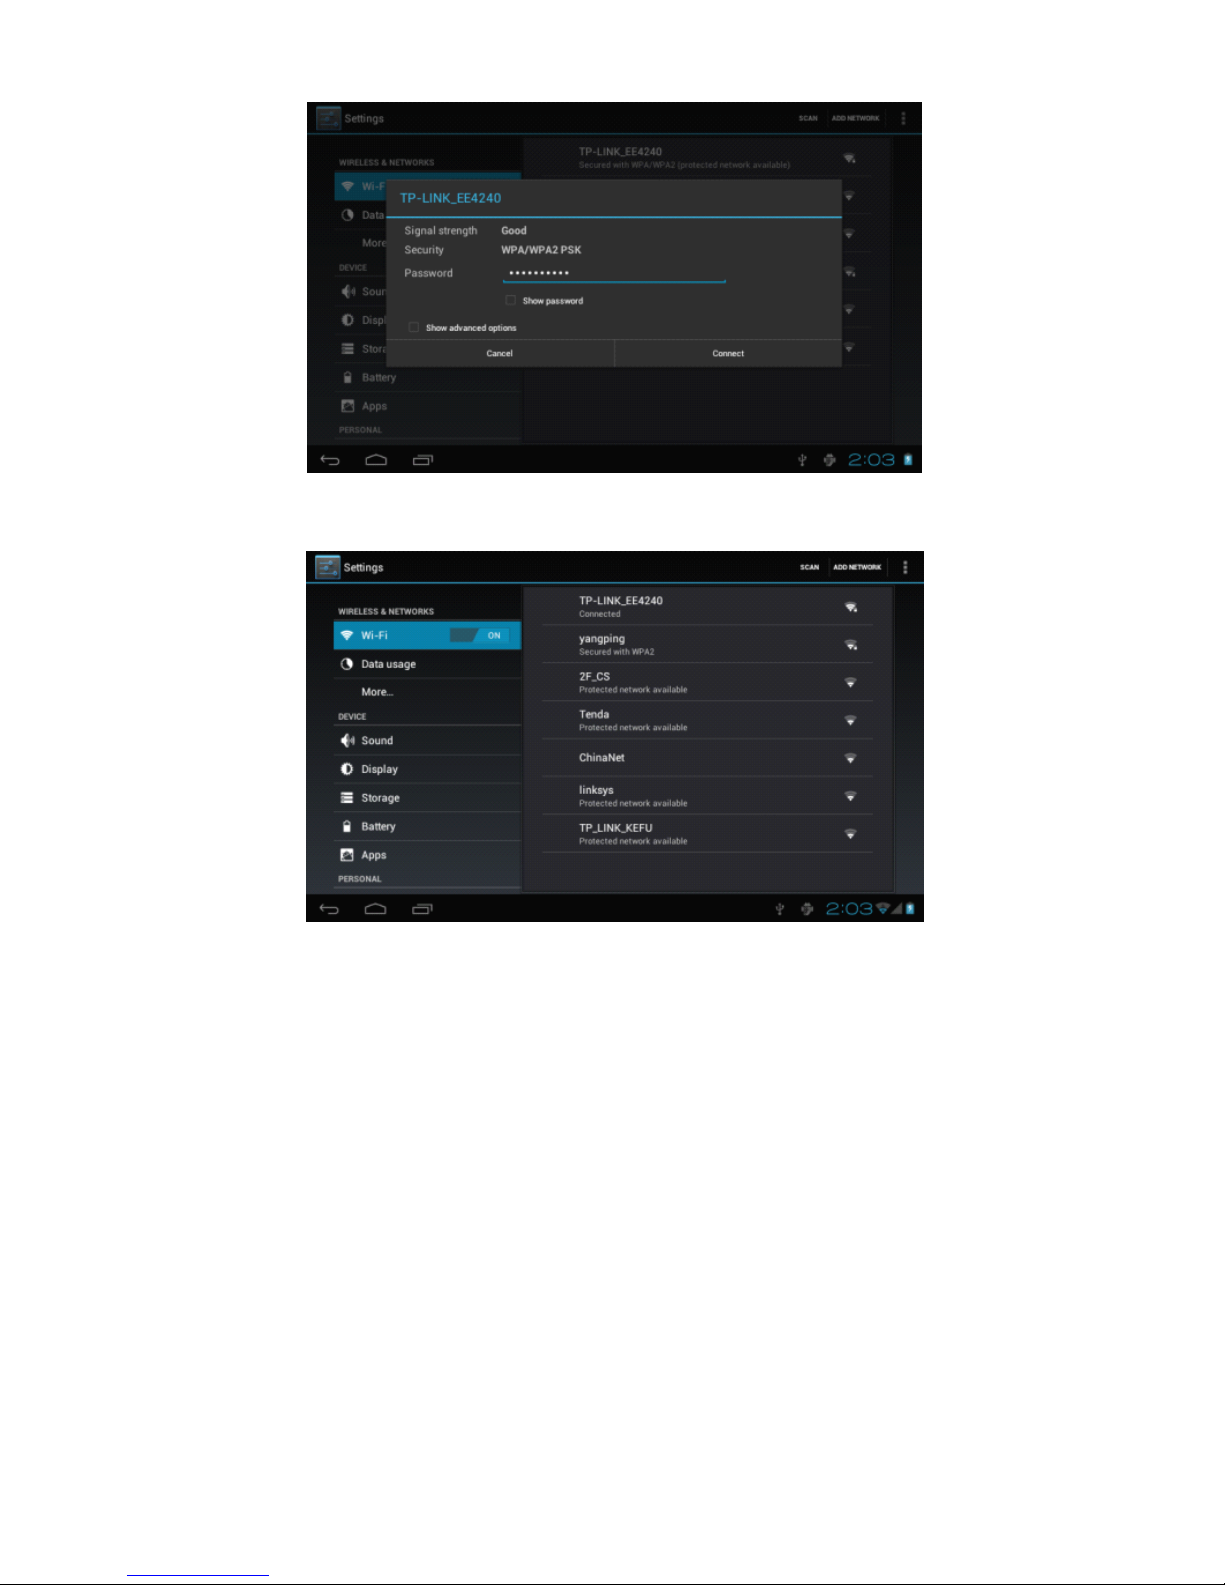
Wireless Connection: ................................................................................................... 7
Applications install and uninstall ................................................................................ 8
Browser ......................................................................................................................... 9
Video player: ............................................................................................................... 10
Music player: .............................................................................................................. 10
Photo Browser ............................................................................................................ 11
Camera ........................................................................................................................ 12
Sound Recorder .......................................................................................................... 14
Play Store .................................................................................................................... 14
Frequently Asked Questions .................................................................................................. 15
Important Safety Precautions ................................................................................................ 16
System:Android4.0
Processor: Boxchip A13
Edition:V0 2
DA46

1
Basic
Basic
Basic
Basic Introduction
Introduction
Introduction
Introduction
CPU: Boxchip A1 3 Cortex A8 1.0Ghz
LCD Screen:7
"
800 * 480 TFT LCD
Camera: Front 0.3M/Rear 0.3 M pixel camera
Operating System: Google Android 4.0
Network Connection: Built-in 802.11 b/g/n wireless
Audio format: MP3,WMA,MP2,OGG,AAC,M4A ,FLAC, APE,
WAV
Video format: max 2160p full HD video
(
AVI
,3GP , MP4 , MPG , RM , RMVB , MOV ,
FLV
, WMV,MKV)
TOUCH PANNEL: Multi-touch Capacitive screen
Language: support multiple language
Ports: mini USB*1(OTG) , Earphone * 1, TF card slot * 1,DC IN*1 ,MIC*1
Buttons: Power
/Vol+/Vol-

2
Quick
Quick
Quick
Quick Start
Start
Start
Start
Boot
Boot
Boot
Boot and
and
and
and Shutdown
Shutdown
Shutdown
Shutdown
Boot:
Boot:
Boot:
Boot: Press and hold the power button, the system will enter the boot process
System has been started, entering the Android system:
The system enters the default home interface.
Shutdown:
Shutdown:
Shutdown:
Shutdown: Press the power button, pop-up device options, select Power off
Click OK, you can safely shut down
Connect
Connect
Connect
Connect with
with
with
with PC
PC
PC
PC
By
micro USB (OTG) interface of the device,
You
can connect with PC by micro USB
cable attached with the device. USB Data transferring is available.
You
can operate the
files through the PC.

3
When your device is connected successfully, to pull up the notification area of the
status bar , can see the following icon .
When your device is connected successfully, to pull up the notification area of the status
bar , can see the following icon
Then click to enter the next
Click , Then the device can transmission data with PC .
N ote: The device also s upport s the
FAT32
format for external devices , for example U
disk , Micro SD card to Transfer data

4
Interface
Interface
Interface
Interface Introduction
Introduction
Introduction
Introduction
Bottom
Bottom
Bottom
Bottom bar
bar
bar
bar of
of
of
of the
the
the
the Interface
Interface
Interface
Interface
A. WIFI signal status icon:
If
connected to the WIFI wireless network, the icon will be
displayed
B. OTG connect icon:
If
the device connected to the PC , will show the OTG connected
icon .
C. Time display: Display the time of the current system, which has been s e t.
D. Battery status icon: Displays the current battery level and the charging status.
E. Menu, Home, Back, vir tual buttons
The
The
The
The HOME
HOME
HOME
HOME Screen
Screen
Screen
Screen menu
menu
menu
menu
Press the menu icon on the device, it will display a home screen menu as
following:
Wallpaper: Users can replace the wallpaper with you wishes.
Manage apps:
It
can quickly open a list of all applications.
S
ystem Settings: Fast access to system settings, user can choose “ Wireless & networks ” ,
“ D isplay ” , “ Date & time ” etc, for personalized settings.

5
Desktop
Desktop
Desktop
Desktop
When sliding around with your finger to switch the main screen, the desktop fixed on the
main screen, will not move. User could drag the application icon placed on the desktop
area in the main screen.
Basic
Basic
Basic
Basic Operation
Operation
Operation
Operation
Click the "Settings" i c on in the main applications area, you can open the system
settings interface, as shown below:
Select the appropriate operation of the relevant items, such as: w ireless and network ,
D isplay , d ate and time settings , a bout Device , e tc

6
Date
Date
Date
Date and
and
and
and time
time
time
time settings:
settings:
settings:
settings:
Click
"
Date & time
"
to enter the D ate and time settings interface:
S
elect to set the date, select the time zone, set the time, time format, date format and
other information.
For example, choose to set the date, as follows:
Select +: that the increase of 1 unit,
Select -: that the reduction of 1 unit.
Also you can choose the number, enter the input mode. Directly entering the desired
number, then click “ Done ” to set the Date .
Display
Display
Display
Display settings
settings
settings
settings
In the settings interface choose
"
D isplay
"
to enter the display settings interface, select
"Brightness", Pull the progress bar to adjust the brightness ,as below interface:

7
Click Sleep, A djust the inactivity time of the device . You can press power key to activate
the device. When display "Screen locked" interface , follow the prompts to unlock it
Wireless
Wireless
Wireless
Wireless Connection:
Connection:
Connection:
Connection:
Click the main menu "Settings" icon, go to "Settings" screen, click on "Wireless and
network s
"
into the "Wireless and network s settings
"
interface. Turn on Wi-Fi switch, the
Wi-Fi module built-in the device will search AP lists automatic , click the search ed AP
can be used, will pop up settings dialog , please follow the prompts to complete the WIFI
network links. Some encrypted network, need to enter a valid
key.
As shown below:

8
According to the above method to connected Wi-Fi, a s shown below:
Applications
Applications
Applications
Applications install
install
install
install and
and
and
and uninstall
uninstall
uninstall
uninstall
Install
Install
Install
Install applications
applications
applications
applications
1. First you should select the Unknown sources which allow installation of non-Marekt
apps

9
2 . Copy the APK installer software to Micro SD or NAND FLASH.
3 . click FileManage to find the app directory, then Select applications to
install
Users can "A ndroid market" online installation, or download via the computer, or online
through the machine built-in browser to download and install.
Uninstall
Uninstall
Uninstall
Uninstall applications
applications
applications
applications
P itch on the item "Settings - App s – DOWNLOAD ", select the appropriate application
has been installed, click the applications which you need to uninstall
Browser
Browser
Browser
Browser
When the network connected, open the
Web
browser enter the URL, you can quickly
Otros manuales para 707-D
1
Tabla de contenidos
Otros manuales de Tableta de Adcom


